Speech-to-Text adalah API yang didukung oleh teknologi kecerdasan buatan (AI) Google. Anda mengirimkan data audio ke Speech-to-Text, lalu menerima transkripsi teks data audio Anda sebagai respons.
Untuk informasi selengkapnya tentang cara membuat permintaan Speech-to-Text, lihat halaman permintaan.
Ringkasan
Sebelum dapat mulai mengirim permintaan ke Speech-to-Text, Anda harus mengaktifkan API di konsol Google Cloud. Langkah-langkah di halaman ini akan memandu Anda melakukan tindakan berikut:
- Mengaktifkan Speech-to-Text di sebuah project.
- Pastikan penagihan diaktifkan untuk Speech-to-Text.
- (Opsional) Buat bucket Google Cloud Storage baru untuk menyimpan data audio Anda.
Sebelum Memulai
Ada dua cara untuk mengakses layanan ini: menggunakan REST API dan menggunakan Speech-to-Text Console. Kami menyediakan contoh kode yang menunjukkan cara membuat permintaan ke REST API dan menerima respons. Anda dapat mempelajari cara menggunakan contoh ini dengan mengikuti panduan memulai dan panduan cara kerja Speech-to-Text. Jika ingin menggunakan Speech-to-Text dengan coding minimal, Anda dapat menggunakan Cloud Speech-to-Text Console.
Panduan ini membahas langkah-langkah yang diperlukan untuk mulai mengirim permintaan ke REST API. Jika Anda baru mengenal coding, sebaiknya mulai dengan tutorial langkah demi langkah dalam konsol di Google Cloud Platform sebelum memulai panduan memulai ini.
Menyiapkan project Google Cloud untuk Speech-to-Text
-
Anda dapat memilih project yang sudah ada atau membuat project baru. Untuk informasi selengkapnya tentang cara membuat project, lihat Membuat dan mengelola project.
Jika membuat project baru, Anda akan diminta untuk menautkan akun penagihan ke project ini. Jika menggunakan project yang sudah ada, pastikan Anda telah mengaktifkan penagihan.
Pelajari cara mengonfirmasi bahwa penagihan diaktifkan untuk project Anda
Setelah memilih project dan menautkannya ke akun penagihan, Anda dapat mengaktifkan Speech-to-Text API. Buka kotak Search products and resources di bagian atas halaman dan ketik "speech". Pilih Cloud Speech-to-Text API dari daftar hasil.
Untuk mencoba Speech-to-Text tanpa menautkannya ke project Anda, pilih opsi TRY THIS API. Untuk mengaktifkan Speech-to-Text API agar dapat digunakan dengan project Anda, klik ENABLE.
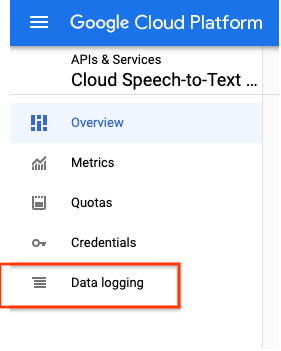
(Opsional) Aktifkan logging data. Dengan memilih mengaktifkan logging data, Anda mengizinkan Google merekam data audio apa pun yang Anda kirim ke Speech-to-Text. Data ini digunakan untuk meningkatkan kualitas model Speech-to-Text. Pengguna yang memilih mengaktifkan logging data akan mendapatkan manfaat berupa harga yang lebih rendah. Lihat halaman harga serta persyaratan dan ketentuan logging data untuk informasi selengkapnya.
Opsional: Membuat bucket Cloud Storage
Jika ingin mentranskripsi audio dengan durasi lebih dari 60 detik atau ukuran file lebih dari 10 MB, Anda harus menyimpan data audio ini di bucket Cloud Storage agar dapat mentranskripsikannya menggunakan Speech-to-Text. Langkah-langkah berikut akan memandu Anda menyelesaikan proses pembuatan bucket baru.
- For Name your bucket, enter a unique bucket name. Don't include sensitive information in the bucket name, because the bucket namespace is global and publicly visible.
-
In the Choose where to store your data section, do the following:
- Select a Location type.
- Choose a location where your bucket's data is permanently stored from the Location type drop-down menu.
- If you select the dual-region location type, you can also choose to enable turbo replication by using the relevant checkbox.
- To set up cross-bucket replication, select
Add cross-bucket replication via Storage Transfer Service and
follow these steps:
Set up cross-bucket replication
- In the Bucket menu, select a bucket.
In the Replication settings section, click Configure to configure settings for the replication job.
The Configure cross-bucket replication pane appears.
- To filter objects to replicate by object name prefix, enter a prefix that you want to include or exclude objects from, then click Add a prefix.
- To set a storage class for the replicated objects, select a storage class from the Storage class menu. If you skip this step, the replicated objects will use the destination bucket's storage class by default.
- Click Done.
-
In the Choose how to store your data section, do the following:
- Select a default storage class for the bucket or Autoclass for automatic storage class management of your bucket's data.
- To enable hierarchical namespace, in the Optimize storage for data-intensive workloads section, select Enable hierarchical namespace on this bucket.
- In the Choose how to control access to objects section, select whether or not your bucket enforces public access prevention, and select an access control method for your bucket's objects.
-
In the Choose how to protect object data section, do the
following:
- Select any of the options under Data protection that you
want to set for your bucket.
- To enable soft delete, click the Soft delete policy (For data recovery) checkbox, and specify the number of days you want to retain objects after deletion.
- To set Object Versioning, click the Object versioning (For version control) checkbox, and specify the maximum number of versions per object and the number of days after which the noncurrent versions expire.
- To enable the retention policy on objects and buckets, click the Retention (For compliance) checkbox, and then do the following:
- To enable Object Retention Lock, click the Enable object retention checkbox.
- To enable Bucket Lock, click the Set bucket retention policy checkbox, and choose a unit of time and a length of time for your retention period.
- To choose how your object data will be encrypted, expand the Data encryption section (), and select a Data encryption method.
- Select any of the options under Data protection that you
want to set for your bucket.
Menonaktifkan Speech-to-Text API
Selesaikan langkah-langkah berikut jika Anda tidak perlu lagi menggunakan Speech-to-Text API pada masa mendatang.
- Buka dasbor Google Cloud, lalu klik link Go to APIs overview di kotak APIs.
- Pilih Cloud Speech-to-Text API.
- Klik tombol DISABLE API di bagian atas halaman Cloud Speech-to-Text API.
Langkah berikutnya
Pelajari cara mengirim permintaan transkripsi ke Speech-to-Text API menggunakan library klien, gcloud, command line, atau UI Speech-to-Text.