This page describes the available methods for viewing, adding, modifying, or removing Essential Contacts and configuring notification categories for them.
If you are an Organization Admin, you can manage your Essential Contacts by using the Google Cloud console, the Google Cloud CLI, or the REST API. Follow best practices for managing Essential Contacts.
If you are an essential contact, ask your administrator to send you a test email to verify reception for the specific notification category. If you are not receiving notifications, verify the following:
- Check your email spam or junk folder.
- Verify that the email address registered as a contact is correct and can receive external emails.
- Make sure your contact information is assigned to the relevant notification categories.
Before you begin
To receive notifications, the contact must be able to receive emails from Google.
If you want to manage contacts by using the gcloud CLI or the REST API, enable the Essential Contacts API. If you only want to manage contacts by using the Google Cloud console, you don't need to enable the API.
Roles required to enable APIs
To enable APIs, you need the Service Usage Admin IAM
role (roles/serviceusage.serviceUsageAdmin), which
contains the serviceusage.services.enable permission. Learn how to grant
roles.
Required roles
To get the permissions that you need to manage contacts, ask your administrator to grant you the following IAM roles on the project, folder, or organization where the contact is assigned:
-
To view contacts:
Essential Contacts Viewer (
roles/essentialcontacts.viewer) -
To view, edit, delete, and create contacts:
Essential Contacts Admin (
roles/essentialcontacts.admin)
For more information about granting roles, see Manage access to projects, folders, and organizations.
These predefined roles contain the permissions required to manage contacts. To see the exact permissions that are required, expand the Required permissions section:
Required permissions
The following permissions are required to manage contacts:
-
To view contacts:
-
essentialcontacts.contacts.get -
essentialcontacts.contacts.list
-
-
To edit, delete, and create contacts:
-
essentialcontacts.contacts.create -
essentialcontacts.contacts.delete -
essentialcontacts.contacts.update
-
You might also be able to get these permissions with custom roles or other predefined roles.
View contacts
Child resources, which refer to folders and projects, inherit contacts from their ancestors, which can be organizations and other folders. When viewing contacts from a child resource, you can also view contacts inherited from its ancestor if you have the corresponding permissions for the ancestor. To gain this ability, obtain a role on the ancestor resource that includes the required permissions to view contacts. When you view contacts from an organization or top-level folder, you don't see contacts from their child resources.
To view the list of all Essential Contacts in your project, folder, or organization, do the following:
Console
In the Google Cloud console, go to the Essential Contacts page.
Make sure the name of your project, folder, or organization appears in the resource selector of the page. The resource selector lets you select the project, folder, or organization from which you want to view Essential Contacts.
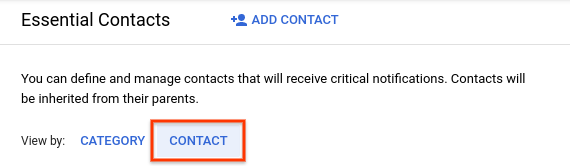
Next to View by, you can choose one of the following options:
- To view the list of contacts by category, select Category.
- To view the list of contacts alphabetically, select Contact.
gcloud
-
In the Google Cloud console, activate Cloud Shell.
At the bottom of the Google Cloud console, a Cloud Shell session starts and displays a command-line prompt. Cloud Shell is a shell environment with the Google Cloud CLI already installed and with values already set for your current project. It can take a few seconds for the session to initialize.
-
With the Google Cloud CLI, you can either list the contacts that are defined
on a resource or list all contacts and inherited contacts for a resource.
List contacts defined on a resource
To view Essential Contacts defined on a specific project, folder, or organization, use the
gcloud essential-contacts listcommand:gcloud essential-contacts list --RESOURCE_TYPE="RESOURCE_ID"
Replace the following:
RESOURCE_TYPE: the resource type that you want to list contacts from. Use the valueproject,folder, ororganization.RESOURCE_ID: your Google Cloud project, organization, or folder ID. Project IDs are alphanumeric strings, likemy-project. Folder and organization IDs are numeric, like123456789012.
Alternatively, if you don't specify a resource type or ID, the gcloud CLI lists contacts from the current project.
The response is similar to the following example:
---
email: my-contact-1@example.com
languageTag: en-US
name: projects/my-projects/contacts/1
notificationCategorySubscriptions:
- ALL
---
email: my-contact-2@example.com
languageTag: en-US
name: projects/my-projects/contacts/2
notificationCategorySubscriptions:
- BILLING
---
List contacts and inherited contacts
If you want to list all contacts from a resource and its inherited contacts from an ancestor, you must have a role on the ancestor resource that includes the required permissions to view contacts. Then, use the
gcloud essential-contacts computecommand:gcloud essential-contacts compute --notification-categories="NOTIFICATION_CATEGORY" \ --RESOURCE_TYPE="RESOURCE_ID"
Replace the following:
NOTIFICATION_CATEGORY: a comma-separated list of the notification categories that you want to view contacts for. The list can contain any of the following values:billinglegalproduct-updatessecuritysuspensiontechnicalallnotification-category-unspecified
For more information, see Notification categories.
RESOURCE_TYPE: the resource type that you want to view contacts from. Use the valueproject,folder, ororganization.RESOURCE_ID: your Google Cloud project, organization, or folder ID. Project IDs are alphanumeric strings, likemy-project. Folder and organization IDs are numeric, like123456789012.
If you don't specify a resource type and ID, the gcloud CLI lists contacts for the current project.
The response is similar to the following example:
---
email: my-contact-1@example.com
languageTag: en-US
name: projects/my-projects/contacts/1
notificationCategorySubscriptions:
- ALL
---
email: my-contact-2@example.com
languageTag: en-US
name: projects/my-projects/contacts/2
notificationCategorySubscriptions:
- BILLING
---
email: my-organization-contact@example.com
languageTag: en-US
name: organizations/my-organization/contacts/1
notificationCategorySubscriptions:
- ALL
---
REST
With the Essential Contacts REST API, you can either list the contacts that are defined on a resource or list all contacts and inherited contacts for a resource.
List contacts defined on a resource
To view the contacts defined on a specific project, folder, or organization, use
the Essential Contacts API's contacts.list method.
Request:
GET essentialcontacts.googleapis.com/v1/RESOURCE_TYPE/RESOURCE_ID/contacts?pageSize=PAGE_SIZE&pageToken=NEXT_PAGE_TOKEN
Replace the following:
RESOURCE_TYPE: the resource type that you want to list contacts from. Use the valueprojects,folders, ororganizations.RESOURCE_ID: your Google Cloud project, organization, or folder ID. Project IDs are alphanumeric strings, likemy-project. Folder and organization IDs are numeric, like123456789012.PAGE_SIZE: Optional. The number of contacts to include in the response. The default value is50, and the maximum value is100. If the number of contacts is greater than the page size, the response contains a pagination token that you can use to retrieve the next page of results.NEXT_PAGE_TOKEN: Optional. The pagination token returned in an earlier response from this method. If specified, the list of contacts starts where the previous response ended.
To send your request, expand one of these options:
curl (Linux, macOS, or Cloud Shell)
Set the GOOGLE_APPLICATION_CREDENTIALS
environment variable to your service account private key path. Then, make
the request:
curl -X GET \
-H "Authorization: Bearer "$(gcloud auth application-default print-access-token) \
https://essentialcontacts.googleapis.com/v1/RESOURCE_TYPE/RESOURCE_ID/contacts?pageSize=PAGE_SIZE&pageToken=NEXT_PAGE_TOKEN
PowerShell (Windows)
Set the GOOGLE_APPLICATION_CREDENTIALS
environment variable to your service account private key path. Then, make
the request:
$cred = gcloud auth application-default print-access-token
$headers = @{ "Authorization" = "Bearer $cred" }

Invoke-WebRequest `
  -Method GET `
  -Headers $headers `
  -Uri "https://essentialcontacts.googleapis.com/v1/RESOURCE_TYPE/RESOURCE_ID/contacts?pageSize=PAGE_SIZE&pageToken=NEXT_PAGE_TOKEN" | Select-Object -Expand Content
After sending the request, you receive a JSON response similar to the following example:
{
  "contacts": [
    {
      "name": "projects/my-projects/contacts/1",
      "email": "my-contact-1@example.com",
      "notificationCategorySubscriptions": [
        "ALL"
      ],
      "languageTag": "en-US"
    },
    {
      "name": "projects/my-projects/contacts/2",
      "email": "my-contact-2@example.com",
      "notificationCategorySubscriptions": [
        "BILLING"
      ],
      "languageTag": "en-US"
    }
  ]
}
List contacts and inherited contacts
If you want to list all contacts from a resource and its inherited contacts from
an ancestor, you must have a role on the ancestor resource that includes the
required permissions to view contacts. Then, use the
Essential Contacts API's contacts.compute method.
Request:
GET essentialcontacts.googleapis.com/v1/RESOURCE_TYPE/RESOURCE_ID/contacts:compute?notificationCategories=NOTIFICATION_CATEGORY&pageSize=PAGE_SIZE&pageToken=NEXT_PAGE_TOKEN
Replace the following:
RESOURCE_TYPE: the resource type that you want to view contacts from. Use the valueprojects,folders, ororganizations.RESOURCE_ID: your Google Cloud project, organization, or folder ID. Project IDs are alphanumeric strings, likemy-project. Folder and organization IDs are numeric, like123456789012.NOTIFICATION_CATEGORY: the notification category you want to view contacts from. You can repeat this field to list contacts from multiple notification categories. It can take any of the following values:BILLINGLEGALPRODUCT_UPDATESSECURITYSUSPENSIONTECHNICALALLNOTIFICATION_CATEGORY_UNSPECIFIED
For more information, see Notification categories.
PAGE_SIZE: Optional. The number of contacts to include in the response. The default value is50, and the maximum value is100. If the number of contacts is greater than the page size, the response contains a pagination token that you can use to retrieve the next page of results.NEXT_PAGE_TOKEN: Optional. The pagination token returned in an earlier response from this method. If specified, the list of contacts starts where the previous response ended.
To send your request, expand one of these options:
curl (Linux, macOS, or Cloud Shell)
Set the GOOGLE_APPLICATION_CREDENTIALS
environment variable to your service account private key path. Then, make
the request:
curl -X GET \
-H "Authorization: Bearer "$(gcloud auth application-default print-access-token) \
https://essentialcontacts.googleapis.com/v1/RESOURCE_TYPE/RESOURCE_ID/contacts:compute?notificationCategories=NOTIFICATION_CATEGORY&pageSize=PAGE_SIZE&pageToken=NEXT_PAGE_TOKEN
PowerShell (Windows)
Set the GOOGLE_APPLICATION_CREDENTIALS
environment variable to your service account private key path. Then, make
the request:
$cred = gcloud auth application-default print-access-token
$headers = @{ "Authorization" = "Bearer $cred" }

Invoke-WebRequest `
  -Method GET `
  -Headers $headers `
  -Uri "https://essentialcontacts.googleapis.com/v1/RESOURCE_TYPE/RESOURCE_ID/contacts:compute?notificationCategories=NOTIFICATION_CATEGORY&pageSize=PAGE_SIZE&pageToken=NEXT_PAGE_TOKEN" | Select-Object -Expand Content
After sending the request, you receive a JSON response similar to the following example:
{
  "contacts": [
    {
      "name": "projects/my-projects/contacts/1",
      "email": "my-project-contact-1@example.com",
      "notificationCategorySubscriptions": [
        "ALL"
      ],
      "languageTag": "en-US"
    },
    {
      "name": "projects/my-projects/contacts/2",
      "email": "my-project-contact-2@example.com",
      "notificationCategorySubscriptions": [
        "BILLING"
      ],
      "languageTag": "en-US"
    },
    {
      "name": "organizations/my-organization/contacts/1",
      "email": "my-organization-contact@example.com",
      "notificationCategorySubscriptions": [
        "ALL"
      ],
      "languageTag": "en-US"
    }
  ]
}
Add a contact
To add a contact, do the following:
Console
In the Google Cloud console, go to the Essential Contacts page.
Make sure the name of your project, folder, or organization appears in the resource selector of the page. The resource selector lets you select the project, folder, or organization from which you want to add Essential Contacts.
Click Add contact.
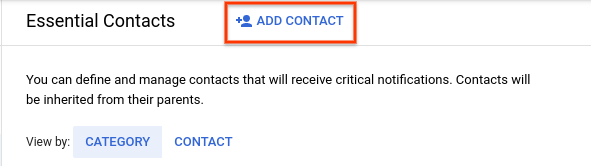
In the Email and Confirm email fields, enter the email address of the contact you want to add.
From the Notification categories drop-down menu, select the categories that you want the contact to receive notifications for.
For a list of notification categories and recommended contacts, see Notification categories.
Click Save.
gcloud
-
In the Google Cloud console, activate Cloud Shell.
At the bottom of the Google Cloud console, a Cloud Shell session starts and displays a command-line prompt. Cloud Shell is a shell environment with the Google Cloud CLI already installed and with values already set for your current project. It can take a few seconds for the session to initialize.
Add a new contact with the
gcloud essential-contacts createcommand:gcloud essential-contacts create --email="EMAIL" \ --notification-categories="NOTIFICATION_CATEGORY" \ --language="LANGUAGE" \ --RESOURCE_TYPE="RESOURCE_ID"
Replace the following:
EMAIL: the email address of the contact you want to add. You cannot change this field after you create your contact.NOTIFICATION_CATEGORY: a comma-separated list of the categories that you want the contact to receive notifications for. The list can contain any of the following values:billinglegalproduct-updatessecuritysuspensiontechnicalallnotification-category-unspecified
LANGUAGE: the language code for your contact's preferred notification language. You can include the language code of any of the supported languages.RESOURCE_TYPE: the resource type that you want to create a contact for. Use the valueproject,folder, ororganization.RESOURCE_ID: your Google Cloud project, organization, or folder ID. Project IDs are alphanumeric strings, likemy-project. Folder and organization IDs are numeric, like123456789012.
If you don't specify a resource type and ID, the gcloud CLI creates a contact in the current project.
If the command is successful, you don't receive any response.
REST
To add a new contact, use the Essential Contacts API's
contacts.create method.
Request:
POST essentialcontacts.googleapis.com/v1/RESOURCE_TYPE/RESOURCE_ID/contacts
Request body:
{
  "email": "EMAIL",
  "notificationCategorySubscriptions": [
    "NOTIFICATION_CATEGORY_1",
    "NOTIFICATION_CATEGORY_2"
  ],
  "languageTag": "LANGUAGE"
}
Replace the following:
RESOURCE_TYPE: the resource type that you want to create a contact for. Use the valueprojects,folders, ororganizations.RESOURCE_ID: your Google Cloud project, organization, or folder ID. Project IDs are alphanumeric strings, likemy-project. Folder and organization IDs are numeric, like123456789012.EMAIL: the email address of your contact. You cannot change this field after you create your contact.NOTIFICATION_CATEGORY_1andNOTIFICATION_CATEGORY_2: the categories that you want the contact to receive notifications for. You can add more notification categories by including more of these values. The list can take one or more of the following values:BILLINGLEGALPRODUCT_UPDATESSECURITYSUSPENSIONTECHNICALALL
For a list of notification categories and recommended contacts, see Notification categories.
LANGUAGE: the language code for your contact's preferred notification language. You can include the language code of any of the supported languages.
To send your request, expand one of these options:
After sending the request, you receive a JSON response similar to the following example:
{
  "name": "projects/my-project/contacts/3",
  "email": "my-new-contact@example.com",
  "notificationCategorySubscriptions": [
    "SUSPENSION",
    "TECHNICAL"
  ],
  "languageTag": "en"
}
Modify contact information
You can change the notification categories or preferred language for a contact, but you can't change a contact's email address. If a contact's email address changes, add a new contact with the updated email address and delete the old contact.
To change the notification categories assigned to a contact or their preferred language, do the following:
Console
In the Google Cloud console, go to the Essential Contacts page.
Make sure the name of your project, folder, or organization appears in the resource selector of the page. The resource selector lets you select the project, folder, or organization from which you want to manage Essential Contacts.
Next to View by, select Contact.
Click Edit next to the contact whose notification category you want to change.

Select the notification categories you want to modify from the Notification categories drop-down menu and click Save.
When you manage contacts from the Google Cloud console, the Google Cloud console automatically configures the contact's preferred language based on the contact creator's preferred language settings. For more information, see Supported languages.
gcloud
-
In the Google Cloud console, activate Cloud Shell.
At the bottom of the Google Cloud console, a Cloud Shell session starts and displays a command-line prompt. Cloud Shell is a shell environment with the Google Cloud CLI already installed and with values already set for your current project. It can take a few seconds for the session to initialize.
Update an existing contact with the
gcloud essential-contacts updatecommand:gcloud essential-contacts update CONTACT_ID \ --notification-categories="NOTIFICATION_CATEGORY" \ --language="LANGUAGE" --RESOURCE_TYPE="RESOURCE_ID"
Replace the following:
CONTACT_ID: the numeric ID of the contact you want to update. To see the IDs of all contacts in your project, folder, or organization, view your contacts. The numeric ID is the entire value aftercontactsin the contact's name.NOTIFICATION_CATEGORY: a comma-separated list of the new categories that you want the contact to receive notifications for. This list replaces the existing list of notification categories.The list can contain any of the following values:
billinglegalproduct-updatessecuritysuspensiontechnicalallnotification-category-unspecified
LANGUAGE: the language code for your contact's preferred notification language. You can include the language code of any of the supported languages.RESOURCE_TYPE: the resource type where you want to modify contact information. Use the valueproject,folder, ororganization.RESOURCE_ID: the ID of the Google Cloud project, organization, or folder where the contact is defined. Project IDs are alphanumeric strings, likemy-project. Folder and organization IDs are numeric, like123456789012.
If you don't specify a resource type and ID, the gcloud CLI updates the contact with the specified ID in the current project. If no contact with the specified ID exists, the gcloud CLI returns an error.
If the command is successful, you don't receive any response.
REST
To change the notification categories or preferred language of an existing
contact, use the Essential Contacts API's contacts.patch
method.
Request:
PATCH essentialcontacts.googleapis.com/v1/RESOURCE_TYPE/RESOURCE_ID/contacts/CONTACT_ID?updateMask="UPDATE_MASK"
Request body:
{
  "name": "RESOURCE_TYPE/RESOURCE_ID/contact/CONTACT_ID",
  "email": "EMAIL",
  "notificationCategorySubscriptions": [
    "NOTIFICATION_CATEGORY_1",
    "NOTIFICATION_CATEGORY_2"
  ],
  "languageTag": "LANGUAGE"
}
Replace the following:
RESOURCE_TYPE: the resource type where you want to modify contact information. Use the valueprojects,folders, ororganizations.RESOURCE_ID: your Google Cloud project, organization, or folder ID. Project IDs are alphanumeric strings, likemy-project. Folder and organization IDs are numeric, like123456789012.CONTACT_ID: the numeric ID of the contact you want to update. To see the IDs of all contacts in your project, folder, or organization, view your contacts. The numeric ID is the entire value aftercontactsin the contact's name.UPDATE_MASK: Optional. A mask describing which fields of the contact you want to change. The format for the mask is a comma-separated list of fully qualified names of fields, for example,notificationCategorySubscriptions,languageTag.EMAIL: the email address of your contact. This field must match the email address associated with theCONTACT_IDthat you include in the request.NOTIFICATION_CATEGORY_1andNOTIFICATION_CATEGORY_2: Optional. The updated categories that you want the contact to receive notifications for. You can add more notification categories by including more of these values. The list can take one or more of the following values:BILLINGLEGALPRODUCT_UPDATESSECURITYSUSPENSIONTECHNICALALL
For a list of notification categories and recommended contacts, see Notification categories.
LANGUAGE: the language code for the contact's preferred notification language. You can include the language code of any of the supported languages.
To send your request, expand one of these options:
After sending the request, you receive a JSON response similar to the following example:
{
  "name": "projects/my-project/contacts/2",
  "email": "my-new-contact@example.com",
  "notificationCategorySubscriptions": [
    "ALL"
  ],
  "languageTag": "en"
}
Delete a contact
To delete a contact, do the following:
Console
In the Google Cloud console, go to the Essential Contacts page.
Make sure the name of your project, folder, or organization appears in the resource selector of the page. The resource selector lets you select the project, folder, or organization from which you want to delete Essential Contacts.
Next to View by, select Contact.
Click Delete next to the email address of the contact you want to delete. Then, in the dialog, confirm that you want to delete the contact.

gcloud
-
In the Google Cloud console, activate Cloud Shell.
At the bottom of the Google Cloud console, a Cloud Shell session starts and displays a command-line prompt. Cloud Shell is a shell environment with the Google Cloud CLI already installed and with values already set for your current project. It can take a few seconds for the session to initialize.
Delete an existing contact with the
gcloud essential-contacts deletecommand:gcloud essential-contacts delete CONTACT_ID \ --RESOURCE_TYPE="RESOURCE_ID"
Replace the following:
CONTACT_ID: the numeric ID of the contact you want to delete. To see the IDs of all contacts in your project, folder, or organization, view your contacts. The numeric ID is the entire value aftercontactsin the contact's name.RESOURCE_TYPE: the resource type where the contact is defined on. Use the valueproject,folder, ororganization.RESOURCE_ID: the ID of the Google Cloud project, organization, or folder where the contact is defined. Project IDs are alphanumeric strings, likemy-project. Folder and organization IDs are numeric, like123456789012.
If you don't specify a resource type and ID, the gcloud CLI deletes the contact with the specified ID in the current project. If no contact with the specified ID exists, the gcloud CLI returns an error.
If the command is successful, you don't receive any response.
REST
To delete a contact, use the Essential Contacts API's
contacts.delete method.
Request:
DELETE essentialcontacts.googleapis.com/v1/RESOURCE_TYPE/RESOURCE_ID/contacts/CONTACT_ID
Replace the following:
RESOURCE_TYPE: the resource type where the contact is defined on. Use the valueprojects,folders, ororganizations.RESOURCE_ID: your Google Cloud project, organization, or folder ID. Project IDs are alphanumeric strings, likemy-project. Folder and organization IDs are numeric, like123456789012.CONTACT_ID: the numeric ID of the contact you want to delete. To see the IDs of all contacts in your project, folder, or organization, view your contacts. The numeric ID is the entire value aftercontactsin the contact's name.
To send your request, expand one of these options:
If the request is successful, the response body is empty.
Manage contacts by category
In the Google Cloud console, you can manage contacts by notification category by going to the Category tab on the Essential Contacts page.
To add, change, or delete the contacts assigned to a single notification category, do the following:
In the Google Cloud console, go to the Essential Contacts page.
Make sure the name of your project, folder, or organization appears in the resource selector of the page. The resource selector lets you select the project, folder, or organization from which you want to manage Essential Contacts.
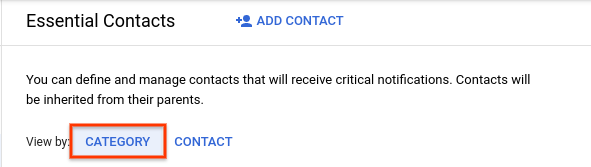
Next to View by, select Category.
Click Edit in the same row as the category whose contacts you want to manage.

Manage the contacts assigned to the notification category:
- To add a new contact, click Add contact and follow the steps to add a contact.
- To change the notification category assigned to a contact, click Edit next to the contact whose category you want to change. Then, select the notification categories you want from the Notification categories drop-down menu and click Save.
- To delete a contact, click Delete next to the contact's email address.
Send a test email to verify reception
You can send a test email to contacts in each category to verify whether the email accounts can receive emails from Google Cloud. You can send a maximum of one test email every 24 hours to each contact in every category and resource.
To send a test email to contacts in a specific notification category, do the following:
In the Google Cloud console, go to the Essential Contacts page.
Make sure the name of your project, folder, or organization appears in the resource selector of the page. The resource selector lets you select the project, folder, or organization from which you want to manage Essential Contacts.
Next to View by, select Category.
Click Send in the same row as the notification category whose contacts you want to deliver test emails to.
Select the checkboxes next to the contacts to whom you want to send emails.
Click Send. The system sends a test email to the selected contacts.
Communicate with each contact to make sure they received the test email from
gcp-essential-contacts-noreply@google.com.
Set advanced configurations and automation
This section covers options for further management of your Essential Contacts, including restricting contact domains, using Infrastructure as Code (IaC) with Terraform for automation, and creating custom organization policies.
Limit allowed domains for contacts
To restrict the email address domains that new contacts can have, set the
organization policy constraint
constraints/essentialcontacts.allowedContactDomains. Existing contacts are not
impacted by this constraint.
To learn how to set organization policy constraints, see Creating and managing organization policies.
Manage contacts with Terraform
You can use Terraform to manage your Essential Contacts. Contacts have the following format in Terraform language:
resource "google_essential_contacts_contact" "contact" {
  parent = "RESOURCE_TYPE/RESOURCE_ID"
  email = "EMAIL"
  language_tag = "LANGUAGE"
  notification_category_subscriptions = [NOTIFICATION_CATEGORY]
}
When managing a contact, replace the following:
RESOURCE_TYPE: the resource type where you want to manage the contact. Use the valueprojects,folders, ororganizations.RESOURCE_ID: your Google Cloud project, organization, or folder ID. Project IDs are alphanumeric strings, likemy-project. Folder and organization IDs are numeric, like123456789012.EMAIL: the email address of your contact. You cannot change this field after you create the contact.LANGUAGE: Optional. The language code for the contact's preferred notification language. You can include the language code of any of the supported languages.NOTIFICATION_CATEGORY: an array of the categories that you want the contact to receive notifications for, such as["BILLING", "LEGAL"]. This array can contain any of the following values:BILLINGLEGALPRODUCT_UPDATESSECURITYSUSPENSIONTECHNICALALL
For a list of notification categories and recommended contacts, see Notification categories.
To add, modify or remove a contact, add, modify or remove a contact resource in your Terraform configuration file. For more details, see Terraform Essential Contacts documentation.
What's next
- Learn more about Essential Contacts.
- Create custom constraints for Essential Contacts.
- Learn how to associate a domain with a project for verification purposes.
- Understand how to manage notification preferences.
- Learn about Advisory Notifications.