在本文件中,您會使用 Google Cloud的下列計費元件:
- Dataproc
- Compute Engine
- Cloud Scheduler
如要根據預測用量估算費用,請使用 Pricing Calculator。
事前準備
設定專案
- Sign in to your Google Cloud account. If you're new to Google Cloud, create an account to evaluate how our products perform in real-world scenarios. New customers also get $300 in free credits to run, test, and deploy workloads.
-
In the Google Cloud console, on the project selector page, select or create a Google Cloud project.
Roles required to select or create a project
- Select a project: Selecting a project doesn't require a specific IAM role—you can select any project that you've been granted a role on.
-
Create a project: To create a project, you need the Project Creator
(
roles/resourcemanager.projectCreator), which contains theresourcemanager.projects.createpermission. Learn how to grant roles.
-
Verify that billing is enabled for your Google Cloud project.
-
Enable the Dataproc, Compute Engine, and Cloud Scheduler APIs.
Roles required to enable APIs
To enable APIs, you need the Service Usage Admin IAM role (
roles/serviceusage.serviceUsageAdmin), which contains theserviceusage.services.enablepermission. Learn how to grant roles. -
Install the Google Cloud CLI.
-
如果您使用外部識別資訊提供者 (IdP),請先 使用聯合身分登入 gcloud CLI。
-
如要初始化 gcloud CLI,請執行下列指令:
gcloud init -
In the Google Cloud console, on the project selector page, select or create a Google Cloud project.
Roles required to select or create a project
- Select a project: Selecting a project doesn't require a specific IAM role—you can select any project that you've been granted a role on.
-
Create a project: To create a project, you need the Project Creator
(
roles/resourcemanager.projectCreator), which contains theresourcemanager.projects.createpermission. Learn how to grant roles.
-
Verify that billing is enabled for your Google Cloud project.
-
Enable the Dataproc, Compute Engine, and Cloud Scheduler APIs.
Roles required to enable APIs
To enable APIs, you need the Service Usage Admin IAM role (
roles/serviceusage.serviceUsageAdmin), which contains theserviceusage.services.enablepermission. Learn how to grant roles. -
Install the Google Cloud CLI.
-
如果您使用外部識別資訊提供者 (IdP),請先 使用聯合身分登入 gcloud CLI。
-
如要初始化 gcloud CLI,請執行下列指令:
gcloud init - 在 Google Cloud 控制台中,開啟「IAM & Admin」(IAM 與管理) →「Roles」(角色) 頁面。
- 按一下「CREATE ROLE」開啟「建立角色」頁面。
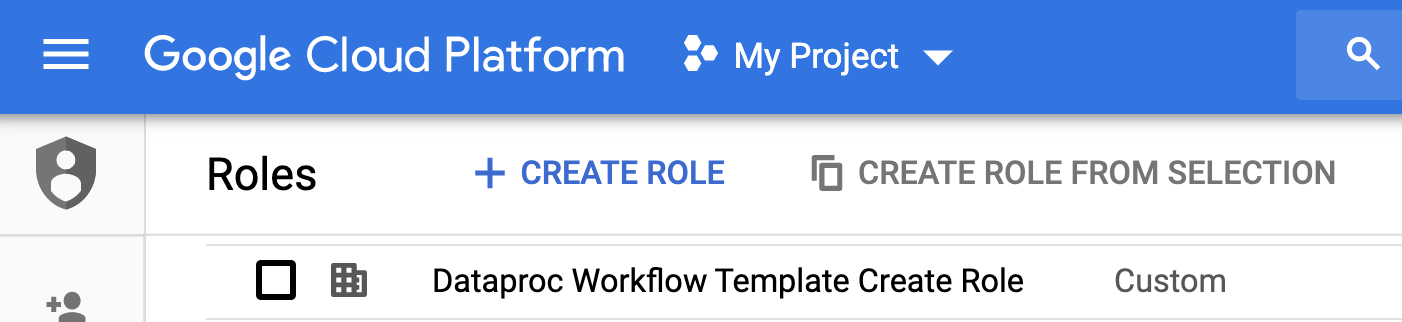
- 填寫「名稱」、「說明」、「ID」和「發布階段」欄位。建議: 使用「Dataproc Workflow Template Create」做為角色名稱。
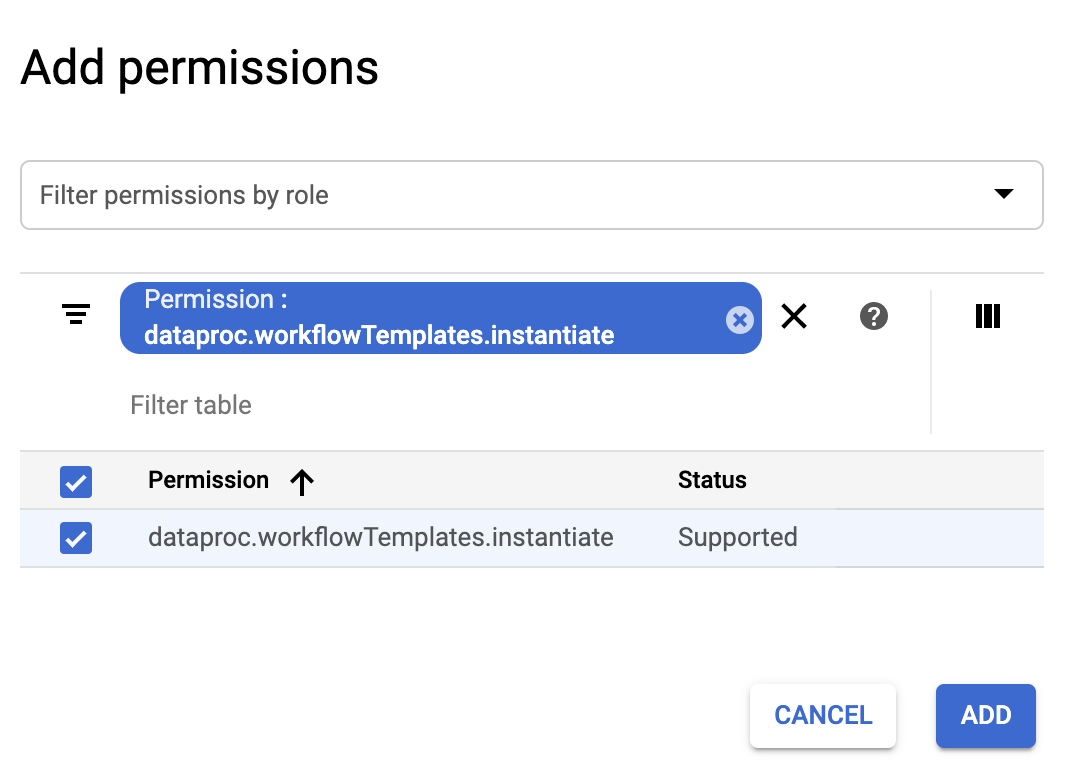
- 按一下「新增權限」。
- 在「Add permissions」(新增權限) 表單中,按一下「Filter」(篩選器),然後選取「Permission」(權限)。完成篩選器,讀取「權限:dataproc.workflowTemplates.instantiate」。
- 勾選列出權限左側的核取方塊,然後按一下「新增」。
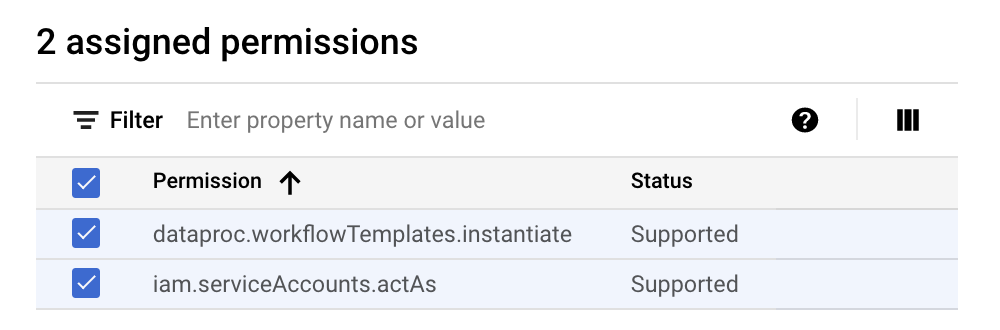
- 在「建立角色」頁面中,再次按一下「新增權限」,重複先前的子步驟,將「iam.serviceAccounts.actAs」權限新增至自訂角色。「建立角色」頁面現在會列出兩項權限。
- 在「自訂角色」頁面按一下「建立」。
自訂角色會列在「角色」頁面。
前往 Google Cloud 控制台的「Service Accounts」(服務帳戶) 頁面。
選取專案。
按一下「建立服務帳戶」。
在「Service account name」(服務帳戶名稱) 欄位中輸入名稱
workflow-scheduler。 Google Cloud 控制台會根據這個名稱填入「服務帳戶 ID」欄位。選用:在「服務帳戶說明」欄位中,輸入服務帳戶的說明。
按一下「建立並繼續」。
按一下「Select a role」(選取角色) 欄位,然後選擇您在上一個步驟中建立的「Dataproc Workflow Template Create」(Dataproc 工作流程範本建立) 自訂角色。
按一下「繼續」。
在「Service account admins role」(服務帳戶管理員角色) 欄位中,輸入您的 Google 帳戶電子郵件地址。
按一下「Done」(完成),即完成建立服務帳戶。
- 這些指令會指定「us-central1」地區。如果您先前已執行
gcloud config set compute/region來設定區域屬性,可以指定其他區域或刪除--region標記。 add-job指令中的「-- 」(破折號破折號空格) 序列會將1000引數傳遞至 SparkPi 工作,指定用於估算圓周率值的樣本數。- 建立工作流程範本。
gcloud dataproc workflow-templates create sparkpi \
    --region=us-central1
- 將 Spark 工作新增至 sparkpi 工作流程範本。「compute」步驟 ID 為必填欄位,用於識別新增的 SparkPi 工作。
gcloud dataproc workflow-templates add-job spark \
    --workflow-template=sparkpi \
    --step-id=compute \
    --class=org.apache.spark.examples.SparkPi \
    --jars=file:///usr/lib/spark/examples/jars/spark-examples.jar \
    --region=us-central1 \
    -- 1000
- 使用代管、單一節點叢集執行工作流程。Dataproc 會建立叢集、在叢集上執行工作流程,然後在工作流程完成時刪除叢集。
gcloud dataproc workflow-templates set-managed-cluster sparkpi \
    --cluster-name=sparkpi \
    --single-node \
    --region=us-central1
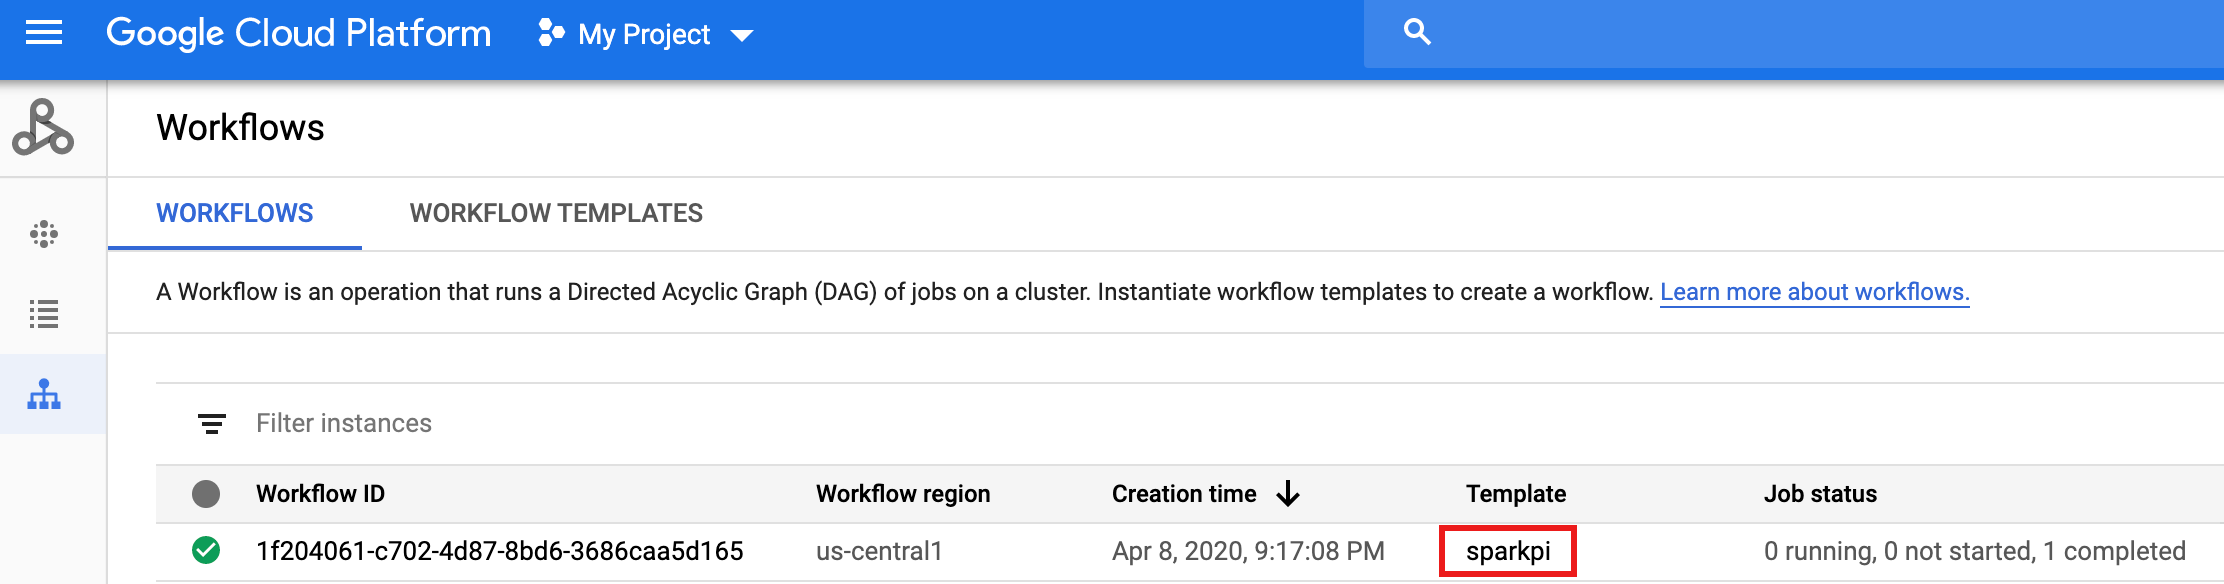
- 在 Google Cloud 控制台的 Dataproc「Workflows」 頁面中,按一下
sparkpi名稱,開啟「Workflow template details」頁面。確認 sparkpi 範本屬性。
在Google Cloud 控制台中開啟「Cloud Scheduler」頁面 (您可能需要選取專案才能開啟頁面)。按一下「CREATE JOB」。
輸入或選取下列工作資訊:
- 選取區域:「us-central」或其他您建立工作流程範本的區域。
- 名稱:「sparkpi」
- 頻率:「* * * * *」會選取每分鐘,「0 9 * * 1」則會選取每週一上午 9 點。如需其他 unix-cron 值,請參閱「定義工作排程」。注意:無論您為工作設定的頻率為何,都可以在 Google Cloud 控制台的 Cloud Scheduler「工作」頁面點選「立即執行」按鈕,執行及測試工作。
- 時區:選取timezone。輸入「United States」即可列出美國時區。
- 目標:「HTTP」
- 網址:插入 your-project-id 後,請插入下列網址。如果您是在其他區域建立工作流程範本,請將「us-central1」替換為該區域。這個網址會呼叫 Dataproc
workflowTemplates.instantiateAPI,執行 sparkpi 工作流程範本。https://dataproc.googleapis.com/v1/projects/your-project-id/regions/us-central1/workflowTemplates/sparkpi:instantiate?alt=json
- HTTP 方法:
- 「POST」
- 主體:「{}」
- 驗證標頭:
- 「新增 OAuth 權杖」
- 服務帳戶:插入service account address,也就是您為本教學課程建立的服務帳戶。插入 your-project-id 後,您可以使用下列帳戶地址:
workflow-scheduler@your-project-id.iam.gserviceaccount.com
- 範圍:您可以忽略這個項目。
- 按一下「建立」。
工作流程刪除代管叢集後,工作詳細資料仍會保留在 Google Cloud 控制台中。按一下 Dataproc「Jobs」(工作) 頁面列出的
compute...工作,即可查看工作流程工作詳細資料。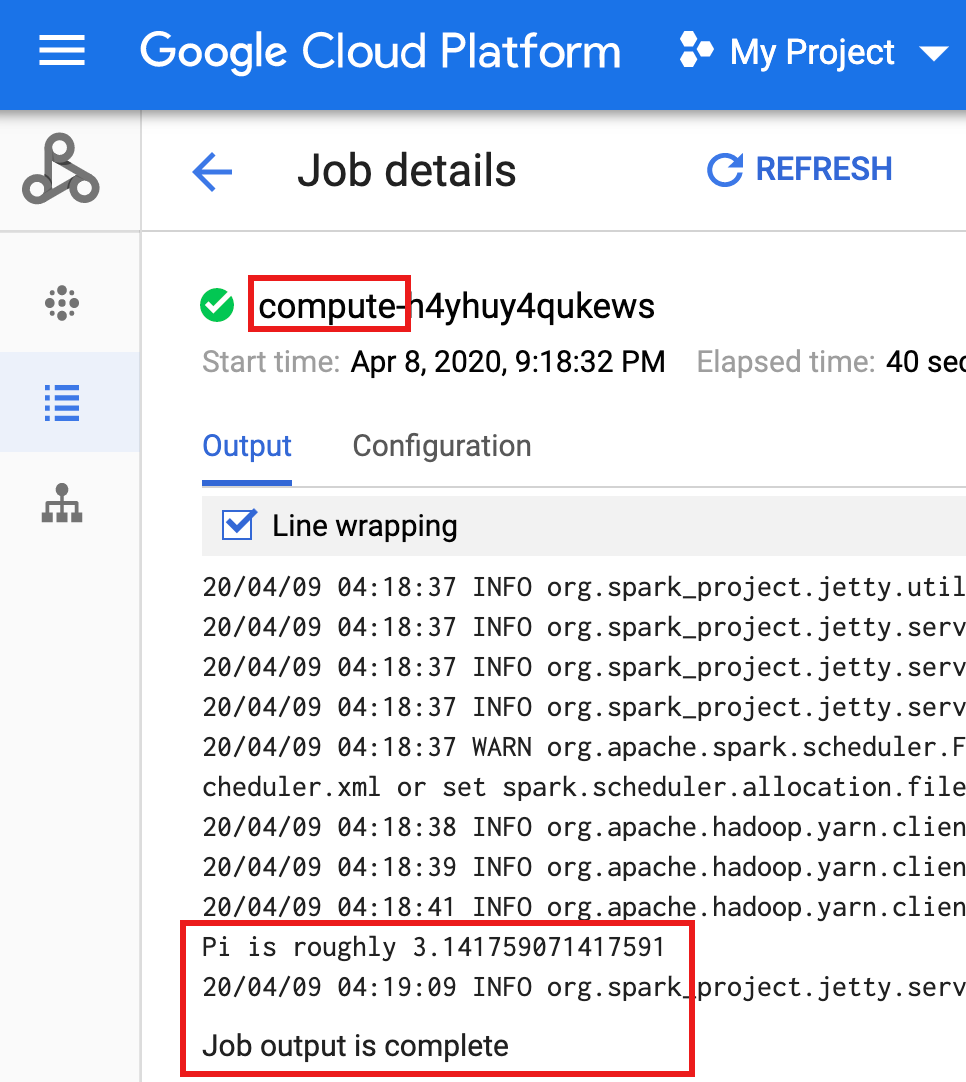
- In the Google Cloud console, go to the Manage resources page.
- In the project list, select the project that you want to delete, and then click Delete.
- In the dialog, type the project ID, and then click Shut down to delete the project.
- 請參閱「Dataproc 工作流程範本總覽」。
- 請參閱工作流程排程解決方案。
建立自訂角色
建立服務帳戶
建立工作流程範本。
複製下列指令並在本機終端機視窗或 Cloud Shell 中執行,以建立及定義工作流程範本。
注意:
建立 Cloud Scheduler 工作
測試排定的工作流程工作
清除所用資源
本教學課程中的工作流程會在完成時刪除代管叢集。保留工作流程可讓您重新執行工作流程,且不會產生費用。您可以刪除在本教學課程中建立的其他資源,以免產生週期性費用。
刪除專案
刪除工作流程範本
gcloud dataproc workflow-templates delete sparkpi \
    --region=us-central1
刪除 Cloud Scheduler 工作
在 Google Cloud 控制台中開啟 Cloud Scheduler「工作」頁面,選取 sparkpi 函式左側的方塊,然後按一下「刪除」。
刪除服務帳戶
在 Google Cloud 控制台中開啟「IAM 與管理 → 服務帳戶」頁面,選取服務帳戶左側的方塊 workflow-scheduler...,然後按一下「刪除」。