Mit Sammlungen den Überblick behalten
Sie können Inhalte basierend auf Ihren Einstellungen speichern und kategorisieren.
Speech-to-Text ist eine API, die auf der künstlichen Intelligenz (KI) von Google basiert. Sie senden Ihre Audiodaten an Speech-to-Text und erhalten dann eine Texttranskription der Audiodaten als Antwort.
Weitere Informationen zum Erstellen einer Speech-to-Text-Anfrage finden Sie auf der Seite Anfragen.
Übersicht
Bevor Sie Anfragen an Speech-to-Text senden können, müssen Sie die API in der Google Cloud Console aktivieren. Die Schritte auf dieser Seite führen Sie durch die folgenden Aktionen:
Speech-to-Text in einem Projekt aktivieren.
Die Abrechnung für Speech-to-Text muss aktiviert sein.
(Optional) Erstellen Sie einen neuen Google Cloud Storage-Bucket zum Speichern Ihrer Audiodaten.
Vorbereitung
Es gibt zwei Möglichkeiten, auf den Dienst zuzugreifen: mithilfe der REST API oder mithilfe der Speech-to-Text-Konsole. Wir stellen Codebeispiele bereit, die zeigen, wie Sie eine Anfrage an die REST API senden und eine Antwort erhalten. Informationen zur Verwendung dieser Beispiele finden Sie in den Kurzanleitungen und Schritt-für-Schritt-Anleitungen für Speech-to-Text. Wenn Sie Speech-to-Text mit minimalem Programmieraufwand verwenden möchten, können Sie die Cloud Speech-to-Text-Konsole verwenden.
In dieser Anleitung werden Sie durch die Schritte geführt, die zum Senden von Anfragen an die REST API erforderlich sind. Wenn Sie mit dem Coding noch nicht vertraut sind, sollten Sie mit den detaillierten Anleitungen in der Konsole auf der Google Cloud Platform beginnen, bevor Sie mit dieser Kurzanleitung beginnen.
Google Cloud -Projekt für Speech-to-Text einrichten
Sie können entweder ein vorhandenes Projekt auswählen oder ein neues erstellen. Weitere Informationen zum Erstellen eines Projekts finden Sie unter Projekte erstellen und verwalten.
Wenn Sie ein neues Projekt erstellen, werden Sie aufgefordert, ein Abrechnungskonto mit diesem Projekt zu verknüpfen. Wenn Sie ein bereits vorhandenes Projekt verwenden, muss die Abrechnung aktiviert sein.
Nachdem Sie ein Projekt ausgewählt und mit einem Rechnungskonto verknüpft haben, können Sie die Speech-to-Text API aktivieren. Öffnen Sie oben auf der Seite die Leiste Produkte und Ressourcen suchen und geben Sie speech ein. Wählen Sie in der Ergebnisliste die Cloud Speech-to-Text API aus.
Wenn Sie Speech-to-Text ausprobieren möchten, ohne es mit Ihrem Projekt zu verknüpfen, wählen Sie die Option DIESE API TESTEN aus. Klicken Sie auf AKTIVIEREN, um die Speech-to-Text API für die Verwendung mit Ihrem Projekt zu aktivieren.
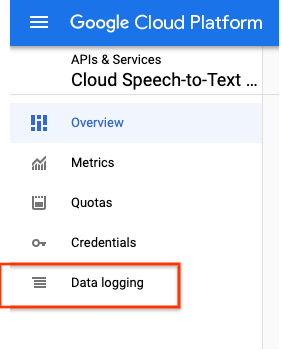
(Optional) Aktivieren Sie das Daten-Logging. Wenn Sie Daten-Logging aktivieren, kann Google alle an Speech-to-Text gesendeten Audiodaten aufzeichnen.
Mit diesen Daten werden die Speech-to-Text-Modelle verbessert. Nutzer, die das Daten-Logging aktivieren, profitieren von niedrigeren Preisen. Weitere Informationen finden Sie auf den Seiten zu Preisen und den Nutzungsbedingungen für das Daten-Logging.
Optional: Cloud Storage-Bucket erstellen
Wenn Sie Audiodaten transkribieren möchten, die länger als 60 Sekunden sind oder eine Dateigröße von mehr als 10 MB haben, müssen Sie die Audiodaten in einem Cloud Storage-Bucket speichern, bevor Sie sie mit Speech-to-Text transkribieren können. Die folgenden Schritte führen Sie durch den Prozess der Erstellung eines neuen Buckets.
In the Google Cloud console, go to the Cloud Storage
Buckets page.
On the Create a bucket page, enter your bucket information. To go to the next
step, click Continue.
For Name your bucket, enter a unique bucket name. Don't include sensitive
information in the bucket name, because the bucket namespace is global and publicly
visible.
In the Choose where to store your data section, do the following:
Choose a location where your bucket's data is permanently stored from the Location type drop-down menu.
If you select the dual-region location type, you can
also choose to enable turbo replication by using the
relevant checkbox.
To set up cross-bucket replication, select
Add cross-bucket replication via Storage Transfer Service and
follow these steps:
Set up cross-bucket replication
In the Bucket menu, select a bucket.
In the Replication settings section,
click Configure to configure settings for the
replication job.
The Configure cross-bucket replication pane
appears.
To filter objects to replicate by object name prefix,
enter a prefix that you want to include or exclude objects from, then click addAdd a prefix.
To set a storage class for the replicated objects,
select a storage class from the Storage class menu.
If you skip this step, the replicated objects will use the
destination bucket's storage class by default.
Click Done.
In the Choose how to store your data section, do the following:
Select a default storage class for the bucket or
Autoclass for automatic storage class management of your
bucket's data.
To enable hierarchical namespace, in the
Optimize storage for data-intensive workloads section, select
Enable hierarchical namespace on this bucket.
In the Choose how to control access to objects section, select
whether or not your bucket enforces public access prevention,
and select an access control method for your bucket's objects.
In the Choose how to protect object data section, do the
following:
Select any of the options under Data protection that you
want to set for your bucket.
To enable soft delete, click the
Soft delete policy (For data recovery) checkbox,
and specify the number of days you want to retain objects
after deletion.
To set Object Versioning, click the
Object versioning (For version control) checkbox,
and specify the maximum number of versions per object and the number of days after which
the noncurrent versions expire.
To enable the retention policy on objects and buckets, click the Retention (For compliance) checkbox, and then do the following:
[[["Leicht verständlich","easyToUnderstand","thumb-up"],["Mein Problem wurde gelöst","solvedMyProblem","thumb-up"],["Sonstiges","otherUp","thumb-up"]],[["Schwer verständlich","hardToUnderstand","thumb-down"],["Informationen oder Beispielcode falsch","incorrectInformationOrSampleCode","thumb-down"],["Benötigte Informationen/Beispiele nicht gefunden","missingTheInformationSamplesINeed","thumb-down"],["Problem mit der Übersetzung","translationIssue","thumb-down"],["Sonstiges","otherDown","thumb-down"]],["Zuletzt aktualisiert: 2025-09-02 (UTC)."],[],[],null,["# Set up Speech-to-Text\n\nSpeech-to-Text is an API that is powered by Google's artificial intelligence\n(AI) technology. You send your audio data to Speech-to-Text, then receive a\ntext transcription of your audio data in response.\n\nFor more information about\nhow to construct a Speech-to-Text request, see the\n[requests](/speech-to-text/docs/speech-to-text-requests) page.\n\nOverview\n--------\n\nBefore you can begin sending requests to Speech-to-Text, you must enable the\nAPI in the Google Cloud console. The steps on this page walk you through the\nfollowing actions:\n\n- Enable Speech-to-Text on a project.\n- Make sure billing is enabled for Speech-to-Text.\n- (Optional) Create a new Google Cloud Storage bucket to store your audio data.\n\nBefore You Begin\n----------------\n\nThere are two ways to access the service: by using the REST API, or by using the\nSpeech-to-Text Console. We provide\n[code samples](/speech-to-text/docs/samples) that show you how to\nmake a request to the REST API and receive a response. You can learn how to use\nthese samples by following the Speech-to-Text\n[quickstarts](/speech-to-text/docs/quickstart) and\n[how-to guides](/speech-to-text/docs/how-to). If you prefer to use\nSpeech-to-Text with minimal coding, you can use the\n[Cloud Speech-to-Text Console](/speech-to-text/docs/transcribe-console).\n\nThis guide walks you through the steps necessary to start sending requests to\nthe REST API. If you are new to coding, we recommend that you start with the\n[step-by-step in-console tutorials in Google Cloud Platform](/speech-to-text/docs/console-tutorials)\nbefore beginning this quickstart.\n\nSet up your Google Cloud project for Speech-to-Text\n---------------------------------------------------\n\n1. [Sign in to Google Cloud console](https://console.cloud.google.com/)\n\n2. [Go to the project selector page](https://console.cloud.google.com/projectselector2/home/dashboard)\n\n You can either choose an existing project or create a new one. For more\n information about creating a project, see\n [Creating and managing projects](/resource-manager/docs/creating-managing-projects).\n3. If you create a new project, you will be prompted to link a billing account\n to this project. If you are using a pre-existing project, make sure that you\n have billing enabled.\n\n [Learn how to confirm that billing is enabled for your project](/billing/docs/how-to/modify-project)\n | **Note:** You must enable billing to use Speech-to-Text API, however you will not be charged unless you exceed the free quota. See the [pricing](/speech-to-text/pricing) page for more details.\n4. Once you have selected a project and linked it to a billing account, you\n can enable the Speech-to-Text API. Go to the **Search products and\n resources** bar at the top of the page and type in **\"speech\"** . Select the\n **Cloud Speech-to-Text API** from the list of results.\n\n5. To try Speech-to-Text without linking it to your project, choose\n the **TRY THIS API** option. To enable the Speech-to-Text API for use\n with your project, click **ENABLE**.\n\n6. (Optional) Enable data logging. By opting in to data logging, you\n allow Google to record any audio data that you send to Speech-to-Text.\n This data is used to improve the Speech-to-Text models. Users who\n opt in to data logging benefit from lower pricing. See the\n [pricing](/speech-to-text/pricing) and data logging\n [terms and conditions](/speech-to-text/docs/data-logging-terms)\n pages for more information.\n\nOptional: Create a Cloud Storage bucket\n---------------------------------------\n\nIf you intend to transcribe audio longer than 60 seconds or with a file size\nlarger than 10 MB, you must store the audio data in a Cloud Storage bucket\nbefore you can transcribe it using Speech-to-Text. The following steps walk\nyou through the process of creating a new bucket.\n- In the Google Cloud console, go to the Cloud Storage **Buckets** page.\n\n [Go to Buckets](https://console.cloud.google.com/storage/browser)\n- Click add_box **Create**.\n- On the **Create a bucket** page, enter your bucket information. To go to the next step, click **Continue** .\n 1. For **Name your bucket**, enter a unique bucket name. Don't include sensitive information in the bucket name, because the bucket namespace is global and publicly visible.\n 2. In the **Choose where to store your data** section, do the following:\n 1. Select a [Location type](/storage/docs/locations).\n 2. Choose a location where your bucket's data is permanently stored from the **[Location type](/storage/docs/locations#available-locations)** drop-down menu.\n - If you select the [dual-region](/storage/docs/locations#location-dr) location type, you can also choose to enable [turbo replication](/storage/docs/availability-durability#turbo-replication) by using the relevant checkbox.\n 3. To set up [cross-bucket replication](/storage/docs/availability-durability#cross-bucket-replication), select **Add cross-bucket replication via Storage Transfer Service** and follow these steps: \n\n #### Set up cross-bucket replication\n\n 1. In the **Bucket** menu, select a bucket.\n 2. In the **Replication settings** section,\n click **Configure** to configure settings for the\n replication job.\n\n The **Configure cross-bucket replication** pane\n appears.\n - To filter objects to replicate by object name prefix, enter a prefix that you want to include or exclude objects from, then click add **Add a prefix**.\n - To set a storage class for the replicated objects, select a storage class from the **Storage class** menu. If you skip this step, the replicated objects will use the destination bucket's storage class by default.\n - Click **Done**.\n 3. In the **Choose how to store your data** section, do the following:\n 1. Select a [default storage class](/storage/docs/storage-classes) for the bucket or [Autoclass](/storage/docs/autoclass) for automatic storage class management of your bucket's data.\n 2. To enable [hierarchical namespace](/storage/docs/hns-overview), in the **Optimize storage for data-intensive workloads** section, select **Enable hierarchical namespace on this bucket** . **Note:** You cannot enable hierarchical namespace in existing buckets.\n 4. In the **Choose how to control access to objects** section, select whether or not your bucket enforces [public access prevention](/storage/docs/public-access-prevention), and select an [access control method](/storage/docs/access-control) for your bucket's objects. **Note:** You cannot change the **Prevent public access** setting if this setting is enforced at an [organization policy](/storage/docs/org-policy-constraints#public-access-prevention).\n 5. In the **Choose how to protect object data** section, do the following:\n - Select any of the options under **Data protection** that you want to set for your bucket.\n - To enable [soft delete](/storage/docs/soft-delete), click the **Soft delete policy (For data recovery)** checkbox, and specify the number of days you want to retain objects after deletion.\n - To set [Object Versioning](/storage/docs/object-versioning), click the **Object versioning (For version control)** checkbox, and specify the maximum number of versions per object and the number of days after which the noncurrent versions expire.\n - To enable the retention policy on objects and buckets, click the **Retention (For compliance)** checkbox, and then do the following:\n - To enable [Object Retention Lock](/storage/docs/object-lock), click the **Enable object retention** checkbox.\n - To enable [Bucket Lock](/storage/docs/bucket-lock), click the **Set bucket retention policy** checkbox, and choose a unit of time and a length of time for your retention period.\n - To choose how your object data will be encrypted, expand the **Data encryption** section (expand_more), and select a [**Data encryption** method](/storage/docs/encryption).\n- Click **Create**.\n\nDisable the Speech-to-Text API\n------------------------------\n\n- Complete the following steps if you no longer need to use the Speech-to-Text API in the future.\n 1. Navigate to your Google Cloud dashboard and click on the **Go to APIs\n overview** link in the **APIs** box.\n 2. Select **Cloud Speech-to-Text API**.\n 3. Click the **DISABLE API** button at the top of the Cloud Speech-to-Text API page.\n\nWhat's next\n-----------\n\n- Learn how to send a transcription request to the Speech-to-Text API using [client libraries](/speech-to-text/docs/transcribe-client-libraries), [gcloud](/speech-to-text/docs/transcribe-client-libraries), the [command line](/speech-to-text/docs/transcribe-client-libraries), or the [Speech-to-Text UI](/speech-to-text/docs/transcribe-console)."]]