在 Cloud Service Mesh 1.5 以上版本中,系統預設會啟用自動相互傳輸層安全標準 (自動 mTLS)。透過自動 mTLS,用戶端 Sidecar Proxy 會自動偵測伺服器是否具有 Sidecar。用戶端 Sidecar 會將 mTLS 傳送至含有 Sidecar 的工作負載,並將純文字傳送至不含 Sidecar 的工作負載。但請注意,服務接受純文字和 mTLS 流量。將補充代理程式注入 Pod 時,建議您也設定服務,只接受 mTLS 流量。
使用 Cloud Service Mesh 時,您只要套用單一 YAML 檔案,即可在應用程式程式碼外部強制執行 mTLS。Cloud Service Mesh 可讓您靈活地將驗證政策套用至整個服務網格、命名空間或個別工作負載。

費用
在本文件中,您會使用 Google Cloud的下列計費元件:
如要根據預測用量估算費用,請使用 Pricing Calculator。
完成本教學課程後,您可以刪除已建立的資源,避免持續產生費用。詳情請參閱「清除」。
事前準備
確認專案已啟用計費功能。
在 GKE 叢集上佈建 Cloud Service Mesh。系統支援多種設定方法:
複製存放區:
git clone https://github.com/GoogleCloudPlatform/anthos-service-mesh-samples
cd anthos-service-mesh-samples
部署 Ingress 閘道
將
kubectl的目前環境設為叢集:gcloud container clusters get-credentials CLUSTER_NAME \ --project=PROJECT_ID \ --zone=CLUSTER_LOCATION為 Ingress 閘道建立命名空間:
kubectl create namespace asm-ingress啟用要用於注入的命名空間。步驟取決於您的控制層實作。
代管 (TD)
將預設插入標籤套用至命名空間:
kubectl label namespace asm-ingress \
    istio.io/rev- istio-injection=enabled --overwrite
受管理 (Istiod)
建議:執行下列指令,將預設插入標籤套用至命名空間:
  kubectl label namespace asm-ingress \
      istio.io/rev- istio-injection=enabled --overwrite
如果您是使用受管理 Istiod 控制平面的現有使用者: 建議您使用預設注入,但系統也支援以修訂版本為準的注入。請按照下列指示操作:
執行下列指令,找出可用的發布管道:
kubectl -n istio-system get controlplanerevision輸出結果會與下列內容相似:
NAME AGE asm-managed-rapid 6d7h在輸出內容中,「
NAME」欄下方的值是與 Cloud Service Mesh 版本可用發布管道對應的修訂版本標籤。將修訂版本標籤套用至命名空間:
kubectl label namespace asm-ingress \
    istio-injection- istio.io/rev=REVISION_LABEL --overwrite
在
anthos-service-mesh-samples存放區中部署範例閘道:kubectl apply -n asm-ingress \ -f docs/shared/asm-ingress-gateway預期輸出內容:
serviceaccount/asm-ingressgateway configured
service/asm-ingressgateway configured
deployment.apps/asm-ingressgateway configured
gateway.networking.istio.io/asm-ingressgateway configured
部署 Online Boutique 範例應用程式
如果尚未設定,請將
kubectl的目前背景資訊設為叢集:gcloud container clusters get-credentials CLUSTER_NAME \ --project=PROJECT_ID \ --zone=CLUSTER_LOCATION為範例應用程式建立命名空間:
kubectl create namespace onlineboutique標記
onlineboutique命名空間,自動插入 Envoy Proxy。 按照這些步驟啟用自動 Sidecar 插入功能。部署範例應用程式、前端的
VirtualService,以及工作負載的服務帳戶。在本教學課程中,您將部署 Online Boutique,這是一個微服務示範應用程式。kubectl apply \ -n onlineboutique \ -f docs/shared/online-boutique/virtual-service.yaml kubectl apply \ -n onlineboutique \ -f docs/shared/online-boutique/service-accounts
查看服務
查看
onlineboutique命名空間中的 Pod:kubectl get pods -n onlineboutique預期輸出內容:
NAME                                     READY   STATUS    RESTARTS   AGE
adservice-85598d856b-m84m6               2/2     Running   0          2m7s
cartservice-c77f6b866-m67vd              2/2     Running   0          2m8s
checkoutservice-654c47f4b6-hqtqr         2/2     Running   0          2m10s
currencyservice-59bc889674-jhk8z         2/2     Running   0          2m8s
emailservice-5b9fff7cb8-8nqwz            2/2     Running   0          2m10s
frontend-77b88cc7cb-mr4rp                2/2     Running   0          2m9s
loadgenerator-6958f5bc8b-55q7w           2/2     Running   0          2m8s
paymentservice-68dd9755bb-2jmb7          2/2     Running   0          2m9s
productcatalogservice-84f95c95ff-c5kl6   2/2     Running   0          114s
recommendationservice-64dc9dfbc8-xfs2t   2/2     Running   0          2m9s
redis-cart-5b569cd47-cc2qd               2/2     Running   0          2m7s
shippingservice-5488d5b6cb-lfhtt         2/2     Running   0          2m7s
應用程式的所有 Pod 都應已啟動並執行,且
READY欄中會顯示2/2。這表示 Pod 已成功插入 Envoy 補充容器 Proxy。如果幾分鐘後仍未顯示2/2,請參閱疑難排解指南。取得外部 IP,並將其設為變數:
kubectl get services -n asm-ingress
export FRONTEND_IP=$(kubectl --namespace asm-ingress \
get service --output jsonpath='{.items[0].status.loadBalancer.ingress[0].ip}' \
)
畫面會顯示類似以下內容的輸出:
NAME                   TYPE           CLUSTER-IP      EXTERNAL-IP   PORT(S)                                      AGE
asm-ingressgateway   LoadBalancer   10.19.247.233   35.239.7.64   80:31380/TCP,443:31390/TCP,31400:31400/TCP   27m
在網路瀏覽器中前往
EXTERNAL-IP位址。您應該會在瀏覽器中看到 Online Boutique 商店。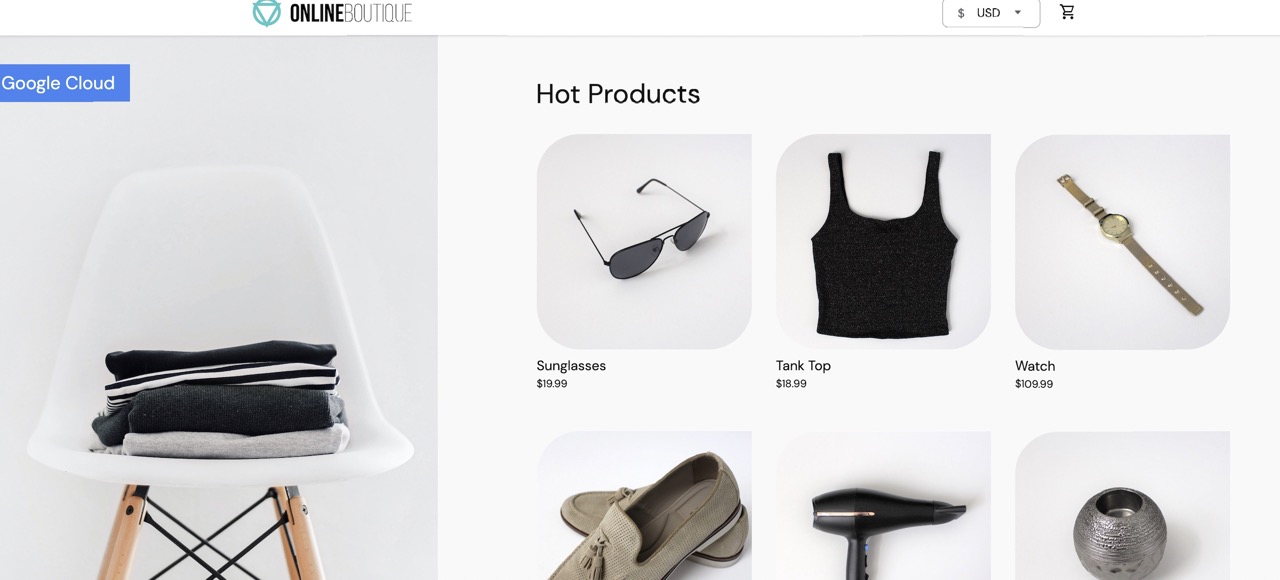
建立 TestCurl Pod
建立 TestCurl Pod,傳送純文字流量以進行測試。
  apiVersion: v1
  kind: Pod
  metadata:
    name: testcurl
    namespace: default
    annotations:
      sidecar.istio.io/inject: "false"
  spec:
    containers:
    - name: curl
      image: curlimages/curl
      command: ["sleep", "600"]
存取 Online Boutique
將
kubectl的目前內容設為部署 Online Boutique 的叢集:gcloud container clusters get-credentials CLUSTER_NAME \ --project=PROJECT_ID \ --zone=CLUSTER_LOCATION列出
frontend命名空間中的服務:kubectl get services -n frontend請注意,
frontend-external是LoadBalancer,而且具有外部 IP 位址。範例應用程式包含負載平衡器服務,因此可部署在 GKE 上,不必使用 Cloud Service Mesh。在瀏覽器中,使用
frontend-external服務的外部 IP 位址造訪應用程式:http://FRONTEND_EXTERNAL_IP/Cloud Service Mesh 可讓您部署 Ingress 閘道。您也可以使用 Ingress 閘道的外部 IP 位址存取 Online Boutique。取得閘道的外部 IP。將預留位置替換為下列資訊:
- GATEWAY_SERVICE_NAME:Ingress 閘道服務的名稱。如果您部署範例閘道時未進行修改,或是部署預設 Ingress 閘道,名稱會是
istio-ingressgateway。 - GATEWAY_NAMESPACE:部署 Ingress 閘道的命名空間。如果您部署的是預設輸入閘道,命名空間為
istio-system。
kubectl get service GATEWAY_NAME -n GATEWAY_NAMESPACE- GATEWAY_SERVICE_NAME:Ingress 閘道服務的名稱。如果您部署範例閘道時未進行修改,或是部署預設 Ingress 閘道,名稱會是
在瀏覽器中開啟另一個分頁,然後使用 Ingress 閘道的外部 IP 位址造訪應用程式:
http://INGRESS_GATEWAY_EXTERNAL_IP/執行下列指令,從另一個 Pod
curlfrontend服務 (使用純 HTTP)。由於服務位於不同命名空間,因此您需要使用frontend服務的 DNS 名稱執行 curl。kubectl debug --image istio/base --target istio-proxy -it \ $(kubectl get pod -l app=productcatalogservice -n product-catalog -o jsonpath={.items..metadata.name}) \ -n product-catalog -- \ curl http://frontend.frontend.svc.cluster.local:80/ -o /dev/null -s -w '%{http_code}\n'您的要求會成功,狀態為
200,因為系統預設會接受 TLS 和純文字流量。
為每個命名空間啟用 mTLS
如要強制執行 mTLS,請套用含有 kubectl 的 PeerAuthentication 政策。
將下列驗證政策儲存為
mtls-namespace.yaml。cat <<EOF > mtls-namespace.yaml apiVersion: "security.istio.io/v1beta1" kind: "PeerAuthentication" metadata: name: "namespace-policy" spec: mtls: mode: STRICT EOFYAML 中的
mode: STRICT行會將服務設為只接受 mTLS。根據預設,mode為PERMISSIVE,這會將服務設定為接受純文字和 mTLS。套用驗證策略,將所有 Online Boutique 服務設為只接受 mTLS:
for ns in ad cart checkout currency email frontend loadgenerator \
     payment product-catalog recommendation shipping; do
kubectl apply -n $ns -f mtls-namespace.yaml
done
預期輸出內容:
peerauthentication.security.istio.io/namespace-policy created
peerauthentication.security.istio.io/namespace-policy created
peerauthentication.security.istio.io/namespace-policy created
peerauthentication.security.istio.io/namespace-policy created
peerauthentication.security.istio.io/namespace-policy created
peerauthentication.security.istio.io/namespace-policy created
peerauthentication.security.istio.io/namespace-policy created
peerauthentication.security.istio.io/namespace-policy created
peerauthentication.security.istio.io/namespace-policy created
peerauthentication.security.istio.io/namespace-policy created
peerauthentication.security.istio.io/namespace-policy created
在瀏覽器中前往使用
frontend-external服務外部 IP 位址存取 Online Boutique 的分頁:http://FRONTEND_EXTERNAL_IP/重新整理頁面。瀏覽器會顯示下列錯誤:

重新整理頁面會導致系統將純文字傳送至
frontend服務。 由於STRICT驗證政策,Sidecar Proxy 會封鎖對服務的要求。前往瀏覽器中透過
istio-ingressgateway外部 IP 位址存取 Online Boutique 的分頁,然後重新整理頁面,應會顯示成功。使用 Ingress 閘道存取 Online Boutique 時,要求會經過下列路徑:
mTLS 驗證流程:
- 瀏覽器會將純文字 HTTP 要求傳送至伺服器。
- Ingress 閘道 Proxy 容器會攔截要求。
- Ingress 閘道 Proxy 會與伺服器端 Proxy (本例中的前端服務) 執行 TLS 握手。這項握手程序包括交換憑證。Cloud Service Mesh 會將這些憑證預先載入 Proxy 容器。
- Ingress 閘道 Proxy 會對伺服器憑證執行安全命名檢查,確認伺服器是由授權身分執行。
- 連入閘道和伺服器 Proxy 會建立相互 TLS 連線,而伺服器 Proxy 會將要求轉送至伺服器應用程式容器 (前端服務)。
執行下列指令,從另一個 Pod
curlfrontend服務 (使用純 HTTP)。kubectl exec testcurl -n default -- curl \ http://frontend.frontend.svc.cluster.local:80/ -o /dev/null -s -w '%{http_code}\n'由於我們從沒有 Sidecar 的工作負載傳送純文字流量,且套用了 STRICT
peerAuthentication政策,因此您的要求失敗。
尋找及刪除驗證政策
如要查看服務網格中的所有
PeerAuthentication政策,請執行下列指令:kubectl get peerauthentication --all-namespaces輸出結果會與下列內容相似:
NAMESPACE         NAME               MODE     AGE
ad                namespace-policy   STRICT   17m
cart              namespace-policy   STRICT   17m
checkout          namespace-policy   STRICT   17m
currency          namespace-policy   STRICT   17m
email             namespace-policy   STRICT   17m
frontend          namespace-policy   STRICT   17m
loadgenerator     namespace-policy   STRICT   17m
payment           namespace-policy   STRICT   17m
product-catalog   namespace-policy   STRICT   17m
recommendation    namespace-policy   STRICT   17m
shipping          namespace-policy   STRICT   17m
從所有 Online Boutique 命名空間中刪除驗證政策:
for ns in ad cart checkout currency email frontend loadgenerator payment \
  product-catalog recommendation shipping; do
    kubectl delete peerauthentication -n $ns namespace-policy
done;
預期輸出內容:
peerauthentication.security.istio.io "namespace-policy" deleted
peerauthentication.security.istio.io "namespace-policy" deleted
peerauthentication.security.istio.io "namespace-policy" deleted
peerauthentication.security.istio.io "namespace-policy" deleted
peerauthentication.security.istio.io "namespace-policy" deleted
peerauthentication.security.istio.io "namespace-policy" deleted
peerauthentication.security.istio.io "namespace-policy" deleted
peerauthentication.security.istio.io "namespace-policy" deleted
peerauthentication.security.istio.io "namespace-policy" deleted
peerauthentication.security.istio.io "namespace-policy" deleted
peerauthentication.security.istio.io "namespace-policy" deleted
使用
frontend-external服務的外部 IP 位址存取 Online Boutique,然後重新整理頁面。頁面會如預期顯示。執行下列指令,從另一個 Pod
curlfrontend服務 (使用純 HTTP)。kubectl debug --image istio/base --target istio-proxy -it \ $(kubectl get pod -l app=productcatalogservice -n product-catalog -o jsonpath={.items..metadata.name}) \ -n product-catalog -- \ curl http://frontend.frontend.svc.cluster.local:80/ -o /dev/null -s -w '%{http_code}\n'您的要求會成功,狀態為
200,因為系統預設會接受 TLS 和純文字流量。
在 Google Cloud 控制台中重新整理顯示「工作負載」清單的頁面,現在會顯示 mTLS 狀態為 Permissive。
為每個工作負載啟用雙向 TLS
如要為特定工作負載設定 PeerAuthentication 政策,您必須設定 selector 區段,並指定與所需工作負載相符的標籤。不過,Cloud Service Mesh 無法彙整工作負載層級的政策,以用於服務的輸出 mTLS 流量。您需要設定目的地規則來管理這項行為。
將驗證政策套用至特定工作負載。請注意,下列政策如何使用標籤和選取器,指定特定
frontend部署作業。cat <<EOF | kubectl apply -n frontend -f - apiVersion: "security.istio.io/v1beta1" kind: "PeerAuthentication" metadata: name: "frontend" namespace: "frontend" spec: selector: matchLabels: app: frontend mtls: mode: STRICT EOF預期輸出內容:
peerauthentication.security.istio.io/frontend created
設定相符目的地規則。
cat <<EOF | kubectl apply -n frontend -f -
apiVersion: "networking.istio.io/v1alpha3"
kind: "DestinationRule"
metadata:
  name: "frontend"
spec:
  host: "frontend.demo.svc.cluster.local"
  trafficPolicy:
    tls:
      mode: ISTIO_MUTUAL
EOF
預期輸出內容:
destinationrule.networking.istio.io/frontend created
使用
frontend-external服務的外部 IP 位址存取 Online Boutique,然後重新整理頁面。由於frontend service設為STRICTmTLS,且 Sidecar Proxy 封鎖要求,因此網頁不會顯示。執行下列指令,從另一個 Pod
curlfrontend服務 (使用純 HTTP)。kubectl exec testcurl -n default -- curl \ http://frontend.frontend.svc.cluster.local:80/ -o /dev/null -s -w '%{http_code}\n'由於我們從沒有 Sidecar 的工作負載傳送純文字流量,且套用了 STRICT
peerAuthentication政策,因此您的要求失敗。刪除驗證政策:
kubectl delete peerauthentication -n frontend frontend預期輸出內容:
peerauthentication.security.istio.io "frontend" deleted刪除目的地規則:
kubectl delete destinationrule -n frontend frontend預期輸出內容:
destinationrule.networking.istio.io "frontend" deleted
強制執行網格範圍的 mTLS
如要防止網格中的所有服務接受純文字流量,請設定網格範圍的 PeerAuthentication 政策,並將 mTLS 模式設為 STRICT。全網格 PeerAuthentication 政策不應有選取器,且必須套用至根命名空間 istio-system。部署政策後,控制平面會自動佈建 TLS 憑證,讓工作負載彼此驗證。
強制執行網格範圍的 mTLS:
kubectl apply -f - <<EOF
apiVersion: "security.istio.io/v1beta1"
kind: "PeerAuthentication"
metadata:
  name: "mesh-wide"
  namespace: "istio-system"
spec:
  mtls:
    mode: STRICT
EOF
預期輸出內容:
peerauthentication.security.istio.io/mesh-wide created
使用
frontend-external服務的外部 IP 位址存取 Online Boutique,然後重新整理頁面。網頁不會顯示。執行下列指令,從另一個 Pod
curlfrontend服務 (使用純 HTTP)。kubectl exec testcurl -n default -- curl \ http://frontend.frontend.svc.cluster.local:80/ -o /dev/null -s -w '%{http_code}\n'由於我們從沒有 Sidecar 的工作負載傳送純文字流量,且套用了 STRICT
peerAuthentication政策,因此您的要求失敗。刪除
mesh-wide政策:kubectl delete peerauthentication -n istio-system mesh-wide預期輸出內容:
peerauthentication.security.istio.io "mesh-wide" deleted
清除所用資源
如要避免系統向您的 Google Cloud 帳戶收取本教學課程中所用資源的相關費用,請刪除含有該項資源的專案,或者保留專案但刪除個別資源。
如要避免產生額外費用,請刪除叢集:
gcloud container clusters delete  CLUSTER_NAME  \
    --project=PROJECT_ID \
    --zone=CLUSTER_LOCATION
如要保留叢集並移除 Online Boutique 範例,請按照下列步驟操作:
- 刪除應用程式命名空間:
kubectl delete -f online-boutique/kubernetes-manifests/namespaces預期輸出內容:
namespace "ad" deleted namespace "cart" deleted namespace "checkout" deleted namespace "currency" deleted namespace "email" deleted namespace "frontend" deleted namespace "loadgenerator" deleted namespace "payment" deleted namespace "product-catalog" deleted namespace "recommendation" deleted namespace "shipping" deleted- 刪除服務項目:
kubectl delete -f online-boutique/istio-manifests/allow-egress-googleapis.yaml預期輸出內容:
serviceentry.networking.istio.io "allow-egress-googleapis" deleted
serviceentry.networking.istio.io "allow-egress-google-metadata" deleted
後續步驟
- 如需設定
PeerAuthentication政策的一般指南,請參閱「設定傳輸層安全防護」。