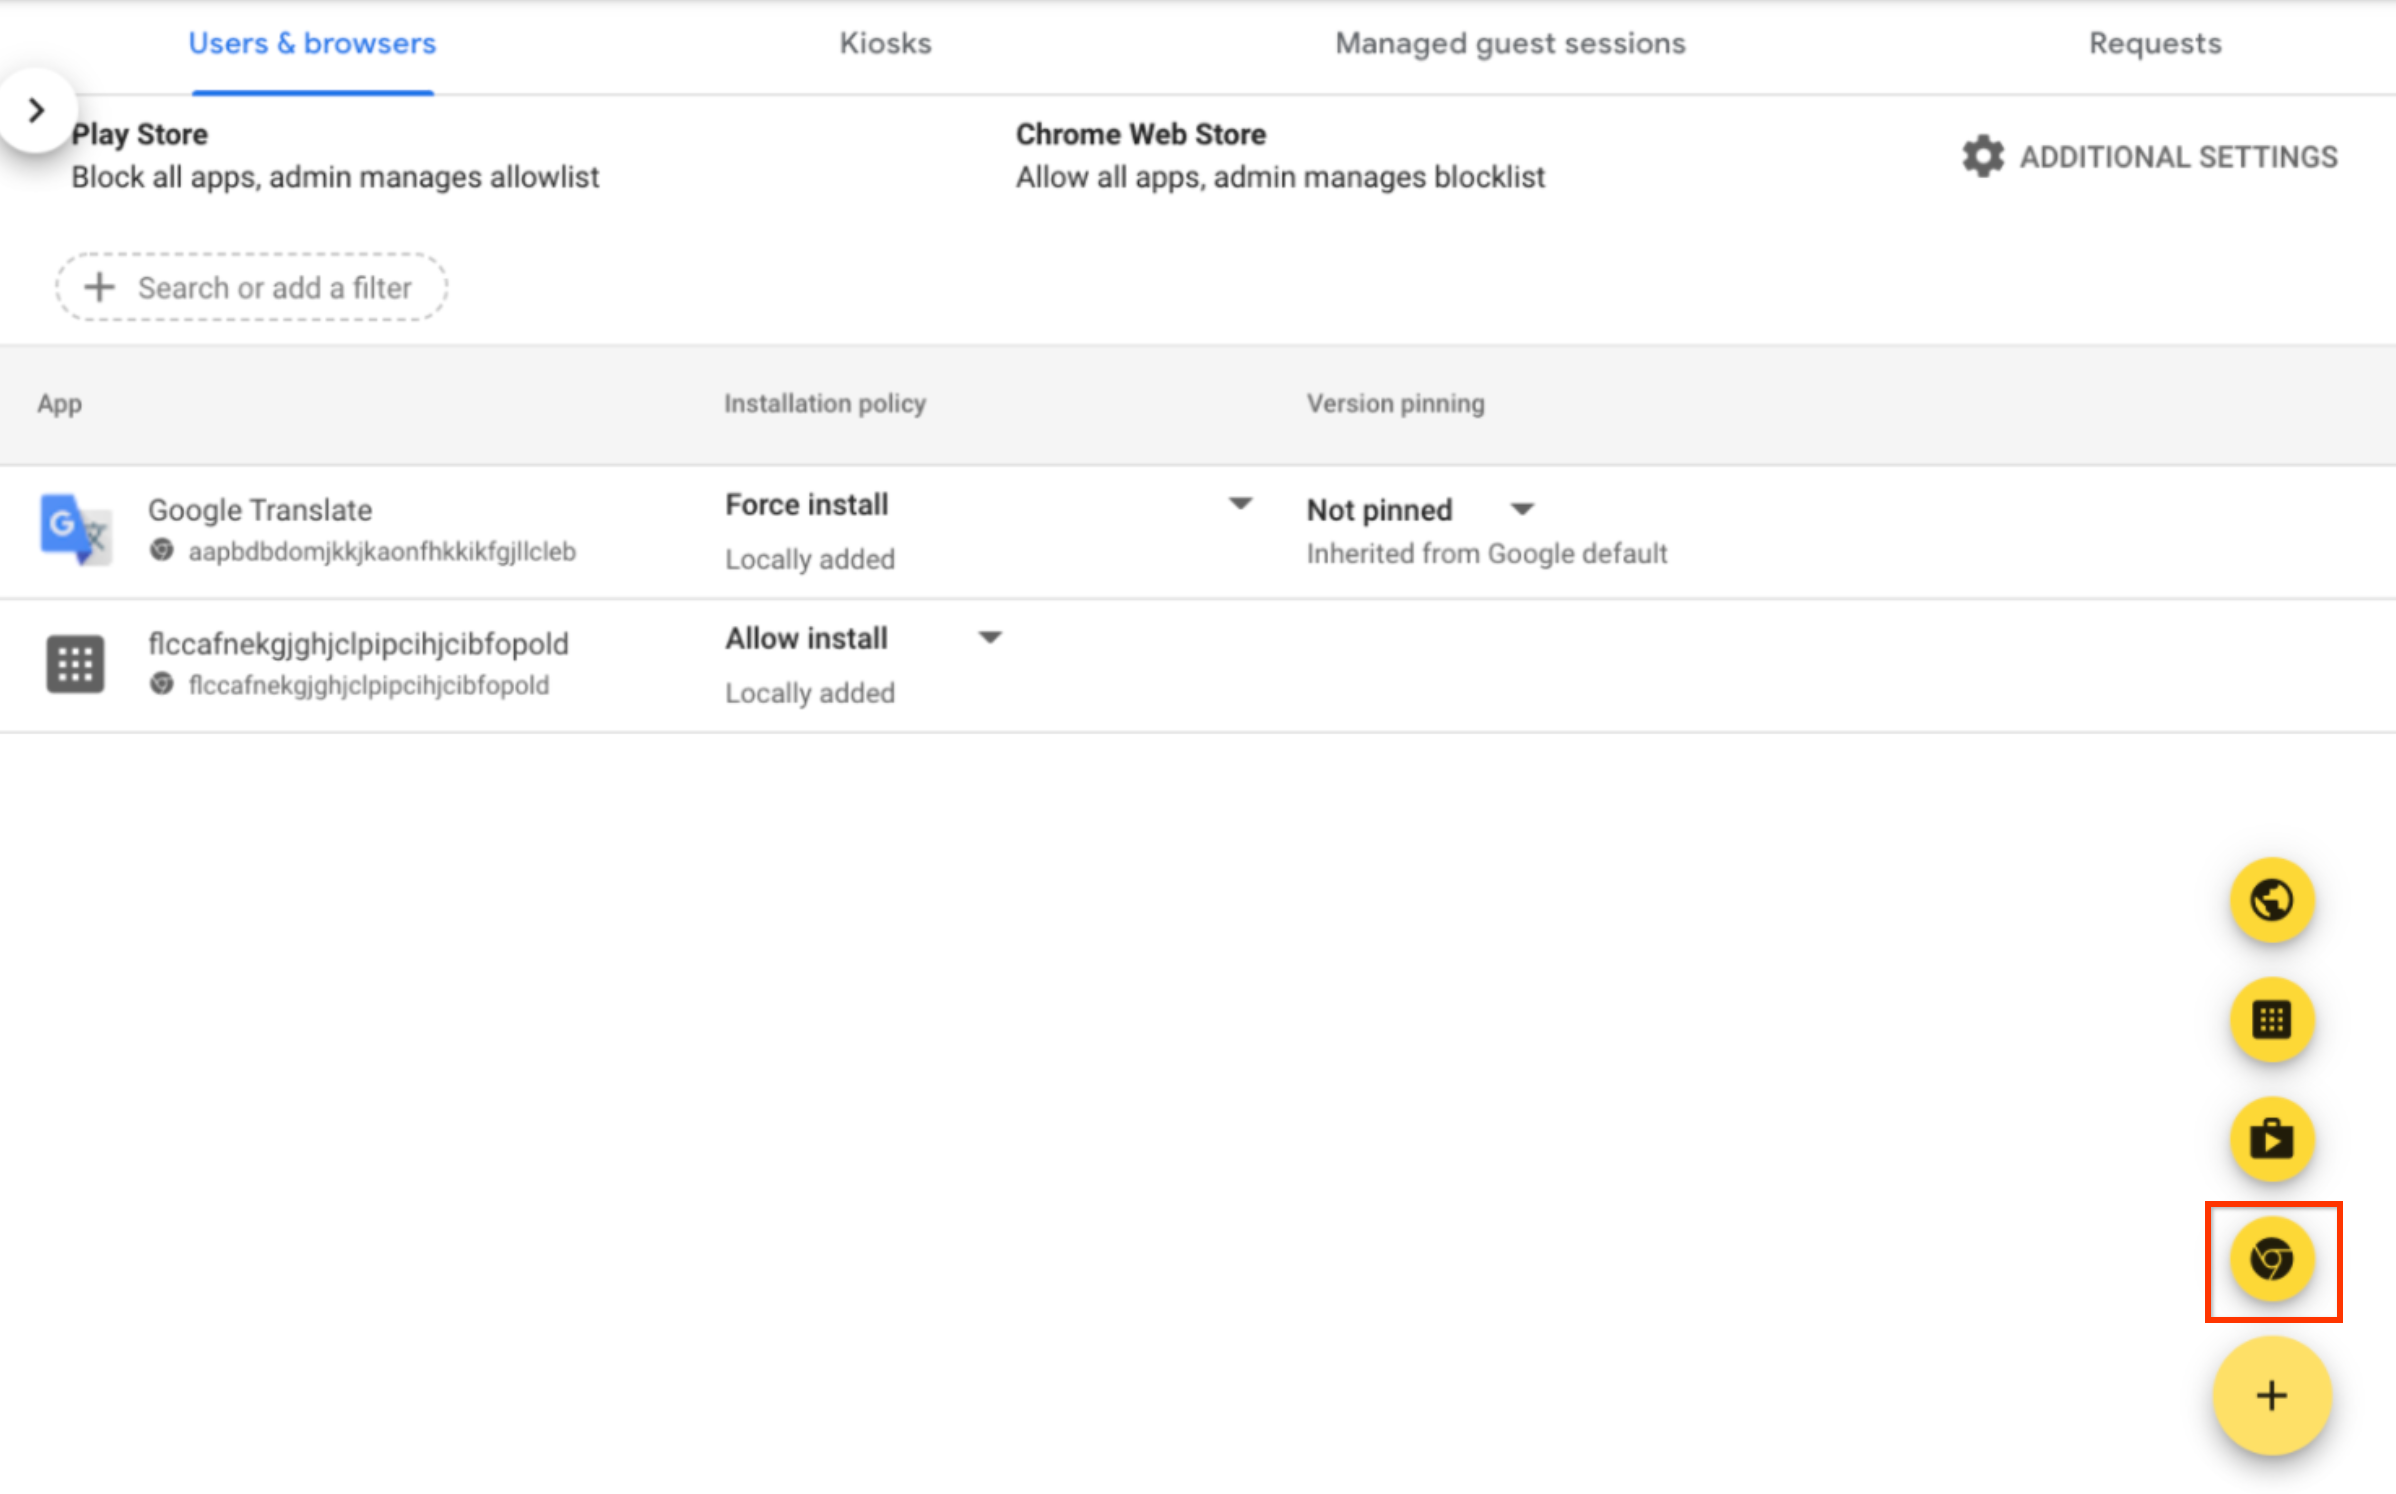
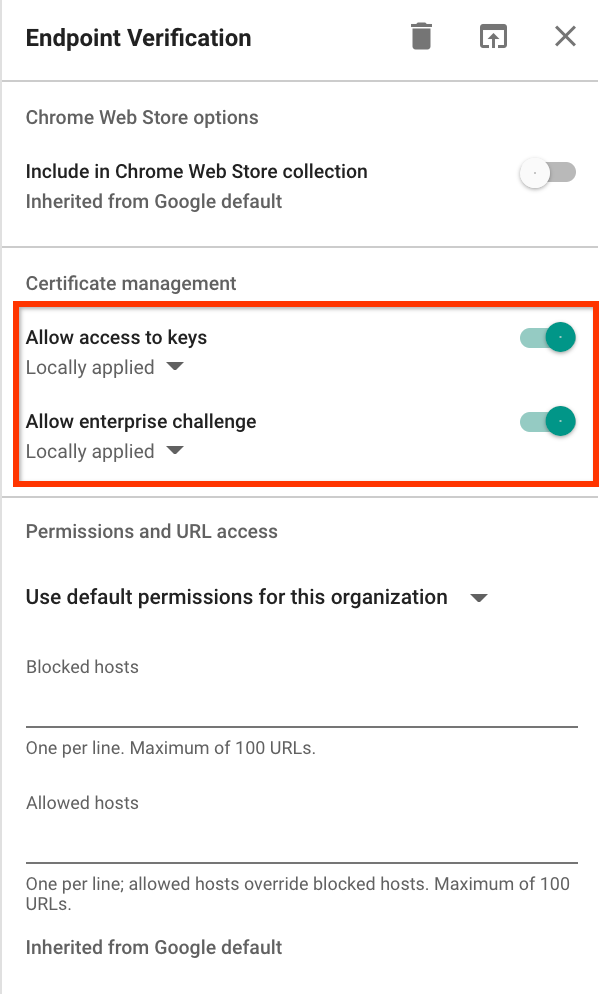
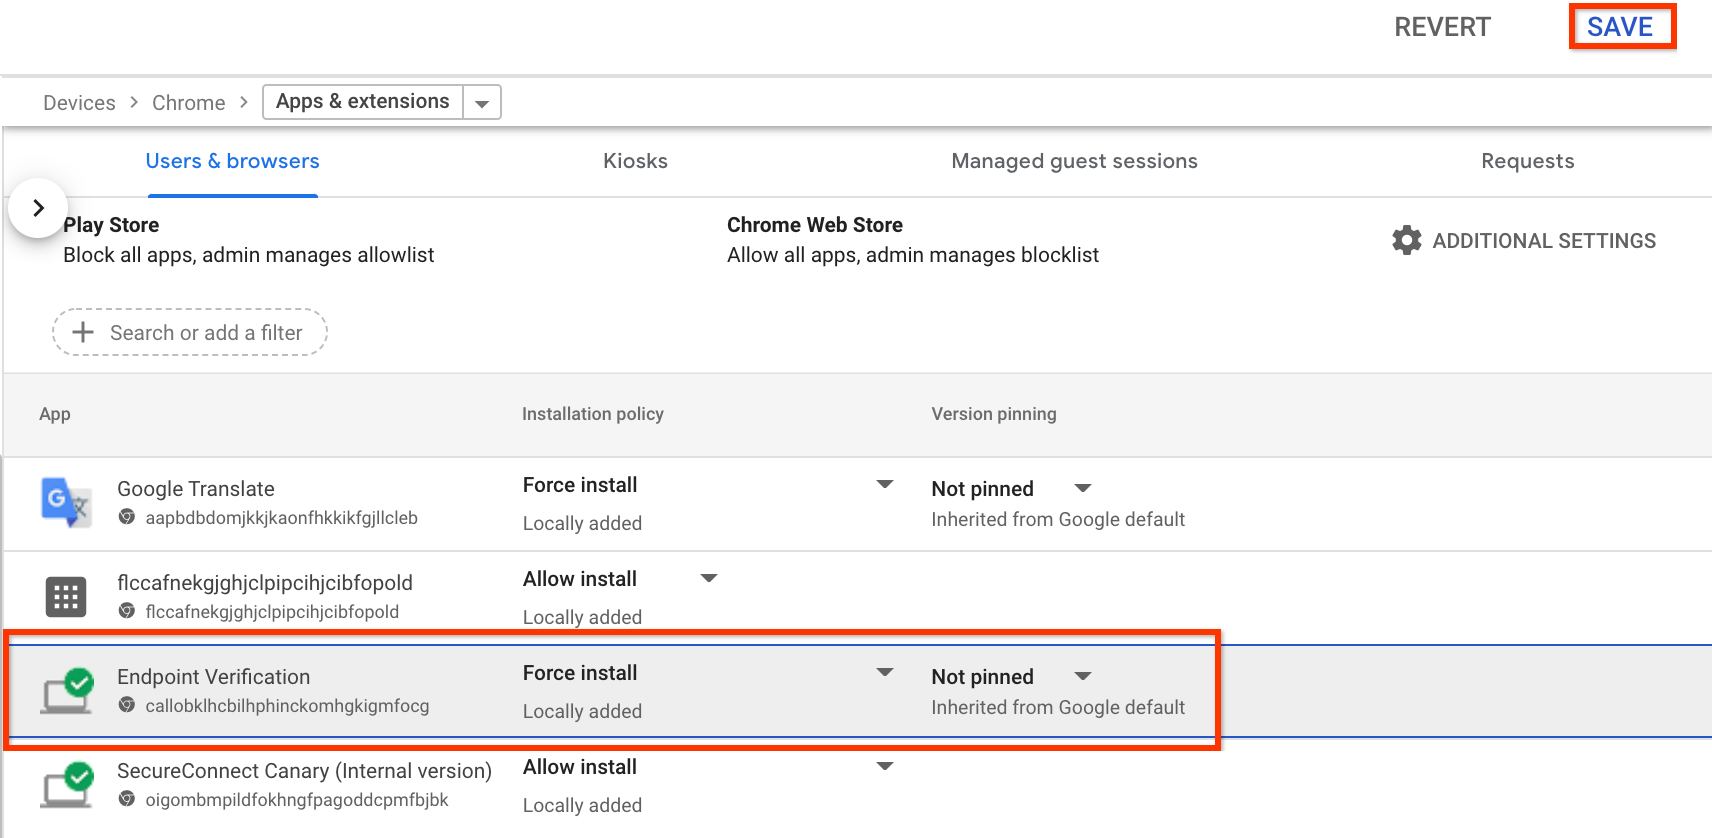
Anda harus memiliki unit organisasi dengan minimal satu perangkat yang menjalankan salah satu sistem operasi berikut:
ChromeOS
Apple® Mac® OS X® El Capitan (10.11) atau yang lebih baru
Microsoft® Windows® 10 dan 11
Linux® Debian® dan Ubuntu®
Anda harus menggunakan Chrome 110 atau yang lebih baru. Meskipun Anda dapat menginstal Verifikasi Endpoint di browser berbasis Chromium, verifikasi endpoint hanya didukung di browser Chrome.
Mengaktifkan Verifikasi Endpoint
Untuk mengumpulkan informasi tentang perangkat yang mengakses resource organisasi Anda, Verifikasi Endpoint harus diaktifkan untuk unit organisasi Anda. Secara default, Verifikasi Endpoint diaktifkan.
Untuk mengonfirmasi apakah Verifikasi Endpoint diaktifkan, lakukan langkah-langkah berikut:
Dari Halaman beranda konsol Admin, buka Perangkat.
Daftar perangkat di organisasi Anda akan ditampilkan.
Untuk mendapatkan informasi selengkapnya tentang perangkat tertentu, klik perangkat tersebut.
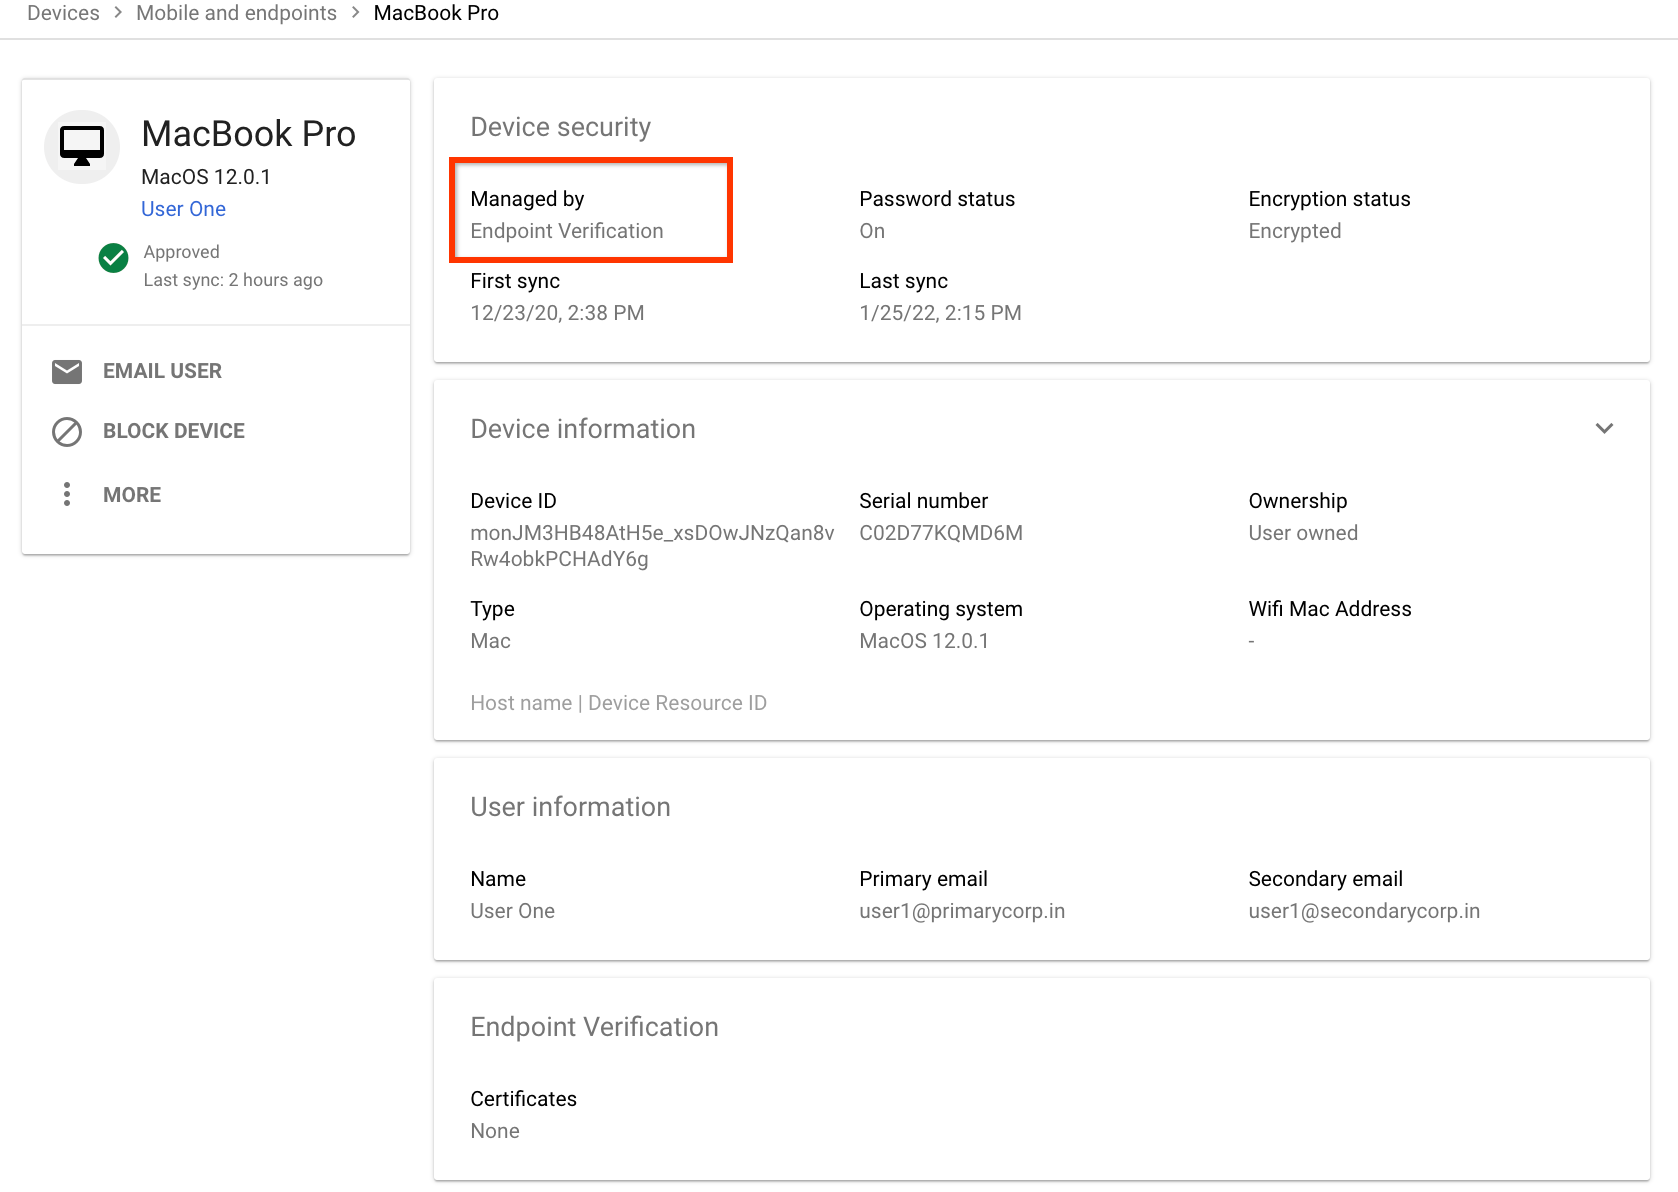
Informasi perangkat ditampilkan untuk perangkat tertentu tersebut.
Detail perangkat menunjukkan bahwa perangkat dikelola oleh Verifikasi Endpoint.
Pembersihan
Jika Anda tidak ingin Verifikasi Endpoint mengelola perangkat,
lakukan hal berikut:
Dari Halaman beranda konsol Admin, buka Perangkat.
[[["Mudah dipahami","easyToUnderstand","thumb-up"],["Memecahkan masalah saya","solvedMyProblem","thumb-up"],["Lainnya","otherUp","thumb-up"]],[["Sulit dipahami","hardToUnderstand","thumb-down"],["Informasi atau kode contoh salah","incorrectInformationOrSampleCode","thumb-down"],["Informasi/contoh yang saya butuhkan tidak ada","missingTheInformationSamplesINeed","thumb-down"],["Masalah terjemahan","translationIssue","thumb-down"],["Lainnya","otherDown","thumb-down"]],["Terakhir diperbarui pada 2025-09-03 UTC."],[[["\u003cp\u003eEndpoint Verification is used to understand the security posture of devices accessing your organization's resources and must be turned on for your organizational unit.\u003c/p\u003e\n"],["\u003cp\u003eTo set up Endpoint Verification, you must have a Google Workspace administrator account, an organization unit with supported devices, and use Chrome 110 or later.\u003c/p\u003e\n"],["\u003cp\u003eThe installation process for Endpoint Verification involves adding the extension from the Chrome Web Store within the Google Admin console, ensuring key access and enterprise challenge features are enabled, with a forced installation policy.\u003c/p\u003e\n"],["\u003cp\u003eYou can view device information managed by Endpoint Verification through the Devices overview in the Google Admin console, including specific details for individual devices.\u003c/p\u003e\n"],["\u003cp\u003eIf you no longer want Endpoint Verification to manage your devices, you must clear the "Monitor which devices access organization data" checkbox in the Google Admin Console settings.\u003c/p\u003e\n"]]],[],null,["# Set up Endpoint Verification on your devices\n============================================\n\nThis quickstart document guides you how to set up Endpoint Verification on your\ndevices to understand the security posture of your devices.\n\nBefore you begin\n----------------\n\n\n1. You must have a Google Workspace administrator account with the [Service Settings](https://support.google.com/a/answer/1219251) privilege.\n2. Log in to the **Google Admin console** by using your Google Workspace\n administrator account.\n\n [Log in to Google Admin console](https://admin.google.com/ac/devices/list)\n3. You must have an organization unit with at least one device running one of the following operating systems:\n\n - ChromeOS\n - Apple® Mac® OS X® El Capitan (10.11) or later\n - Microsoft® Windows® 10 and 11\n - Linux® Debian® and Ubuntu®\n4. You must use Chrome 110 or later. While you can install Endpoint Verification on any Chromium-based browser, it's supported only on Chrome browser.\n\n\u003cbr /\u003e\n\n\nTurn on Endpoint Verification\n-----------------------------\n\nTo collect information about the devices accessing the resources of your organization,\nEndpoint Verification must be turned on for your organizational unit. By default, Endpoint Verification\nis turned on.\n\nTo confirm if Endpoint Verification is turned on, do the following:\n\n1. From the Admin console Home page, go to **Devices**.\n\n [Go to Devices](https://admin.google.com/ac/devices/list)\n2. In the navigation menu, click **Mobile \\& endpoints \\\u003e Settings \\\u003e Universal settings**.\n3. Click **Data Access \\\u003e Endpoint Verification**.\n4. From the **Organizational Units** pane, select your organization unit.\n5. Ensure that the **Monitor which devices access organization data** checkbox is selected.\n6. Click **Save**. If you configured a child organizational unit, you might be able to inherit or override the settings of a parent organizational unit.\n\n\u003cbr /\u003e\n\n\nInstall Endpoint Verification on your devices\n---------------------------------------------\n\n1. From the Admin console Home page, go to **Devices**.\n\n [Go to Devices](https://admin.google.com/ac/devices/list)\n2. In the navigation menu, click **Chrome \\\u003e Apps \\& extensions \\\u003e Users \\& browsers**.\n3. From the **Organizational Units** pane, select your organization unit for which you want to install the Endpoint Verification extension.\n4. Hold the pointer over **Add** , and click **Add from Chrome Web Store**.\n\n5. In the **Search the store** field, enter **Endpoint Verification**.\n6. Click **Endpoint Verification** and then click **Select**.\n7. In the **Endpoint Verification** dialog, ensure that **Allow access to keys** and **Allow enterprise challenge** are enabled.\n - **Allow access to keys**: allows the Endpoint Verification extension to access client certificates and keys on ChromeOS.\n - **Allow enterprise challenge** : allows the Endpoint Verification extension to use the Verified Access feature on ChromeOS. For more information, see [Chrome Verified Access Overview](https://developers.google.com/chrome/verified-access/overview).\n\n8. Click the **Installation policy** drop-down for Endpoint Verification, and select\n **Force install**.\n\n9. Click **Save**.\n\n\u003cbr /\u003e\n\nView your devices information\n-----------------------------\n\n1. From the Admin console Home page, go to **Devices \\\u003e Overview** .\n\n [Go to Devices overview](https://admin.google.com/u/1/ac/dm)\n\n2. Click **Endpoints** .\n\n The list of devices in your organization is displayed.\n3.\n\n To get more information about a specific device, click the device.\n The device information is displayed for that specific device.\n\n\n The device details show that the device is managed by Endpoint Verification.\n\n \u003cbr /\u003e\n\nClean up\n--------\n\nIf you don't want Endpoint Verification to manage your devices,\ndo the following:\n\n1. From the Admin console Home page, go to **Devices**.\n\n [Go to Devices](https://admin.google.com/ac/devices/list)\n2. In the navigation menu, click **Mobile \\& endpoints \\\u003e Settings \\\u003e Universal settings**.\n3. Click **Data Access \\\u003e Endpoint Verification**.\n4. From the **Organizational Units** pane, select your organization unit.\n5. Clear the **Monitor which devices access organization data** checkbox.\n6. Click **Save**.\n\nWhat's next\n-----------\n\n- [Endpoint Verification overview](/endpoint-verification/docs/overview)\n\n- [Device attributes collected by Endpoint Verification](/endpoint-verification/docs/device-information)"]]