Set up Endpoint Verification on your devices
This quickstart document guides you how to set up Endpoint Verification on your devices to understand the security posture of your devices.
Before you begin
- You must have a Google Workspace administrator account with the Service Settings privilege.
-
Log in to the Google Admin console by using your Google Workspace administrator account.
You must have an organization unit with at least one device running one of the following operating systems:
- ChromeOS
- Apple® Mac® OS X® El Capitan (10.11) or later
- Microsoft® Windows® 10 and 11
- Linux® Debian® and Ubuntu®
- You must use Chrome 110 or later. While you can install Endpoint Verification on any Chromium-based browser, it's supported only on Chrome browser.
Turn on Endpoint Verification
To collect information about the devices accessing the resources of your organization, Endpoint Verification must be turned on for your organizational unit. By default, Endpoint Verification is turned on.
To confirm if Endpoint Verification is turned on, do the following:
-
From the Admin console Home page, go to Devices.
- In the navigation menu, click Mobile & endpoints > Settings > Universal settings.
- Click Data Access > Endpoint Verification.
- From the Organizational Units pane, select your organization unit.
- Ensure that the Monitor which devices access organization data checkbox
is selected.
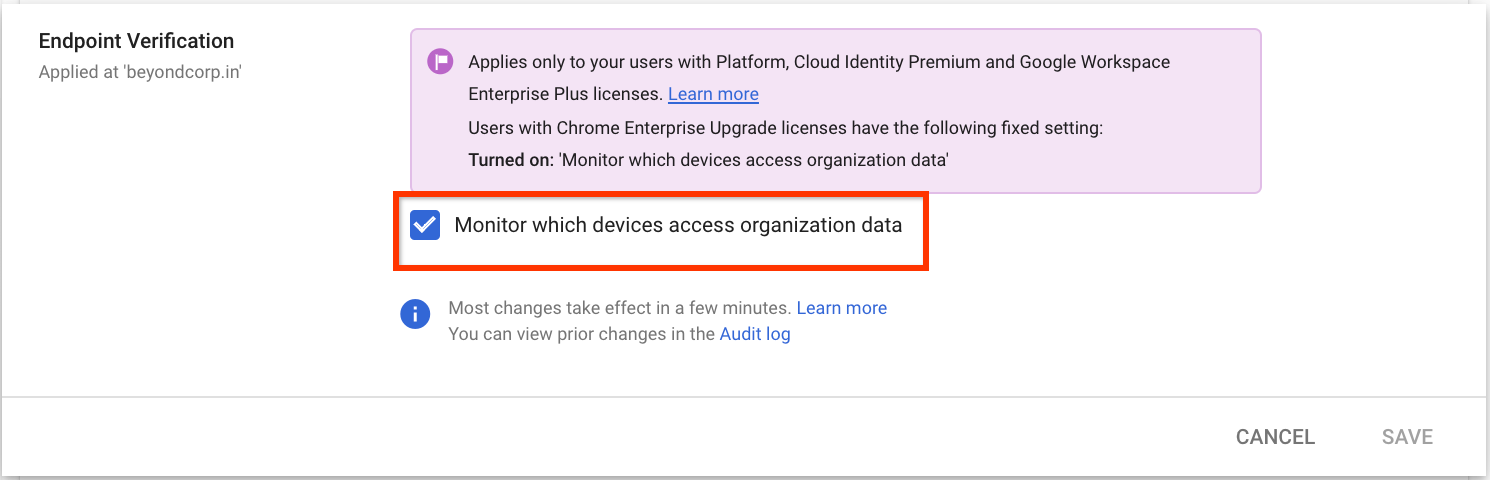
- Click Save. If you configured a child organizational unit, you might be able to inherit or override the settings of a parent organizational unit.
Install Endpoint Verification on your devices
-
From the Admin console Home page, go to Devices.
- In the navigation menu, click Chrome > Apps & extensions > Users & browsers.
- From the Organizational Units pane, select your organization unit for which you want to install the Endpoint Verification extension.
Hold the pointer over Add, and click Add from Chrome Web Store.
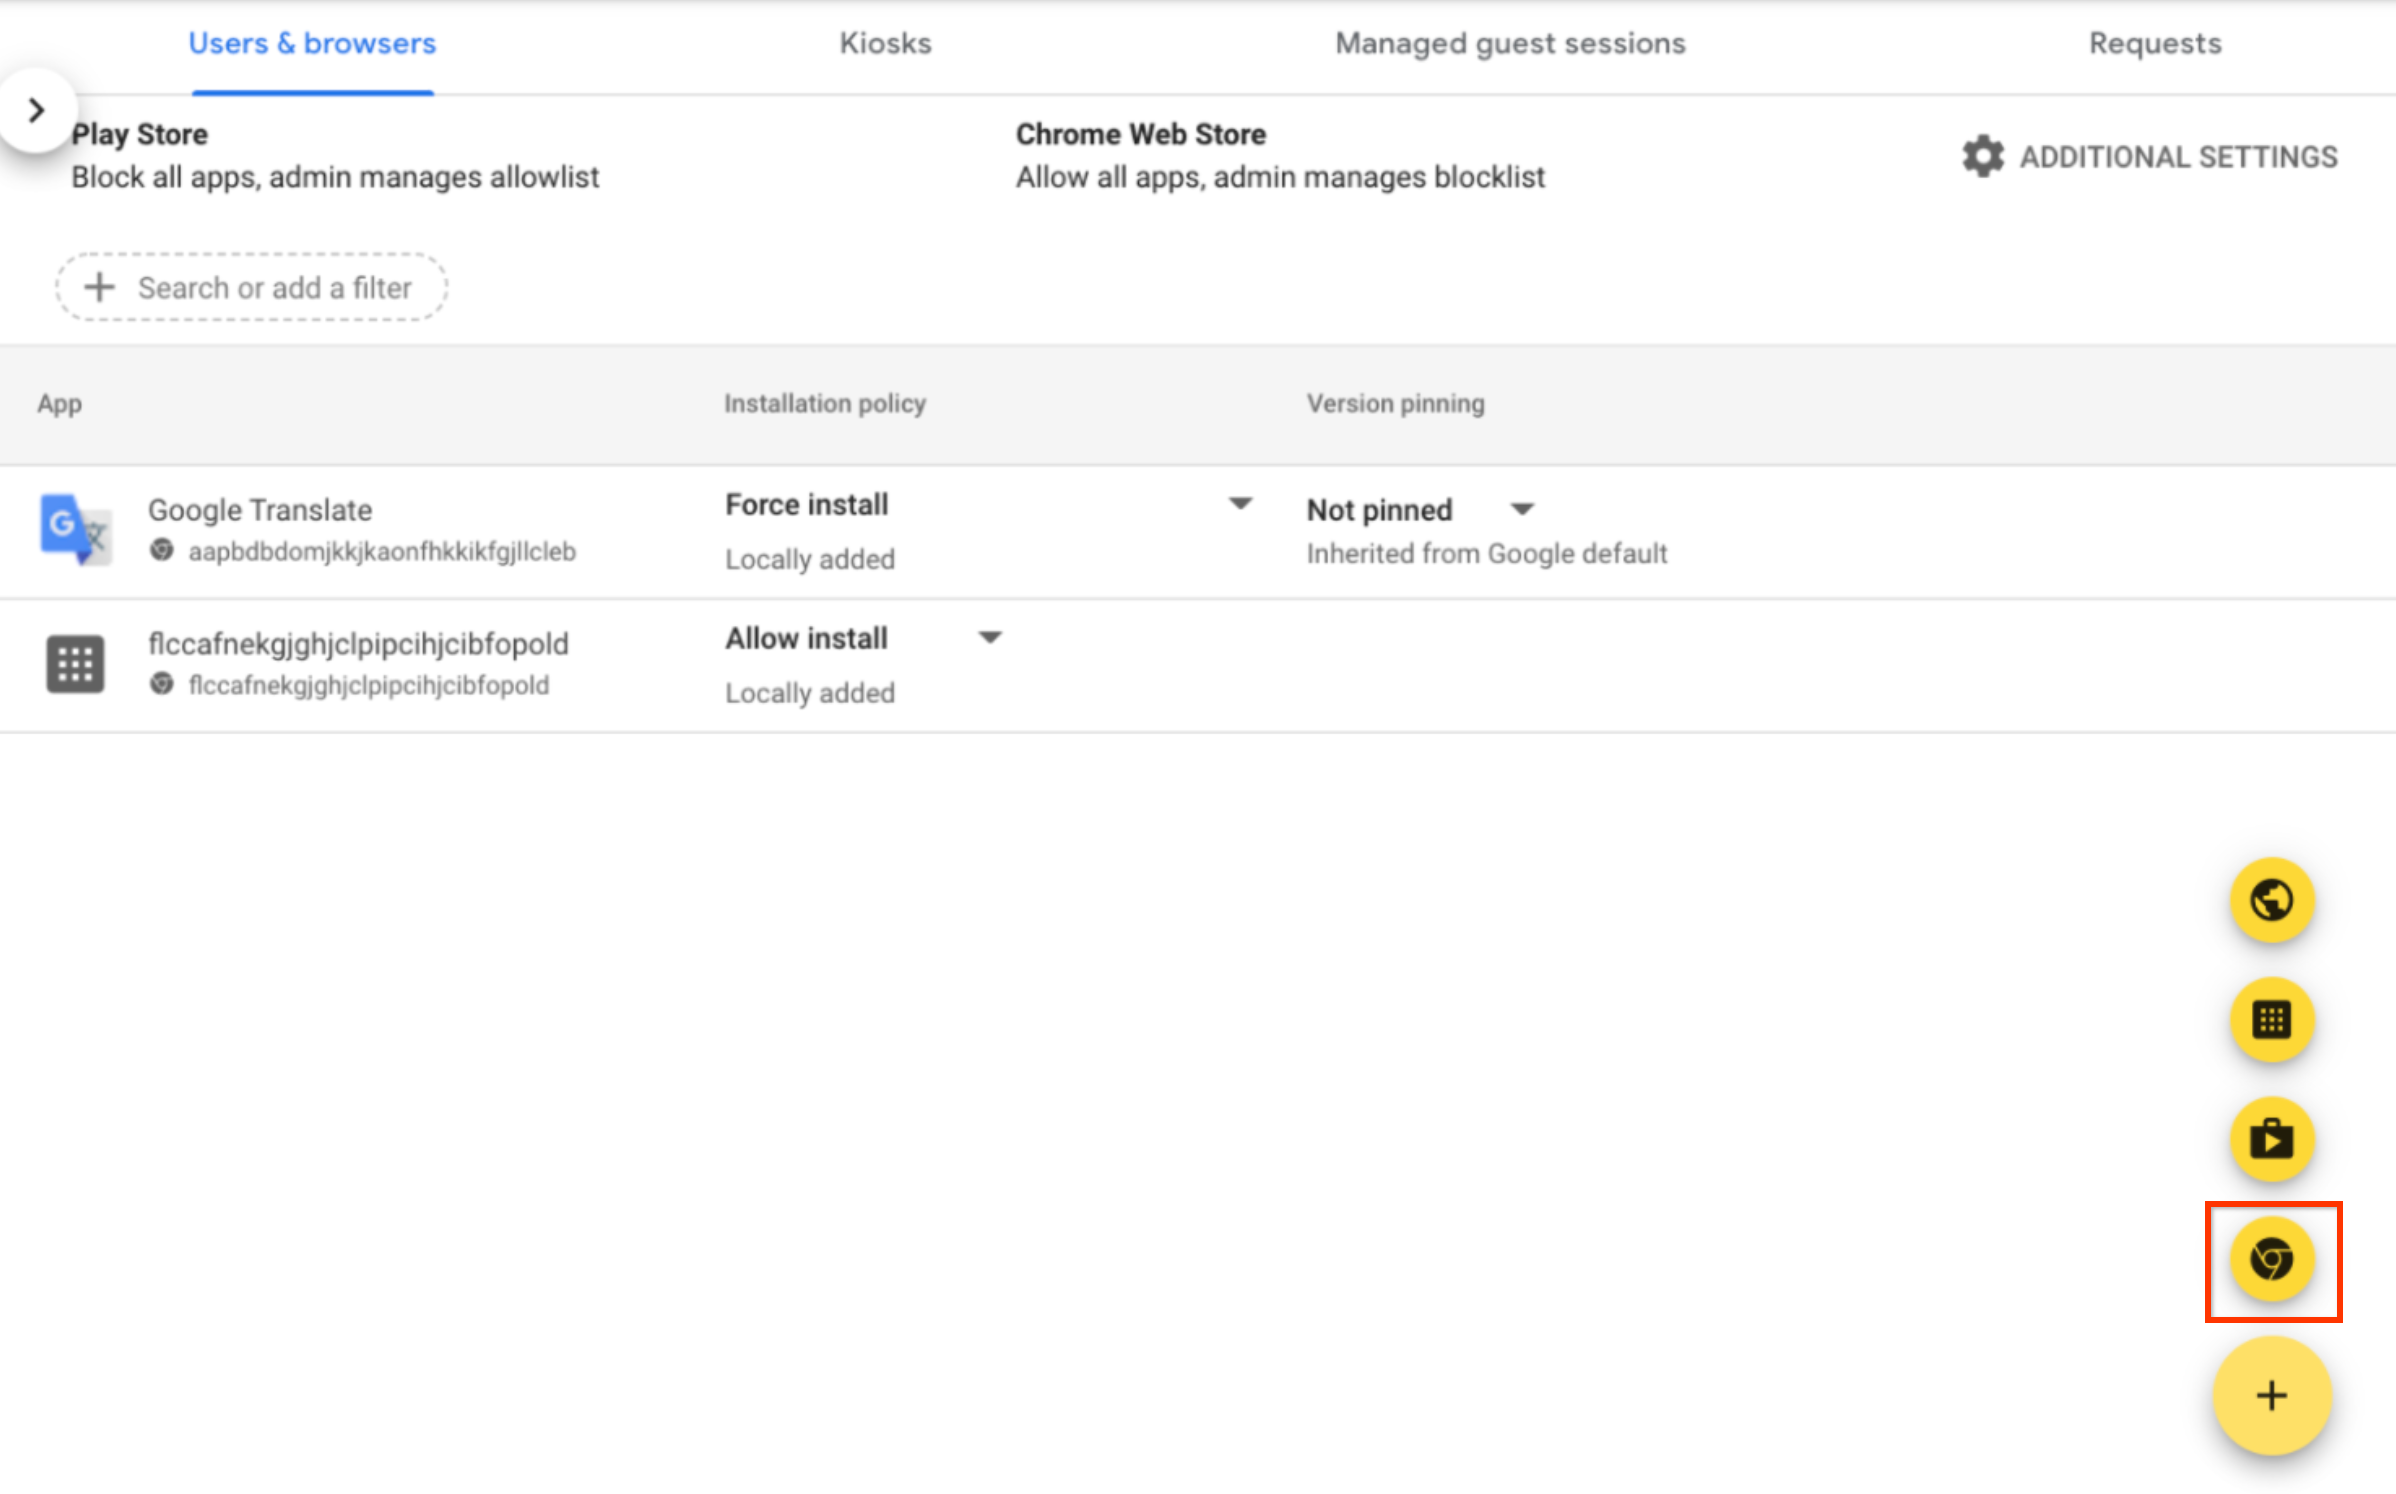
- In the Search the store field, enter Endpoint Verification.
- Click Endpoint Verification and then click Select.
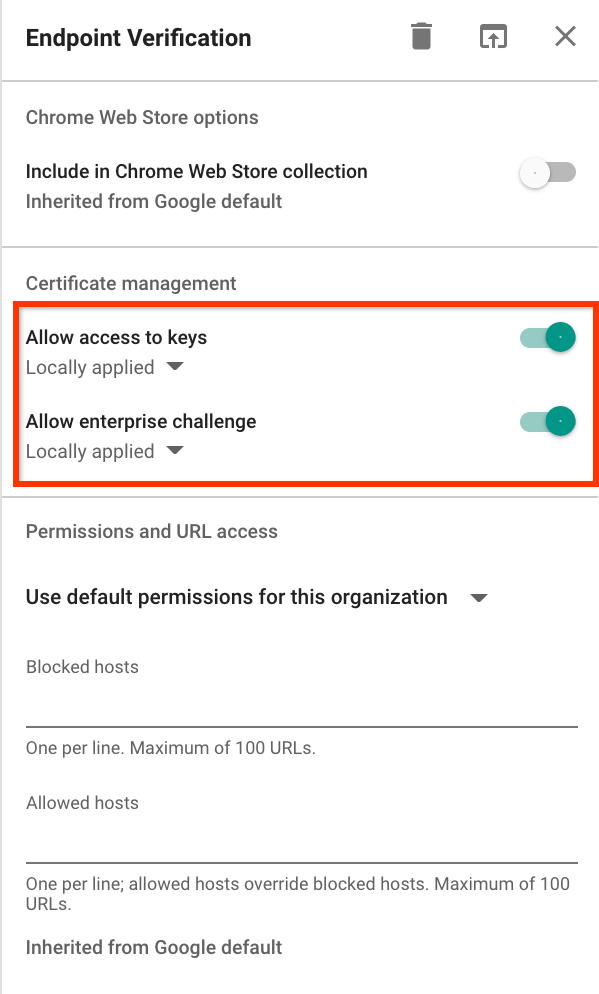
- In the Endpoint Verification dialog, ensure that Allow access to keys
and Allow enterprise challenge are enabled.
- Allow access to keys: allows the Endpoint Verification extension to access client certificates and keys on ChromeOS.
- Allow enterprise challenge: allows the Endpoint Verification extension to use the Verified Access feature on ChromeOS. For more information, see Chrome Verified Access Overview.
Click the Installation policy drop-down for Endpoint Verification, and select Force install.

- Click Save.
View your devices information
- From the Admin console Home page, go to Devices > Overview.
-
Click Endpoints.
The list of devices in your organization is displayed.
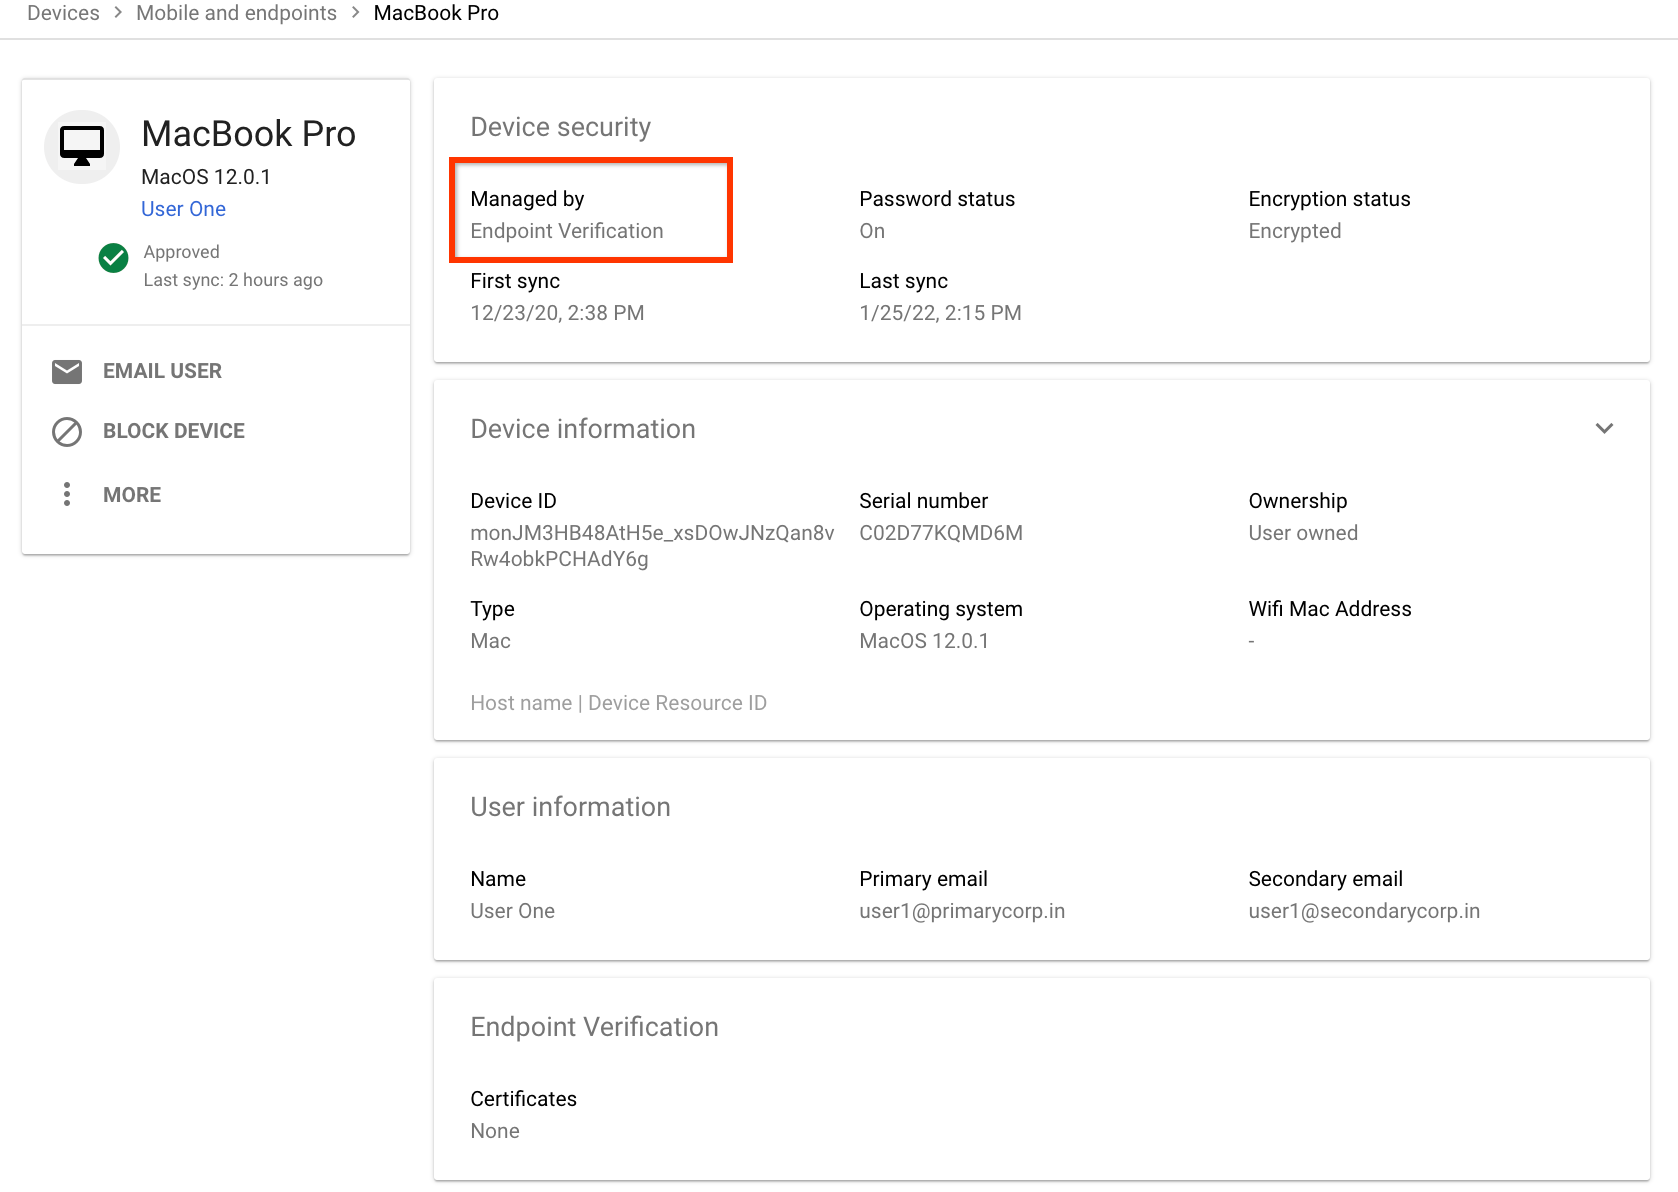
To get more information about a specific device, click the device. The device information is displayed for that specific device.
The device details show that the device is managed by Endpoint Verification.
Clean up
If you don't want Endpoint Verification to manage your devices, do the following:
-
From the Admin console Home page, go to Devices.
- In the navigation menu, click Mobile & endpoints > Settings > Universal settings.
- Click Data Access > Endpoint Verification.
- From the Organizational Units pane, select your organization unit.
- Clear the Monitor which devices access organization data checkbox.
- Click Save.