在本文件中,您會使用 Google Cloud的下列計費元件:
- Dataproc
- Compute Engine
- Cloud Composer
如要根據預測用量估算費用,請使用 Pricing Calculator。
事前準備
設定專案
- Sign in to your Google Cloud account. If you're new to Google Cloud, create an account to evaluate how our products perform in real-world scenarios. New customers also get $300 in free credits to run, test, and deploy workloads.
-
In the Google Cloud console, on the project selector page, select or create a Google Cloud project.
Roles required to select or create a project
- Select a project: Selecting a project doesn't require a specific IAM role—you can select any project that you've been granted a role on.
-
Create a project: To create a project, you need the Project Creator
(
roles/resourcemanager.projectCreator), which contains theresourcemanager.projects.createpermission. Learn how to grant roles.
-
Verify that billing is enabled for your Google Cloud project.
-
Enable the Dataproc, Compute Engine, and Cloud Composer APIs.
Roles required to enable APIs
To enable APIs, you need the Service Usage Admin IAM role (
roles/serviceusage.serviceUsageAdmin), which contains theserviceusage.services.enablepermission. Learn how to grant roles. -
Install the Google Cloud CLI.
-
如果您使用外部識別資訊提供者 (IdP),請先 使用聯合身分登入 gcloud CLI。
-
如要初始化 gcloud CLI,請執行下列指令:
gcloud init -
In the Google Cloud console, on the project selector page, select or create a Google Cloud project.
Roles required to select or create a project
- Select a project: Selecting a project doesn't require a specific IAM role—you can select any project that you've been granted a role on.
-
Create a project: To create a project, you need the Project Creator
(
roles/resourcemanager.projectCreator), which contains theresourcemanager.projects.createpermission. Learn how to grant roles.
-
Verify that billing is enabled for your Google Cloud project.
-
Enable the Dataproc, Compute Engine, and Cloud Composer APIs.
Roles required to enable APIs
To enable APIs, you need the Service Usage Admin IAM role (
roles/serviceusage.serviceUsageAdmin), which contains theserviceusage.services.enablepermission. Learn how to grant roles. -
Install the Google Cloud CLI.
-
如果您使用外部識別資訊提供者 (IdP),請先 使用聯合身分登入 gcloud CLI。
-
如要初始化 gcloud CLI,請執行下列指令:
gcloud init - 建立
sparkpi工作流程範本。gcloud dataproc workflow-templates create sparkpi \ --region=us-central1 - 將 Spark 工作新增至
sparkpi工作流程範本。「compute」step-id標記會識別 SparkPi 工作。gcloud dataproc workflow-templates add-job spark \ --workflow-template=sparkpi \ --step-id=compute \ --class=org.apache.spark.examples.SparkPi \ --jars=file:///usr/lib/spark/examples/jars/spark-examples.jar \ --region=us-central1 \ -- 1000 - 使用代管、單一節點叢集執行工作流程。Dataproc 會建立叢集、在叢集上執行工作流程,然後在工作流程完成時刪除叢集。
gcloud dataproc workflow-templates set-managed-cluster sparkpi \ --cluster-name=sparkpi \ --single-node \ --region=us-central1 - 確認建立工作流程範本。
- 建立或使用現有的 Cloud Composer 環境。
- 設定環境變數。
Airflow UI
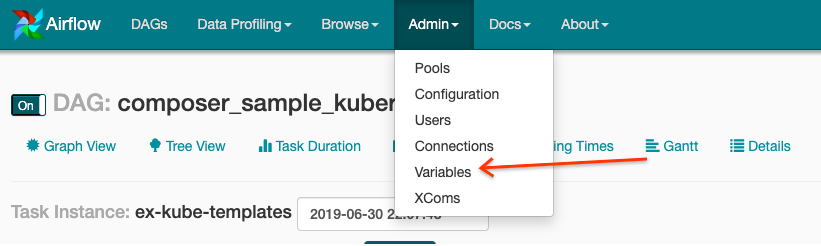
- 依序按一下工具列中的「管理」>「變數」。
- 按一下「建立」。
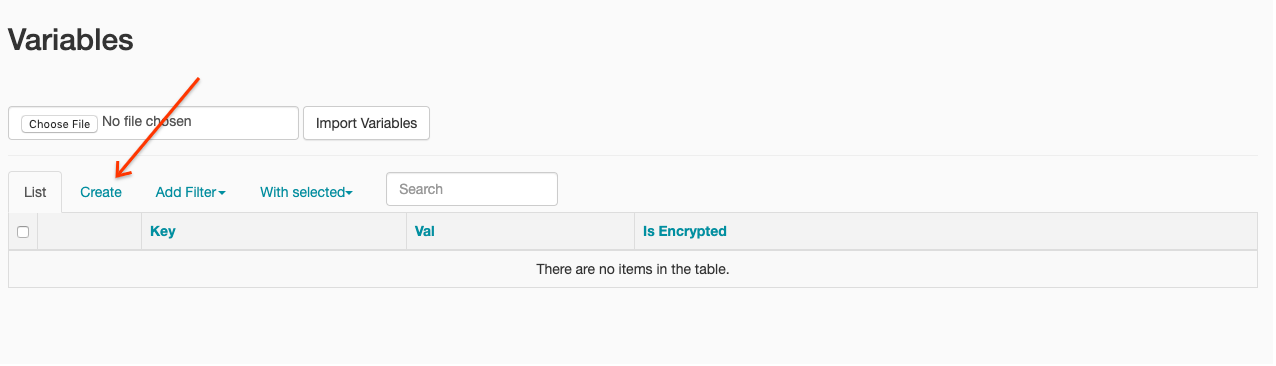
- 輸入下列資訊:
- 按鍵:
project_id - Val:PROJECT_ID - 您的 Google Cloud 專案 ID
- 按鍵:
- 按一下 [儲存]。
gcloud 指令
輸入下列指令:
ENVIRONMENT是 Cloud Composer 環境的名稱LOCATION是 Cloud Composer 環境所在的區域PROJECT_ID是包含 Cloud Composer 環境的專案 ID
gcloud composer environments run ENVIRONMENT --location LOCATION variables set -- project_id PROJECT_ID - 依序按一下工具列中的「管理」>「變數」。
- 將下列 DAG 程式碼複製到名為「composer-dataproc-dag.py」的本機檔案中,該檔案會使用 DataprocInstantiateWorkflowTemplateOperator。
Airflow 2
Airflow 1
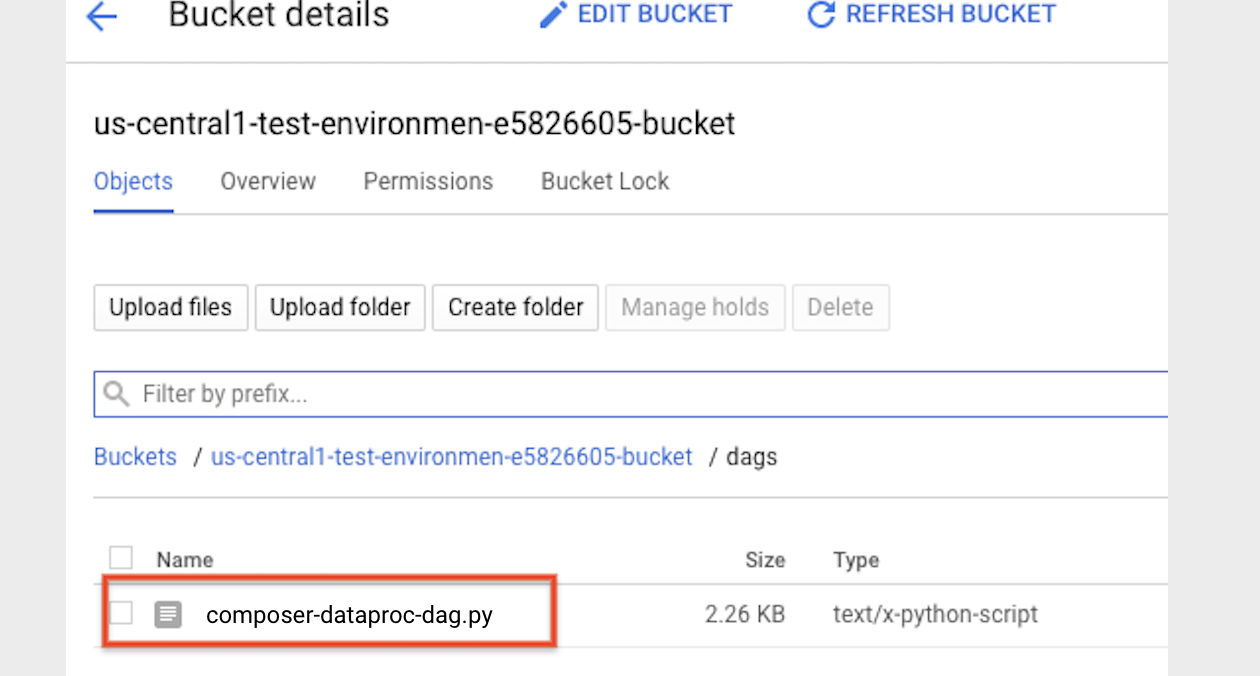
- 將 DAG 上傳到 Cloud Storage 中的環境資料夾。上傳成功後,請按一下 Cloud Composer 環境頁面上的「DAGs Folder」連結。
- 開啟 Airflow 網頁介面。
- 在 DAG 頁面中,按一下 DAG 名稱 (例如
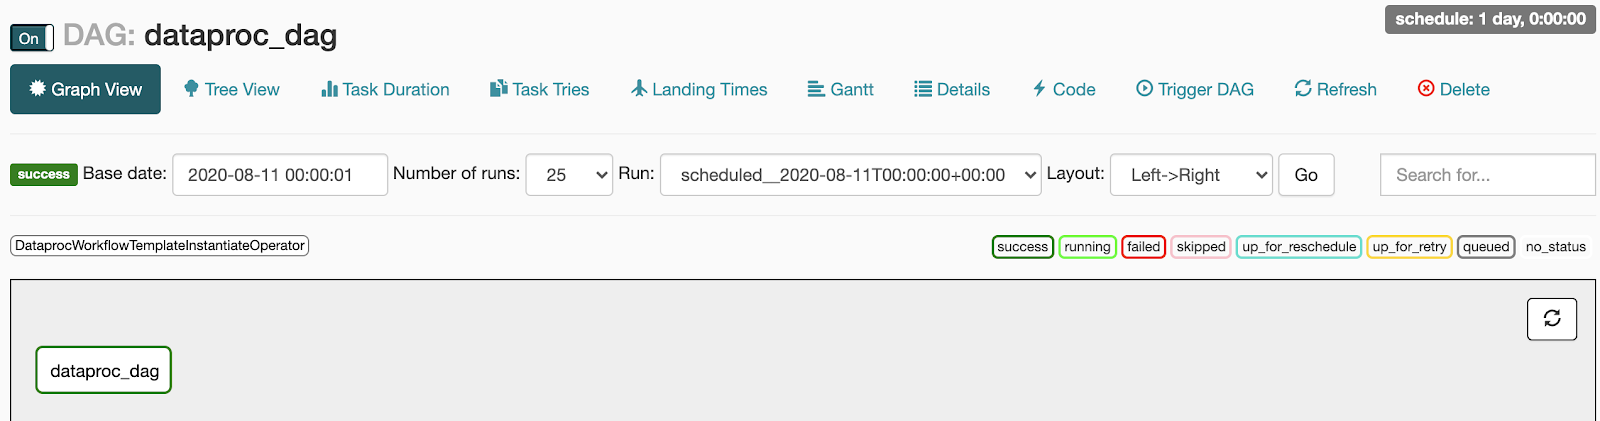
dataproc_workflow_dag)。 - 在 DAG 詳細資料頁面中,按一下「Graph View」。
- 查看狀態:
- 失敗:工作周圍有紅色方框。
你也可以將指標懸停在工作上,然後尋找「狀態:失敗」。

- 成功:工作周圍會顯示綠色方塊。
您也可以將指標懸停在工作上,檢查是否顯示「State: Success」。
- 失敗:工作周圍有紅色方框。
你也可以將指標懸停在工作上,然後尋找「狀態:失敗」。
- 請參閱「Dataproc 工作流程範本總覽」。
- 請參閱工作流程排程解決方案。
建立 Dataproc 工作流程範本
複製下列指令並在本地終端機視窗或 Cloud Shell 中執行,以建立及定義工作流程範本。

建立 DAG 並上傳至 Cloud Storage
查看工作狀態
Airflow UI
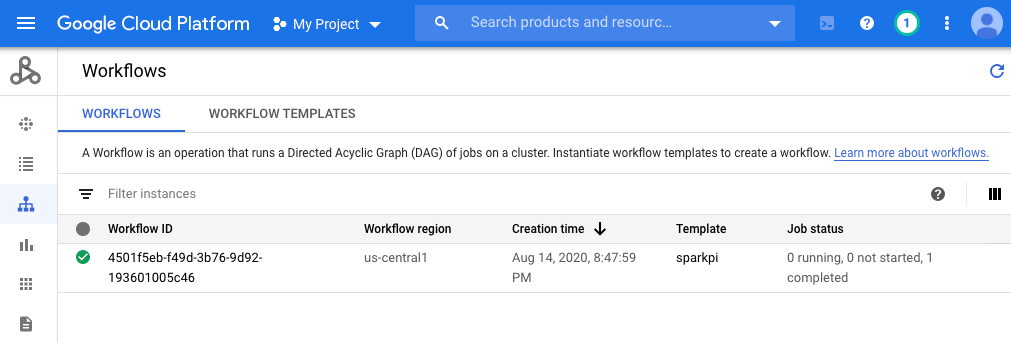
控制台
按一下「工作流程」分頁標籤,即可查看工作流程狀態。
gcloud 指令
gcloud dataproc operations list \
    --region=us-central1 \
    --filter="labels.goog-dataproc-workflow-template-id=sparkpi"
清除所用資源
如要避免系統向您的 Google Cloud 帳戶收費,請刪除本教學課程所用的資源: