Stay organized with collections
Save and categorize content based on your preferences.
Create and run a build in a private pool
This page explains how to create a Cloud Build private pool connected
to the service producer network, and run a build in the private pool.
The service producer network is the network that hosts the private pool.
By default, a private pool is set up to use the service producer network,
which provides a build environment with:
Configurable machine types
Configurable disk sizes
Access to resources in the public internet, such as resources in a
repository or a registry
To follow step-by-step guidance for this task directly in the
Cloud Shell Editor, click Guide me:
Sign in to your Google Cloud account. If you're new to
Google Cloud,
create an account to evaluate how our products perform in
real-world scenarios. New customers also get $300 in free credits to
run, test, and deploy workloads.
In the Google Cloud console, on the project selector page,
select or create a Google Cloud project.
In the Create private pool panel, enter the following settings:
In the Name field, enter
my-first-privatepool.
In the Region field, select us-central1.
In the Machine type field, select e2-standard-2.
In the Available disk size field, enter 800.
Leave the Network project number field blank.
Leave the Network field blank.
Make sure Assign external IPs is selected.
Click Create to create the private pool.
Allow a short time for the private pool to be created. After the private pool
is created, it is listed on the Worker pool tab.
Run a build in a private pool
Open a terminal window.
Create a new directory named quickstart-private-pool and navigate into it:
mkdir quickstart-private-pool
cd quickstart-private-pool
Create a file named cloudbuild.yaml with the following contents:
steps:
- name: "bash"
script: echo "I am running in a private pool!"
options:
pool:
name: "projects/$PROJECT_ID/locations/us-central1/workerPools/my-first-privatepool"
Start the build using the build config file:
gcloudbuildssubmit
When the build is complete, you'll see an output similar to the following:
I am running in a private pool!PUSHDONE------------------------------------------------------------------------------------------------------------------------------------------------------------------------------------------------------------ID CREATE_TIME DURATION SOURCE IMAGES STATUS5df45735-6414-40b7-9e10-e6d2023c8cea 2020-08-31T13:16:18+00:00 10S gs://private-pool-test_cloudbuild/source/1598879777.206444- 58901ecbd14e431f8cdacc85d5dd0fc3.tgz - SUCCESS
View build details
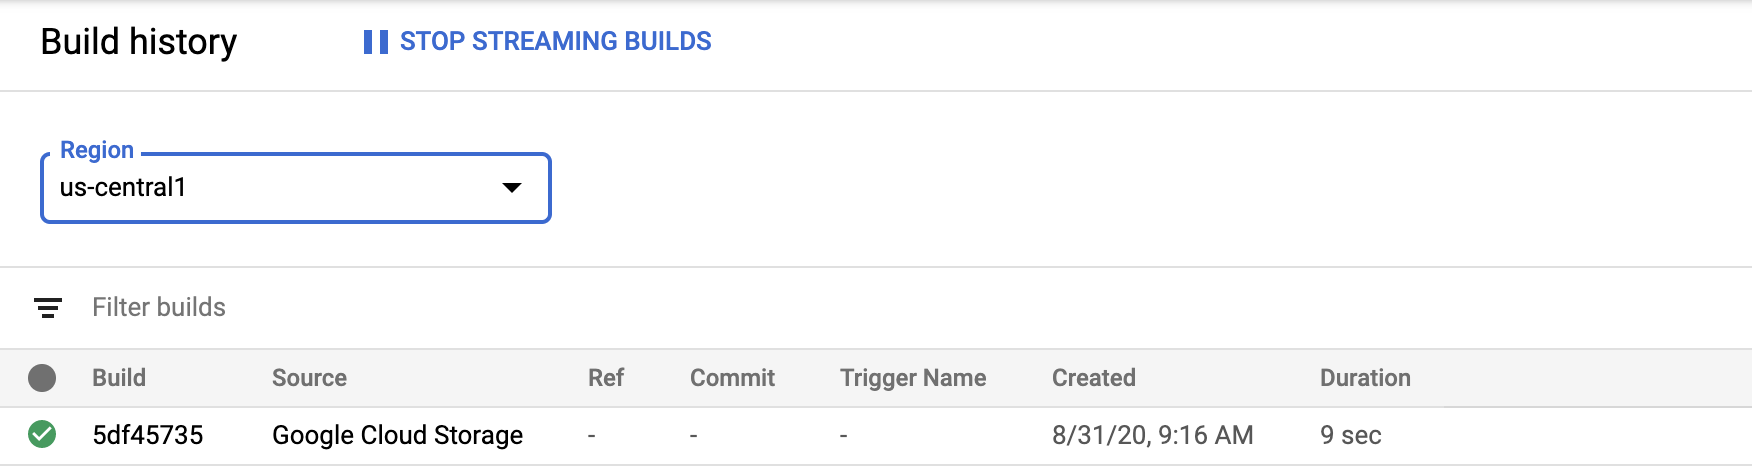
Open the Build history page in the Google Cloud console.
In the row with your private pool, click the trash icon.
In the Delete private pool? pop-up box, click Delete.
The private pool that you created as part of this quickstart is now deleted.
You might need to refresh your screen to delete the private pool from the
Worker pool page.
[[["Easy to understand","easyToUnderstand","thumb-up"],["Solved my problem","solvedMyProblem","thumb-up"],["Other","otherUp","thumb-up"]],[["Hard to understand","hardToUnderstand","thumb-down"],["Incorrect information or sample code","incorrectInformationOrSampleCode","thumb-down"],["Missing the information/samples I need","missingTheInformationSamplesINeed","thumb-down"],["Other","otherDown","thumb-down"]],["Last updated 2025-08-25 UTC."],[[["\u003cp\u003eThis guide details the process of creating a Cloud Build private pool, which is hosted on the service producer network, offering configurable machine types, disk sizes, and access to public internet resources.\u003c/p\u003e\n"],["\u003cp\u003eYou can create a private pool by navigating to the Cloud Build Worker pool tab in the Google Cloud console, specifying settings like name, region, machine type, and disk size.\u003c/p\u003e\n"],["\u003cp\u003eTo run a build in the private pool, you need to create a \u003ccode\u003ecloudbuild.yaml\u003c/code\u003e file specifying the pool name, and then initiate the build using the \u003ccode\u003egcloud builds submit\u003c/code\u003e command.\u003c/p\u003e\n"],["\u003cp\u003eAfter running a build, you can view the build details, including the build summary and artifacts, by navigating to the Build history page in the Google Cloud console and selecting the appropriate region.\u003c/p\u003e\n"],["\u003cp\u003eTo avoid charges, you should delete the private pool by clicking the trash icon next to it in the Worker Pool page, and confirming the action.\u003c/p\u003e\n"]]],[],null,["# Quickstart: Create and run a build in a private pool\n\nCreate and run a build in a private pool\n========================================\n\nThis page explains how to create a Cloud Build private pool connected\nto the service producer network, and run a build in the private pool.\n\nThe service producer network is the network that hosts the private pool.\nBy default, a private pool is set up to use the service producer network,\nwhich provides a build environment with:\n\n- Configurable machine types\n- Configurable disk sizes\n- Access to resources in the public internet, such as resources in a repository or a registry\n\n*** ** * ** ***\n\nTo follow step-by-step guidance for this task directly in the\nCloud Shell Editor, click **Guide me**:\n\n[Guide me](https://console.cloud.google.com/freetrial?redirectPath=/getting-started?walkthrough_tutorial_id=build__quickstart-private-pools)\n\n*** ** * ** ***\n\nBefore you begin\n----------------\n\n- Sign in to your Google Cloud account. If you're new to Google Cloud, [create an account](https://console.cloud.google.com/freetrial) to evaluate how our products perform in real-world scenarios. New customers also get $300 in free credits to run, test, and deploy workloads.\n- In the Google Cloud console, on the project selector page,\n select or create a Google Cloud project.\n\n | **Note**: If you don't plan to keep the resources that you create in this procedure, create a project instead of selecting an existing project. After you finish these steps, you can delete the project, removing all resources associated with the project.\n\n [Go to project selector](https://console.cloud.google.com/projectselector2/home/dashboard)\n-\n [Verify that billing is enabled for your Google Cloud project](/billing/docs/how-to/verify-billing-enabled#confirm_billing_is_enabled_on_a_project).\n\n-\n\n\n Enable the Cloud Build API.\n\n\n [Enable the API](https://console.cloud.google.com/flows/enableapi?apiid=cloudbuild.googleapis.com&redirect=https://cloud.google.com/cloud-build/docs/quickstart-private-pools)\n-\n [Install](/sdk/docs/install) the Google Cloud CLI.\n\n- If you're using an external identity provider (IdP), you must first\n [sign in to the gcloud CLI with your federated identity](/iam/docs/workforce-log-in-gcloud).\n\n-\n To [initialize](/sdk/docs/initializing) the gcloud CLI, run the following command:\n\n ```bash\n gcloud init\n ```\n\n- In the Google Cloud console, on the project selector page,\n select or create a Google Cloud project.\n\n | **Note**: If you don't plan to keep the resources that you create in this procedure, create a project instead of selecting an existing project. After you finish these steps, you can delete the project, removing all resources associated with the project.\n\n [Go to project selector](https://console.cloud.google.com/projectselector2/home/dashboard)\n-\n [Verify that billing is enabled for your Google Cloud project](/billing/docs/how-to/verify-billing-enabled#confirm_billing_is_enabled_on_a_project).\n\n-\n\n\n Enable the Cloud Build API.\n\n\n [Enable the API](https://console.cloud.google.com/flows/enableapi?apiid=cloudbuild.googleapis.com&redirect=https://cloud.google.com/cloud-build/docs/quickstart-private-pools)\n-\n [Install](/sdk/docs/install) the Google Cloud CLI.\n\n- If you're using an external identity provider (IdP), you must first\n [sign in to the gcloud CLI with your federated identity](/iam/docs/workforce-log-in-gcloud).\n\n-\n To [initialize](/sdk/docs/initializing) the gcloud CLI, run the following command:\n\n ```bash\n gcloud init\n ```\n\n| If you've already installed Google Cloud CLI previously, make sure you have the\n| latest available version by running `gcloud components update`.\n\nCreate a private pool\n---------------------\n\n1. In the Google Cloud console, open the **Cloud Build Worker pool** tab:\n\n [Open the Cloud Build worker pool tab](https://console.cloud.google.com/cloud-build/settings/worker-pool)\n2. Click **Create**.\n\n3. In the **Create private pool** panel, enter the following settings:\n\n 1. In the **Name** field, enter\n `my-first-privatepool`.\n\n 2. In the **Region** field, select `us-central1`.\n\n 3. In the **Machine type** field, select `e2-standard-2`.\n\n 4. In the **Available disk size** field, enter `800`.\n\n 5. Leave the **Network project number** field blank.\n\n 6. Leave the **Network** field blank.\n\n 7. Make sure **Assign external IPs** is selected.\n\nClick **Create** to create the private pool.\n\nAllow a short time for the private pool to be created. After the private pool\nis created, it is listed on the **Worker pool** tab.\n\n\u003cbr /\u003e\n\nRun a build in a private pool\n-----------------------------\n\n1. Open a terminal window.\n\n2. Create a new directory named `quickstart-private-pool` and navigate into it:\n\n mkdir quickstart-private-pool\n cd quickstart-private-pool\n\n3. Create a file named `cloudbuild.yaml` with the following contents:\n\n steps:\n - name: \"bash\"\n script: echo \"I am running in a private pool!\"\n options:\n pool:\n name: \"projects/$PROJECT_ID/locations/us-central1/workerPools/my-first-privatepool\"\n\n4. Start the build using the build config file:\n\n gcloud builds submit\n\nWhen the build is complete, you'll see an output similar to the following: \n\n I am running in a private pool!\n PUSH\n DONE\n ------------------------------------------------------------------------------------------------------------------------------------ ------------------------------------------------------------------------\n\n ID CREATE_TIME DURATION SOURCE IMAGES STATUS\n 5df45735-6414-40b7-9e10-e6d2023c8cea 2020-08-31T13:16:18+00:00 10S gs://private-pool-test_cloudbuild/source/1598879777.206444- 58901ecbd14e431f8cdacc85d5dd0fc3.tgz - SUCCESS\n\nView build details\n------------------\n\n1. Open the **Build history** page in the Google Cloud console.\n\n [Open the Cloud Build page](https://console.cloud.google.com/cloud-build)\n2. In the **Region** drop-down box, select **us-central1**.\n\n You will see the build that you ran in the private pool.\n3. Click on the build to view the build details, such as build summary and artifacts.\n\nClean up\n--------\n\n\nTo avoid incurring charges to your Google Cloud account for\nthe resources used on this page, follow these steps.\n\n1. Open the **Worker pool** page in the Google Cloud console:\n\n [Open the Cloud Build private pool page](https://console.cloud.google.com/cloud-build/settings/worker-pool)\n2. In the row with your private pool, click the trash icon.\n\n3. In the **Delete private pool?** pop-up box, click **Delete**.\n\nThe private pool that you created as part of this quickstart is now deleted.\nYou might need to refresh your screen to delete the private pool from the\n**Worker pool** page.\n\nWhat's next\n-----------\n\n- Learn how to [create a private VPC peering connection](/build/docs/private-pools/set-up-private-pool-environment#setup-private-connection).\n- Learn more about [private pools](/build/docs/private-pools/private-pools-overview)."]]