了解如何从本地计算机到工作站打开 SSH 隧道,然后使用 VS Code 远程开发支持从本地 VS Code 编辑器连接到 Cloud Workstations。
准备工作
在开始之前,请确保您已按照以下步骤完成以下任务:
- 确保您的团队中有人创建了工作站配置。
- 创建并启动工作站。
在 Google Cloud 控制台中,复制以下信息:
- 项目名称和 ID:点击菜单栏中的项目名称,然后复制随即打开的项目名称和 ID 对话框中的 ID。 Google Cloud
- 区域
- 集群名称
- 配置名称
在本地机器上,安装
gcloudCLI。如果您是首次运行
gcloudCLI,可能还需要运行gcloud auth login来获取凭据,并运行gcloud config set project PROJECT_ID将当前项目设置为您在上一步中复制的项目 ID。首次使用
ssh时,请安装远程 SSH 扩展程序,以便您可以通过扩展程序市场或通过命令 Palette 从 VS Code 编辑器连接到工作站。Extensions Marketplace
打开本地 VS Code 编辑器应用,然后在活动栏中依次选择
 Extensions(扩展程序)以打开 Extensions Marketplace(扩展程序市场)。
点击安装以安装 Remote - SSH 扩展程序。
在搜索字段中输入
remote ssh,系统随即会打开远程 - SSH 的扩展程序页面。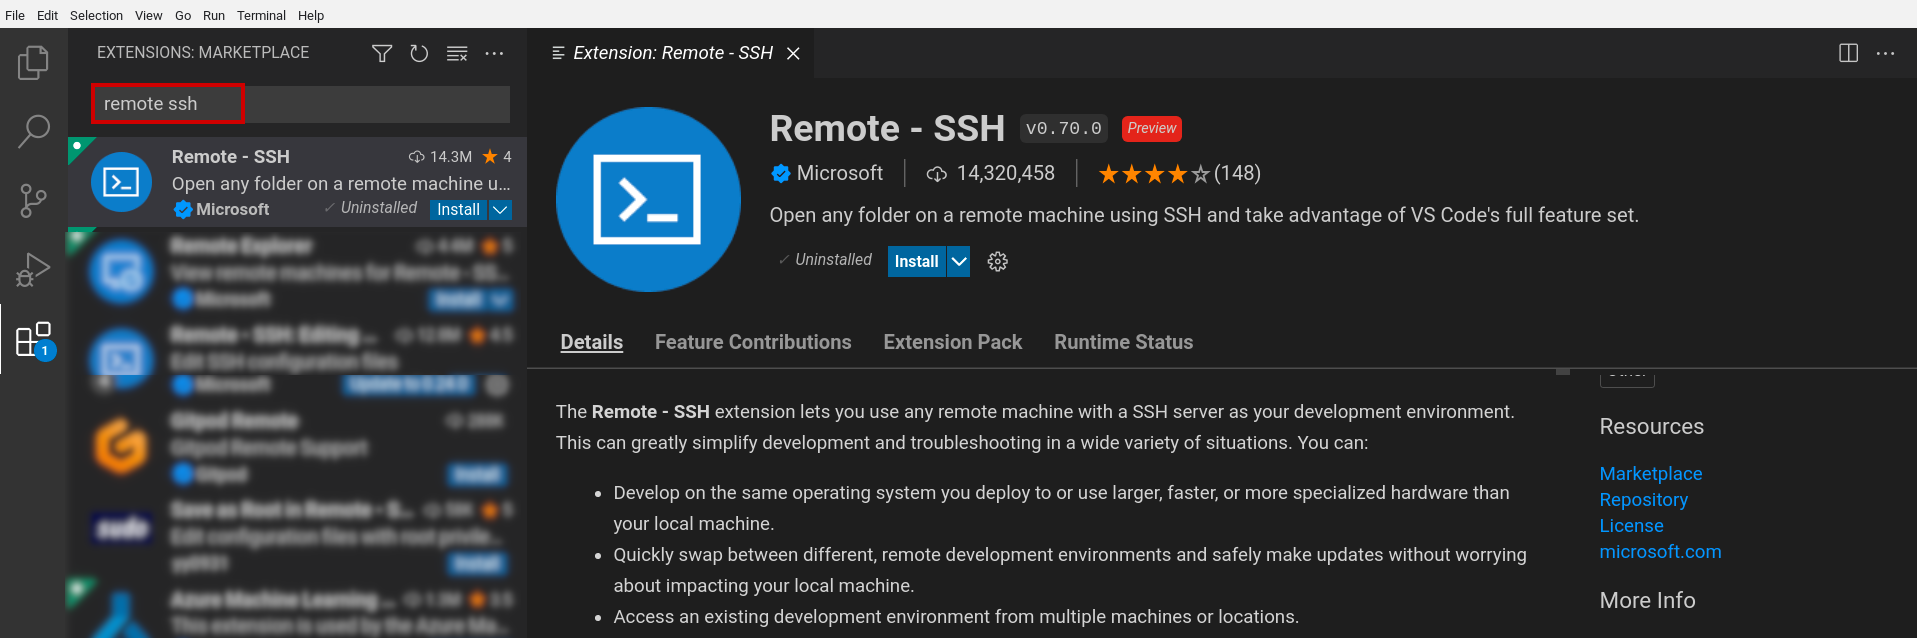
命令面板
如需打开命令面板,请按 Ctrl+Shift+P(在 macOS 上,按 Command+Shift+P),或点击视图 > 命令面板。
输入
ext install ms-vscode-remote.remote-ssh以安装该扩展程序。
打开 SSH 隧道
使用 gcloud workstations start-tcp-tunnel 命令打开从本地计算机到工作站的 SSH 隧道:
在 Google Cloud 控制台中,前往 Cloud Workstations > 工作站页面。
点击工作站名称以打开工作站详情页面。
在以下示例中,替换工作站名称、区域(位置)、工作站集群名称和工作站配置名称的占位符。将“工作站详细信息”面板中的值复制到带有修改图标的占位符中。
gcloud workstations start-tcp-tunnel \ --project=PROJECT_ID \ --region=REGION \ --cluster=CLUSTER_NAME \ --config=CONFIG_NAME \ --local-host-port=:LOCAL_PORT \ WORKSTATION_NAME 22请参阅准备工作部分,查找项目 ID。
--local-host-port=:LOCAL_PORT标志是可选的。如果您想指定本地端口,请将LOCAL_PORT替换为您要使用的本地端口号。如果您未指定本地端口,系统会为您选择一个任意未使用的本地端口,并输出包含端口号的消息,以便您知道它使用的是哪个本地端口。填充占位符后,点击 content_copy Copy code sample 复制
gcloudCLI 命令。将该命令粘贴到本地终端窗口中,然后按 Enter 键以创建隧道。
命令成功后,系统会显示
Listening on port消息,后跟本地端口号。
如需详细了解每个配置标志,请参阅 SSH 隧道或 start-tcp-tunnel。
连接到 Cloud Workstations 主机
请按照以下步骤连接到 Cloud Workstations 主机:
- 打开或返回 VS Code 应用。
如需启动远程 - SSH,请点击状态栏中的
 打开远程窗口。
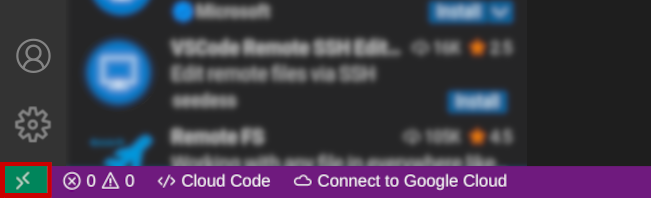
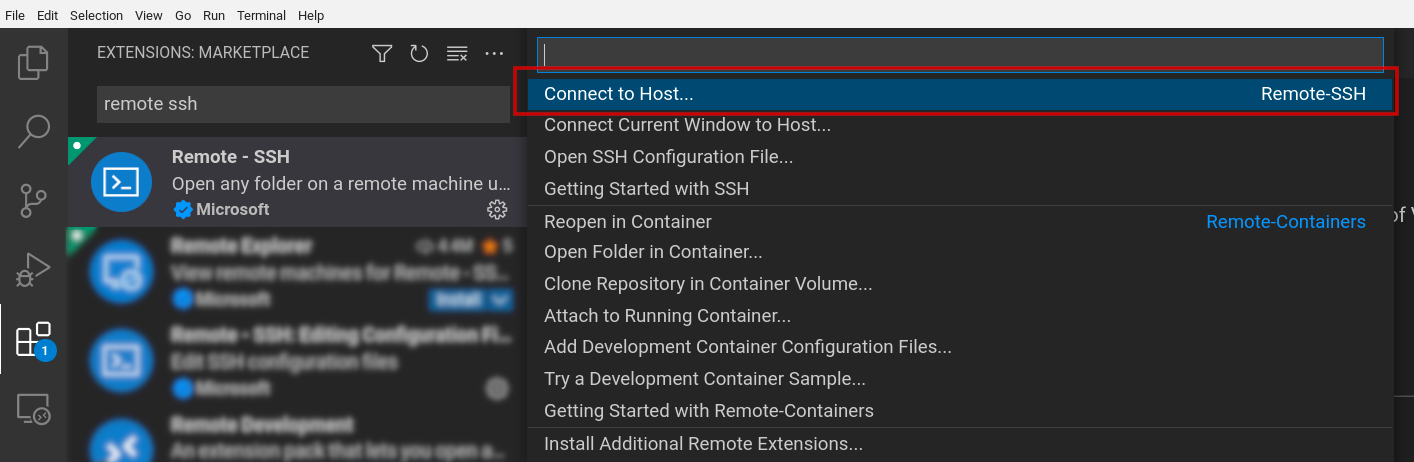
当 Command Palette 打开时,选择 Connect to Host 选项。
输入
user@localhost:LOCAL_PORT,将LOCAL_PORT替换为您的本地端口号。以下示例通过指定
user@localhost:1025连接到本地端口1025。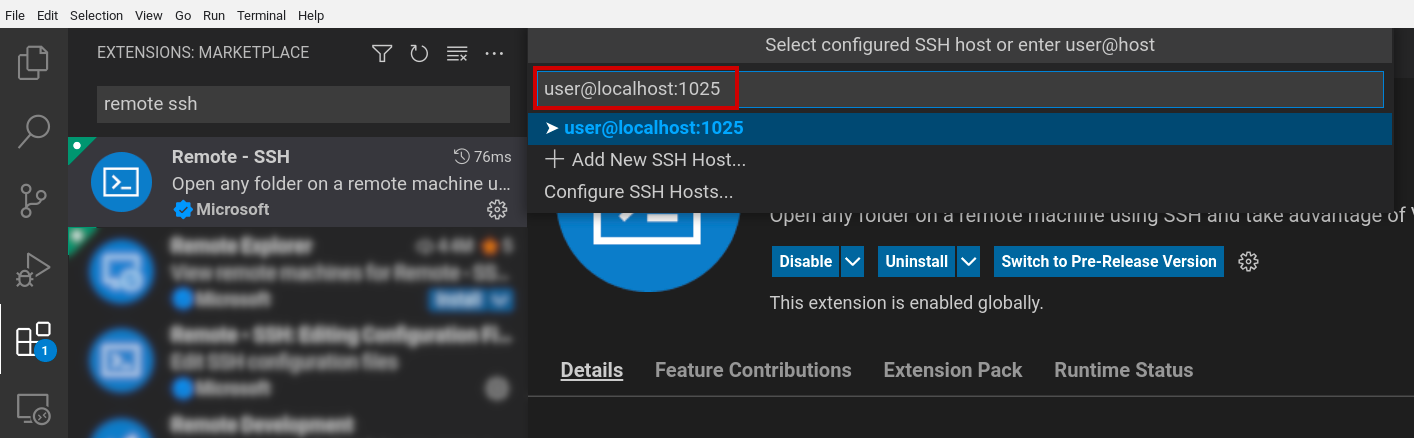
如果您在看到主机已添加确认消息后收到连接提示,请点击连接。
系统可能还会提示您确认哈希。如果出现提示,请点击继续。
系统会打开一个新的 VS Code 编辑器,并且 VS Code 状态栏会显示
SSH: localhost: 后跟端口号。现在,您可以访问远程工作站上的文件和语言服务器,还可以构建和运行在工作站内运行的进程。
以下示例展示了一个通过
SSH: localhost: 1025 连接到 Cloud Workstations 的 VS Code 编辑器窗口。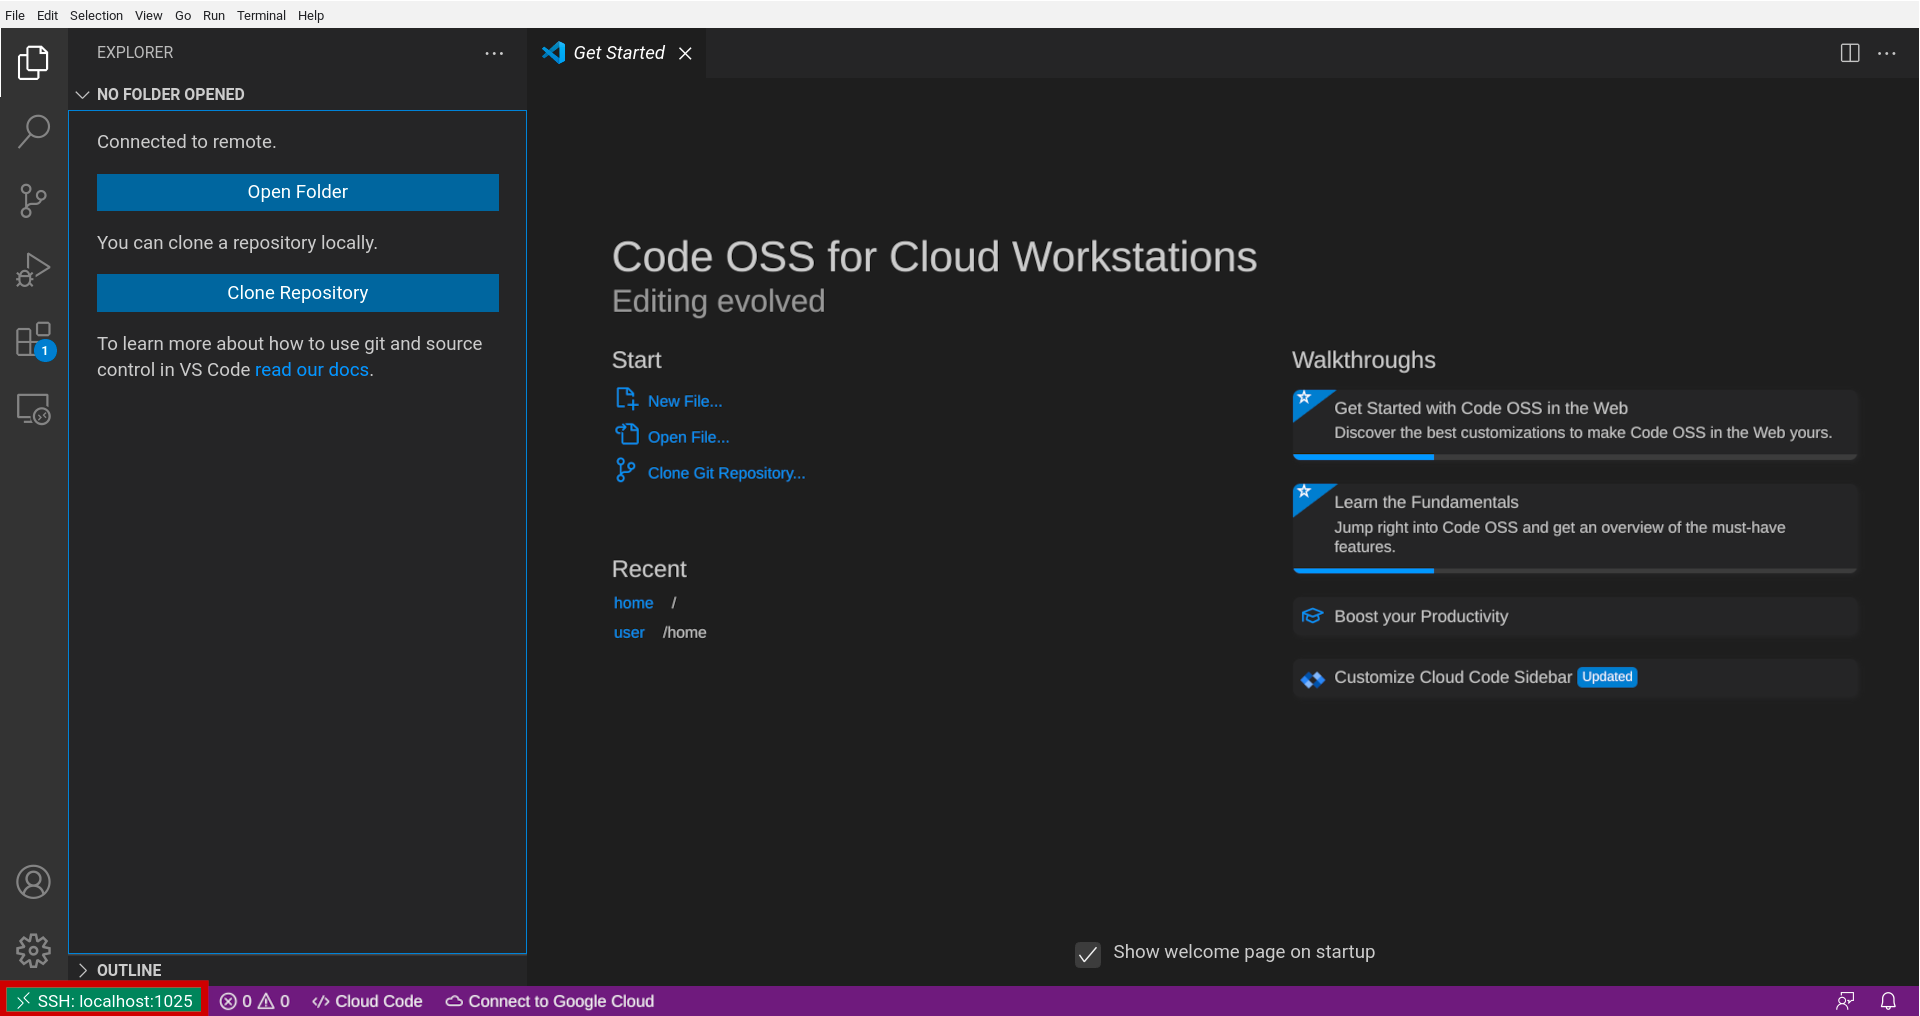
您还可以返回 Extensions Marketplace 安装 Cloud Code 和其他本地 VS Code 扩展程序,以帮助您构建、运行和测试代码。