Stay organized with collections
Save and categorize content based on your preferences.
Code OSS for Cloud Workstations is based on the open source project
Code-OSS.
You can debug code, run scripts, view code with syntax highlighting, and use
version control through the editor interface. The editor provides basic support
for the most common programming languages and you can add additional languages
and features with extensions or customize your environment with
containers.
Browse extensions
You can find and install extensions from the
Open VSX Registry
through the Cloud Workstations interface.
To access extensions from within Cloud Workstations, follow these steps:
Start and launch your workstation.
If you haven't started and launched a workstation before, see the
Create a workstation section
first.
Navigate to the Activity Bar and click Extensions.
The primary sidebar opens and displays a list of extensions.
Enter text in the search field to browse the catalog and find extensions to
add additional features to your IDE. For example, enter python to find extensions for the Python programming language.
Install an extension
After you browse and find an extension you want to try, install it with these
steps:
In the primary sidebar, select the extension that you want to install.
The Editor area displays additional information about the extension. To
install the extension, click Install from the entry in the catalog.
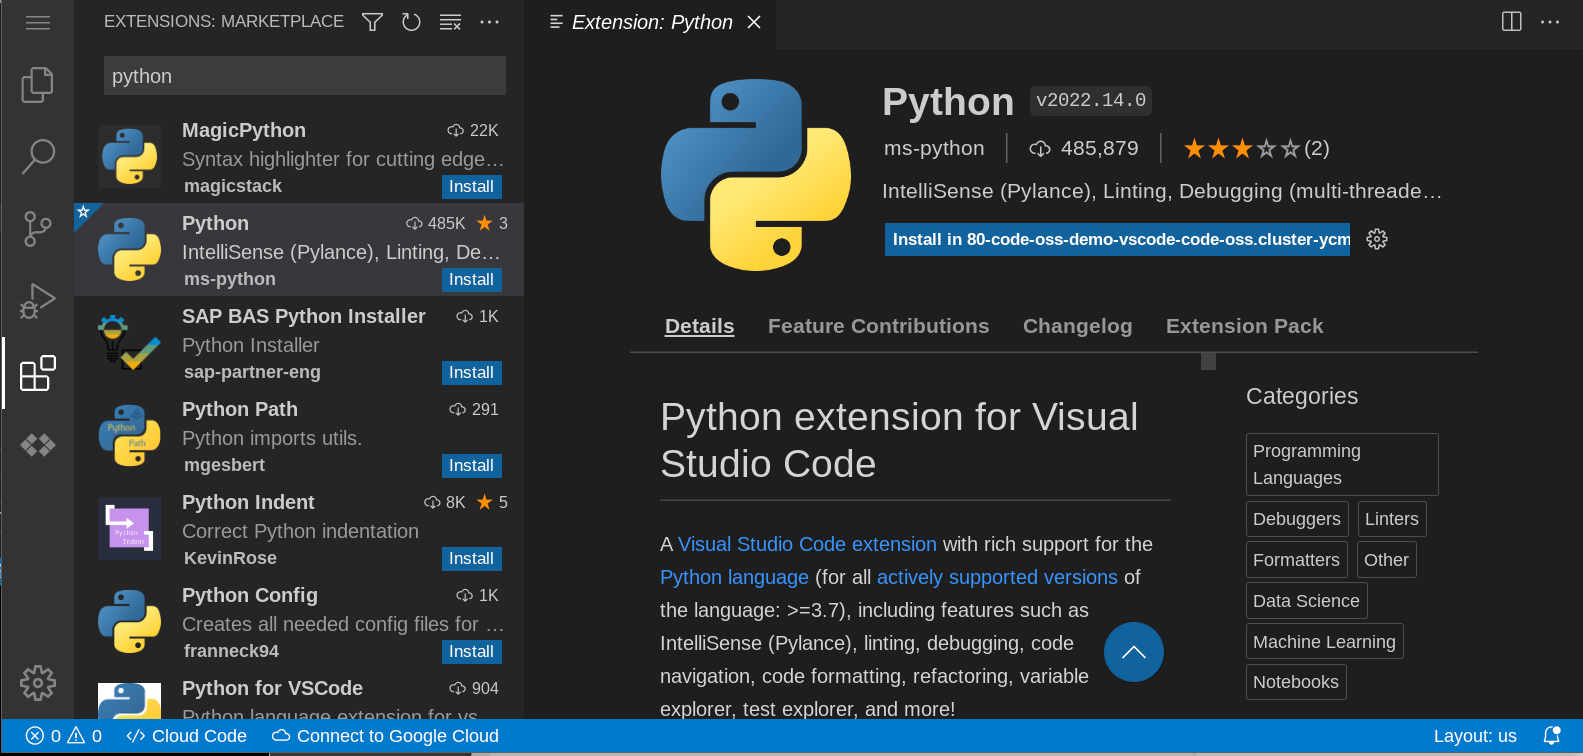
During installation, the Install button in the primary sidebar changes
to Installing. After the installation finishes, the button changes to
Manage.
[[["Easy to understand","easyToUnderstand","thumb-up"],["Solved my problem","solvedMyProblem","thumb-up"],["Other","otherUp","thumb-up"]],[["Hard to understand","hardToUnderstand","thumb-down"],["Incorrect information or sample code","incorrectInformationOrSampleCode","thumb-down"],["Missing the information/samples I need","missingTheInformationSamplesINeed","thumb-down"],["Other","otherDown","thumb-down"]],["Last updated 2025-08-25 UTC."],[],[],null,["# Extensions Marketplace\n\nCode OSS for Cloud Workstations is based on the open source project\n[Code-OSS](https://github.com/microsoft/vscode).\nYou can debug code, run scripts, view code with syntax highlighting, and use\nversion control through the editor interface. The editor provides basic support\nfor the most common programming languages and you can add additional languages\nand features with extensions or customize your environment with\n[containers](/workstations/docs/custom-container-images).\n\nBrowse extensions\n-----------------\n\nYou can find and install extensions from the\n[Open VSX Registry](https://open-vsx.org/)\nthrough the Cloud Workstations interface.\n\nTo access extensions from within Cloud Workstations, follow these steps:\n\n1. Start and launch your workstation.\n\n If you haven't started and launched a workstation before, see the\n [Create a workstation](/workstations/docs/create-workstation) section\n first.\n2. Navigate to the Activity Bar and click **Extensions**.\n The primary sidebar opens and displays a list of extensions.\n\n3. Enter text in the search field to browse the catalog and find extensions to\n add additional features to your IDE. For example, enter `python` to find extensions for the Python programming language.\n\nInstall an extension\n--------------------\n\n| **Note:** Google does not operate open-vsx.org nor validate the extensions hosted there. Before installing an extension, make sure that you validate and trust the provenance of the extension. For added protection, we recommend using a custom container and [installing extensions from a known source](/workstations/docs/customize-container-images#container-image-that-pre-installs-ide-extensions-in-code-oss-for-cloud-workstations-for-java-development) at container build time.\n\nAfter you browse and find an extension you want to try, install it with these\nsteps:\n\n1. In the primary sidebar, select the extension that you want to install.\n\n2. The Editor area displays additional information about the extension. To\n install the extension, click **Install** from the entry in the catalog.\n\n3. During installation, the **Install** button in the primary sidebar changes\n to **Installing** . After the installation finishes, the button changes to\n **Manage**."]]