온라인 작은 배치 파일 주석

Vision API는 Cloud Storage에 저장된 PDF, TIFF 또는 GIF 파일의 여러 페이지 또는 프레임에 대한 온라인(즉각적) 주석을 제공합니다.

각 파일에 선택한 5개의 프레임(GIF; 'image/gif') 또는 페이지(PDF; 'application/pdf' 또는 TIFF; 'image/tiff')의 온라인 기능 감지 및 주석을 요청할 수 있습니다.

이 페이지의 주석 예시는 DOCUMENT_TEXT_DETECTION용이지만 온라인 작은 배치 주석은 모든 Vision 기능에 사용할 수 있습니다.

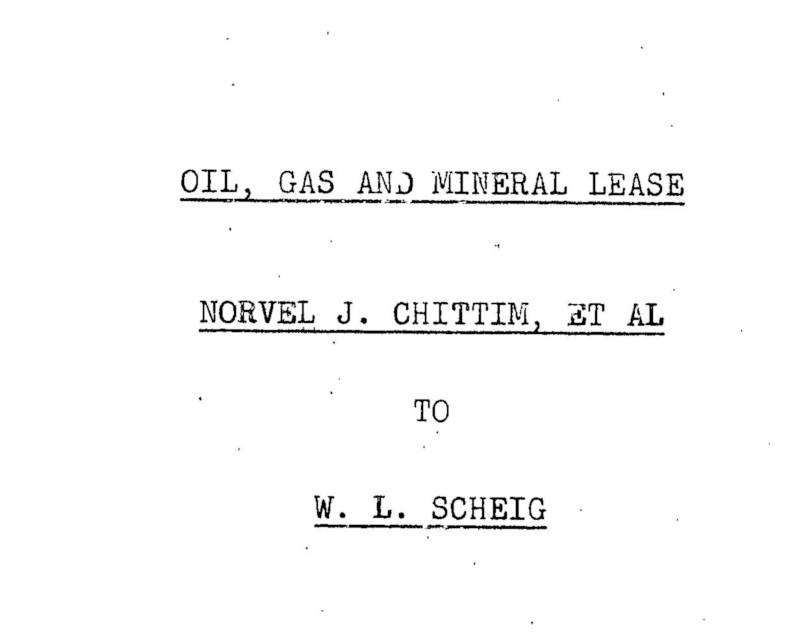
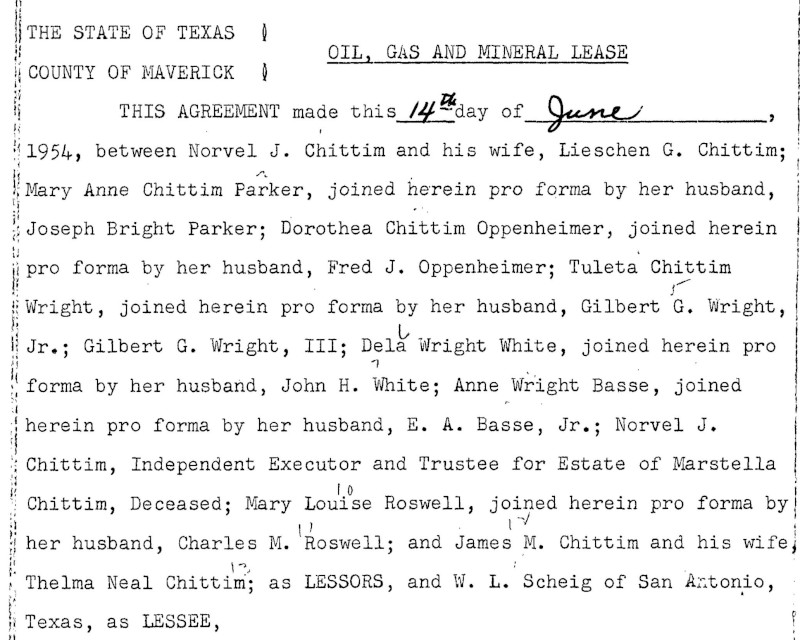
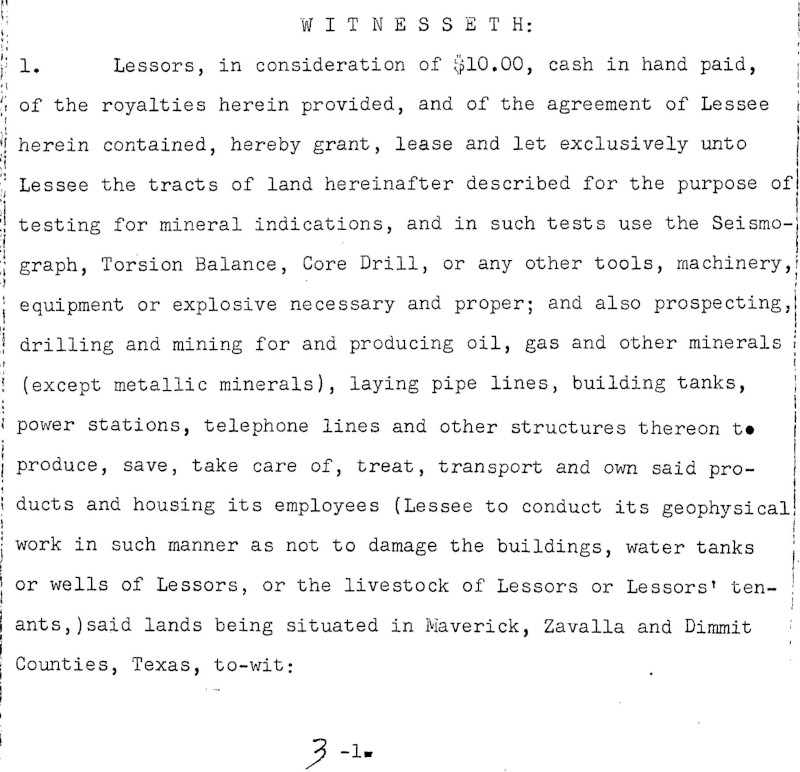
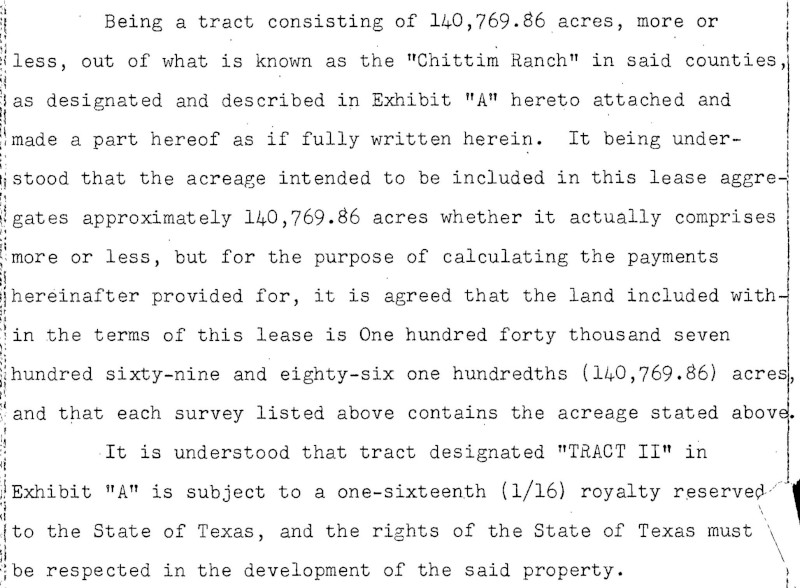
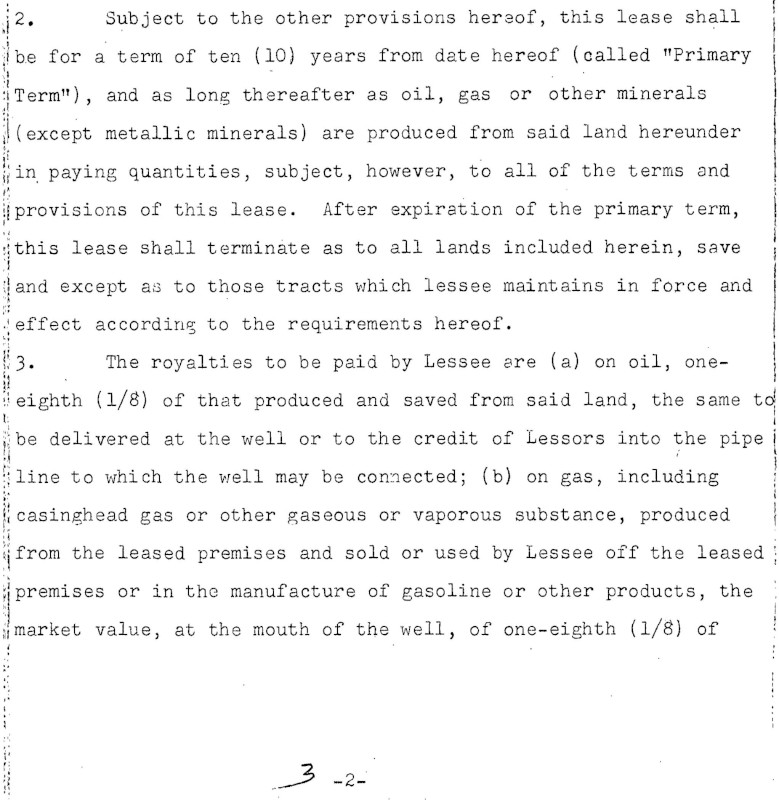
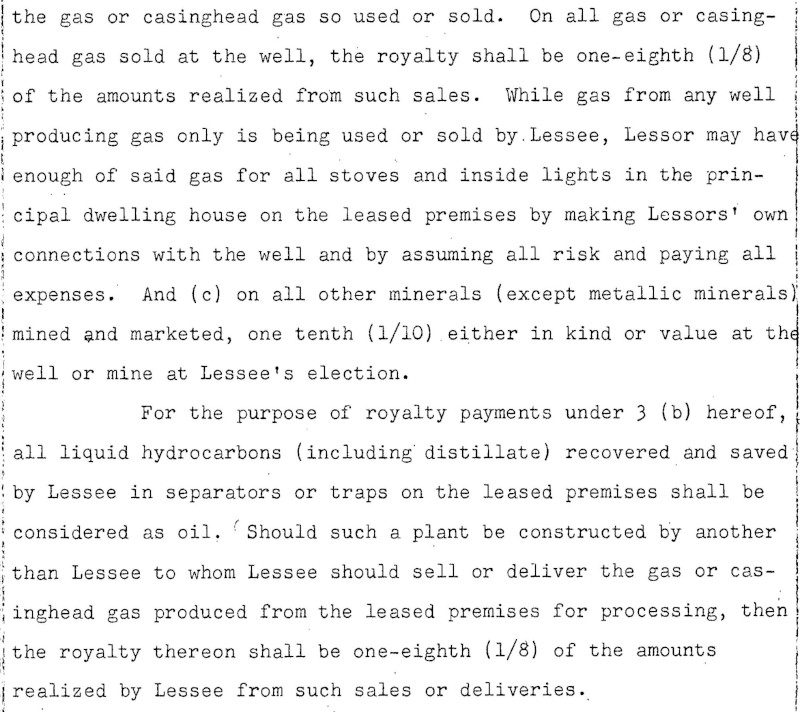
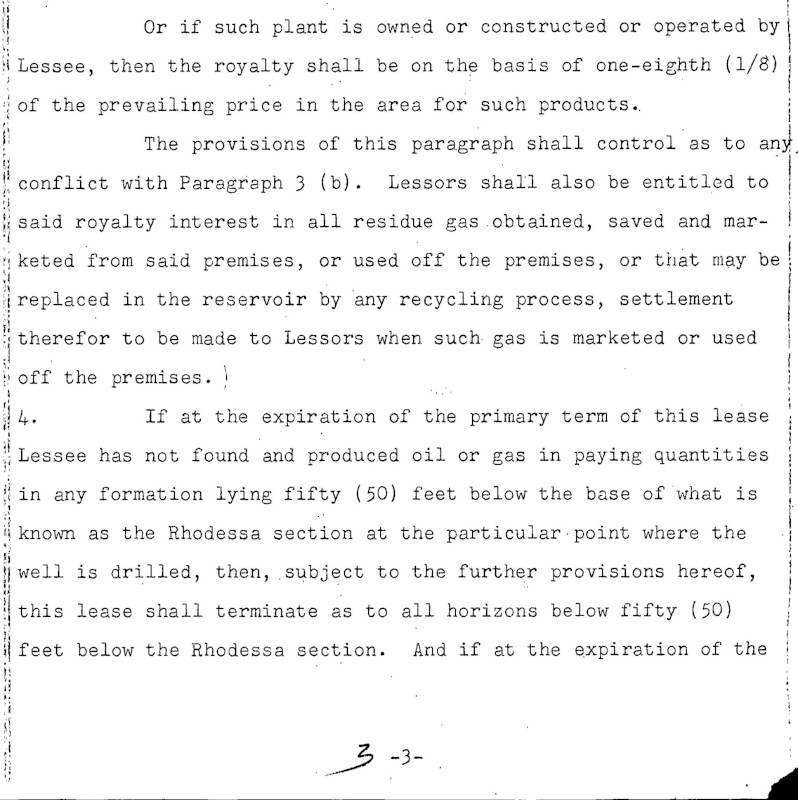
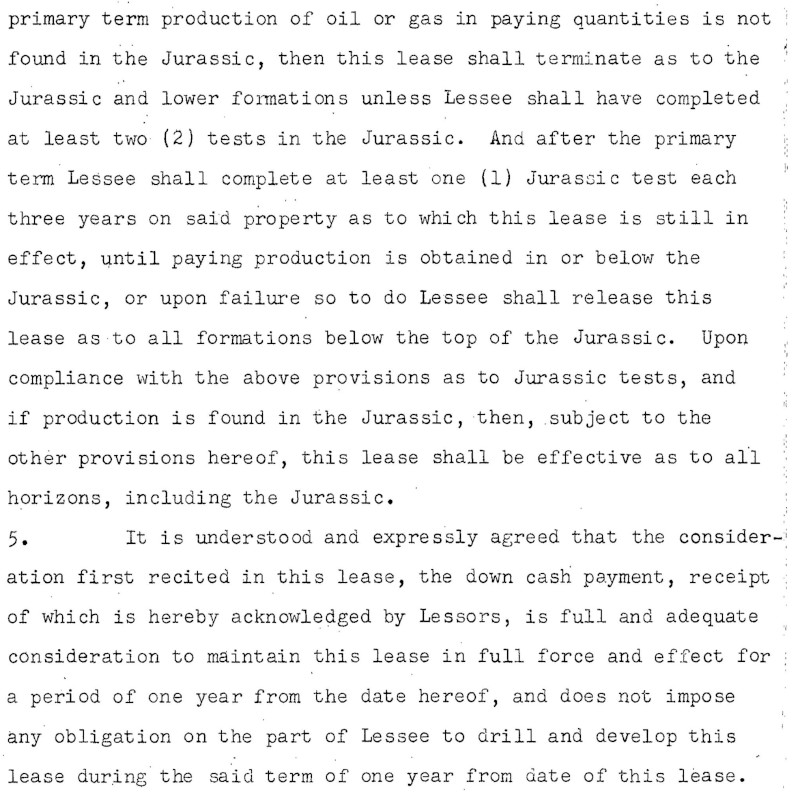
PDF 파일의 처음 5페이지
gs://cloud-samples-data/vision/document_understanding/custom_0773375000.pdf

제한사항

최대 다섯 장까지 주석이 추가됩니다. 사용자는 특정 페이지를 5페이지까지 지정하여 주석을 추가할 수 있습니다.

인증

Google Cloud 프로젝트 및 인증 설정

현재 지원되는 기능 유형

기능 유형
CROP_HINTS 이미지에서 자르기 영역으로 제안되는 꼭짓점을 결정합니다.
DOCUMENT_TEXT_DETECTION 문서(PDF/TIFF)와 같은 밀집 텍스트 이미지와 필기 입력이 포함된 이미지에 OCR을 수행합니다. TEXT_DETECTION은 희소 텍스트 이미지에 사용할 수 있습니다. DOCUMENT_TEXT_DETECTIONTEXT_DETECTION이 모두 존재하는 경우 우선 적용됩니다.
FACE_DETECTION 이미지 안의 얼굴을 감지합니다.
IMAGE_PROPERTIES 이미지의 주요 색상과 같은 이미지 속성의 집합을 계산합니다.
LABEL_DETECTION 이미지 콘텐츠를 기반으로 라벨을 추가합니다.
LANDMARK_DETECTION 이미지 안의 특징을 감지합니다.
LOGO_DETECTION 이미지 안의 회사 로고를 감지합니다.
OBJECT_LOCALIZATION 이미지에서 여러 객체를 감지하고 추출합니다.
SAFE_SEARCH_DETECTION 세이프서치를 실행하여 안전하지 않거나 바람직하지 않은 콘텐츠를 감지합니다.
TEXT_DETECTION 이미지 안의 텍스트에 광 문자 인식(OCR)을 수행합니다. 텍스트 감지는 큰 이미지 내의 희소 텍스트 영역에 최적화되어 있습니다. 이미지가 문서(PDF/TIFF)이거나 밀집 텍스트가 있거나 필기 입력이 포함된 경우 DOCUMENT_TEXT_DETECTION을 대신 사용하세요.
WEB_DETECTION Google 이미지 검색을 사용하여 이미지에서 뉴스, 이벤트, 연예인 등의 주제별 항목을 검색하고 웹에서 유사한 이미지를 찾습니다.

샘플 코드

로컬 저장된 파일을 사용하여 주석 요청을 보내거나 Cloud Storage에 저장된 파일을 사용할 수 있습니다.

로컬 저장된 파일 사용

다음 코드 샘플을 사용하여 로컬 저장된 파일에 대한 기능 주석을 가져옵니다.

REST

작은 배치 파일에 대해 온라인 PDF/TIFF/GIF 기능 감지를 수행하려면 POST 요청을 만들고 적절한 요청 본문을 제공합니다.

요청 데이터를 사용하기 전에 다음을 바꿉니다.

  • BASE64_ENCODED_FILE: 바이너리 파일 데이터의 base64 표현(ASCII 문자열)입니다. 이 문자열은 다음 문자열과 비슷해야 합니다.
    • JVBERi0xLjUNCiW1tbW1...ydHhyZWYNCjk5NzM2OQ0KJSVFT0Y=
    자세한 내용은 base64 인코딩 주제를 참조하세요.
  • PROJECT_ID: Google Cloud 프로젝트 ID입니다.

필드별 고려사항:

  • inputConfig.mimeType - 'application/pdf', 'image/tiff', 'image/gif' 중 하나입니다.
  • pages - 파일에서 기능 감지를 수행할 특정 페이지를 지정합니다.

HTTP 메서드 및 URL:

POST https://vision.googleapis.com/v1/files:annotate

JSON 요청 본문:

{
  "requests": [
    {
      "inputConfig": {
        "content": "BASE64_ENCODED_FILE",
        "mimeType": "application/pdf"
      },
      "features": [
        {
          "type": "DOCUMENT_TEXT_DETECTION"
        }
      ],
      "pages": [
        1,2,3,4,5
      ]
    }
  ]
}

요청을 보내려면 다음 옵션 중 하나를 선택합니다.

curl

요청 본문을 request.json 파일에 저장하고 다음 명령어를 실행합니다.

curl -X POST \
-H "Authorization: Bearer $(gcloud auth print-access-token)" \
-H "x-goog-user-project: PROJECT_ID" \
-H "Content-Type: application/json; charset=utf-8" \
-d @request.json \
"https://vision.googleapis.com/v1/files:annotate"

PowerShell

요청 본문을 request.json 파일에 저장하고 다음 명령어를 실행합니다.

$cred = gcloud auth print-access-token
$headers = @{ "Authorization" = "Bearer $cred"; "x-goog-user-project" = "PROJECT_ID" }

Invoke-WebRequest `
-Method POST `
-Headers $headers `
-ContentType: "application/json; charset=utf-8" `
-InFile request.json `
-Uri "https://vision.googleapis.com/v1/files:annotate" | Select-Object -Expand Content
응답:

annotate 요청이 성공하면 즉시 JSON 응답이 반환됩니다.

이 기능(DOCUMENT_TEXT_DETECTION)의 경우 JSON 응답은 이미지의 문서 텍스트 감지 요청의 응답과 유사합니다. 응답에는 단락, 단어, 개별 기호로 나뉜 블록의 경계 상자가 포함됩니다. 전체 텍스트도 감지됩니다. 응답에는 지정된 PDF 또는 TIFF의 위치와 결과의 파일상 페이지 번호를 표시하는 context 필드도 포함됩니다.

다음 JSON 응답은 단일 페이지(2페이지)에 대한 것이며 보기 편하도록 짧게 편집하였습니다.

Java

이 샘플을 시도하기 전에 Vision API 빠른 시작: 클라이언트 라이브러리 사용의 Java 설정 안내를 따르세요. 자세한 내용은 Vision API Java 참고 문서를 참조하세요.

import com.google.cloud.vision.v1.AnnotateFileRequest;
import com.google.cloud.vision.v1.AnnotateImageResponse;
import com.google.cloud.vision.v1.BatchAnnotateFilesRequest;
import com.google.cloud.vision.v1.BatchAnnotateFilesResponse;
import com.google.cloud.vision.v1.Block;
import com.google.cloud.vision.v1.Feature;
import com.google.cloud.vision.v1.ImageAnnotatorClient;
import com.google.cloud.vision.v1.InputConfig;
import com.google.cloud.vision.v1.Page;
import com.google.cloud.vision.v1.Paragraph;
import com.google.cloud.vision.v1.Symbol;
import com.google.cloud.vision.v1.Word;
import com.google.protobuf.ByteString;
import java.io.IOException;
import java.nio.file.Files;
import java.nio.file.Path;
import java.nio.file.Paths;

public class BatchAnnotateFiles {

  public static void batchAnnotateFiles() throws IOException {
    String filePath = "path/to/your/file.pdf";
    batchAnnotateFiles(filePath);
  }

  public static void batchAnnotateFiles(String filePath) throws IOException {
    // Initialize client that will be used to send requests. This client only needs to be created
    // once, and can be reused for multiple requests. After completing all of your requests, call
    // the "close" method on the client to safely clean up any remaining background resources.
    try (ImageAnnotatorClient imageAnnotatorClient = ImageAnnotatorClient.create()) {
      // You can send multiple files to be annotated, this sample demonstrates how to do this with
      // one file. If you want to use multiple files, you have to create a `AnnotateImageRequest`
      // object for each file that you want annotated.
      // First read the files contents
      Path path = Paths.get(filePath);
      byte[] data = Files.readAllBytes(path);
      ByteString content = ByteString.copyFrom(data);

      // Specify the input config with the file's contents and its type.
      // Supported mime_type: application/pdf, image/tiff, image/gif
      // https://cloud.google.com/vision/docs/reference/rpc/google.cloud.vision.v1#inputconfig
      InputConfig inputConfig =
          InputConfig.newBuilder().setMimeType("application/pdf").setContent(content).build();

      // Set the type of annotation you want to perform on the file
      // https://cloud.google.com/vision/docs/reference/rpc/google.cloud.vision.v1#google.cloud.vision.v1.Feature.Type
      Feature feature = Feature.newBuilder().setType(Feature.Type.DOCUMENT_TEXT_DETECTION).build();

      // Build the request object for that one file. Note: for additional file you have to create
      // additional `AnnotateFileRequest` objects and store them in a list to be used below.
      // Since we are sending a file of type `application/pdf`, we can use the `pages` field to
      // specify which pages to process. The service can process up to 5 pages per document file.
      // https://cloud.google.com/vision/docs/reference/rpc/google.cloud.vision.v1#google.cloud.vision.v1.AnnotateFileRequest
      AnnotateFileRequest fileRequest =
          AnnotateFileRequest.newBuilder()
              .setInputConfig(inputConfig)
              .addFeatures(feature)
              .addPages(1) // Process the first page
              .addPages(2) // Process the second page
              .addPages(-1) // Process the last page
              .build();

      // Add each `AnnotateFileRequest` object to the batch request.
      BatchAnnotateFilesRequest request =
          BatchAnnotateFilesRequest.newBuilder().addRequests(fileRequest).build();

      // Make the synchronous batch request.
      BatchAnnotateFilesResponse response = imageAnnotatorClient.batchAnnotateFiles(request);

      // Process the results, just get the first result, since only one file was sent in this
      // sample.
      for (AnnotateImageResponse imageResponse :
          response.getResponsesList().get(0).getResponsesList()) {
        System.out.format("Full text: %s%n", imageResponse.getFullTextAnnotation().getText());
        for (Page page : imageResponse.getFullTextAnnotation().getPagesList()) {
          for (Block block : page.getBlocksList()) {
            System.out.format("%nBlock confidence: %s%n", block.getConfidence());
            for (Paragraph par : block.getParagraphsList()) {
              System.out.format("\tParagraph confidence: %s%n", par.getConfidence());
              for (Word word : par.getWordsList()) {
                System.out.format("\t\tWord confidence: %s%n", word.getConfidence());
                for (Symbol symbol : word.getSymbolsList()) {
                  System.out.format(
                      "\t\t\tSymbol: %s, (confidence: %s)%n",
                      symbol.getText(), symbol.getConfidence());
                }
              }
            }
          }
        }
      }
    }
  }
}

Node.js

이 샘플을 사용해 보기 전에 Vision 빠른 시작: 클라이언트 라이브러리 사용Node.js 설정 안내를 따르세요. 자세한 내용은 Vision Node.js API 참고 문서를 참조하세요.

Vision에 인증하려면 애플리케이션 기본 사용자 인증 정보를 설정합니다. 자세한 내용은 로컬 개발 환경의 인증 설정을 참조하세요.

/**
 * TODO(developer): Uncomment these variables before running the sample.
 */
// const fileName = 'path/to/your/file.pdf';

// Imports the Google Cloud client libraries
const {ImageAnnotatorClient} = require('@google-cloud/vision').v1;
const fs = require('fs').promises;

// Instantiates a client
const client = new ImageAnnotatorClient();

// You can send multiple files to be annotated, this sample demonstrates how to do this with
// one file. If you want to use multiple files, you have to create a request object for each file that you want annotated.
async function batchAnnotateFiles() {
  // First Specify the input config with the file's path and its type.
  // Supported mime_type: application/pdf, image/tiff, image/gif
  // https://cloud.google.com/vision/docs/reference/rpc/google.cloud.vision.v1#inputconfig
  const inputConfig = {
    mimeType: 'application/pdf',
    content: await fs.readFile(fileName),
  };

  // Set the type of annotation you want to perform on the file
  // https://cloud.google.com/vision/docs/reference/rpc/google.cloud.vision.v1#google.cloud.vision.v1.Feature.Type
  const features = [{type: 'DOCUMENT_TEXT_DETECTION'}];

  // Build the request object for that one file. Note: for additional files you have to create
  // additional file request objects and store them in a list to be used below.
  // Since we are sending a file of type `application/pdf`, we can use the `pages` field to
  // specify which pages to process. The service can process up to 5 pages per document file.
  // https://cloud.google.com/vision/docs/reference/rpc/google.cloud.vision.v1#google.cloud.vision.v1.AnnotateFileRequest
  const fileRequest = {
    inputConfig: inputConfig,
    features: features,
    // Annotate the first two pages and the last one (max 5 pages)
    // First page starts at 1, and not 0. Last page is -1.
    pages: [1, 2, -1],
  };

  // Add each `AnnotateFileRequest` object to the batch request.
  const request = {
    requests: [fileRequest],
  };

  // Make the synchronous batch request.
  const [result] = await client.batchAnnotateFiles(request);

  // Process the results, just get the first result, since only one file was sent in this
  // sample.
  const responses = result.responses[0].responses;

  for (const response of responses) {
    console.log(`Full text: ${response.fullTextAnnotation.text}`);
    for (const page of response.fullTextAnnotation.pages) {
      for (const block of page.blocks) {
        console.log(`Block confidence: ${block.confidence}`);
        for (const paragraph of block.paragraphs) {
          console.log(` Paragraph confidence: ${paragraph.confidence}`);
          for (const word of paragraph.words) {
            const symbol_texts = word.symbols.map(symbol => symbol.text);
            const word_text = symbol_texts.join('');
            console.log(
              `  Word text: ${word_text} (confidence: ${word.confidence})`
            );
            for (const symbol of word.symbols) {
              console.log(
                `   Symbol: ${symbol.text} (confidence: ${symbol.confidence})`
              );
            }
          }
        }
      }
    }
  }
}

batchAnnotateFiles();

Python

이 샘플을 사용해 보기 전에 Vision 빠른 시작: 클라이언트 라이브러리 사용Python 설정 안내를 따르세요. 자세한 내용은 Vision Python API 참고 문서를 참조하세요.

Vision에 인증하려면 애플리케이션 기본 사용자 인증 정보를 설정합니다. 자세한 내용은 로컬 개발 환경의 인증 설정을 참조하세요.


from google.cloud import vision_v1


def sample_batch_annotate_files(file_path="path/to/your/document.pdf"):
    """Perform batch file annotation."""
    client = vision_v1.ImageAnnotatorClient()

    # Supported mime_type: application/pdf, image/tiff, image/gif
    mime_type = "application/pdf"
    with open(file_path, "rb") as f:
        content = f.read()
    input_config = {"mime_type": mime_type, "content": content}
    features = [{"type_": vision_v1.Feature.Type.DOCUMENT_TEXT_DETECTION}]

    # The service can process up to 5 pages per document file. Here we specify
    # the first, second, and last page of the document to be processed.
    pages = [1, 2, -1]
    requests = [{"input_config": input_config, "features": features, "pages": pages}]

    response = client.batch_annotate_files(requests=requests)
    for image_response in response.responses[0].responses:
        print(f"Full text: {image_response.full_text_annotation.text}")
        for page in image_response.full_text_annotation.pages:
            for block in page.blocks:
                print(f"\nBlock confidence: {block.confidence}")
                for par in block.paragraphs:
                    print(f"\tParagraph confidence: {par.confidence}")
                    for word in par.words:
                        print(f"\t\tWord confidence: {word.confidence}")
                        for symbol in word.symbols:
                            print(
                                "\t\t\tSymbol: {}, (confidence: {})".format(
                                    symbol.text, symbol.confidence
                                )
                            )

Cloud Storage의 파일 사용

다음 코드 샘플을 사용하여 Cloud Storage의 파일에 대한 기능 주석을 가져옵니다.

REST

작은 배치 파일에 대해 온라인 PDF/TIFF/GIF 기능 감지를 수행하려면 POST 요청을 만들고 적절한 요청 본문을 제공합니다.

요청 데이터를 사용하기 전에 다음을 바꿉니다.

  • CLOUD_STORAGE_FILE_URI: Cloud Storage 버킷에 있는 유효한 파일(PDF/TIFF)의 경로입니다. 적어도 파일에 대한 읽기 권한이 있어야 합니다. 예를 들면 다음과 같습니다.
    • gs://cloud-samples-data/vision/document_understanding/custom_0773375000.pdf
  • PROJECT_ID: Google Cloud 프로젝트 ID입니다.

필드별 고려사항:

  • inputConfig.mimeType - 'application/pdf', 'image/tiff', 'image/gif' 중 하나입니다.
  • pages - 파일에서 기능 감지를 수행할 특정 페이지를 지정합니다.

HTTP 메서드 및 URL:

POST https://vision.googleapis.com/v1/files:annotate

JSON 요청 본문:

{
  "requests": [
    {
      "inputConfig": {
        "gcsSource": {
          "uri": "CLOUD_STORAGE_FILE_URI"
        },
        "mimeType": "application/pdf"
      },
      "features": [
        {
          "type": "DOCUMENT_TEXT_DETECTION"
        }
      ],
      "pages": [
        1,2,3,4,5
      ]
    }
  ]
}

요청을 보내려면 다음 옵션 중 하나를 선택합니다.

curl

요청 본문을 request.json 파일에 저장하고 다음 명령어를 실행합니다.

curl -X POST \
-H "Authorization: Bearer $(gcloud auth print-access-token)" \
-H "x-goog-user-project: PROJECT_ID" \
-H "Content-Type: application/json; charset=utf-8" \
-d @request.json \
"https://vision.googleapis.com/v1/files:annotate"

PowerShell

요청 본문을 request.json 파일에 저장하고 다음 명령어를 실행합니다.

$cred = gcloud auth print-access-token
$headers = @{ "Authorization" = "Bearer $cred"; "x-goog-user-project" = "PROJECT_ID" }

Invoke-WebRequest `
-Method POST `
-Headers $headers `
-ContentType: "application/json; charset=utf-8" `
-InFile request.json `
-Uri "https://vision.googleapis.com/v1/files:annotate" | Select-Object -Expand Content
응답:

annotate 요청이 성공하면 즉시 JSON 응답이 반환됩니다.

이 기능(DOCUMENT_TEXT_DETECTION)의 경우 JSON 응답은 이미지의 문서 텍스트 감지 요청의 응답과 유사합니다. 응답에는 단락, 단어, 개별 기호로 나뉜 블록의 경계 상자가 포함됩니다. 전체 텍스트도 감지됩니다. 응답에는 지정된 PDF 또는 TIFF의 위치와 결과의 파일상 페이지 번호를 표시하는 context 필드도 포함됩니다.

다음 JSON 응답은 단일 페이지(2페이지)에 대한 것이며 보기 편하도록 짧게 편집하였습니다.

Java

이 샘플을 시도하기 전에 Vision API 빠른 시작: 클라이언트 라이브러리 사용의 Java 설정 안내를 따르세요. 자세한 내용은 Vision API Java 참고 문서를 참조하세요.

import com.google.cloud.vision.v1.AnnotateFileRequest;
import com.google.cloud.vision.v1.AnnotateImageResponse;
import com.google.cloud.vision.v1.BatchAnnotateFilesRequest;
import com.google.cloud.vision.v1.BatchAnnotateFilesResponse;
import com.google.cloud.vision.v1.Block;
import com.google.cloud.vision.v1.Feature;
import com.google.cloud.vision.v1.GcsSource;
import com.google.cloud.vision.v1.ImageAnnotatorClient;
import com.google.cloud.vision.v1.InputConfig;
import com.google.cloud.vision.v1.Page;
import com.google.cloud.vision.v1.Paragraph;
import com.google.cloud.vision.v1.Symbol;
import com.google.cloud.vision.v1.Word;
import java.io.IOException;

public class BatchAnnotateFilesGcs {

  public static void batchAnnotateFilesGcs() throws IOException {
    String gcsUri = "gs://cloud-samples-data/vision/document_understanding/kafka.pdf";
    batchAnnotateFilesGcs(gcsUri);
  }

  public static void batchAnnotateFilesGcs(String gcsUri) throws IOException {
    // Initialize client that will be used to send requests. This client only needs to be created
    // once, and can be reused for multiple requests. After completing all of your requests, call
    // the "close" method on the client to safely clean up any remaining background resources.
    try (ImageAnnotatorClient imageAnnotatorClient = ImageAnnotatorClient.create()) {
      // You can send multiple files to be annotated, this sample demonstrates how to do this with
      // one file. If you want to use multiple files, you have to create a `AnnotateImageRequest`
      // object for each file that you want annotated.
      // First specify where the vision api can find the image
      GcsSource gcsSource = GcsSource.newBuilder().setUri(gcsUri).build();

      // Specify the input config with the file's uri and its type.
      // Supported mime_type: application/pdf, image/tiff, image/gif
      // https://cloud.google.com/vision/docs/reference/rpc/google.cloud.vision.v1#inputconfig
      InputConfig inputConfig =
          InputConfig.newBuilder().setMimeType("application/pdf").setGcsSource(gcsSource).build();

      // Set the type of annotation you want to perform on the file
      // https://cloud.google.com/vision/docs/reference/rpc/google.cloud.vision.v1#google.cloud.vision.v1.Feature.Type
      Feature feature = Feature.newBuilder().setType(Feature.Type.DOCUMENT_TEXT_DETECTION).build();

      // Build the request object for that one file. Note: for additional file you have to create
      // additional `AnnotateFileRequest` objects and store them in a list to be used below.
      // Since we are sending a file of type `application/pdf`, we can use the `pages` field to
      // specify which pages to process. The service can process up to 5 pages per document file.
      // https://cloud.google.com/vision/docs/reference/rpc/google.cloud.vision.v1#google.cloud.vision.v1.AnnotateFileRequest
      AnnotateFileRequest fileRequest =
          AnnotateFileRequest.newBuilder()
              .setInputConfig(inputConfig)
              .addFeatures(feature)
              .addPages(1) // Process the first page
              .addPages(2) // Process the second page
              .addPages(-1) // Process the last page
              .build();

      // Add each `AnnotateFileRequest` object to the batch request.
      BatchAnnotateFilesRequest request =
          BatchAnnotateFilesRequest.newBuilder().addRequests(fileRequest).build();

      // Make the synchronous batch request.
      BatchAnnotateFilesResponse response = imageAnnotatorClient.batchAnnotateFiles(request);

      // Process the results, just get the first result, since only one file was sent in this
      // sample.
      for (AnnotateImageResponse imageResponse :
          response.getResponsesList().get(0).getResponsesList()) {
        System.out.format("Full text: %s%n", imageResponse.getFullTextAnnotation().getText());
        for (Page page : imageResponse.getFullTextAnnotation().getPagesList()) {
          for (Block block : page.getBlocksList()) {
            System.out.format("%nBlock confidence: %s%n", block.getConfidence());
            for (Paragraph par : block.getParagraphsList()) {
              System.out.format("\tParagraph confidence: %s%n", par.getConfidence());
              for (Word word : par.getWordsList()) {
                System.out.format("\t\tWord confidence: %s%n", word.getConfidence());
                for (Symbol symbol : word.getSymbolsList()) {
                  System.out.format(
                      "\t\t\tSymbol: %s, (confidence: %s)%n",
                      symbol.getText(), symbol.getConfidence());
                }
              }
            }
          }
        }
      }
    }
  }
}

Node.js

이 샘플을 사용해 보기 전에 Vision 빠른 시작: 클라이언트 라이브러리 사용Node.js 설정 안내를 따르세요. 자세한 내용은 Vision Node.js API 참고 문서를 참조하세요.

Vision에 인증하려면 애플리케이션 기본 사용자 인증 정보를 설정합니다. 자세한 내용은 로컬 개발 환경의 인증 설정을 참조하세요.

/**
 * TODO(developer): Uncomment these variables before running the sample.
 */
// const gcsSourceUri = 'gs://cloud-samples-data/vision/document_understanding/kafka.pdf';

// Imports the Google Cloud client libraries
const {ImageAnnotatorClient} = require('@google-cloud/vision').v1;

// Instantiates a client
const client = new ImageAnnotatorClient();

// You can send multiple files to be annotated, this sample demonstrates how to do this with
// one file. If you want to use multiple files, you have to create a request object for each file that you want annotated.
async function batchAnnotateFiles() {
  // First Specify the input config with the file's uri and its type.
  // Supported mime_type: application/pdf, image/tiff, image/gif
  // https://cloud.google.com/vision/docs/reference/rpc/google.cloud.vision.v1#inputconfig
  const inputConfig = {
    mimeType: 'application/pdf',
    gcsSource: {
      uri: gcsSourceUri,
    },
  };

  // Set the type of annotation you want to perform on the file
  // https://cloud.google.com/vision/docs/reference/rpc/google.cloud.vision.v1#google.cloud.vision.v1.Feature.Type
  const features = [{type: 'DOCUMENT_TEXT_DETECTION'}];

  // Build the request object for that one file. Note: for additional files you have to create
  // additional file request objects and store them in a list to be used below.
  // Since we are sending a file of type `application/pdf`, we can use the `pages` field to
  // specify which pages to process. The service can process up to 5 pages per document file.
  // https://cloud.google.com/vision/docs/reference/rpc/google.cloud.vision.v1#google.cloud.vision.v1.AnnotateFileRequest
  const fileRequest = {
    inputConfig: inputConfig,
    features: features,
    // Annotate the first two pages and the last one (max 5 pages)
    // First page starts at 1, and not 0. Last page is -1.
    pages: [1, 2, -1],
  };

  // Add each `AnnotateFileRequest` object to the batch request.
  const request = {
    requests: [fileRequest],
  };

  // Make the synchronous batch request.
  const [result] = await client.batchAnnotateFiles(request);

  // Process the results, just get the first result, since only one file was sent in this
  // sample.
  const responses = result.responses[0].responses;

  for (const response of responses) {
    console.log(`Full text: ${response.fullTextAnnotation.text}`);
    for (const page of response.fullTextAnnotation.pages) {
      for (const block of page.blocks) {
        console.log(`Block confidence: ${block.confidence}`);
        for (const paragraph of block.paragraphs) {
          console.log(` Paragraph confidence: ${paragraph.confidence}`);
          for (const word of paragraph.words) {
            const symbol_texts = word.symbols.map(symbol => symbol.text);
            const word_text = symbol_texts.join('');
            console.log(
              `  Word text: ${word_text} (confidence: ${word.confidence})`
            );
            for (const symbol of word.symbols) {
              console.log(
                `   Symbol: ${symbol.text} (confidence: ${symbol.confidence})`
              );
            }
          }
        }
      }
    }
  }
}

batchAnnotateFiles();

Python

이 샘플을 사용해 보기 전에 Vision 빠른 시작: 클라이언트 라이브러리 사용Python 설정 안내를 따르세요. 자세한 내용은 Vision Python API 참고 문서를 참조하세요.

Vision에 인증하려면 애플리케이션 기본 사용자 인증 정보를 설정합니다. 자세한 내용은 로컬 개발 환경의 인증 설정을 참조하세요.


from google.cloud import vision_v1


def sample_batch_annotate_files(
    storage_uri="gs://cloud-samples-data/vision/document_understanding/kafka.pdf",
):
    """Perform batch file annotation."""
    mime_type = "application/pdf"

    client = vision_v1.ImageAnnotatorClient()

    gcs_source = {"uri": storage_uri}
    input_config = {"gcs_source": gcs_source, "mime_type": mime_type}
    features = [{"type_": vision_v1.Feature.Type.DOCUMENT_TEXT_DETECTION}]

    # The service can process up to 5 pages per document file.
    # Here we specify the first, second, and last page of the document to be
    # processed.
    pages = [1, 2, -1]
    requests = [{"input_config": input_config, "features": features, "pages": pages}]

    response = client.batch_annotate_files(requests=requests)
    for image_response in response.responses[0].responses:
        print(f"Full text: {image_response.full_text_annotation.text}")
        for page in image_response.full_text_annotation.pages:
            for block in page.blocks:
                print(f"\nBlock confidence: {block.confidence}")
                for par in block.paragraphs:
                    print(f"\tParagraph confidence: {par.confidence}")
                    for word in par.words:
                        print(f"\t\tWord confidence: {word.confidence}")
                        for symbol in word.symbols:
                            print(
                                "\t\t\tSymbol: {}, (confidence: {})".format(
                                    symbol.text, symbol.confidence
                                )
                            )

직접 해 보기

아래에 소개된 작은 배치 온라인 기능 감지를 사용해 보세요.

이미 지정된 PDF 파일을 사용하거나 자체 파일을 대신 지정할 수 있습니다.

PDF 파일의 처음 5페이지
gs://cloud-samples-data/vision/document_understanding/custom_0773375000.pdf

이 요청에 지정된 기능 유형에는 세 가지가 있습니다.

  • DOCUMENT_TEXT_DETECTION
  • LABEL_DETECTION
  • CROP_HINTS

요청({"type": "FEATURE_NAME"})에서 적절한 객체를 변경하여 다른 기능 유형을 추가하거나 삭제할 수 있습니다.

실행을 선택하여 요청을 보냅니다.

요청 본문:

{
  "requests": [
    {
      "inputConfig": {
        "gcsSource": {
          "uri": "gs://cloud-samples-data/vision/document_understanding/custom_0773375000.pdf"
        },
        "mimeType": "application/pdf"
      },
      "features": [
        {
          "type": "DOCUMENT_TEXT_DETECTION"
        },
        {
          "type": "LABEL_DETECTION"
        },
        {
          "type": "CROP_HINTS"
        }
      ],
      "pages": [
        1,
        2,
        3,
        4,
        5
      ]
    }
  ]
}