本教程将引导您设置一组应用,这些应用通过 Pub/Sub(而不是同步远程过程调用 (RPC))发送消息进行通信。通过解耦应用,消息传递:
- 使应用更稳健
- 可以简化开发
例如,调用者(发布者)不需要接收者(订阅者)随时待命。发布者向 Pub/Sub 发送消息。 发布者不需要知道需要接收消息的订阅者应用具体是哪个以及应用的数量是多少。因此,您可以借助该服务在消息可用时将消息传递给一个或多个订阅者应用。
系统概览
在本教程中,您将启动一个发布者应用,该应用使用一对多通信将“Hello, World!”消息发送给两个订阅者,如下图所示:

这两个订阅者应用使用相同的代码,但您可以在不同的时间启动它们。此过程演示了 Pub/Sub 启用异步通信的方式。如需构建此系统,请完成以下步骤:
- 创建应用用于进行身份验证的 IAM 服务账号。
- 设置 IAM 权限
- 创建 Pub/Sub 主题和订阅。
- 启动三个独立应用:一个发布者应用和两个订阅者应用
准备工作
- Sign in to your Google Cloud account. If you're new to Google Cloud, create an account to evaluate how our products perform in real-world scenarios. New customers also get $300 in free credits to run, test, and deploy workloads.
-
Install the Google Cloud CLI.
-
如果您使用的是外部身份提供方 (IdP),则必须先使用联合身份登录 gcloud CLI。
-
如需初始化 gcloud CLI,请运行以下命令:
gcloud init -
Create or select a Google Cloud project.
Roles required to select or create a project
- Select a project: Selecting a project doesn't require a specific IAM role—you can select any project that you've been granted a role on.
-
Create a project: To create a project, you need the Project Creator
(
roles/resourcemanager.projectCreator), which contains theresourcemanager.projects.createpermission. Learn how to grant roles.
-
Create a Google Cloud project:
gcloud projects create PROJECT_ID
Replace
PROJECT_IDwith a name for the Google Cloud project you are creating. -
Select the Google Cloud project that you created:
gcloud config set project PROJECT_ID
Replace
PROJECT_IDwith your Google Cloud project name.
-
Verify that billing is enabled for your Google Cloud project.
-
Enable the Pub/Sub API:
Roles required to enable APIs
To enable APIs, you need the Service Usage Admin IAM role (
roles/serviceusage.serviceUsageAdmin), which contains theserviceusage.services.enablepermission. Learn how to grant roles.gcloud services enable pubsub.googleapis.com
-
Create local authentication credentials for your user account:
gcloud auth application-default login
If an authentication error is returned, and you are using an external identity provider (IdP), confirm that you have signed in to the gcloud CLI with your federated identity.
-
Grant roles to your user account. Run the following command once for each of the following IAM roles:
roles/pubsub.publisher, roles/pubsub.subscribergcloud projects add-iam-policy-binding PROJECT_ID --member="user:USER_IDENTIFIER" --role=ROLE
Replace the following:
PROJECT_ID: your project ID.USER_IDENTIFIER: the identifier for your user account—for example,myemail@example.com.ROLE: the IAM role that you grant to your user account.
-
Install the Google Cloud CLI.
-
如果您使用的是外部身份提供方 (IdP),则必须先使用联合身份登录 gcloud CLI。
-
如需初始化 gcloud CLI,请运行以下命令:
gcloud init -
Create or select a Google Cloud project.
Roles required to select or create a project
- Select a project: Selecting a project doesn't require a specific IAM role—you can select any project that you've been granted a role on.
-
Create a project: To create a project, you need the Project Creator
(
roles/resourcemanager.projectCreator), which contains theresourcemanager.projects.createpermission. Learn how to grant roles.
-
Create a Google Cloud project:
gcloud projects create PROJECT_ID
Replace
PROJECT_IDwith a name for the Google Cloud project you are creating. -
Select the Google Cloud project that you created:
gcloud config set project PROJECT_ID
Replace
PROJECT_IDwith your Google Cloud project name.
-
Verify that billing is enabled for your Google Cloud project.
-
Enable the Pub/Sub API:
Roles required to enable APIs
To enable APIs, you need the Service Usage Admin IAM role (
roles/serviceusage.serviceUsageAdmin), which contains theserviceusage.services.enablepermission. Learn how to grant roles.gcloud services enable pubsub.googleapis.com
-
Create local authentication credentials for your user account:
gcloud auth application-default login
If an authentication error is returned, and you are using an external identity provider (IdP), confirm that you have signed in to the gcloud CLI with your federated identity.
-
Grant roles to your user account. Run the following command once for each of the following IAM roles:
roles/pubsub.publisher, roles/pubsub.subscribergcloud projects add-iam-policy-binding PROJECT_ID --member="user:USER_IDENTIFIER" --role=ROLE
Replace the following:
PROJECT_ID: your project ID.USER_IDENTIFIER: the identifier for your user account—for example,myemail@example.com.ROLE: the IAM role that you grant to your user account.
下载本教程所需的 Pub/Sub Python 文件。
git clone https://github.com/googleapis/python-pubsub.git
关闭所有打开的终端,然后再继续操作。
为每个教程应用(一个发布者应用和两个订阅者应用)启动一个终端。为方便起见,本教程将这些终端称为:
- 发布者终端
- sub_one 终端
- sub_two 终端
在 publisher 终端中,创建并激活名为
pyenv-qs的 Python 虚拟环境。Bash
python -m venv pyenv-qs
source pyenv-qs/bin/activate
PowerShell
py -m venv pyenv-qs
.\pyenv-qs\Scripts\activate
在 sub_one 和 sub_two 终端中,运行以下命令:
Bash
source pyenv-qs/bin/activate
PowerShell
.\pyenv-qs\Scripts\activate
运行 activate 命令后,命令提示符会包含以下值
(pyenv-qs) $。在发布者终端中,使用
pip安装 Pub/Sub Python 客户端库:python -m pip install --upgrade google-cloud-pubsub
在所有三个终端中,使用当前项目 ID 设置环境变量。此 gcloud 命令可确定您选择的项目 ID 并将其设置为变量:
Bash
export PROJECT=`gcloud config get-value project`
PowerShell
$env:PROJECT=$(gcloud config get-value project)
在所有三个终端中,切换到包含示例代码的项目路径。
cd python-pubsub/samples/snippets/quickstart/
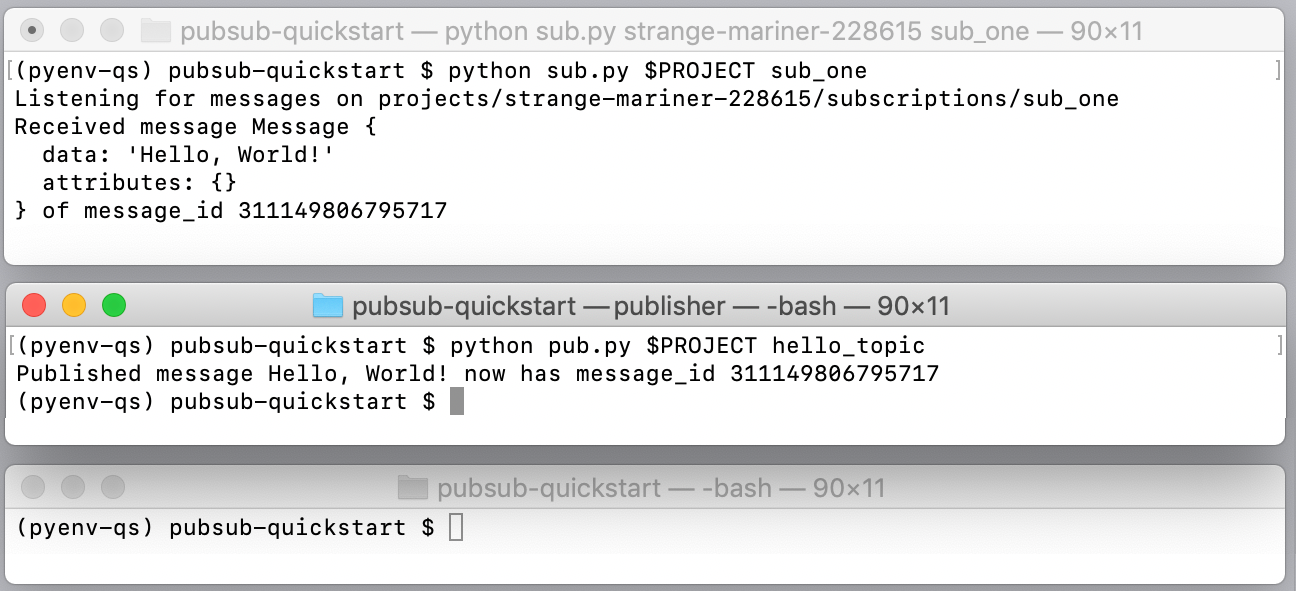
发布者应用将“Hello, World!”消息发送给 Pub/Sub,此时该应用还不知道现在是否有任何订阅。该服务器还分配一个消息 ID。
订阅者 1 应用接收“Hello World”消息,输出该消息,并向 Pub/Sub 发送确认。
发布者应用输出确认。确认告知 Pub/Sub 消息已成功处理,无需重新发送给此订阅者或任何其他 sub_one 订阅者。
- 停止所有正在运行的应用。
- 从本地环境中删除示例代码目录。
删除主题。
gcloud pubsub topics delete hello_topic
删除订阅。
gcloud pubsub subscriptions delete sub_one
gcloud pubsub subscriptions delete sub_two
在 Google Cloud 控制台的 IAM 和管理部分关闭教程项目。
-
Optional: Revoke the authentication credentials that you created, and delete the local credential file.
gcloud auth application-default revoke
-
Optional: Revoke credentials from the gcloud CLI.
gcloud auth revoke
检查教程中的
pub.py和sub.py代码,并浏览 GitHub 中的其他 Pub/Sub 示例。作为练习,请创建一个每秒发布一次本地时间的pub.py版本。了解如何批量处理消息。
使用推送订阅,接收触发 App Engine 端点或 Cloud Functions 函数的消息。
使用重放检索以前确认的消息。 默认情况下,Pub/Sub 会从订阅中移除已确认的消息。例如,在本教程中,您将无法重新运行
sub.py来再次接收“Hello, World!”消息。您可以使用重放功能设置订阅,以便在确认消息后接收这些消息。开始使用其他语言的客户端库。
安装 Python
本教程使用 Pub/Sub 客户端库,该库需要 Python 3.7 或更高版本。按照安装 Python 的说明完成操作。
设置 Pub/Sub 项目
为了管理发布应用和订阅应用之间的消息流,您需要创建一个主题和两个不同的订阅。
创建 Pub/Sub 主题
创建 ID 为 hello_topic 的主题:
gcloud pubsub topics create hello_topic
创建 Pub/Sub 订阅
创建两个订阅,并将它们附加到您的主题。
这些订阅是 StreamingPull 订阅,这是一种拉取订阅。
订阅 1
创建 ID 为 sub_one 的订阅,并将其附加到 hello_topic。
gcloud pubsub subscriptions create sub_one --topic=hello_topic
订阅 2
创建 ID 为 sub_two 的订阅,并将其附加到 hello_topic。
gcloud pubsub subscriptions create sub_two --topic=hello_topic
构建一对多系统
下载发布者和订阅者代码
设置三个终端
启动应用并观察消息流
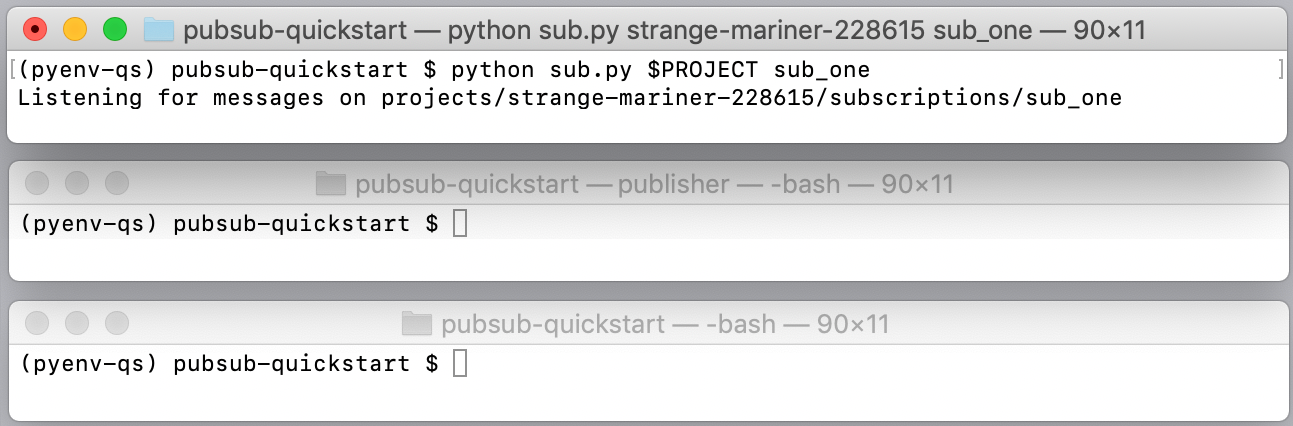
启动订阅者 1 应用
在 sub_one 终端中,启动订阅者 1:
Bash
python sub.py $PROJECT sub_one
PowerShell
py sub.py $env:PROJECT sub_one
启动后,此应用会打开与服务器之间的双向流式传输连接。Pub/Sub 通过数据流传送消息。
启动发布者应用
在发布者终端中,启动发布者应用:
Bash
python pub.py $PROJECT hello_topic
PowerShell
py pub.py $env:PROJECT hello_topic
发布者应用启动后,Pub/Sub 系统将执行以下操作:
Pub/Sub 移除 sub_one 中的消息。
启动订阅者 2 应用
在 sub_two 终端中,启动订阅者 2:
Bash
python sub.py $PROJECT sub_two
PowerShell
py sub.py $env:PROJECT sub_two
该订阅者接收传递给 sub_two 订阅的消息。
订阅者 2 重复使用 sub.py 脚本。其区别在于,订阅者 2 在发布者将消息发送到主题和订阅之后才会启动。如果发布者直接调用订阅者 2,则发布应用要么等到订阅者 2 启动,要么就会超时。Pub/Sub 通过有效地为订阅者 2 保存该消息来管理此过程。

现在,您可以使用 Pub/Sub 进行开发了!
结果怎么样?
Pub/Sub 支持页面提供了其他资源和链接。
清理
后续步骤
以下是您可以尝试的一些事项: