Standardlaufzeiten mit GPUs aktivieren
Wenn Sie während der Vorschau Unterstützung benötigen, senden Sie eine E-Mail an vertex-notebooks-previews-external@google.com.
In diesem Dokument wird beschrieben, wie Sie eine Standardlaufzeit mit GPUs für Colab Enterprise-Nutzer in einem Projekt aktivieren. Nachdem Sie eine Standardlaufzeit mit GPUs aktiviert haben, können Nutzer in ihrem Notebook per Mausklick von einer regulären Standardlaufzeit zu einer Standardlaufzeit mit GPUs wechseln.
Dieses Dokument richtet sich an Colab Enterprise-Administratoren, die Standardlaufzeiten mit GPUs für andere Nutzer in ihrer Organisation aktivieren möchten. Dabei wird davon ausgegangen, dass Sie über Kenntnisse zu folgenden Themen verfügen:
- Informationen zum Verwalten von Colab Enterprise-Laufzeiten und ‑Laufzeitvorlagen.
- Verwenden von Identity and Access Management (IAM) zur Zugriffssteuerung
Übersicht
Damit Nutzer zu einer Standardlaufzeit mit GPUs wechseln können, muss ein Administrator (roles/aiplatform.colabEnterpriseAdmin) oder ein Nutzerkonto mit der Berechtigung aiplatform.notebookRuntimeTemplates.create zuerst eine Standardlaufzeit mit GPUs erstellen.
Wenn Sie zum ersten Mal eine Standardlaufzeit mit GPUs erstellen, wird in Colab Enterprise eine neue Standardlaufzeitvorlage mit GPUs in den Spezifikationen erstellt. Die ursprüngliche Standardlaufzeit ist davon nicht betroffen und bleibt bestehen, bis sie abläuft oder gelöscht wird. Nachdem die neue Standardlaufzeitvorlage mit GPUs erstellt wurde, kann jeder Nutzer mit der Berechtigung aiplatform.notebookRuntimes.assign für das Projekt und der Berechtigung aiplatform.notebookRuntimeTemplates.apply für die Laufzeitvorlage eine Standardlaufzeit mit GPUs erstellen und verwenden. Diese Berechtigungen sind in der Rolle „Colab Enterprise User“ (roles/aiplatform.colabEnterpriseUser) enthalten.
Spezifikationen
Die Standardlaufzeit mit GPUs hat andere Spezifikationen als die ursprüngliche Standardlaufzeit. Die verfügbaren Maschinentypen, GPUs und Datenträgertypen variieren je nach Region. Daher können einige Spezifikationen von der ursprünglichen Standardlaufzeit abweichen.
In der folgenden Tabelle werden die Spezifikationen für eine Standardlaufzeit mit GPUs basierend auf der Region der Standardlaufzeit beschrieben.
| Beschreibung der Region | Spezifikationen für Standardlaufzeit |
|---|---|
| Regionen mit Unterstützung für L4-GPUs |
|
| Regionen, die keine L4-GPUs, aber T4-GPUs unterstützen |
|
| Regionen, die keine L4- oder T4-GPUs unterstützen | Standardlaufzeiten mit GPUs werden nicht unterstützt. |
Verfügbarkeit von Beschleunigern
Colab Enterprise unterstützt Standardlaufzeiten mit den folgenden Beschleunigertypen:
- L4
- T4
Informationen zur regionalen Verfügbarkeit dieser Beschleuniger finden Sie unter Beschleuniger verwenden.
Hinweise
- Sign in to your Google Cloud account. If you're new to Google Cloud, create an account to evaluate how our products perform in real-world scenarios. New customers also get $300 in free credits to run, test, and deploy workloads.
-
In the Google Cloud console, on the project selector page, select or create a Google Cloud project.
Roles required to select or create a project
- Select a project: Selecting a project doesn't require a specific IAM role—you can select any project that you've been granted a role on.
-
Create a project: To create a project, you need the Project Creator
(
roles/resourcemanager.projectCreator), which contains theresourcemanager.projects.createpermission. Learn how to grant roles.
-
Verify that billing is enabled for your Google Cloud project.
-
Enable the Vertex AI, Dataform, and Compute Engine APIs.
Roles required to enable APIs
To enable APIs, you need the Service Usage Admin IAM role (
roles/serviceusage.serviceUsageAdmin), which contains theserviceusage.services.enablepermission. Learn how to grant roles. -
In the Google Cloud console, go to the Colab Enterprise My notebooks page.
-
In the Region menu, select the region that contains your notebook.
-
Click the notebook that you want to open. If you haven't created a notebook yet, create a notebook.
-
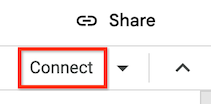
In your notebook, click Connect.
-
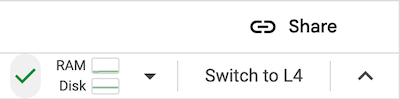
After Colab Enterprise connects to the default runtime, in the top right corner of your notebook, click the button to switch to a default runtime with GPUs. For example, if your notebook is in a region that supports L4 accelerators, click Switch to L4.
Default runtimes with GPUs are only available in regions that support specific accelerator availability. See Accelerator availability.
You must first connect a notebook to a default runtime to be able to switch to a default runtime with GPUs.
- To manage your runtime, see Manage runtimes.
- Learn more about runtimes and runtime templates.
Erforderliche Rollen
Bitten Sie Ihren Administrator, Ihrem Nutzerkonto die IAM-Rolle „Colab Enterprise Admin“ (roles/aiplatform.colabEnterpriseAdmin)
IAM role on the project.
For more information about granting roles, see Manage access to projects, folders, and organizations.
Your administrator might also be able to give your user account
the required permissions through custom
roles or other predefined
roles.
Enable GPUs for default runtimes
To enable GPUs for default runtimes, do the following:
Colab Enterprise creates a new default runtime that has
GPUs, and then connects to the runtime. The ability to switch to a
default runtime with GPUs is enabled for other users in the project.
Turn off GPUs for default runtimes
To turn off the ability to switch to a default runtime with GPUs, you
must delete the runtime template named Default with GPU.
See Delete a runtime template.
Limitations
What's next