Membuat dan menetapkan tingkat akses kustom menggunakan data Falcon ZTA
Tetap teratur dengan koleksi
Simpan dan kategorikan konten berdasarkan preferensi Anda.
Dokumen ini menunjukkan cara membuat tingkat akses kustom berbasis perangkat menggunakan data Falcon ZTA dan menetapkan tingkat akses tersebut ke resource organisasi Anda.
Lakukan upgrade ke Chrome Enterprise Premium, yang merupakan langganan berbayar Chrome Enterprise Premium.
Untuk melakukan upgrade, hubungi tim penjualan kami.
Pastikan Anda memiliki salah satu peran Identity and Access Management berikut:
Anda dapat membuat tingkat akses dengan satu atau beberapa kondisi. Jika Anda ingin perangkat pengguna memenuhi beberapa kondisi (logika DAN pada kondisi), buat tingkat akses yang berisi semua kondisi yang diperlukan.
Untuk membuat tingkat akses kustom baru menggunakan data yang disediakan oleh Falcon ZTA, lakukan
hal berikut:
Buka halaman Access Context Manager di konsol Google Cloud .
Di panel New Access Level, masukkan informasi berikut:
Di kolom Judul tingkat akses, masukkan judul untuk tingkat akses.
Judul maksimal 50 karakter, diawali dengan huruf, dan hanya boleh berisi angka, huruf, garis bawah, dan spasi.
Di bagian Buat Kondisi di, pilih Mode Lanjutan.
Di bagian Kondisi, masukkan ekspresi untuk tingkat akses
kustom Anda. Kondisi harus diselesaikan ke satu nilai boolean.
Untuk menemukan kolom CrowdStrike yang tersedia untuk ekspresi CEL Anda, Anda dapat meninjau
data Falcon ZTA
yang dikumpulkan untuk perangkat Anda.
Contoh
Ekspresi CEL berikut membuat aturan yang mengizinkan akses hanya dari
perangkat yang dikelola Falcon ZTA dengan skor penilaian OS lebih tinggi dari 50:
Ekspresi CEL berikut membuat aturan yang mengizinkan akses hanya dari perangkat yang
dinilai oleh Falcon ZTA dalam dua hari terakhir. Kolom iat (dikeluarkan pada) diberikan
sebagai bagian dari penilaian zero trust Falcon ZTA.
Ekspresi CEL berikut membuat aturan yang mengizinkan akses hanya dari perangkat yang penilaian Falcon ZTA-nya belum berakhir. Kolom exp (masa berlaku) diberikan sebagai bagian dari penilaian zero trust Falcon ZTA.
Untuk contoh dan informasi selengkapnya tentang dukungan Common Expression Language (CEL) dan tingkat akses kustom, lihat Spesifikasi tingkat akses kustom.
Klik Simpan.
Menetapkan tingkat akses kustom
Anda dapat menetapkan tingkat akses kustom untuk mengontrol akses ke aplikasi. Aplikasi ini mencakup aplikasi Google Workspace dan aplikasi yang dilindungi oleh Identity-Aware Proxy di Google Cloud (juga dikenal sebagai resource yang diamankan dengan IAP).
Anda dapat menetapkan satu atau beberapa tingkat akses untuk aplikasi. Jika Anda
memilih beberapa tingkat akses, perangkat pengguna hanya perlu memenuhi kondisi di salah satu
tingkat akses untuk diberi akses ke aplikasi.
Menetapkan tingkat akses kustom untuk aplikasi Google Workspace
Tetapkan tingkat akses untuk aplikasi Google Workspace
dari konsol Admin Google Workspace:
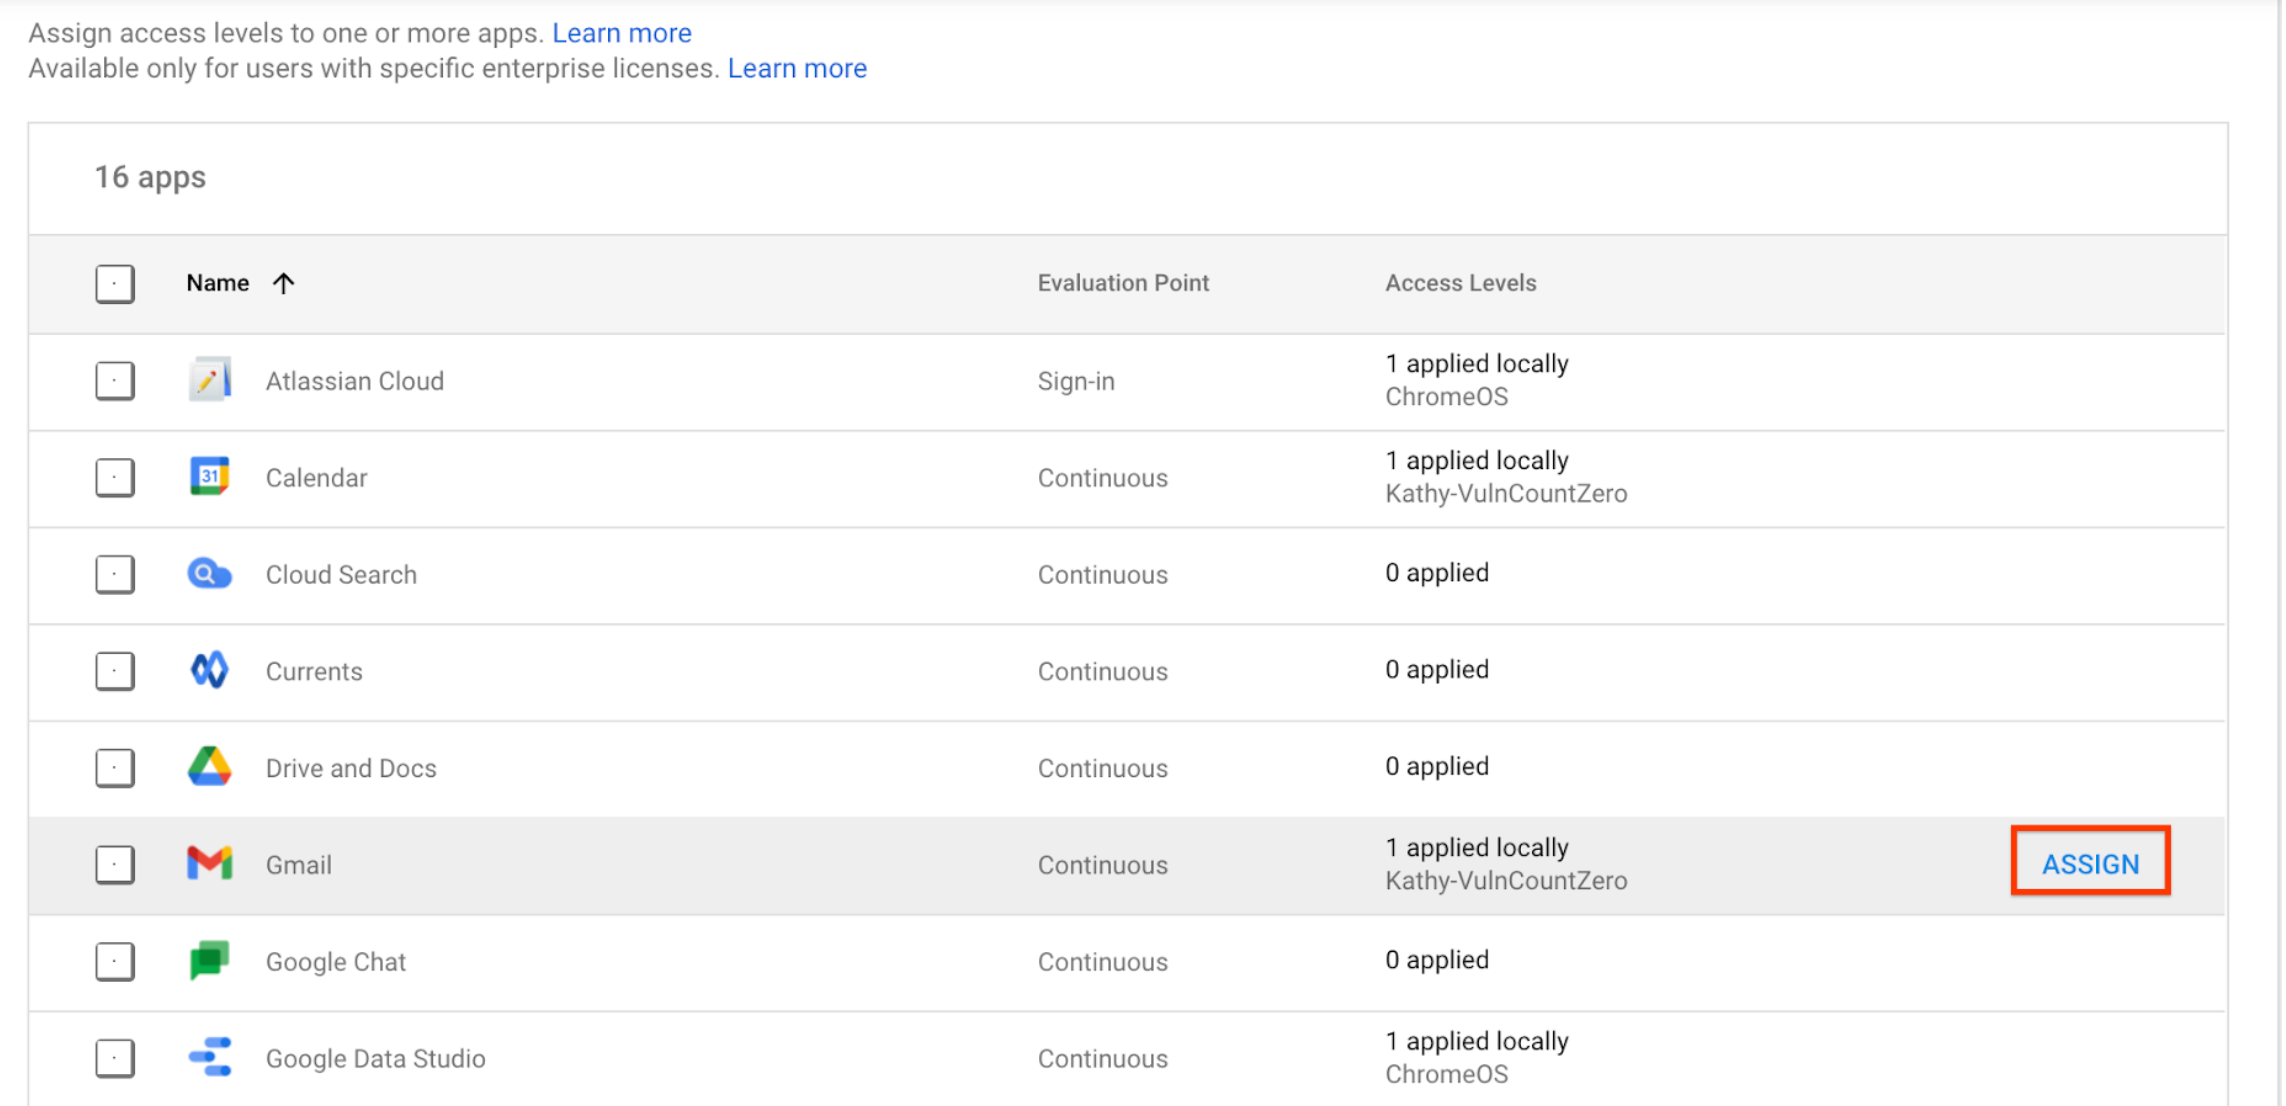
Dari Halaman beranda konsol Admin, buka Keamanan > Akses Kontekstual.
Di bagian Unit organisasi, pilih unit organisasi
atau grup Anda.
Pilih aplikasi yang ingin Anda tetapkan tingkat aksesnya, lalu klik Tetapkan.
Anda akan melihat daftar semua tingkat akses. Tingkat akses adalah resource bersama
antara Google Workspace, Cloud Identity, dan Google Cloud , sehingga Anda
mungkin melihat tingkat akses yang tidak Anda buat dalam daftar.
Pilih satu atau beberapa tingkat akses untuk aplikasi.
Untuk menerapkan tingkat akses ke pengguna di aplikasi desktop dan seluler (dan di browser), pilih Terapkan untuk aplikasi seluler dan desktop Google.
Kotak centang ini hanya berlaku untuk aplikasi bawaan.
Klik Simpan.
Nama tingkat akses muncul di daftar tingkat akses yang ditetapkan di samping
aplikasi.
Menetapkan tingkat akses kustom untuk resource yang diamankan dengan IAP
[[["Mudah dipahami","easyToUnderstand","thumb-up"],["Memecahkan masalah saya","solvedMyProblem","thumb-up"],["Lainnya","otherUp","thumb-up"]],[["Sulit dipahami","hardToUnderstand","thumb-down"],["Informasi atau kode contoh salah","incorrectInformationOrSampleCode","thumb-down"],["Informasi/contoh yang saya butuhkan tidak ada","missingTheInformationSamplesINeed","thumb-down"],["Masalah terjemahan","translationIssue","thumb-down"],["Lainnya","otherDown","thumb-down"]],["Terakhir diperbarui pada 2025-09-05 UTC."],[],[],null,["# Create and assign custom access levels using Falcon ZTA data\n\nThis document shows you how to create device-based custom access levels using Falcon ZTA\ndata and assign those access levels to your organizational resources.\n\nBefore you begin\n----------------\n\n- [Set up Chrome Enterprise Premium and Falcon ZTA integration](/chrome-enterprise-premium/docs/setting-up-cs).\n- Upgrade to Chrome Enterprise Premium, which is the paid subscription of Chrome Enterprise Premium. To upgrade, [contact our sales team](https://go.chronicle.security/beyondcorp-enterprise-upgrade).\n- Ensure that you have one of the following Identity and Access Management roles:\n - Access Context Manager Admin (`roles/accesscontextmanager.policyAdmin`)\n - Access Context Manager Editor (`roles/accesscontextmanager.policyEditor`)\n- Understand the objects and attributes that are used to build the [Common Expression Language (CEL)](https://opensource.google.com/projects/cel) expressions for custom access levels. For details, see [Custom access level specification](/access-context-manager/docs/custom-access-level-spec).\n\nCreate custom access levels\n---------------------------\n\nYou can create access levels with one or more conditions. If you want the users'\ndevices to satisfy multiple conditions (a logical AND of conditions), create\nan access level that contains all the required conditions.\n\nTo create a new custom access level using the data provided by Falcon ZTA, do the\nfollowing:\n\n1. Go to the **Access Context Manager** page in the Google Cloud console.\n\n [Go to Access Context Manager](https://console.cloud.google.com/security/access-level)\n2. If you are prompted, select your organization.\n3. On the **Access Context Manager** page, click **New**.\n4. In the **New Access Level** pane, enter the following:\n 1. In the **Access level title** field, enter a title for the access level. The title must be at most 50 characters, start with a letter, and can contain only numbers, letters, underscores, and spaces.\n 2. In the **Create Conditions in** section, select **Advanced Mode**.\n 3. In the **Conditions** section, enter the expressions for your custom access level. The condition must resolve to a single boolean value.\n\n To find the available CrowdStrike fields for your CEL expression, you can review the\n [Falcon ZTA data](/chrome-enterprise-premium/docs/setting-up-cs#verify-client-data)\n collected for your devices.\n **Examples**\n\n The following CEL expression creates a rule that allows access only from\n Falcon ZTA-managed devices with an OS assessment score higher than 50: \n\n ```scdoc\n device.vendors[\"CrowdStrike\"].is_managed_device == true && device.vendors[\"CrowdStrike\"].data[\"assessment.os\"] \u003e 50.0\n ```\n\n The following CEL expression creates a rule that allows access only from devices that\n Falcon ZTA assessed in the last two days. The `iat` (issued at) field is provided\n as part of the Falcon ZTA's zero trust assessment. \n\n ```text\n request.time - timestamp(device.vendors[\"CrowdStrike\"].data[\"iat\"]) \u003c duration(\"48h\")\n \n ```\n | **Note:** We recommend setting a value more than 90 minutes for `duration` because Chrome Enterprise Premium has an innate delay of 90 minutes for getting any new assessment by Falcon ZTA.\n\n The following CEL expression creates a rule that allows access only from devices whose\n Falcon ZTA's assessment is not expired. The `exp` field (expiry) field is\n provided as part of the Falcon ZTA's zero trust assessment. \n\n ```text\n timestamp(device.vendors[\"CrowdStrike\"].data[\"exp\"]) - request.time \u003e duration(\"0m\")\n \n ```\n\n For examples and more information about Common Expression Language\n (CEL) support and custom access levels, see the [Custom access level specification](/access-context-manager/docs/custom-access-level-spec).\n 4. Click **Save**.\n\nAssign custom access levels\n---------------------------\n\nYou can assign custom access levels to control access to\napplications. These applications include [Google Workspace](https://workspace.google.com/) apps\nand the applications that are protected by [Identity-Aware Proxy](/iap/docs/concepts-overview)\non Google Cloud (also known as IAP-secured resource).\nYou can assign one or more access levels for the apps. If you\nselect multiple access levels, users' devices only need to satisfy the conditions in **one**\nof the access levels to be granted access to the app.\n| **Note:** If you want user devices to satisfy conditions in more than one access level (a logical AND of access levels), create an access level with all the required conditions.\n\n### Assign custom access levels for Google Workspace applications\n\nAssign access levels for Google Workspace applications\nfrom the Google Workspace Admin console:\n\n1. From the Admin console Home page, go to **Security \\\u003e Context-Aware Access**.\n\n [Go to Context-Aware Access](https://admin.google.com/u/1/ac/security/context-aware)\n2. Click **Assign access levels**.\n\n You see a list of apps.\n3. In the **Organizational units** section, select your organizational unit or group.\n4. Select the app for which you want to assign an access level, and click **Assign**.\n\n You see a list of all access levels. Access levels are a shared resource\n between Google Workspace, Cloud Identity, and Google Cloud so you\n might see access levels that you didn't create in the list.\n5. Select one or more access levels for the app.\n6. To apply the access levels to users on desktop and mobile apps (and on the browser), select **Apply to Google desktop and mobile apps**. This checkbox applies to built-in apps only.\n7. Click **Save**. The access level name displays in the assigned access levels list next to the app.\n\n### Assign custom access levels for IAP-secured resources\n\nTo assign access levels for IAP-secured\nresources from the Google Cloud console, follow the instructions in\n[Apply an access level for IAP-secured resources](/chrome-enterprise-premium/docs/access-levels#applying_an_access_level)."]]