Mit Sammlungen den Überblick behalten
Sie können Inhalte basierend auf Ihren Einstellungen speichern und kategorisieren.
Kopierte Daten finalisieren
Durch das Finalisieren wird die Appliance für den Versand an Google vorbereitet. Dazu wird der Entschlüsselungsschlüssel entfernt, wodurch die Daten nicht mehr zugänglich sind, bis sie Google erreichen.
Wenn der Entschlüsselungsschlüssel entfernt wird, können Sie keine weiteren Daten in die Appliance kopieren, ohne alle zuvor kopierten Daten zu löschen.
Führen Sie den Befehl ta finalize aus: Geben Sie das ta_customer-Passwort ein, wenn Sie dazu aufgefordert werden, und notieren Sie sich den in der Ausgabe zurückgegebenen Sicherheitscode.
ta finalize
Die folgende Beispielantwort sieht ungefähr so aus wie die zurückgegebene Ausgabe:
Finalizing prepares the appliance for shipping by removing the decryption
key, making the data inaccessible until it reaches Google. Appliance local
storage will be removed during this process. Once finalized, there is no way
to access your data or add more data without deleting everything on the drive.

Are you ready to finalize the appliance and ship it back to Google? (y/n) y

Please enter user "ta_customer" password to finalize appliance:
Unmounted data partition and disabled automount.
Finalize step is complete.

This passcode must be used to get a return shipping label: NNNN
Enter the passcode returned by the 'ta finalize' command in the form
included in the email titled Google Transfer Appliance Return Instructions
sent by the Transfer Appliance Team.
If you forget your passcode, run 'ta status' to display it again.
Geben Sie den vom Befehl ta finalize zurückgegebenen Sicherheitscode in das Formular ein, das in der vom Transfer Appliance-Team gesendeten E-Mail mit dem Betreff Google Transfer Appliance Return Instructions enthalten ist.
Wenn Sie sich den Sicherheitscode noch einmal ansehen möchten, führen Sie ta status aus.
Das Transfer Appliance-Team antwortet mit dem Versandlabel für die Transfer Appliance für den angegebenen Sicherheitscode.
Sobald Sie das Versandlabel erhalten haben, schalten Sie die Appliance aus und stecken Sie dann alle Kabel ab.
Optional: Daten auf dem Gerät löschen
Durch das Löschen aus der Ferne werden die Daten auf Ihrer Appliance gelöscht. Nach dem Löschen können Sie die Appliance nicht mehr für die Datenerfassung neu konfigurieren. Sie muss an Google zurückgesendet werden.
Daten auf dem Gerät löschen
Das Löschen per Fernzugriff ähnelt dem Löschen der Appliance im Rechenzentrum und entspricht den Richtlinien von Google zur Datenvernichtung.
So löschen Sie die Daten auf Ihrem Gerät:
Führen Sie cd /tmp aus.
Führen Sie den Befehl ta wipe aus: Je nach Gerätetyp dauert die Ausführung des Befehls ta wipe zwischen 1 und 7 Stunden.
Wenn der Befehl ta wipe nicht verfügbar ist, prüfen Sie, ob Ihr Gerät auf die neueste Softwareversion aktualisiert ist. Führen Sie den Befehl ta update aus, um die Appliance zu aktualisieren. Führen Sie nach der Aktualisierung der Appliance den Befehl ta wipe aus.
Nur Appliances vom Typ TA40 und TA300: Starten Sie die Appliance neu und führen Sie den Befehl ta wipe noch einmal aus.
Das Script generiert ein Zertifikat, das bestätigt, dass die Appliance erfolgreich gelöscht wurde, und speichert es unter /opt/certificate.json.
Appliance verpacken und zurückgeben
Nachdem Sie Ihre Daten auf die Transfer Appliance übertragen und finalisiert haben, bereiten Sie die Appliance für den Versand vor. Dazu gehören das Drucken und Anbringen eines Versandlabels, das Sammeln der Kabel, das Verpacken der Appliance und die Kontaktaufnahme mit Ihrem Versender, um das Gerät zurückzugeben.
Verwenden Sie denselben Versandkoffer, in dem Ihnen die Transfer Appliance auch geschickt wurde.
So geben Sie die Appliance zurück:
TA7
Drucken Sie das Versandlabel aus, das Ihnen vom Transfer Appliance-Team im Rahmen der Finalisierung der kopierten Daten gesendet wurde.
Legen Sie die folgenden Artikel in den Versandkoffer:
2 Netzteile in einem Metallrahmen
Transfer Appliance
Schutzabdeckung
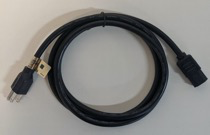
2 Netzkabel
2 Verlängerungskabel
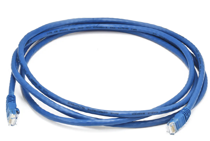
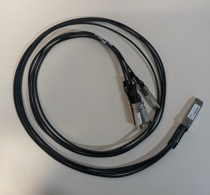
Ethernetkabel
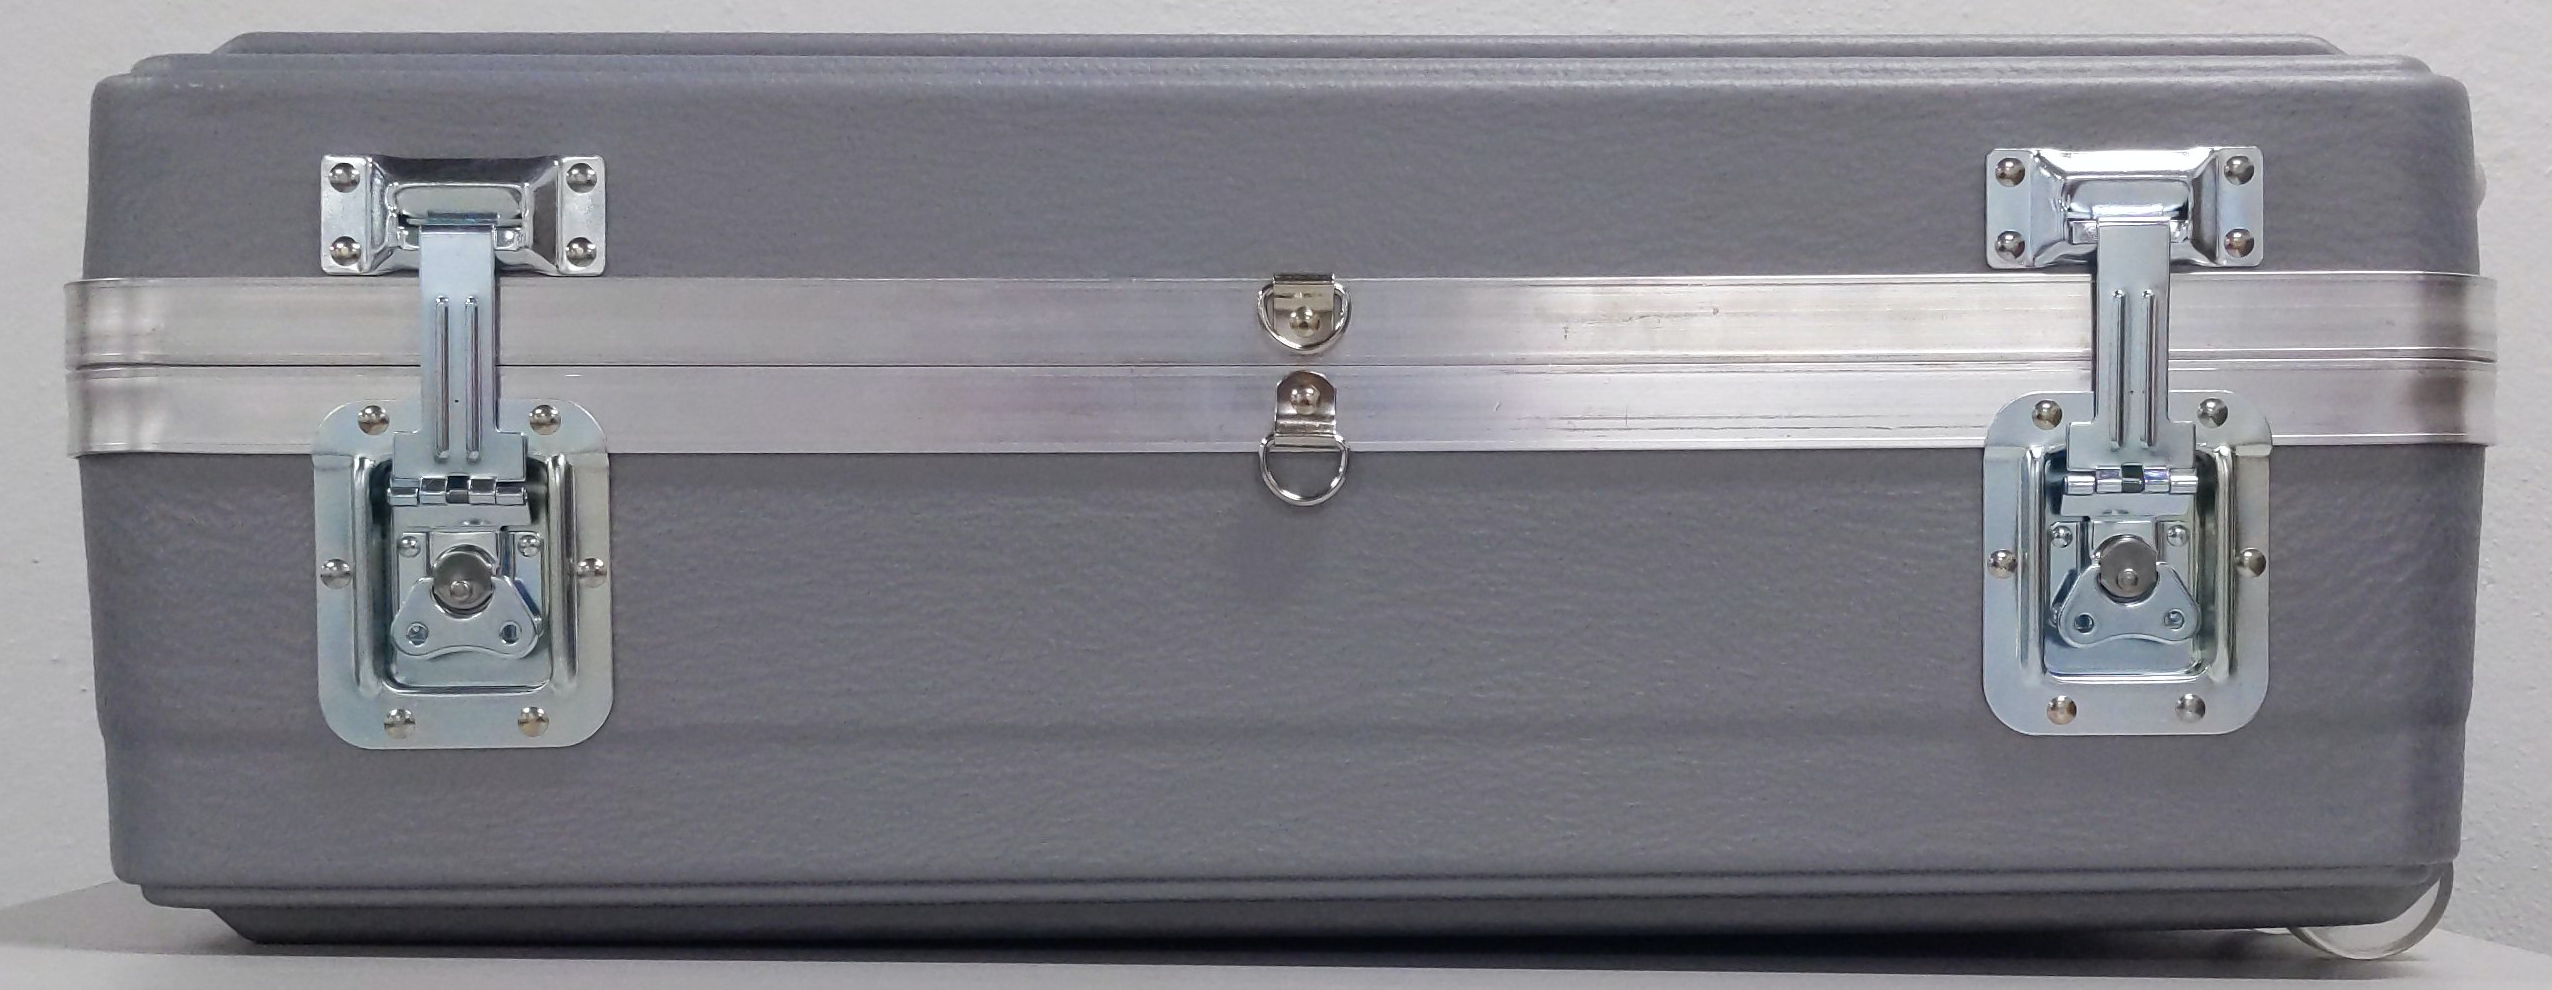
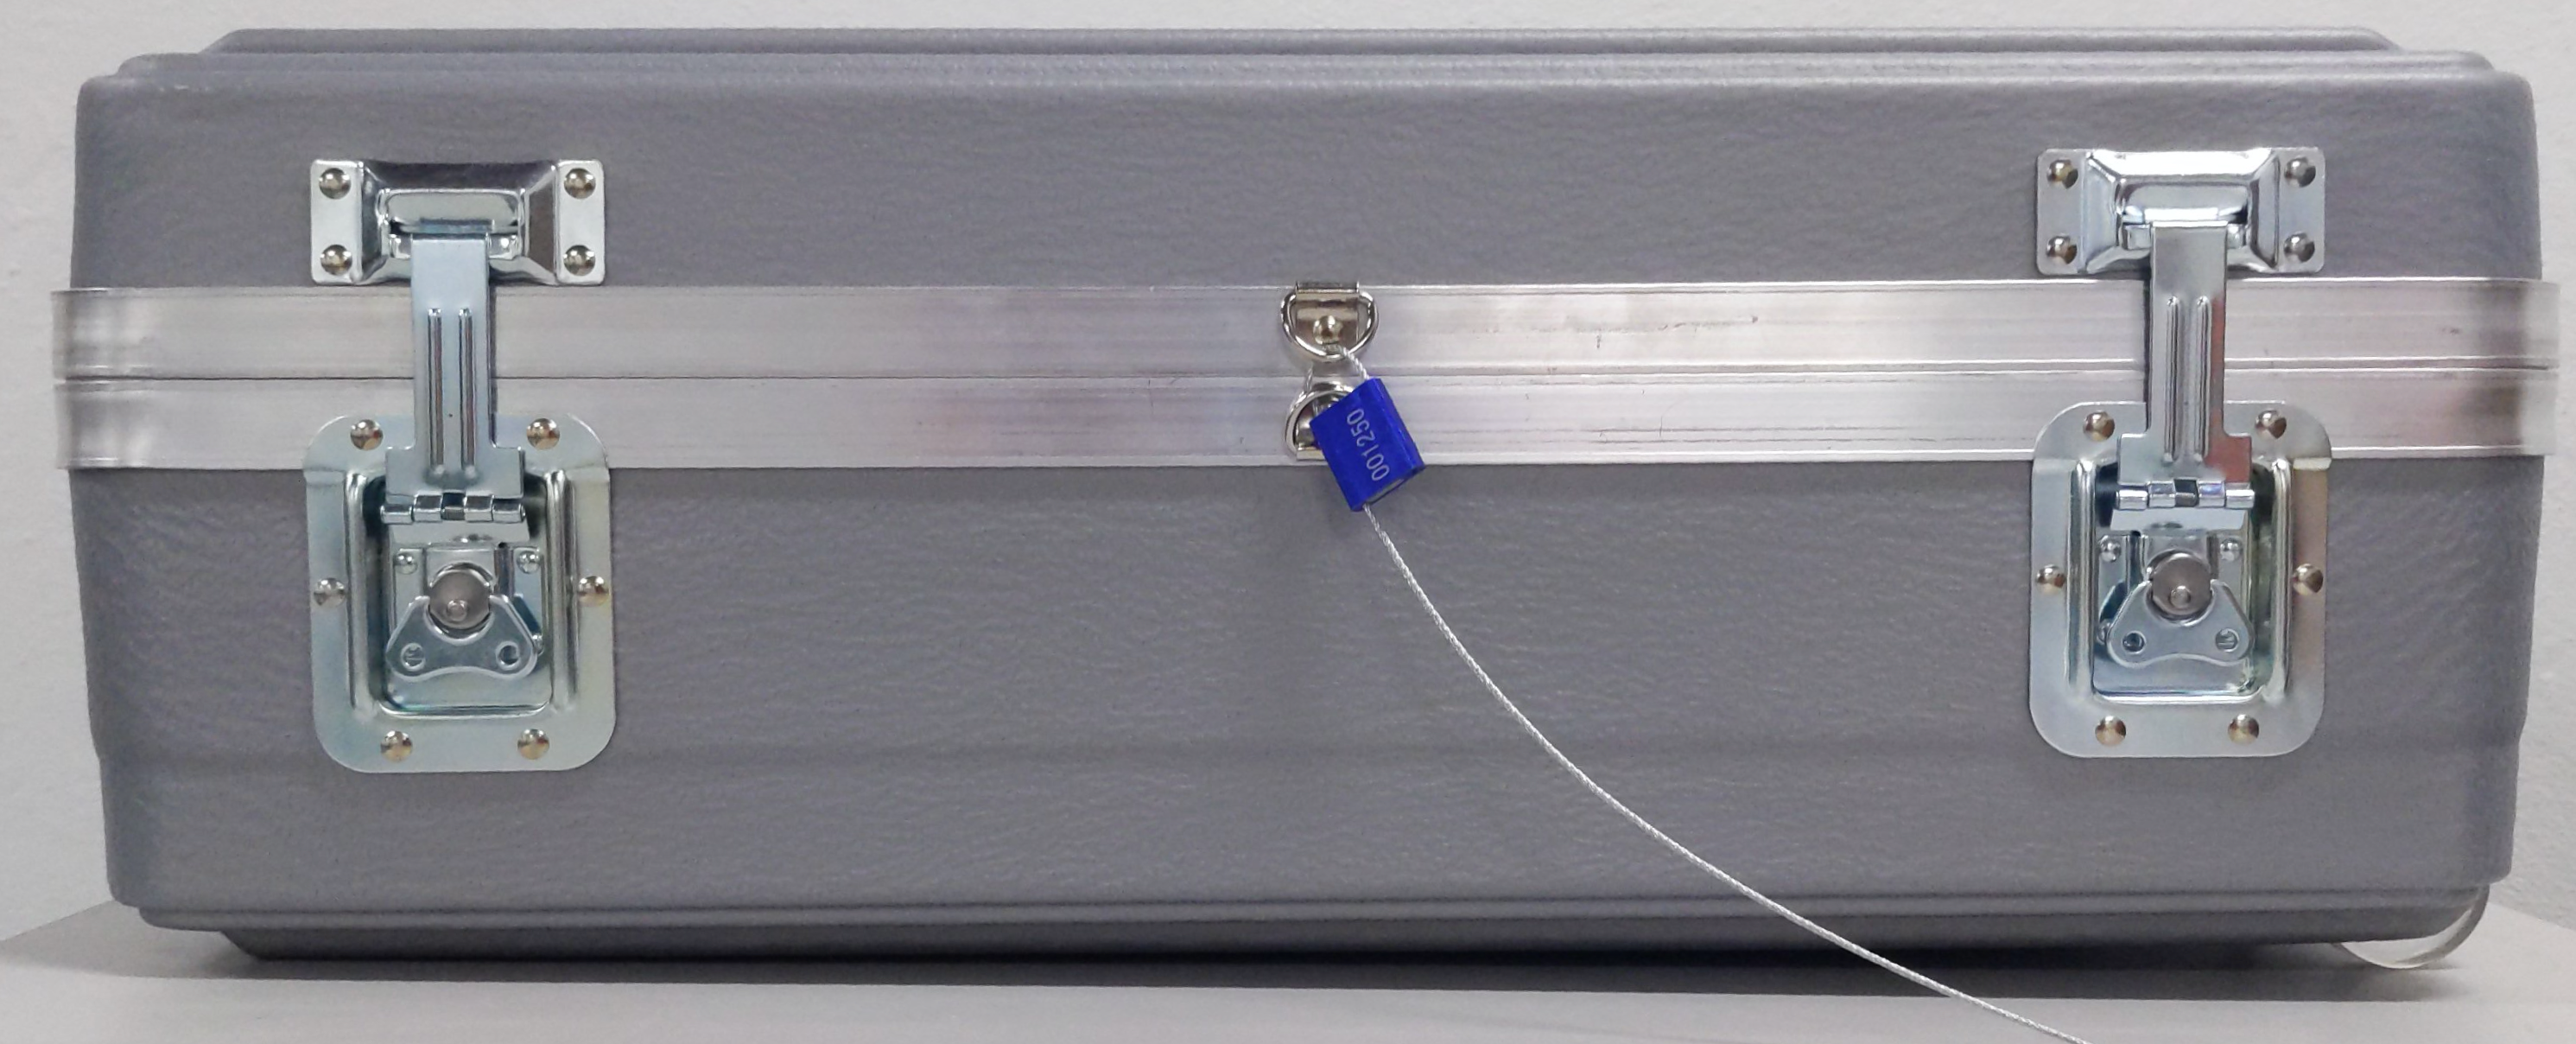
Schließen Sie den Koffer und verriegeln Sie ihn.
Sichern Sie das Gehäuse mit den beiden manipulationssicheren Tags.
Befestigen Sie eine Versandlabeltasche mithilfe eines Bindeetiketts am Koffer.
Legen Sie das Rücksendeetikett in die Tasche. Achten Sie darauf, dass die Rücksendeadresse und die Barcodes sichtbar sind.
Wenden Sie sich bei Bedarf an Ihren Versender, um eine Abholung zu vereinbaren.
Rackable TA40 und TA300
Drucken Sie das Versandlabel aus, das Ihnen vom Transfer Appliance-Team im Rahmen der Finalisierung der kopierten Daten gesendet wurde.
Legen Sie Folgendes in das Kabelfach des Versandkoffers:
Posten
Beschreibung
NEMA-Kabel (5-15p auf c13)
C14-auf-C13-Kabel für das Anschließen an die Stromverteilungseinheit (PDU)
Netzwerkkabel der Kategorie 6 (Cat6)
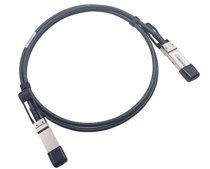
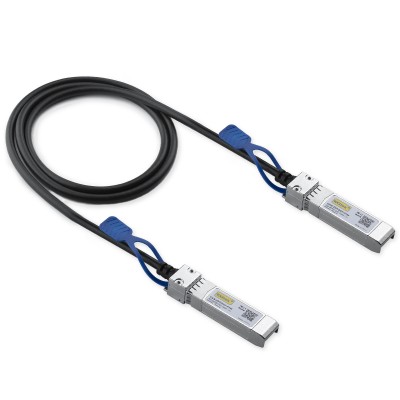
TA40 und TA300 V1:QSFP+ Twinax-Kupfernetzwerkkabel
TA300 V2:QSFP28-Twinax-Kupfernetzwerkkabel
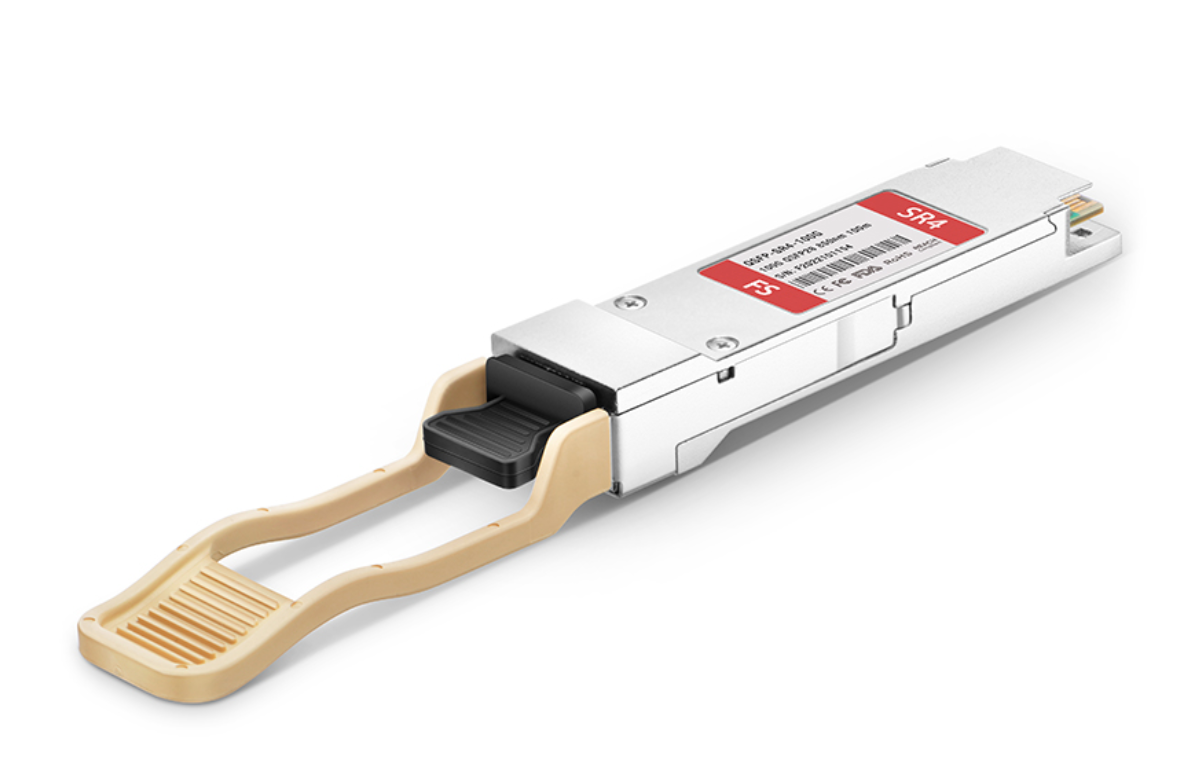
TA40 und TA300 V1:QSFP+ auf 4xSFP+-Netzwerkkabel
TA300 V2:Nicht erforderlich
TA40 und TA300 V1:Nicht erforderlich
TA300 V2:SFP28-zu-SFP28-Netzwerkkabel
TA40 und TA300 V1:Nicht erforderlich
TA300 V2:QSFP28-zu-SFP28-Adapter
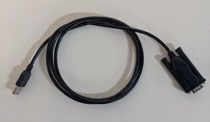
USB-auf-Seriell-Adapterkabel – nur auf Anweisung des Transfer Appliance-Teams verwenden
Serieller Stecker-auf-Buchse-Adapter
Legen Sie die Transfer Appliance in den Versandkoffer.
Schließen Sie den Deckel des Versandkoffers und schliessen Sie die Verriegelung.
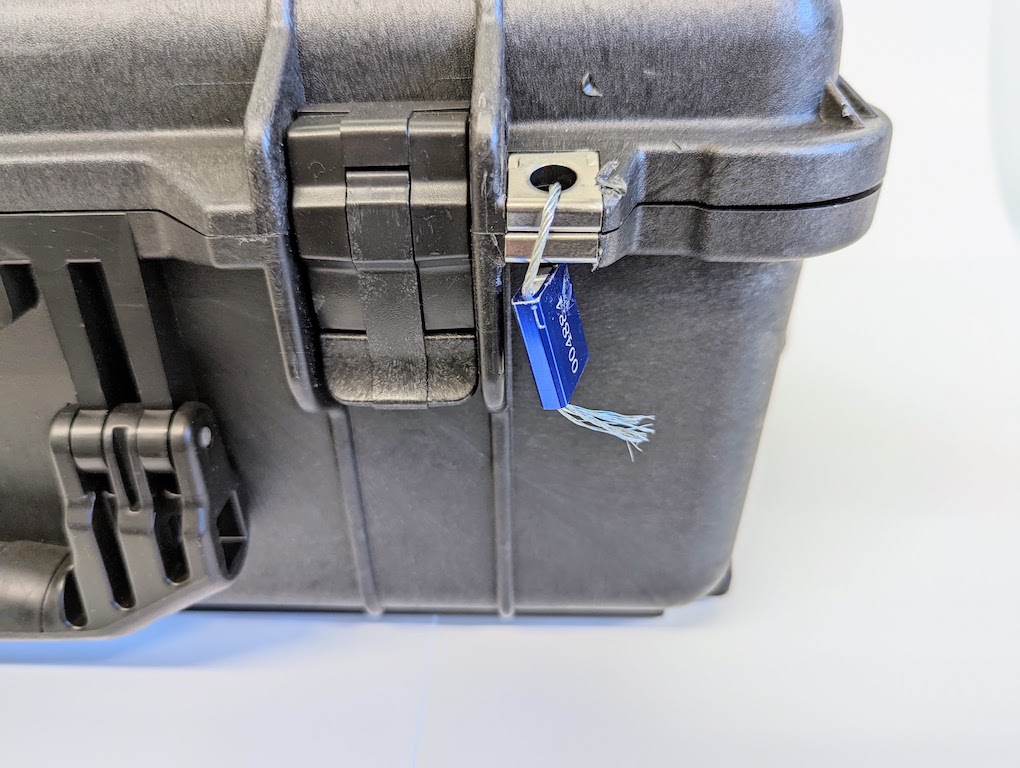
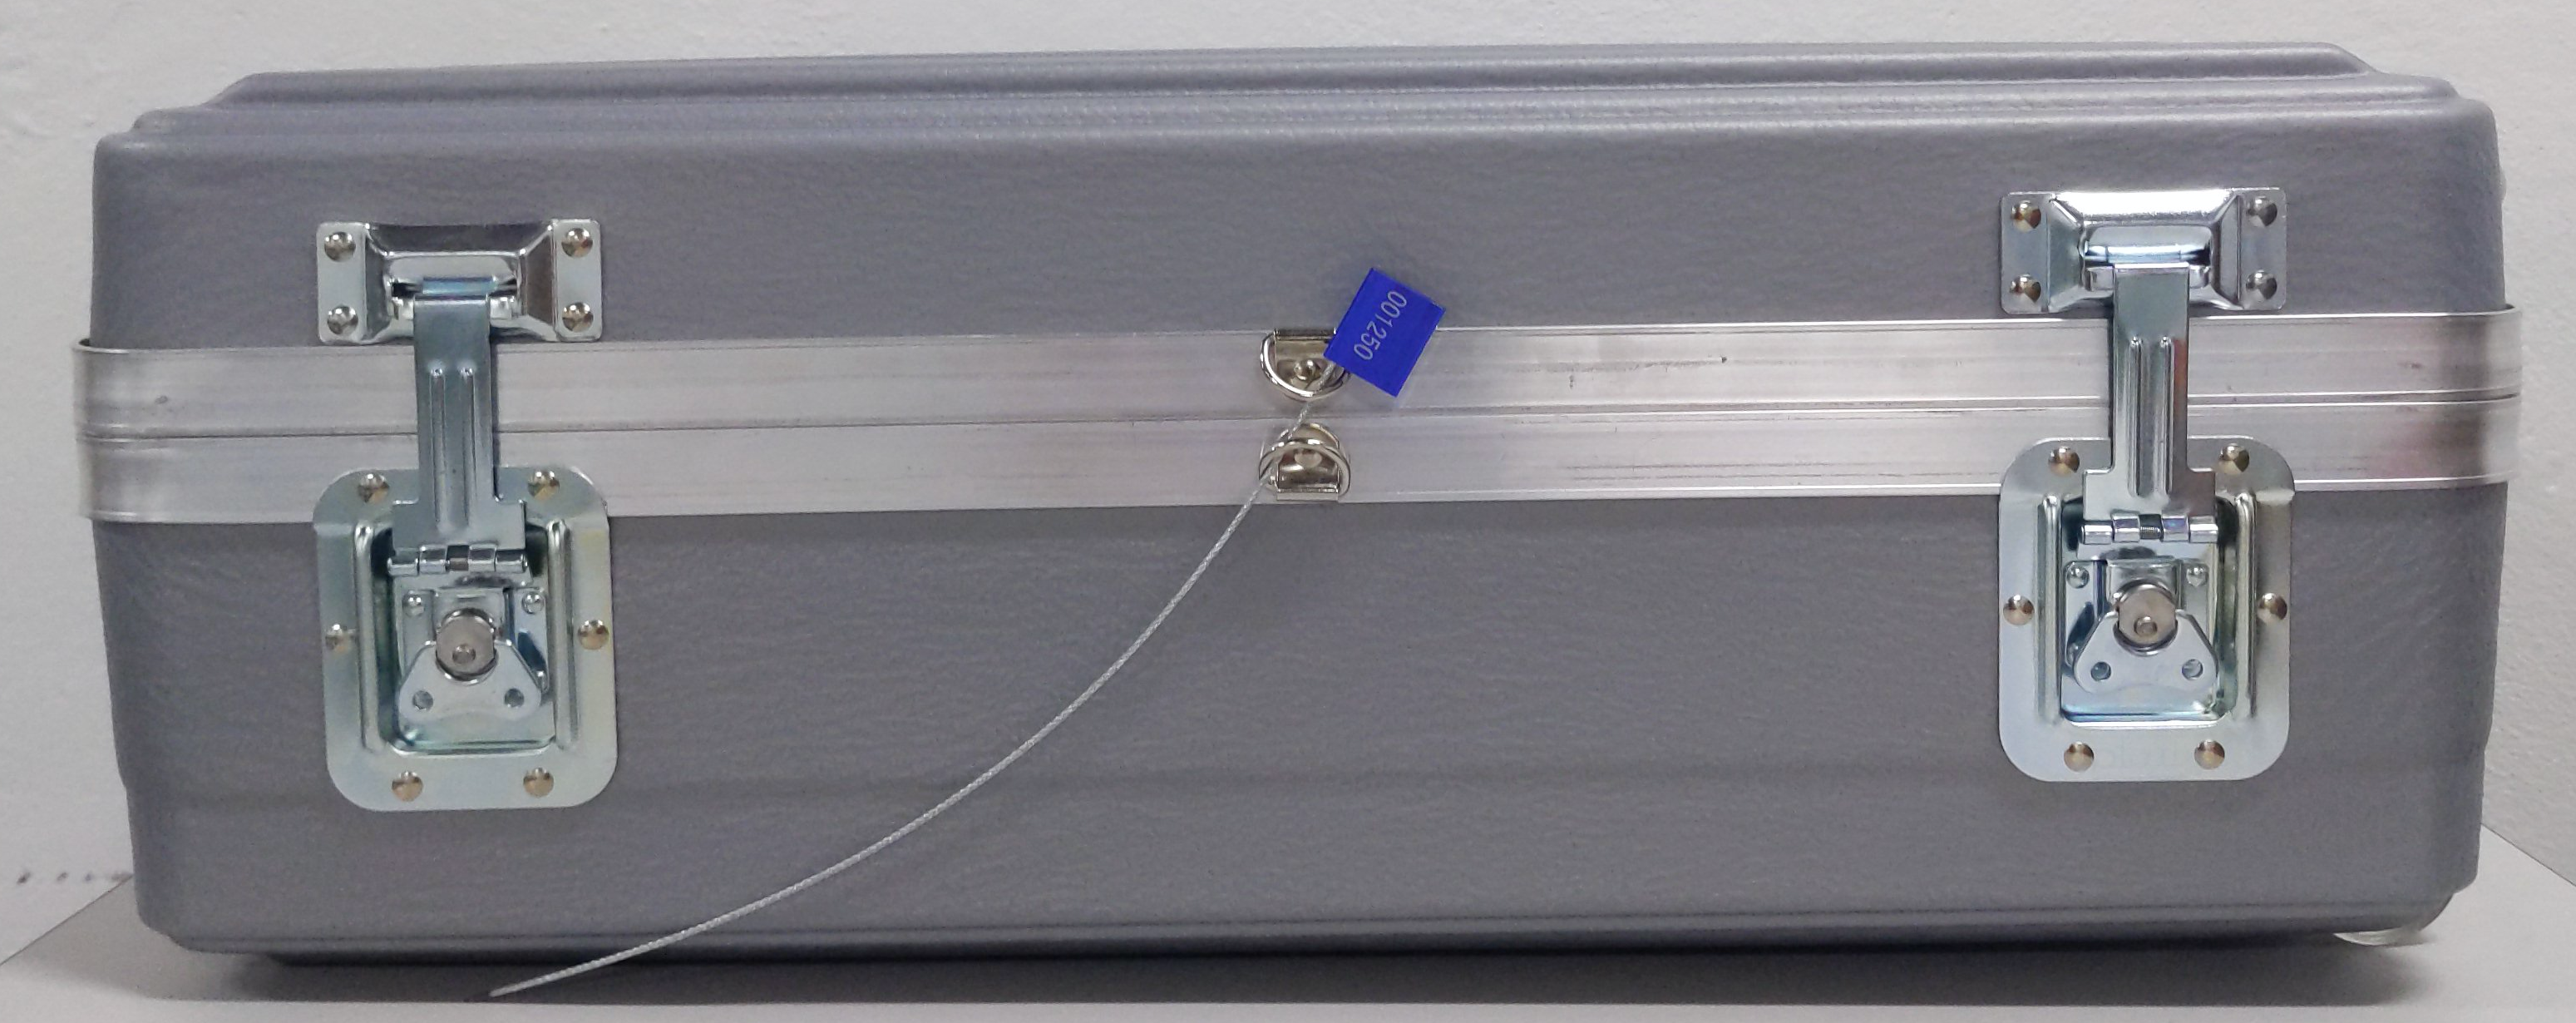
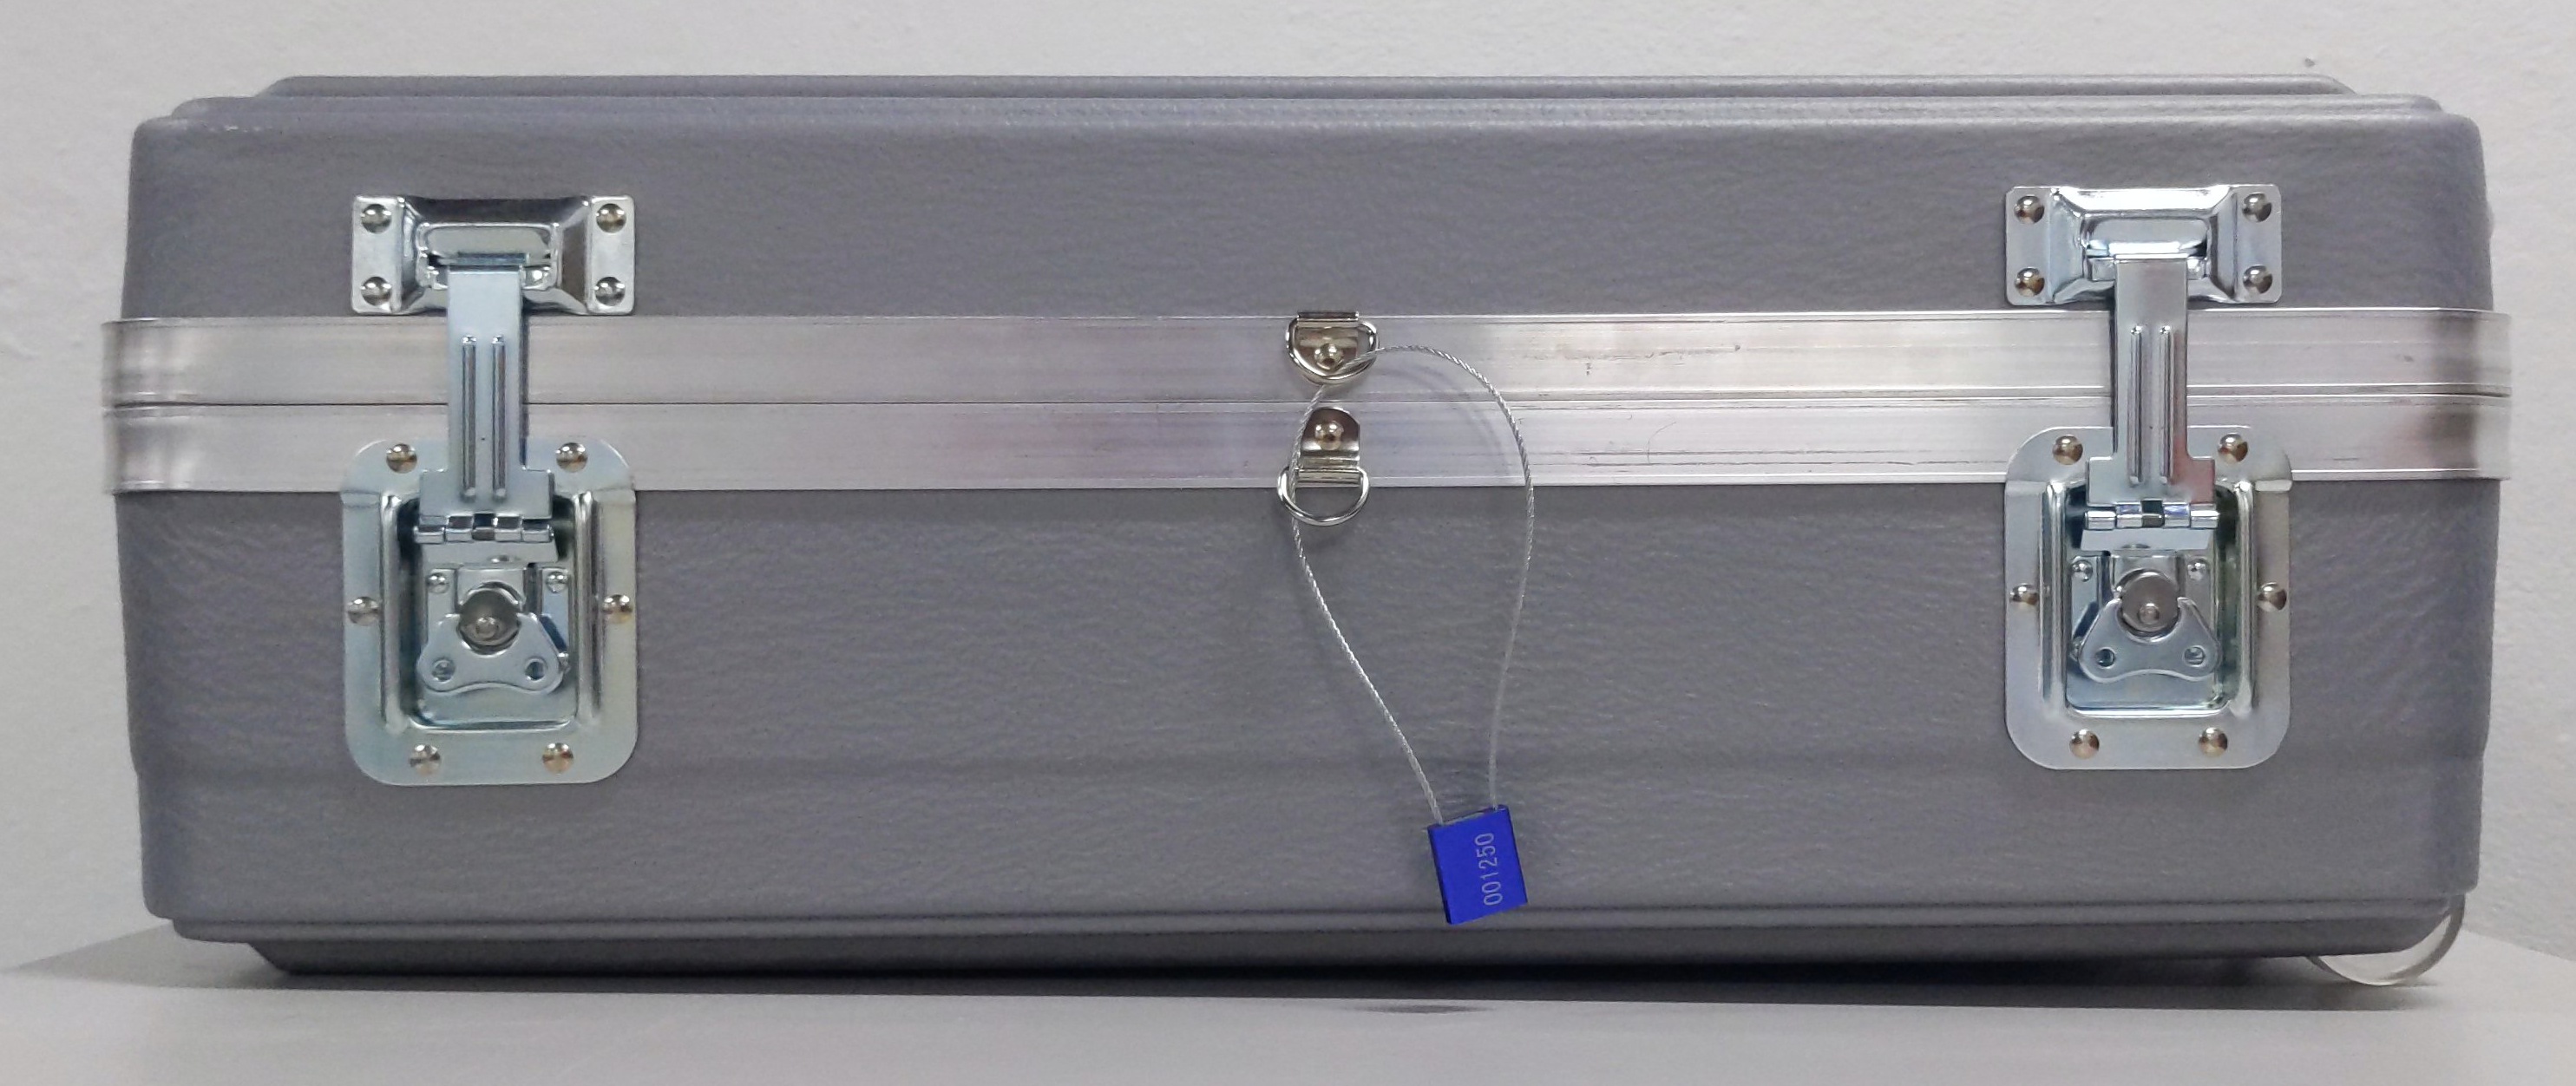
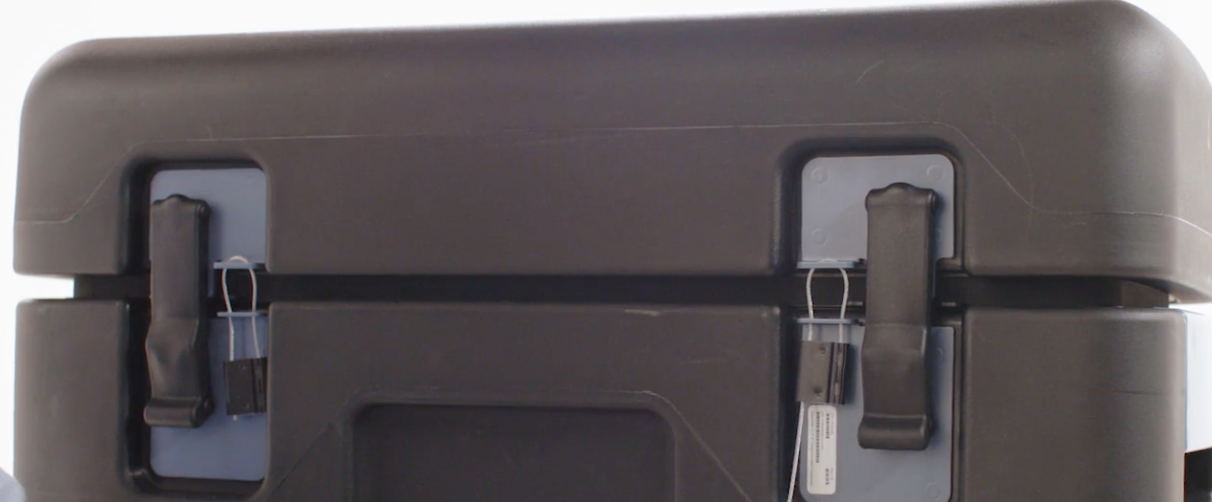
Schützen Sie den Versandkoffer mit einem manipulationssicherem Kabeletikett. Führen Sie dazu die folgenden Schritte aus:
Führen Sie das manipulationssichere Kabeletikett durch die D-Ringe des Versandkoffers.
Führe Sie das Ende des Kabels in das Schloss.
Ziehen Sie das manipulationssichere Kabeletikett durch das Etikettenschloss, bis die D-Ringe gesichert sind.
Befestigen Sie eine Versandlabeltasche mithilfe eines Bindeetiketts am Koffer.
Legen Sie das Rücksendeetikett in die Tasche. Achten Sie darauf, dass die Rücksendeadresse und die Barcodes sichtbar sind.
Wenden Sie sich bei Bedarf an Ihren Versender, um eine Abholung zu vereinbaren.
Freistehende TA40 und TA300
Drucken Sie das Versandlabel aus, das Ihnen vom Transfer Appliance-Team im Rahmen der Finalisierung der kopierten Daten gesendet wurde.
Legen Sie Folgendes in das Kabelfach des Versandkoffers:
Posten
Beschreibung
NEMA-Kabel (5-15p auf c13)
C14-auf-C13-Kabel für das Anschließen an die Stromverteilungseinheit (PDU)
Netzwerkkabel der Kategorie 6 (Cat6)
QSFP+ Twinax-Kupfernetzwerkkabel
QSFP+ auf 4xSFP+-Netzwerkkabel
USB-auf-Seriell-Adapterkabel – nur auf Anweisung des Transfer Appliance-Teams verwenden
Serieller Stecker-auf-Buchse-Adapter
Schließen Sie den Deckel des Versandkoffers und verriegeln Sie ihn.
Schützen Sie den Versandkoffer mit einem manipulationssicheren Kabeletikett:
Befestigen Sie eine Versandlabeltasche mithilfe eines Bindeetiketts am Koffer.
Legen Sie das Rücksendeetikett in die Tasche. Achten Sie darauf, dass die Rücksendeadresse und die Barcodes sichtbar sind.
Wenden Sie sich bei Bedarf an Ihren Versender, um eine Abholung zu vereinbaren.
[[["Leicht verständlich","easyToUnderstand","thumb-up"],["Mein Problem wurde gelöst","solvedMyProblem","thumb-up"],["Sonstiges","otherUp","thumb-up"]],[["Schwer verständlich","hardToUnderstand","thumb-down"],["Informationen oder Beispielcode falsch","incorrectInformationOrSampleCode","thumb-down"],["Benötigte Informationen/Beispiele nicht gefunden","missingTheInformationSamplesINeed","thumb-down"],["Problem mit der Übersetzung","translationIssue","thumb-down"],["Sonstiges","otherDown","thumb-down"]],["Zuletzt aktualisiert: 2025-08-17 (UTC)."],[],[],null,["# Return the appliance\n\nFinalize copied data\n--------------------\n\nFinalizing prepares the appliance for shipping to Google by removing the\ndecryption key, rendering the data inaccessible until it reaches Google.\nWhen the decryption key is removed, you cannot copy additional data\nto the appliance without deleting all previously copied data.\n\nTo finalize the copied data, follow these steps:\n\n1. [Connect to the appliance](/transfer-appliance/docs/4.0/receive-appliance#connecting).\n\n2. Run the `ta finalize` command. Enter the `ta_customer` password when prompted\n and note the passcode returned in the output.\n\n ```\n ta finalize\n ```\n\n The following sample response resembles the output that is returned: \n\n ```\n Finalizing prepares the appliance for shipping by removing the decryption\n key, making the data inaccessible until it reaches Google. Appliance local\n storage will be removed during this process. Once finalized, there is no way\n to access your data or add more data without deleting everything on the drive.\n\n Are you ready to finalize the appliance and ship it back to Google? (y/n) y\n\n Please enter user \"ta_customer\" password to finalize appliance:\n Unmounted data partition and disabled automount.\n Finalize step is complete.\n\n This passcode must be used to get a return shipping label: NNNN\n Enter the passcode returned by the 'ta finalize' command in the form\n included in the email titled Google Transfer Appliance Return Instructions\n sent by the Transfer Appliance Team.\n If you forget your passcode, run 'ta status' to display it again.\n ```\n3. Enter the passcode returned by the `ta finalize` command in the form\n included in the email titled *Google Transfer Appliance\n Return Instructions* sent by the Transfer Appliance Team.\n\n To view the passcode again, run `ta status`.\n\n The Transfer Appliance Team responds with the shipping label for the\n Transfer Appliance for the given passcode.\n | **Note:** The passcode is specific to each appliance. If you have several Transfer Appliances, verify that the session ID printed on the shipping case.\n4. Once you receive the shipping label, turn off the appliance and disconnect\n all cables to it.\n\nOptional: Erase data on the appliance\n-------------------------------------\n\nRemote wipe erases the data on your appliance. After wiping, you cannot\nreconfigure the appliance to capture data and it must be shipped back to Google.\n\n### Wipe your appliance\n\nThe process for remote wipe is similar to wiping the appliance in the data\ncenter and is in accordance with Google's data destruction guidelines.\n\nTo wipe your appliance, follow the instructions below:\n\n1. Run `cd /tmp`.\n\n2. Run the `ta wipe` command. Based on appliance type, the `ta wipe` command\n takes between 1 and 7 hours to complete.\n\n If the `ta wipe` command is not available, make sure your appliance is updated\n to the latest software version. To update your appliance, run the `ta update`\n command. After the appliance has been updated, run the `ta wipe` command.\n3. TA40 and TA300 appliances only: Reboot the appliance and run the `ta wipe`\n command again.\n\nThe script generates a certificate verifying that the appliance was wiped\nsuccessfully and saves it to `/opt/certificate.json`.\n\nPackage and return the appliance\n--------------------------------\n\nAfter transferring and finalizing your data to\nTransfer Appliance, prepare the appliance for shipping. This\nincludes printing and applying a shipping label, gathering the appliance's\ncables, packing the appliance, and contacting your shipper to return the\nappliance.\n\nUse the same shipping case that Transfer Appliance arrived in.\n\nTo return the appliance, do the following: \n\n### TA7\n\n1. Print the shipping label that was sent to you by Transfer Appliance Team\n as part of [finalizing your copied data](#finalizing).\n\n2. Place the following items into the shipping case:\n\n - 2 power bricks in a metal frame\n - Transfer Appliance\n - Dust cover\n - 2 power cords\n - 2 power extension cords\n - Ethernet cable\n3. Close the case and secure the latches.\n\n4. Secure the case lid using the 2 tamper-evident tags.\n\n5. Affix a shipping-label pouch to the case using a tie-on tag.\n\n6. Insert the shipping return label in the pouch. Ensure that the return\n address and barcodes are visible.\n\n7. If necessary, contact your shipper to schedule a pick-up.\n\n### Rackable TA40 and TA300\n\n1. Print the shipping label that was sent to you by Transfer Appliance Team\n as part of [finalizing your copied data](#finalizing).\n\n2. Place the following in the shipping case's cable compartment:\n\n3. Place the Transfer Appliance in the shipping case.\n\n4. Close the lid to the shipping case and secure the latches.\n\n5. Secure the shipping case with a wire tamper-evident tag by following these\n steps:\n\n 1. Insert the wire tamper-evident tag through the shipping case's D-rings.\n\n 2. Insert the end of the wire into the lock.\n\n 3. Draw the tamper-evident tag through the tag lock, until the D-rings are\n secured.\n\n6. Affix a shipping-label pouch to the case using a tie-on tag.\n\n7. Insert the shipping return label in the pouch. Ensure that the return\n address and barcodes are visible.\n\n8. If necessary, contact your shipper to schedule a pick-up.\n\n### Freestanding TA40 and TA300\n\n1. Print the shipping label that was sent to you by Transfer Appliance Team\n as part of [finalizing your copied data](#finalizing).\n\n2. Place the following in the shipping case's cable compartment:\n\n3. Close the shipping case's lid and secure the latches.\n\n4. Secure the shipping case with a wire tamper-evident tag:\n\n5. Affix a shipping-label pouch to the case using a tie-on tag.\n\n6. Insert the shipping return label in the pouch. Ensure that the return\n address and barcodes are visible.\n\n7. If necessary, contact your shipper to schedule a pick-up."]]