Tetap teratur dengan koleksi
Simpan dan kategorikan konten berdasarkan preferensi Anda.
Panduan ini menjelaskan cara membuat dan mengelola kredensial pengguna di VM Windows
yang berjalan di Compute Engine.
Membuat Kredensial Windows
Untuk membuat kredensial, akses dialog Manage Windows Credentials:
Di Cloud Explorer, klik kanan VM tempat Anda ingin membuat kredensial.
Pilih Kelola Kredensial Windows.
Klik Add Credentials.
Masukkan Nama Pengguna.
Masukkan sandi, atau minta Visual Studio untuk membuatnya.
Klik Save.
Kredensial ini dienkripsi di komputer Anda dan dikaitkan dengan VM Windows yang dibuat untuknya.
Menghapus Kredensial Windows
Untuk menghapus kredensial yang ada, akses dialog
Kelola Kredensial Windows:
Di Cloud Explorer, klik kanan VM dengan kredensial yang ingin Anda hapus.
Pilih Kelola Kredensial Windows.
Pilih pengguna, lalu klik Hapus kredensial.
Klik Delete.
Menggunakan Kredensial Windows yang tersimpan
Anda dapat menggunakan kredensial Windows yang disimpan saat membuat file .publishsettings
untuk dipublikasikan ke VM atau saat memulai sesi Layanan Terminal baru
dengan VM.
Menyimpan .publishsettings file
Untuk membuat file .publishsettings guna men-deploy aplikasi ASP.NET ke VM:
Di Cloud Explorer, klik kanan VM tempat Anda ingin men-deploy.
Pilih Simpan setelan publikasi.
Pilih kredensial yang akan digunakan saat membuat file .publishsettings.
Jika Anda tidak melihat kredensial yang ingin digunakan, klik
Kelola Kredensial Windows untuk
membuat kredensial baru.
Membuka sesi Desktop Jarak Jauh
Untuk mengakses VM melalui desktop jarak jauh:
Di Cloud Explorer, klik kanan VM yang ingin Anda
hubungkan.
Pilih Buka sesi Desktop Jarak Jauh.
Pilih kredensial yang ingin Anda gunakan untuk terhubung ke sesi desktop jarak jauh.
Jika Anda tidak melihat kredensial yang ingin digunakan, klik
Kelola Kredensial Windows untuk
membuat kredensial baru.
Anda mungkin melihat peringatan yang menunjukkan bahwa penayang koneksi jarak jauh
tidak dapat diidentifikasi.
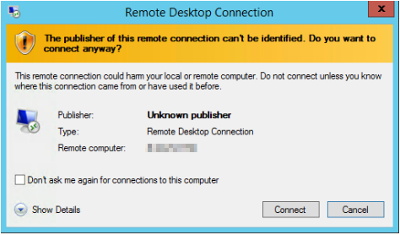
Peringatan ini muncul karena sesi dibuka dengan membuat file sesi yang
tidak ditandatangani karena hanya digunakan untuk memulai sesi ini. Kredensial
yang digunakan dalam file sesi dienkripsi.
Peringatan lain mungkin muncul yang memberi tahu Anda bahwa identitas
komputer jarak jauh tidak dapat diidentifikasi.
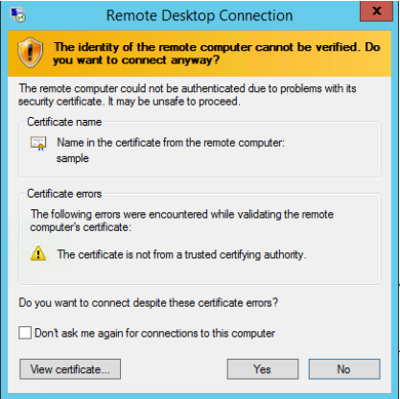
Peringatan ini muncul karena koneksi diamankan menggunakan sertifikat yang ditandatangani sendiri, dan, secara default, komputer Anda tidak memercayai sertifikat yang ditandatangani sendiri. Sertifikat ini tidak digunakan untuk memastikan identitas server,
tetapi untuk mengamankan koneksi antara komputer Anda dan server.
[[["Mudah dipahami","easyToUnderstand","thumb-up"],["Memecahkan masalah saya","solvedMyProblem","thumb-up"],["Lainnya","otherUp","thumb-up"]],[["Sulit dipahami","hardToUnderstand","thumb-down"],["Informasi atau kode contoh salah","incorrectInformationOrSampleCode","thumb-down"],["Informasi/contoh yang saya butuhkan tidak ada","missingTheInformationSamplesINeed","thumb-down"],["Masalah terjemahan","translationIssue","thumb-down"],["Lainnya","otherDown","thumb-down"]],["Terakhir diperbarui pada 2025-08-17 UTC."],[],[],null,["# Managing Windows Credentials\n\nThis guide describes how to create and manage user credentials on Windows VMs\nrunning on Compute Engine.\n\nCreating Windows Credentials\n----------------------------\n\nTo create credentials, access the **Manage Windows Credentials** dialog:\n\n1. In the Cloud Explorer, right-click the VM on which you want to\n create the credentials.\n\n2. Select **Manage Windows Credentials**.\n\n3. Click **Add Credentials**.\n\n4. Enter a **Username**.\n\n5. Enter a password, or have Visual Studio create one.\n\n6. Click **Save**.\n\nThese credentials are encrypted on your machine and associated with the Windows\nVM for which they were created.\n| **Note:** If the account already exists, having Visual Studio create a password resets the existing password. Resetting the password can cause the loss of encrypted data secured with the current password, including files and stored passwords. [Learn more](/compute/docs/instances/windows/creating-passwords-for-windows-instances).\n\nDeleting Windows Credentials\n----------------------------\n\nTo delete existing credentials, access the **Manage Windows Credentials**\ndialog:\n\n1. In the Cloud Explorer, right-click the VM with the credentials you\n want to delete.\n\n2. Select **Manage Windows Credential**.\n\n3. Select a user and click **Delete credentials**.\n\n4. Click **Delete**.\n\n| **Important:** Deleting credentials will delete the Windows account and the data associated with the account.\n\nUsing stored Windows Credentials\n--------------------------------\n\nYou can use the stored Windows credentials when creating a `.publishsettings`\nfile for publishing to a VM or when starting a new Terminal Services session\nwith the VM.\n\n### Saving `.publishsettings` files\n\nTo create a `.publishsettings` file to deploy your ASP.NET app to a VM:\n\n1. In the Cloud Explorer, right-click the VM where you want to\n deploy.\n\n2. Select **Save publishing settings**.\n\n3. Select the credentials to use when creating the `.publishsettings` file.\n\n 1. If you do not see the credentials you want to use, then click **Manage Windows Credentials** to [create new credentials](#creating_windows_credentials).\n\n| **Important:** The credentials stored in `.publishsettings` are in plain text. You should delete this file after it is imported into a publish profile and no longer needed. The publish profile stores the credentials encrypted.\n\n### Opening a Remote Desktop session\n\nTo access a VM through a remote desktop:\n\n1. In the Cloud Explorer, right-click the VM to which you want to\n connect.\n\n2. Select **Open Remote Desktop session**.\n\n3. Select the credentials you want to use to connect to the remote desktop\n session.\n\n 1. If you do not see the credentials you want to use, then click **Manage Windows Credentials** to [create new credentials](#creating_windows_credentials).\n\nYou might see warnings indicating that the publisher of the remote connection\ncan't be identified.\n\n\u003cbr /\u003e\n\n\n\u003cbr /\u003e\n\nThis warning is due to the session being opened by creating a session file that\nis not signed because it is only used to start this session. The credentials\nused in the session file are encrypted.\n\nAnother warning might appear informing you that the identity of the\nremote computer cannot be identified.\n\n\u003cbr /\u003e\n\n\n\u003cbr /\u003e\n\nThis warning appears because the connection is secured using a self-signed\ncertificate, and, by default, your computer does not trust self-signed\ncertificates. This certificate is not used to ensure the identity of the server\nbut to secure the connection between your machine and the server."]]