Mantenha tudo organizado com as coleções
Salve e categorize o conteúdo com base nas suas preferências.
Transcrever voz em texto usando o console do Google Cloud
Neste guia de início rápido, apresentamos o
Console do Cloud Speech-to-Text. Neste
guia de início rápido, você criará e refinará uma transcrição e aprenderá a
usar essa configuração com a API Speech-to-Text para seus próprios aplicativos.
Para saber como enviar solicitações e receber respostas usando a API REST em vez
do console, consulte a
página antes de começar.
Antes de começar
Antes de começar a usar o Console do Speech-to-Text, é preciso ativar a
API no Console do Google Cloud Platform. As etapas abaixo mostram como realizar
as seguintes ações:
Ativar o Speech-to-Text em um projeto.
Verificar se o faturamento está ativado para o Speech-to-Text.
É possível escolher um projeto existente ou criar um novo. Para mais detalhes
sobre como criar um projeto, consulte a
documentação do Google Cloud Platform.
Se você criar um novo projeto, será solicitado que vincule uma conta de faturamento
a esse projeto. Se você estiver usando um projeto atual, verifique se o faturamento
está ativado.
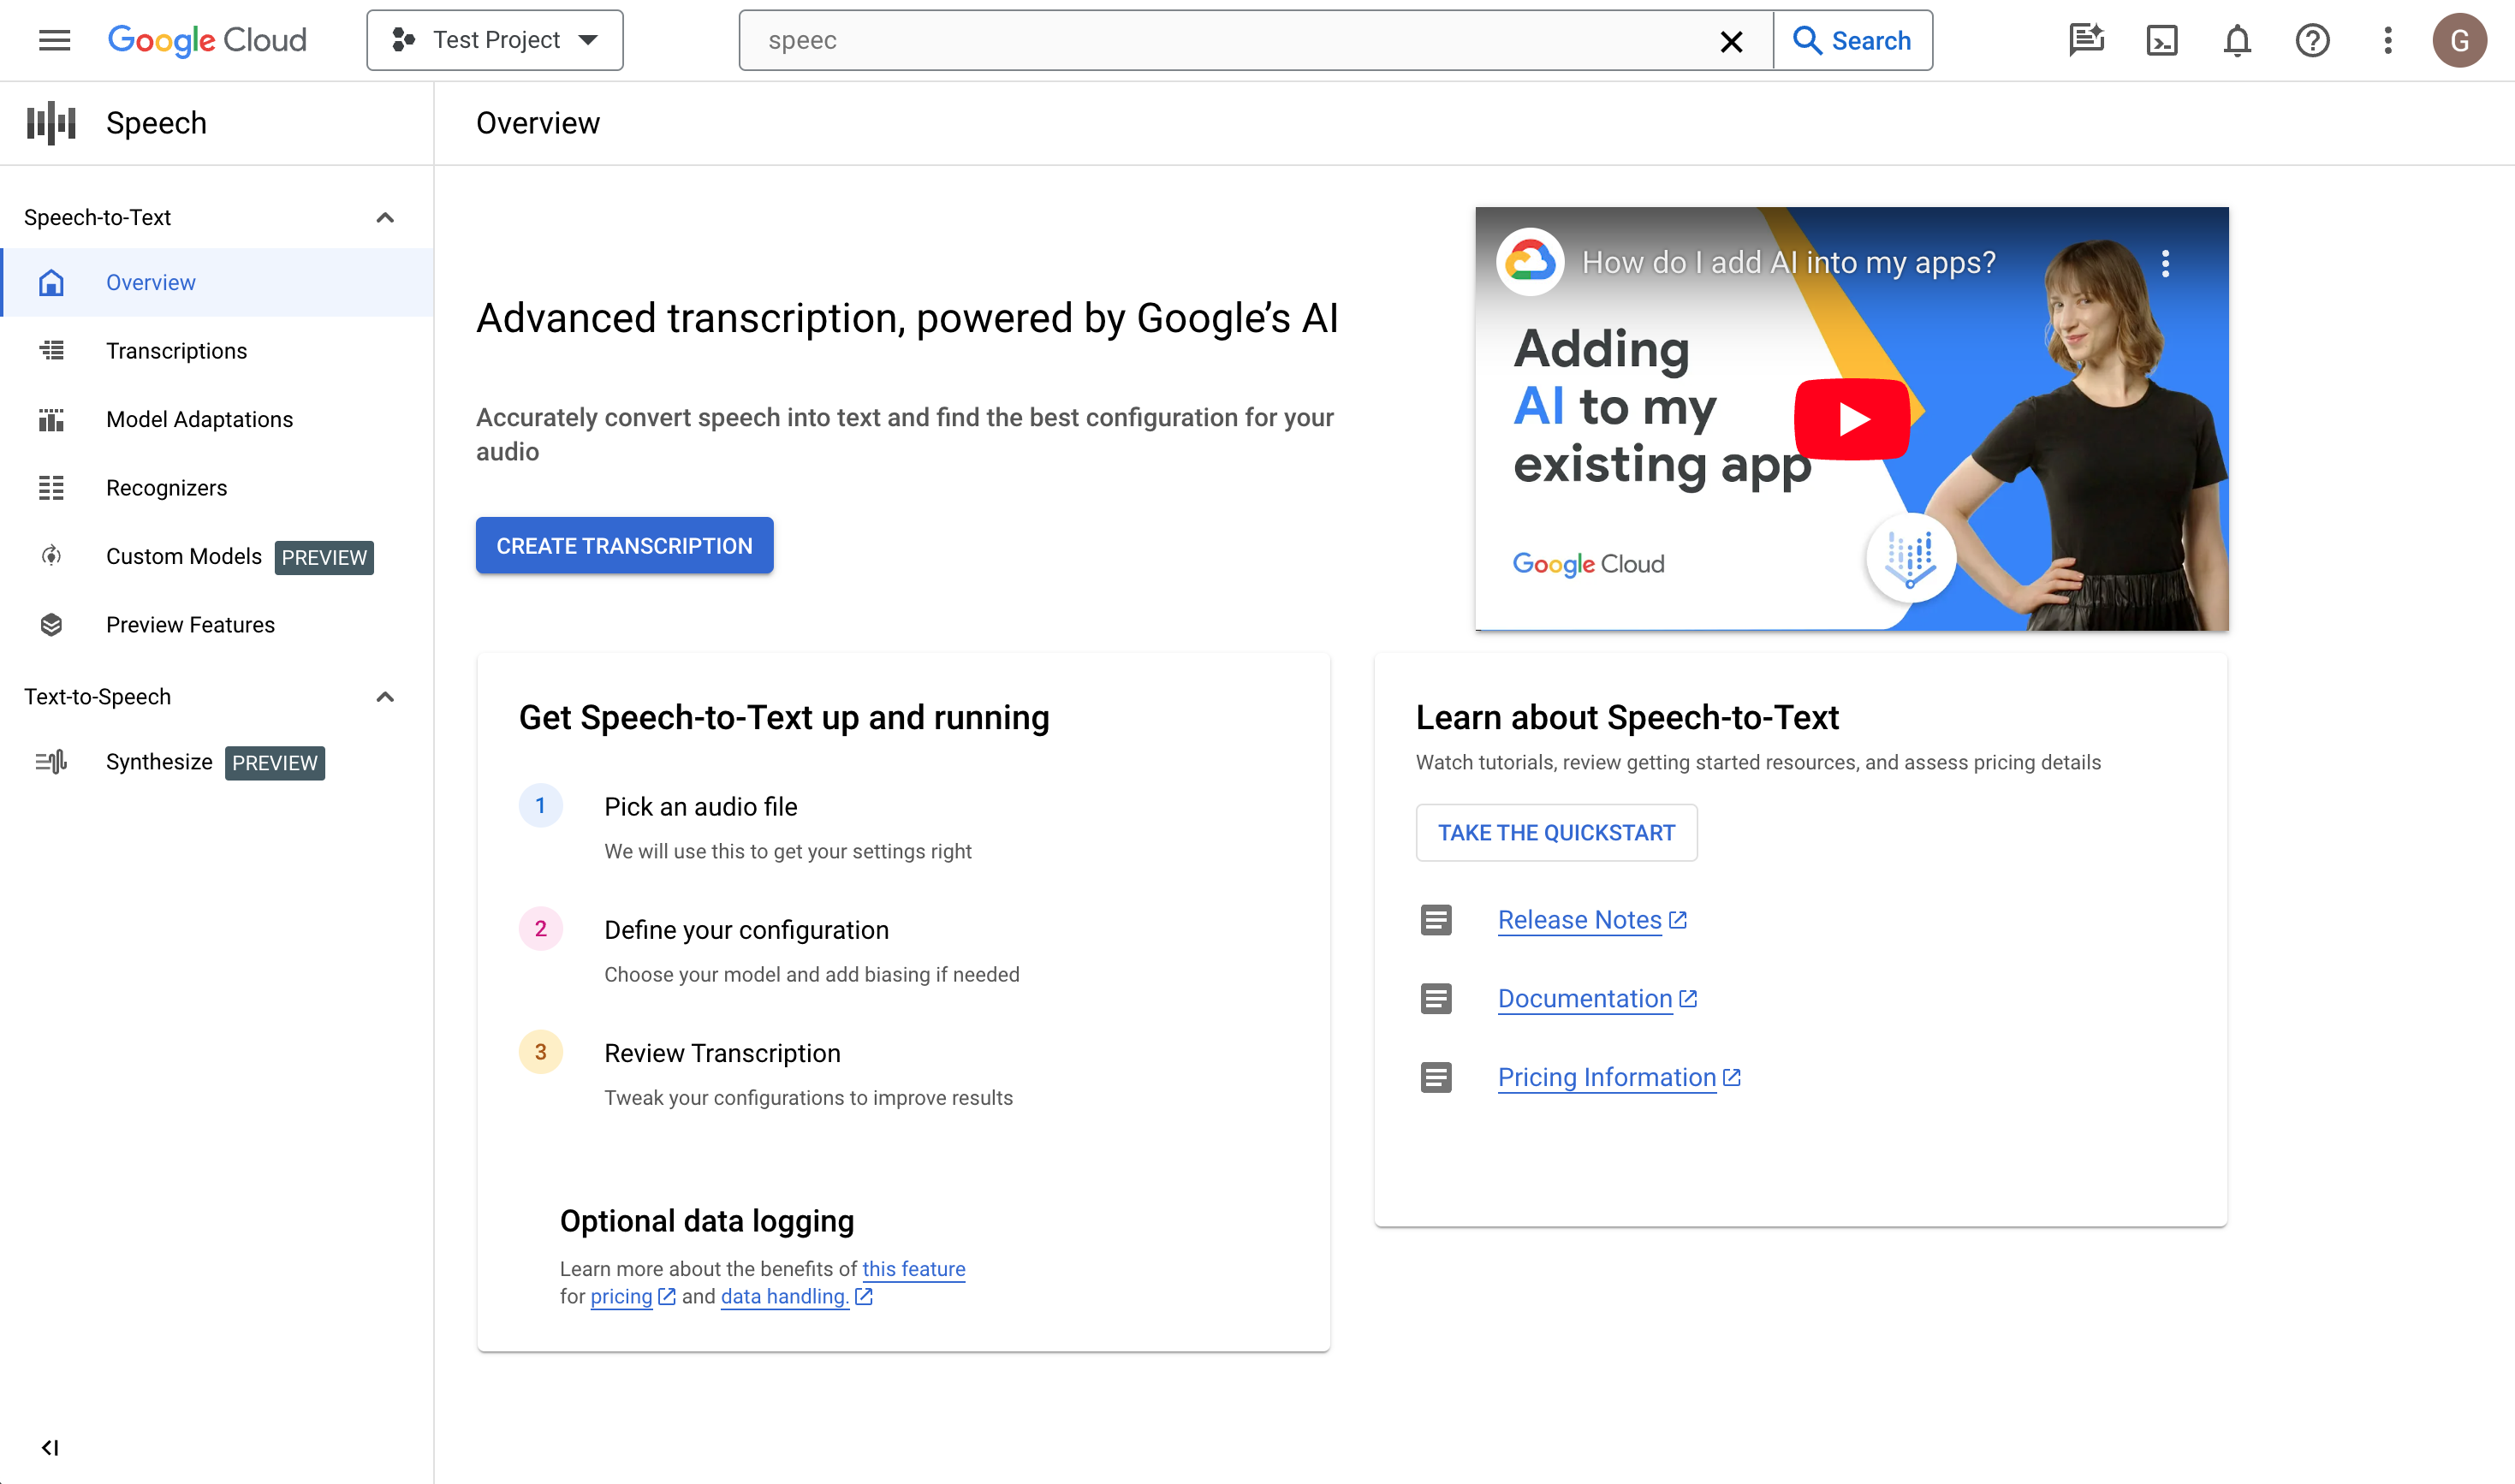
Depois de selecionar um projeto e vinculá-lo a uma conta de faturamento, é
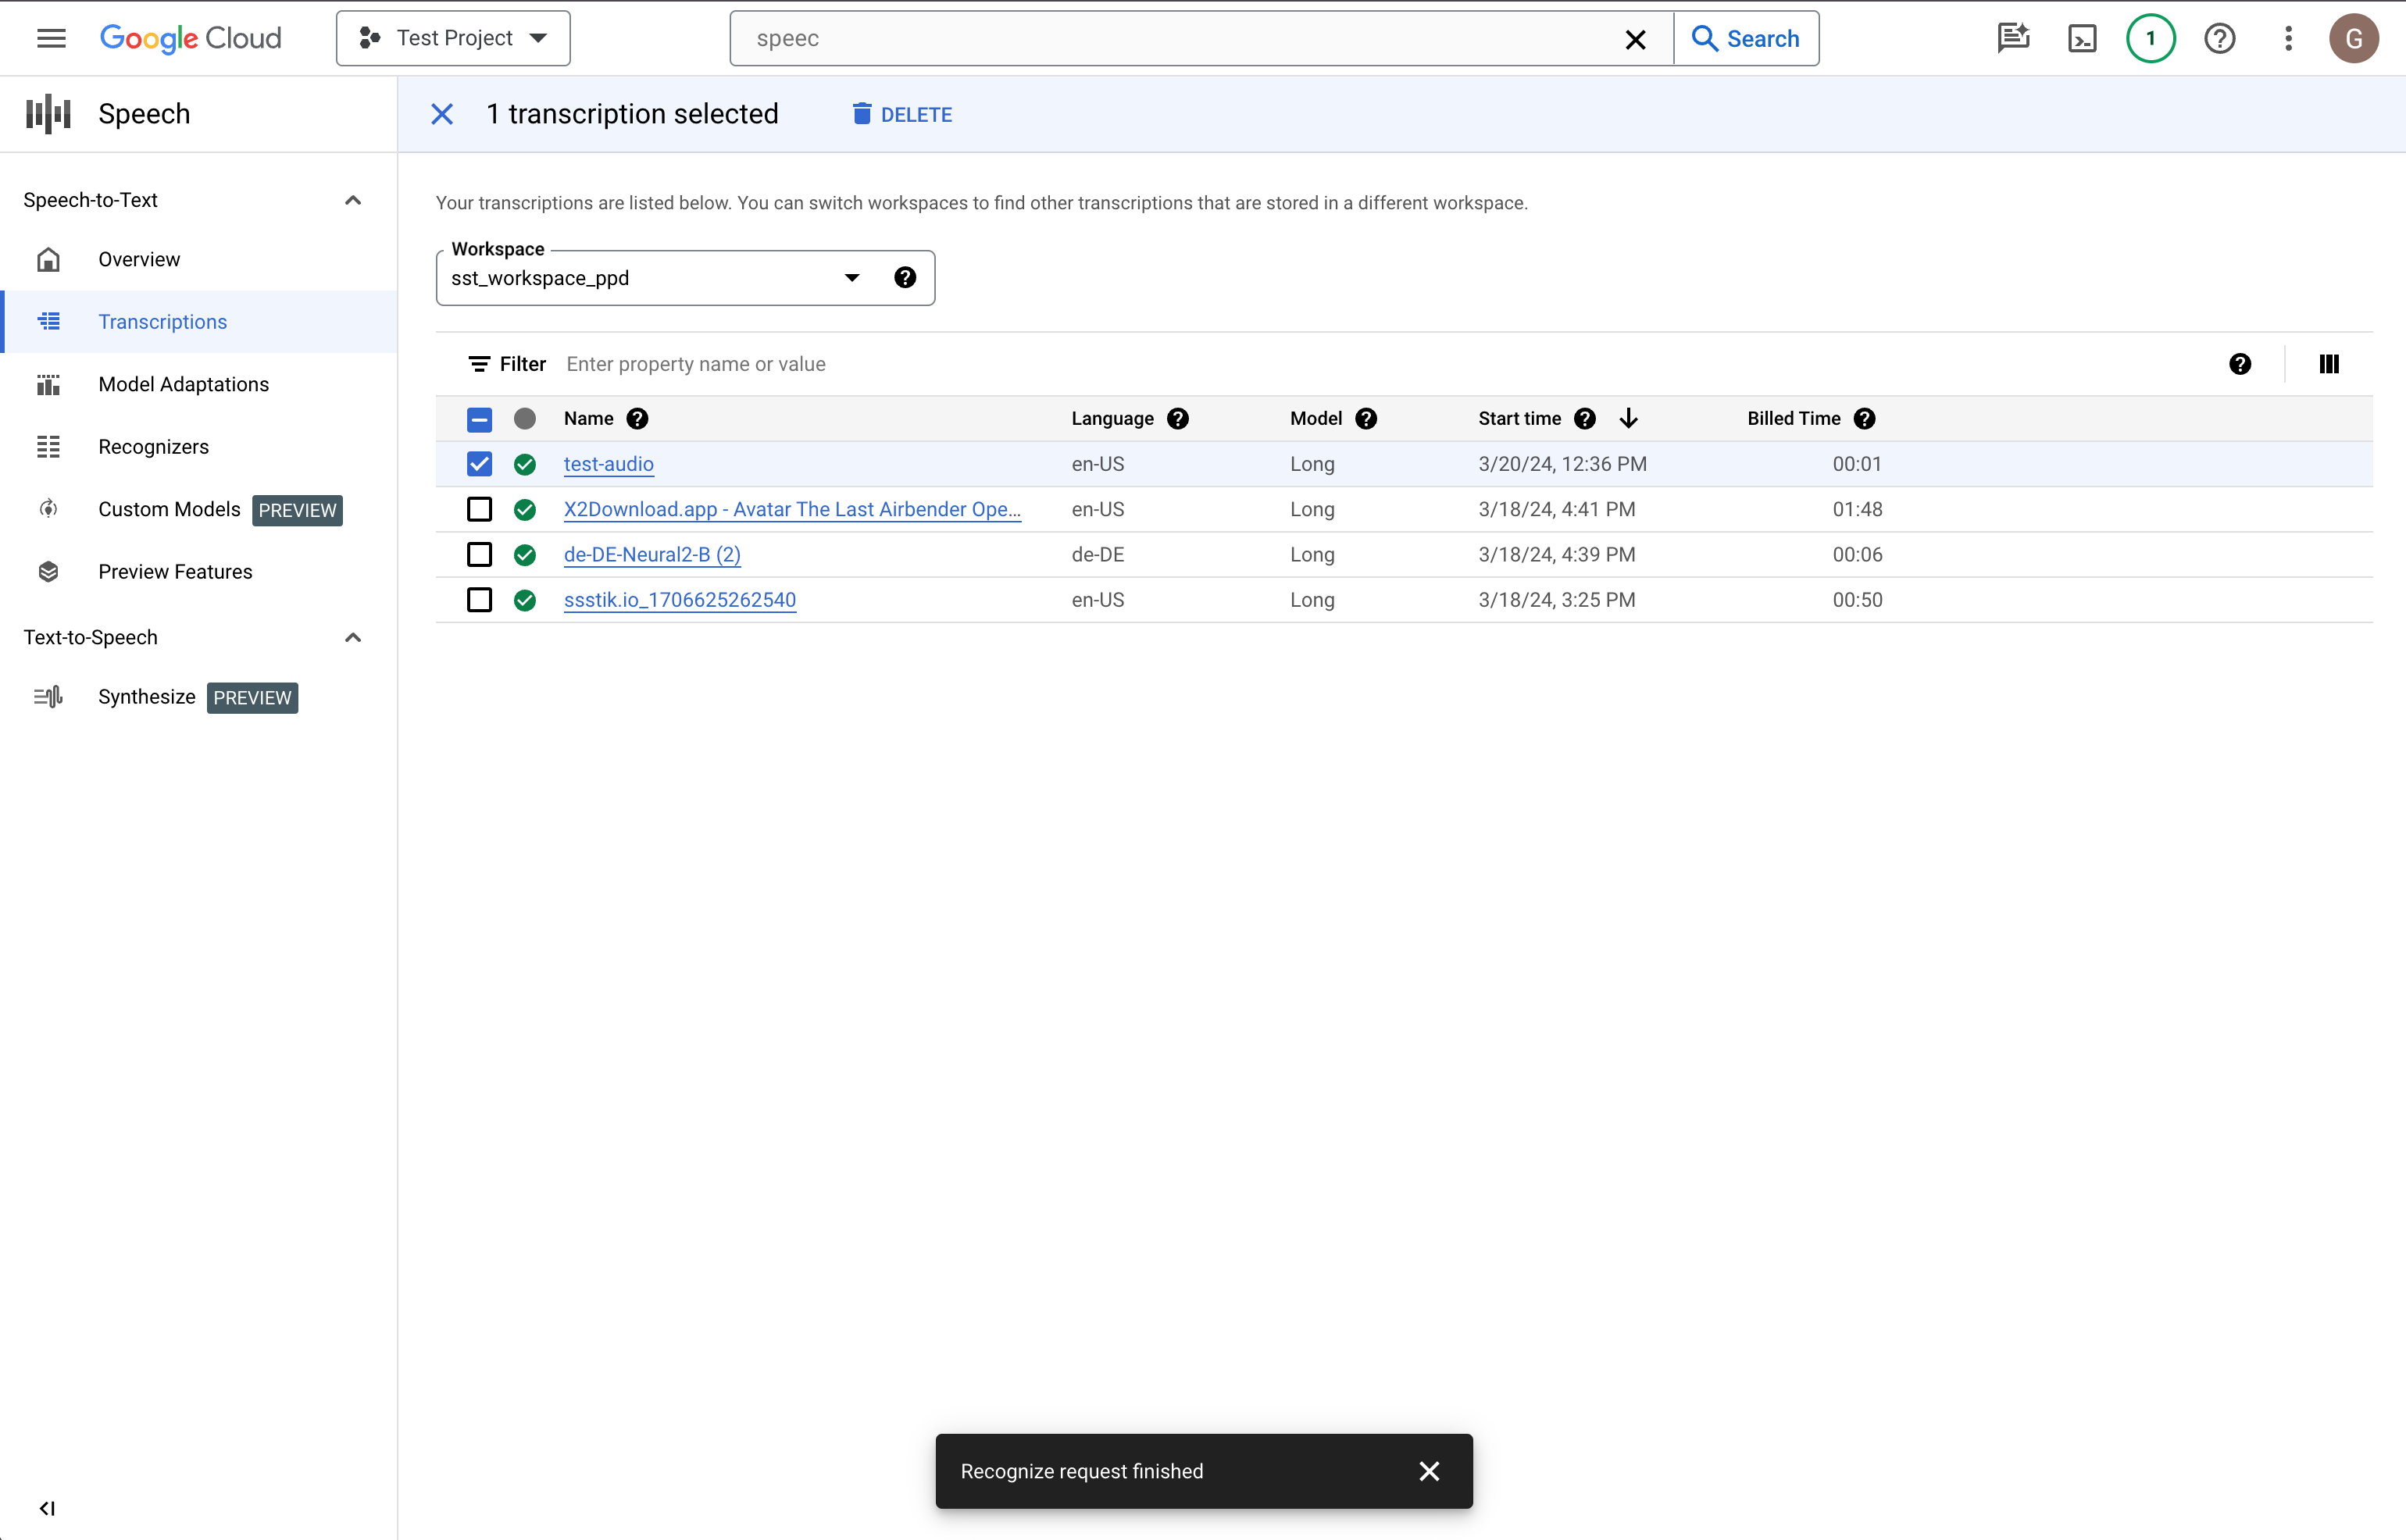
possível ativar a API Speech-to-Text. Acesse a barra Pesquisar produtos e
recursos na parte superior da página e digite "speech".
Selecione a API Cloud Speech-to-Text na lista de resultados.
Para testar o Speech-to-Text sem vinculá-lo ao projeto, escolha
a opção TESTAR ESTA API. Para ativar a API Speech-to-Text para uso
com o projeto, clique em ATIVAR.
Criar uma transcrição
Permissões necessárias para a tarefa
Para executar essa tarefa, é necessário ter
permissões:
storage.buckets.get
storage.buckets.list
storage.buckets.update
No nível do projeto ou do bucket:
storage.objects.create
storage.objects.delete
storage.objects.get
storage.objects.list
storage.objects.update
Use o console do Google Cloud para criar uma nova transcrição:
Se esta for a primeira vez que você usa o console,
será solicitado a escolher onde no Cloud Storage armazenar suas
configurações e transcrições.
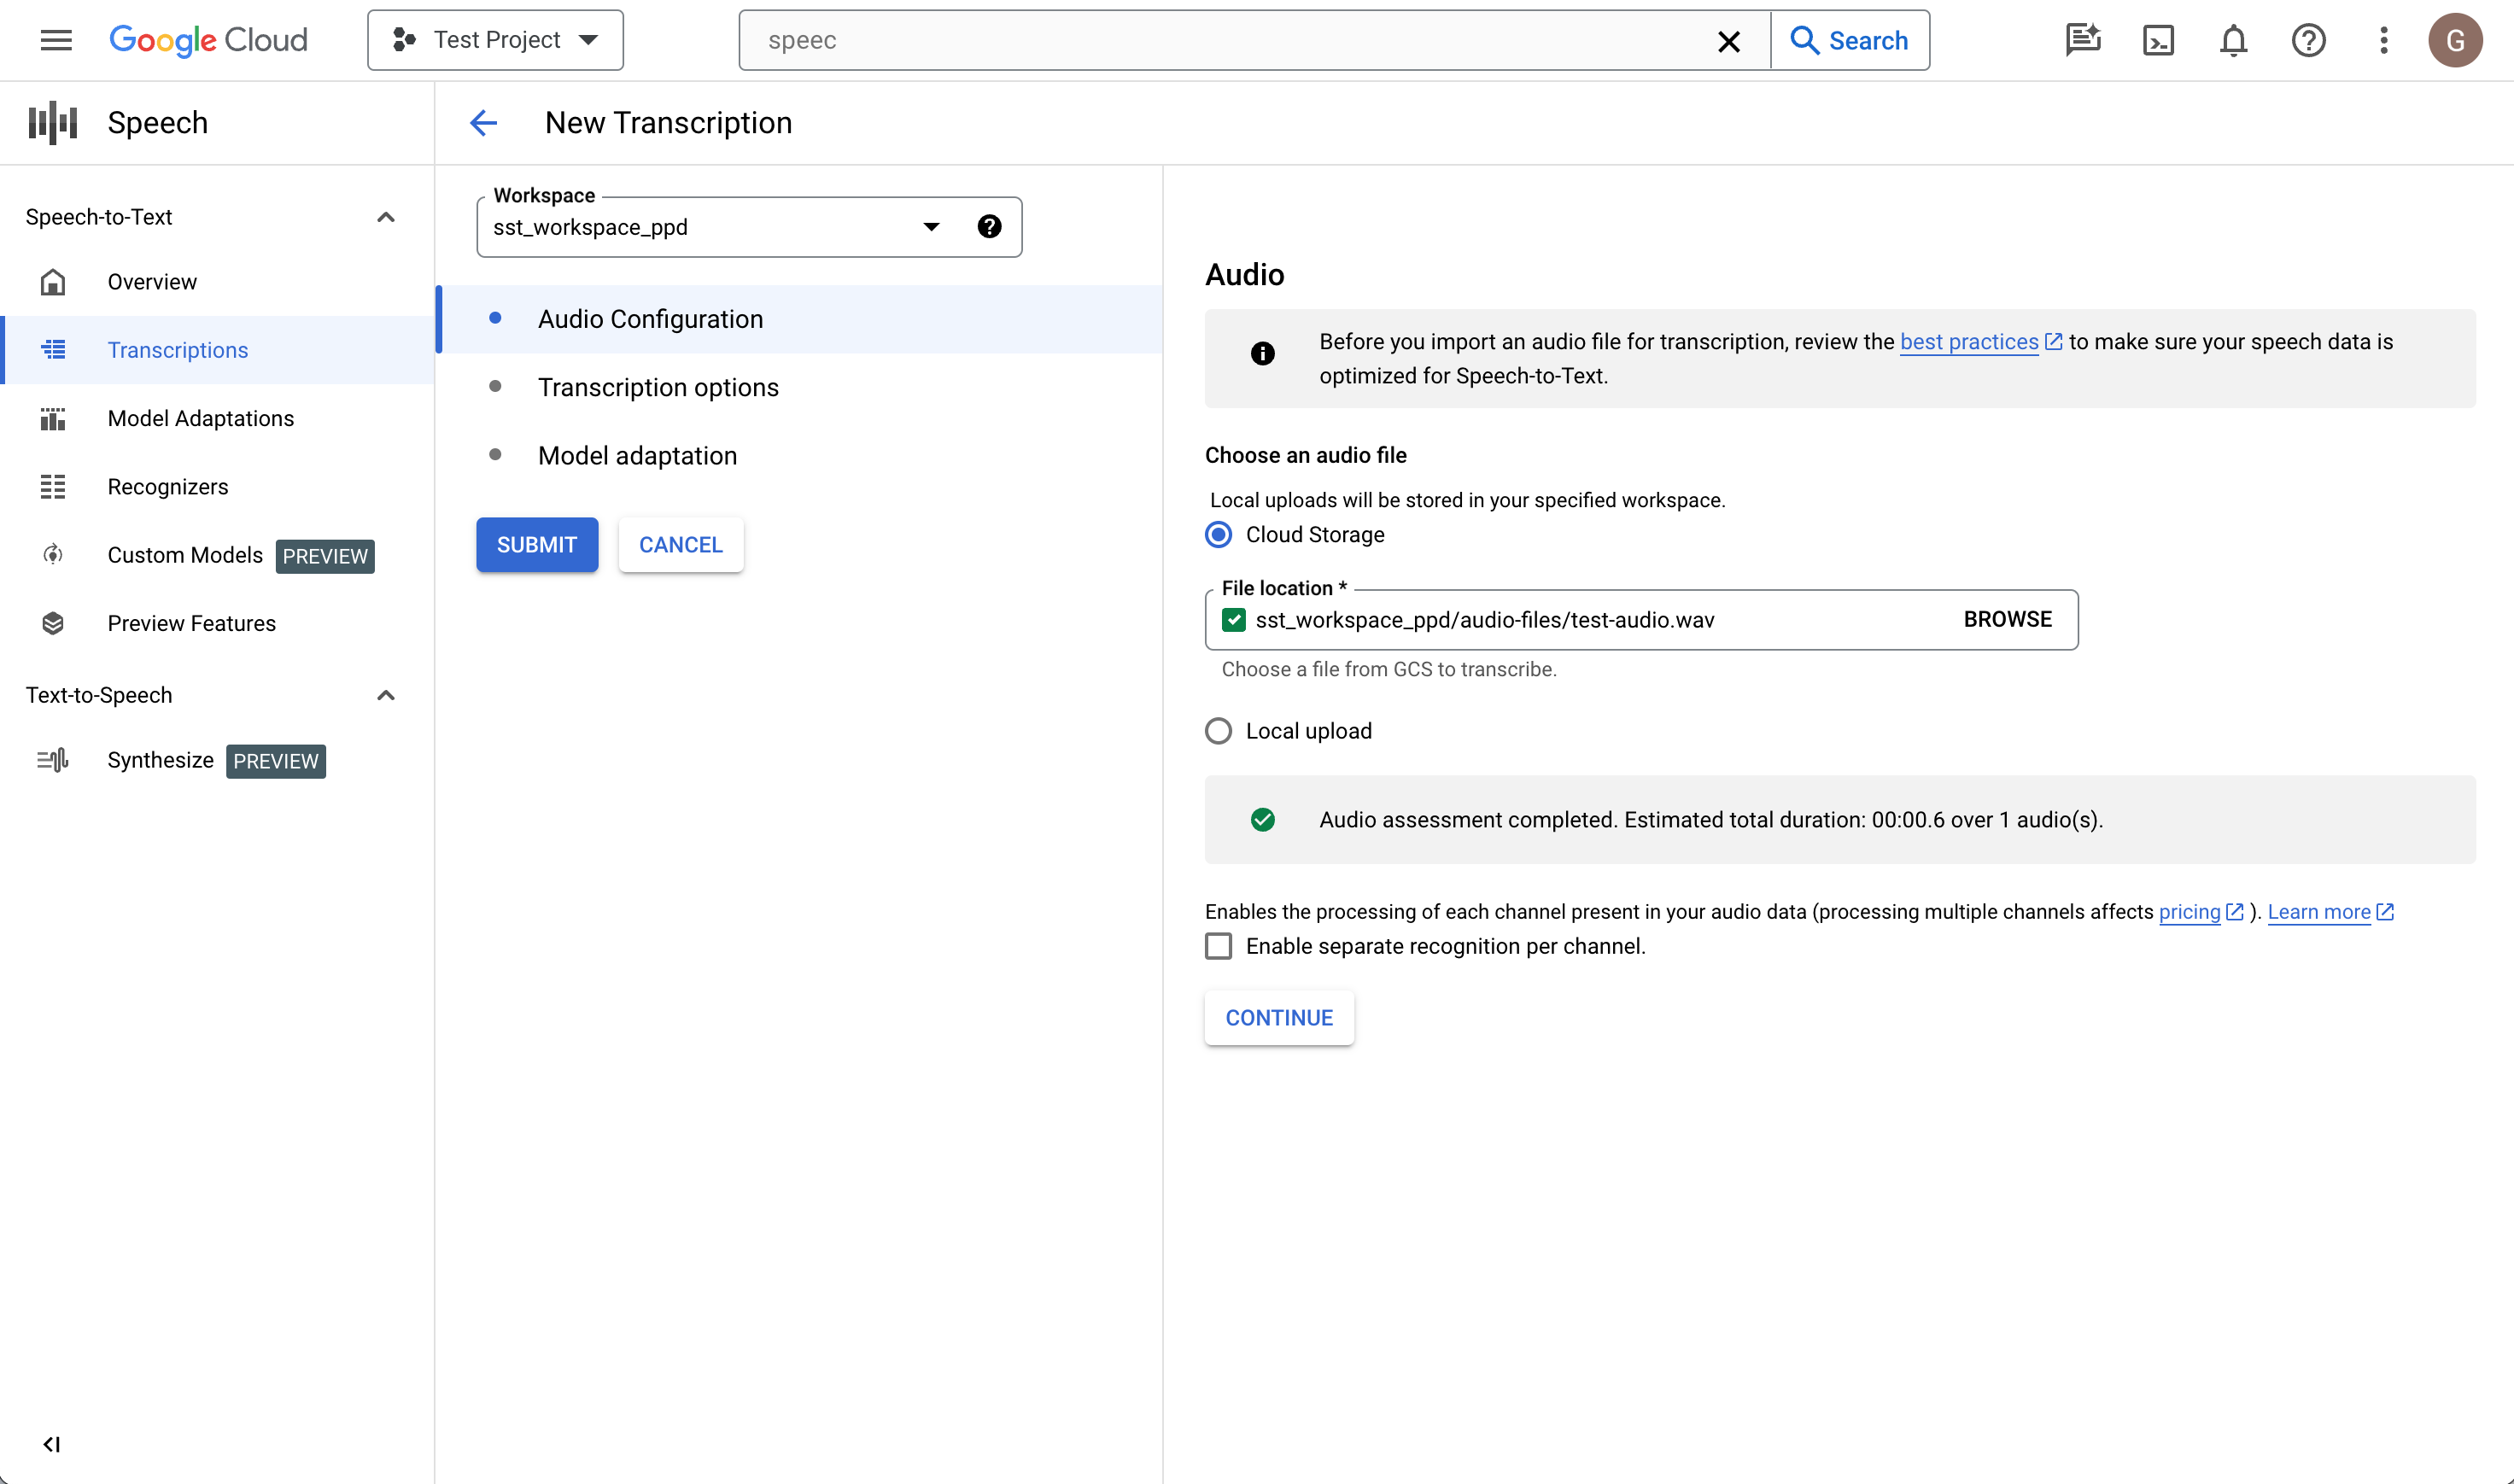
Na página Criar transcrição, Faça upload de um arquivo de áudio de origem.
É possível escolher um arquivo que já está salvo no Cloud Storage ou fazer upload de um
novo para o destino especificado do Cloud Storage.
Selecione o tipo de codificação do arquivo de áudio enviado.
Especifique a taxa de amostragem.
Clique em Continuar. Você será direcionado para Opções de transcrição.
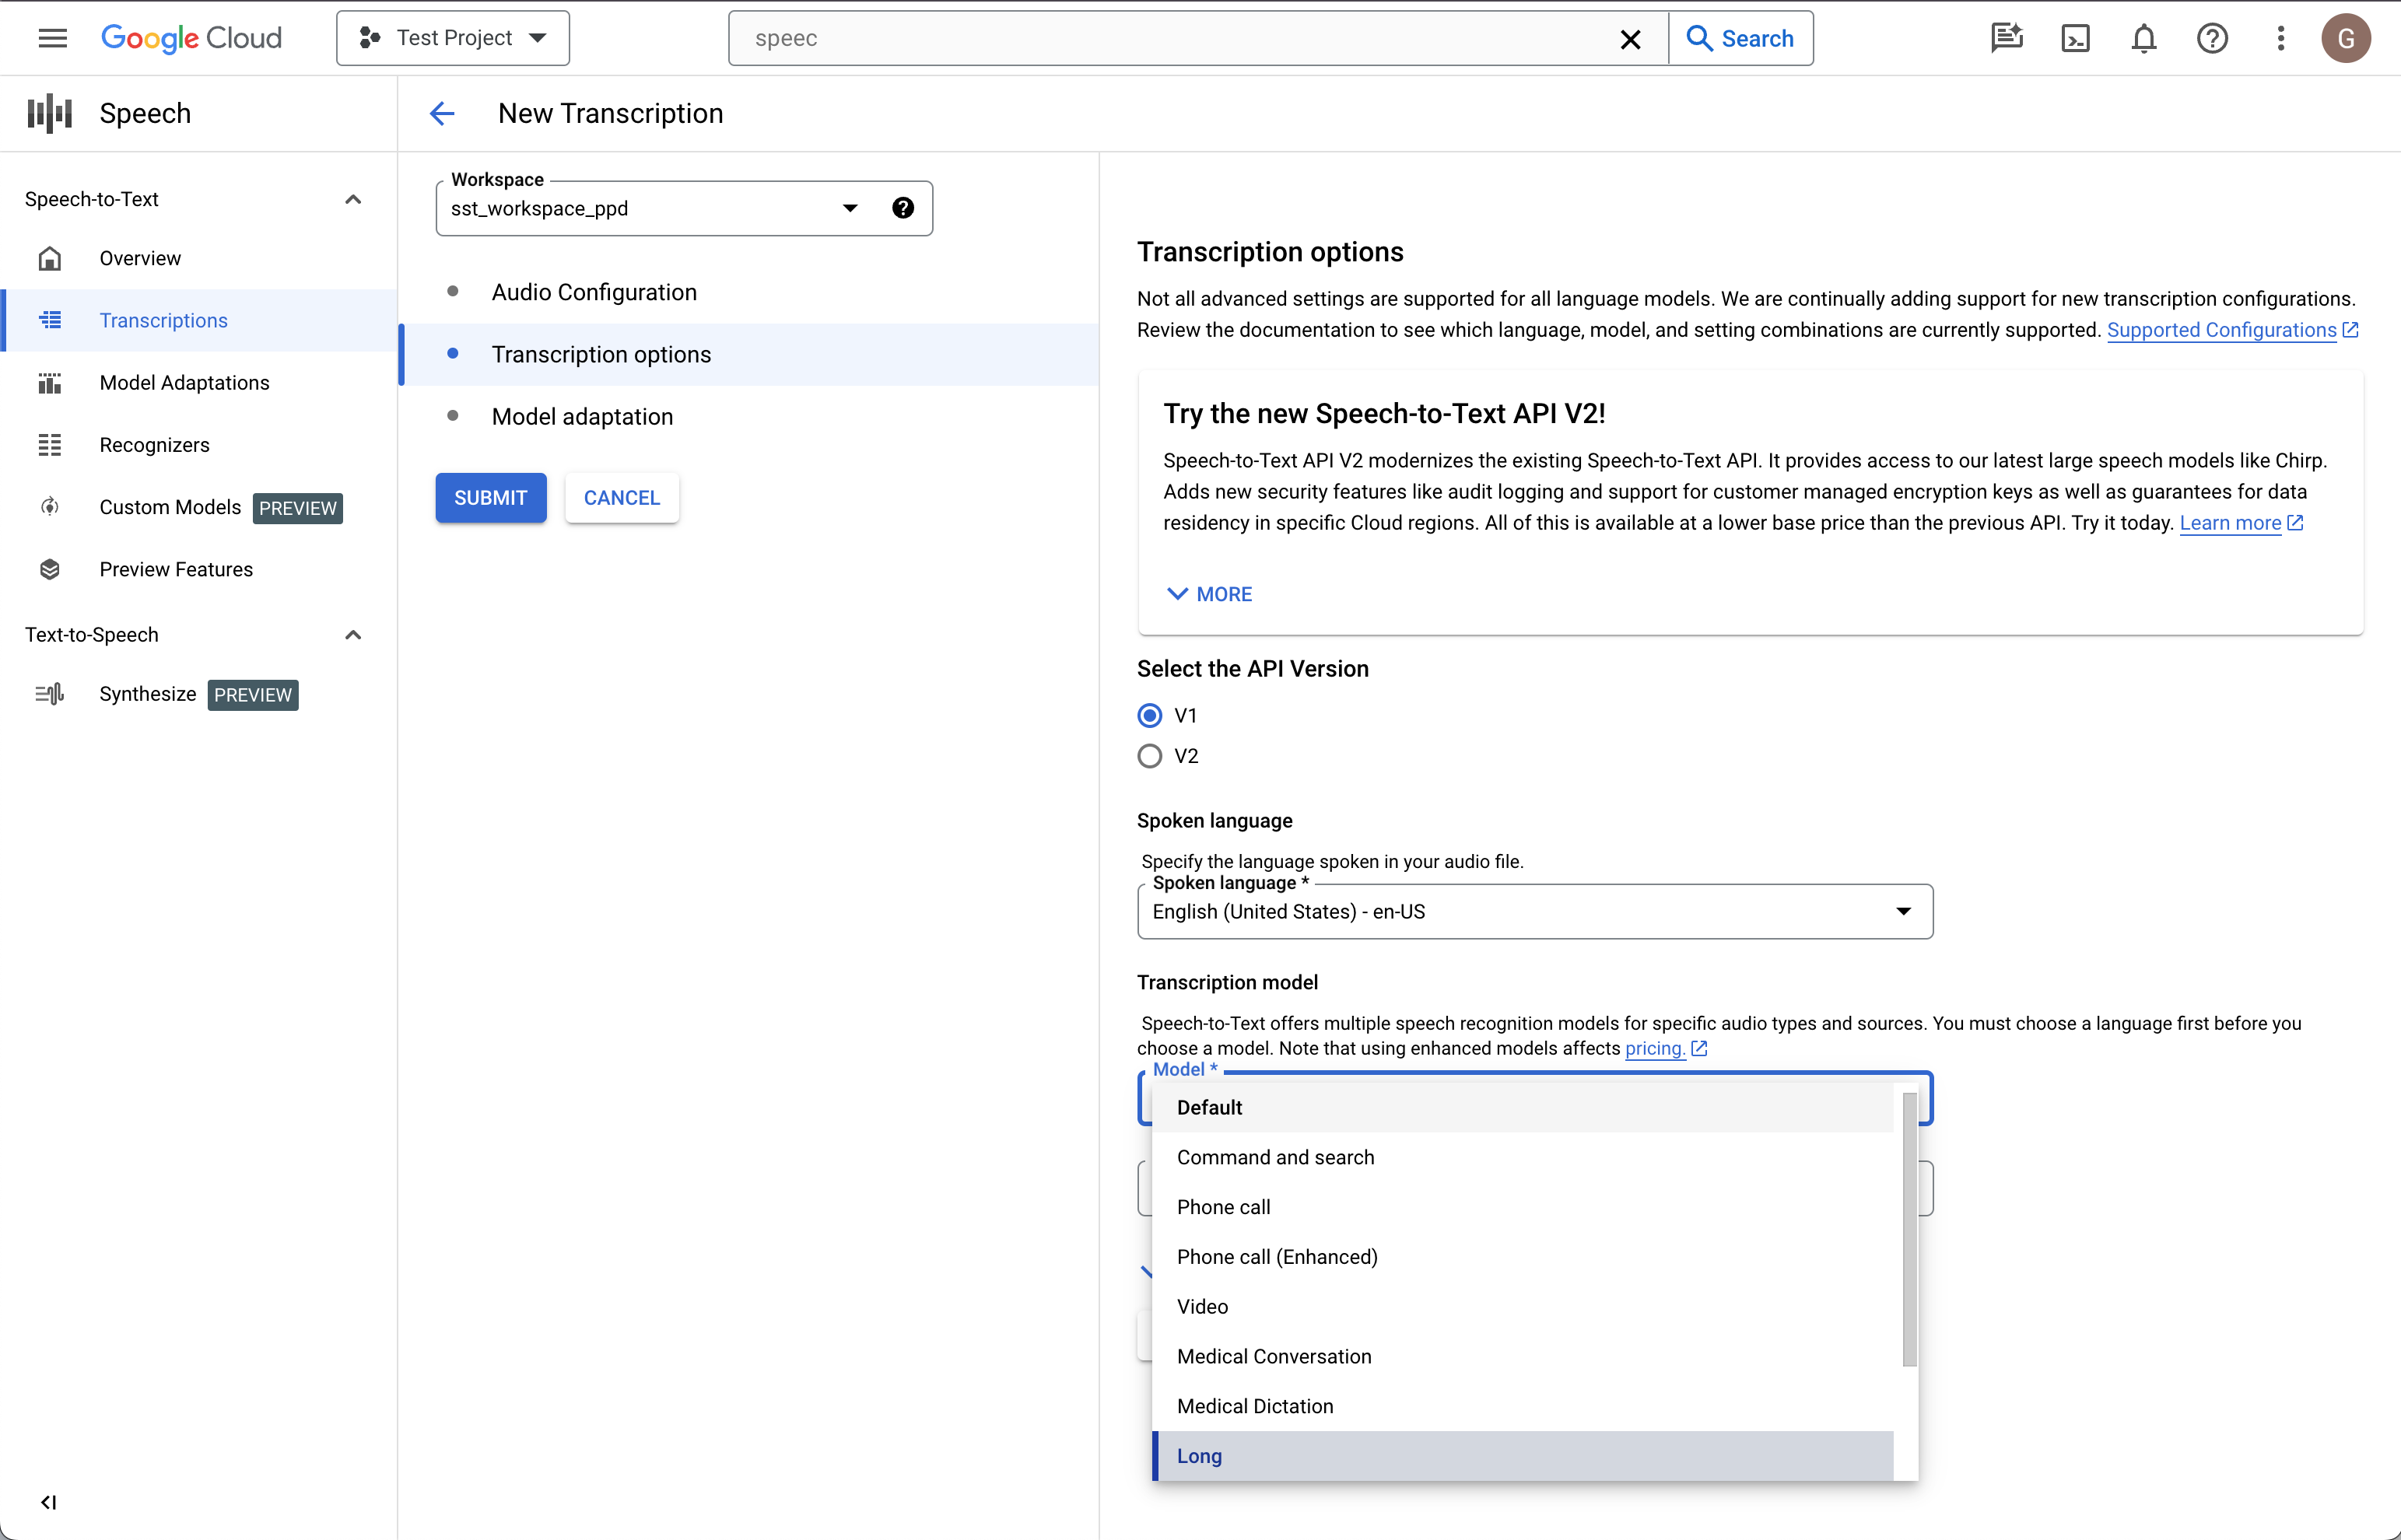
Opções de transcrição
Selecione o código do idioma do áudio de origem. Este é o idioma
falado na gravação.
Escolha o modelo de transcrição que você quer usar no arquivo.
A opção Padrão é pré-selecionada e, geralmente, nenhuma alteração é necessária, mas fazer a
correspondência do modelo com o tipo de áudio pode resultar em maior acurácia.
Observe que os custos do modelo variam.
Clique em Continuar. Você será direcionado para Adaptação do modelo.
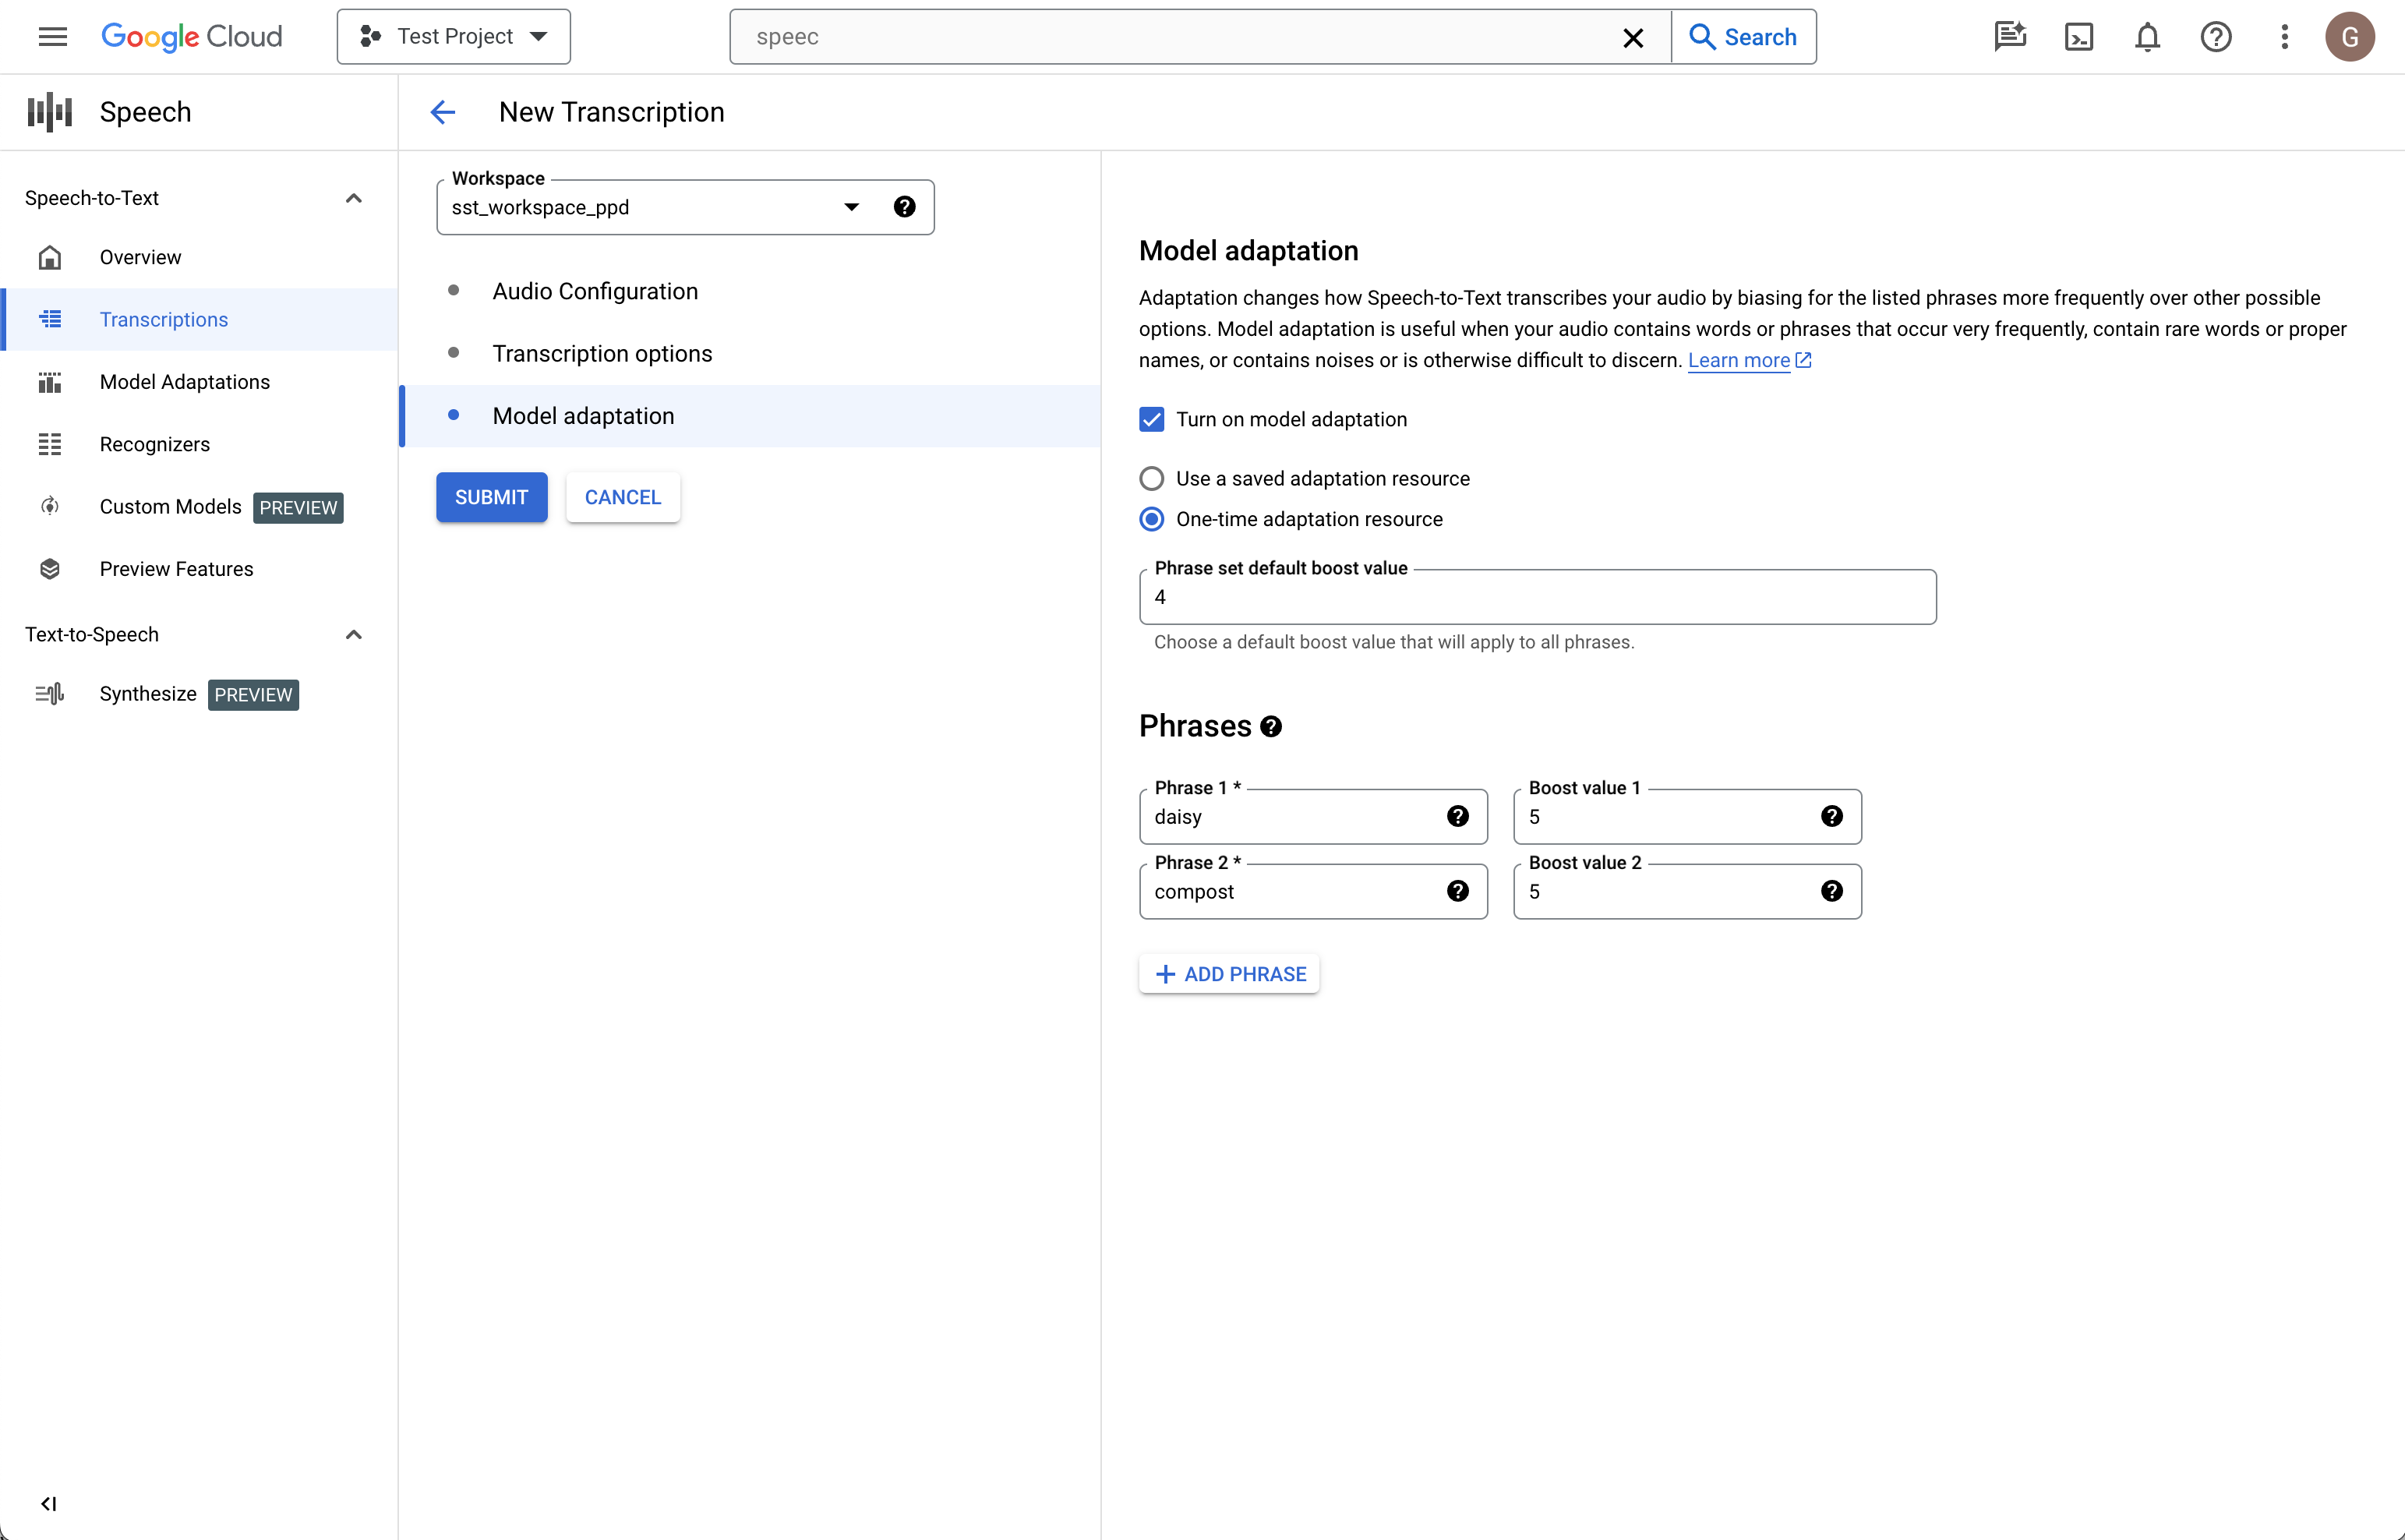
Adaptação do modelo (opcional)
Se o áudio de origem tiver itens como palavras raras, nomes próprios ou
termos reservados, e você tiver problemas com o reconhecimento, a adaptação do
modelo poderá ajudar.
Marque Ativar a adaptação do modelo.
Escolha Recurso de adaptação única.
Adicione frases relevantes e atribua a elas um valor de otimização.
Na coluna à esquerda, clique em Enviar para criar a transcrição.
Revisar a transcrição
Dependendo do tamanho do arquivo de áudio, a transcrição pode levar de
minutos a horas para ser criada. Depois que a transcrição for criada, ela estará pronta para revisão. Classificar a tabela por carimbo de data/hora ajuda você a localizar as transcrições
recentes.
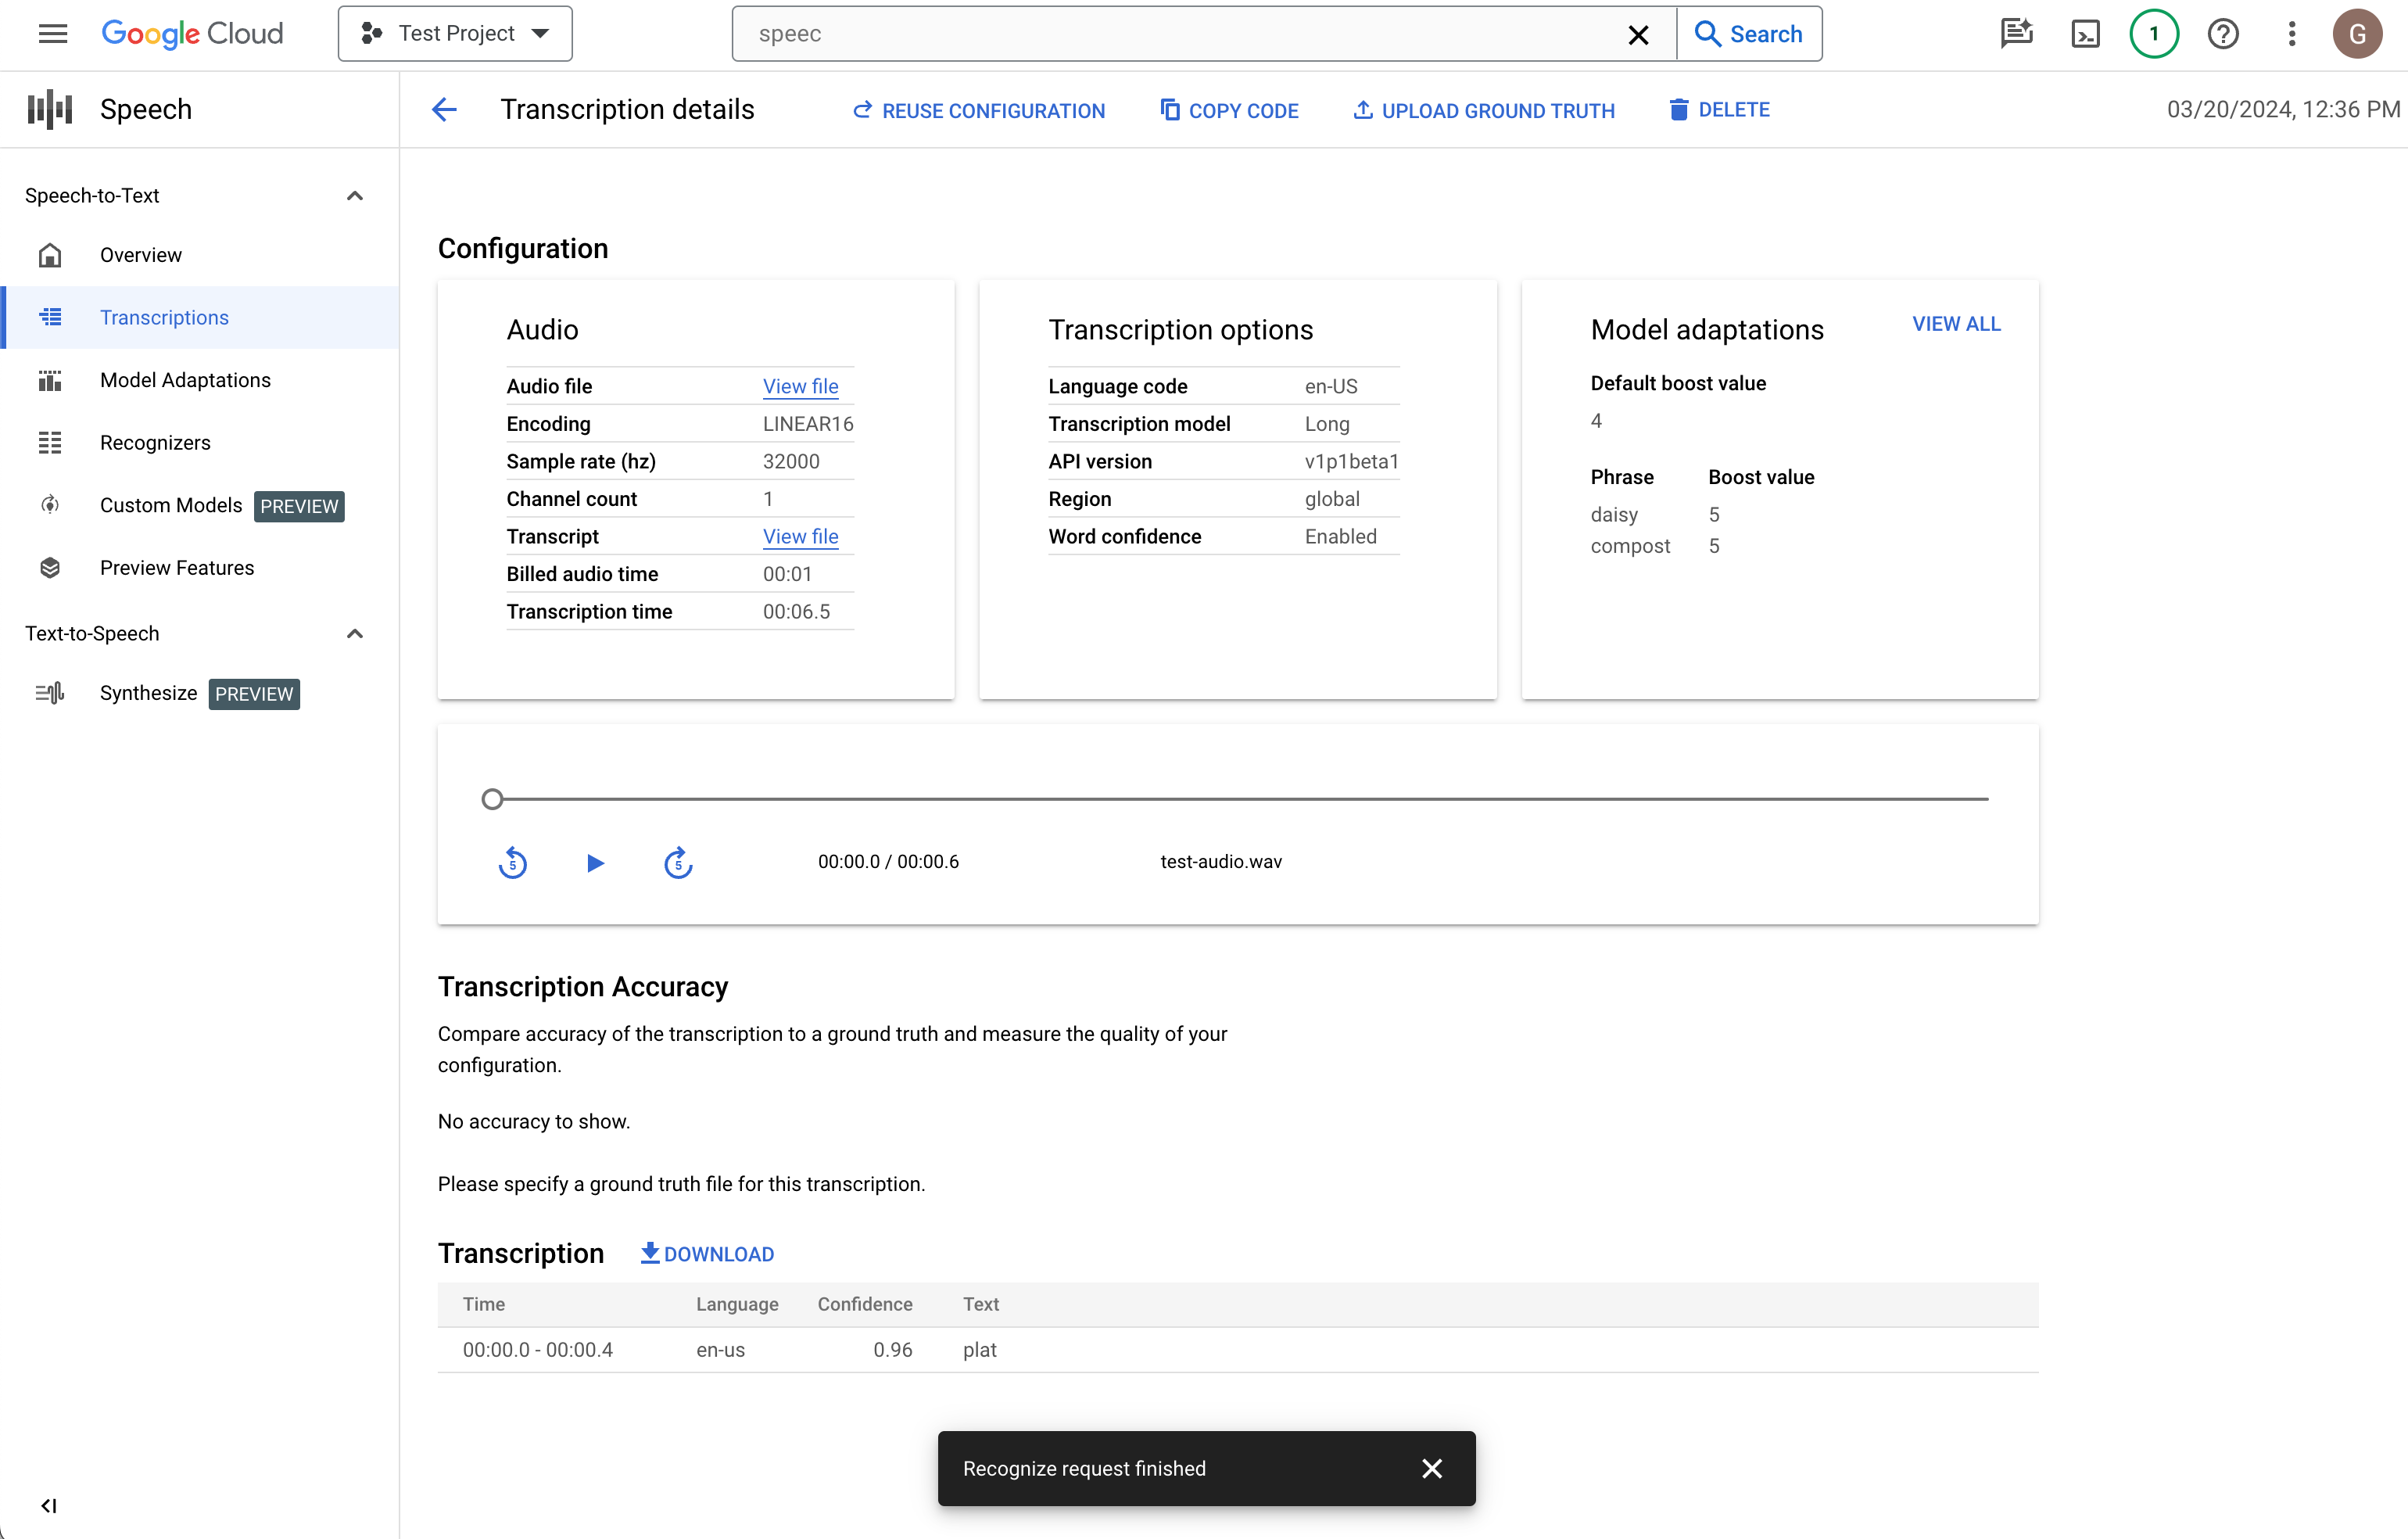
Clique no Nome da transcrição que você quer revisar.
Comparar o texto Transcrição com o arquivo de áudio
Se você quiser fazer alterações, clique em Reutilizar configuração.
Isso levará ao fluxo Criar transcrição com as mesmas
opções pré-selecionadas, permitindo que você altere alguns itens, crie uma nova
transcrição e compare os resultados.
[[["Fácil de entender","easyToUnderstand","thumb-up"],["Meu problema foi resolvido","solvedMyProblem","thumb-up"],["Outro","otherUp","thumb-up"]],[["Difícil de entender","hardToUnderstand","thumb-down"],["Informações incorretas ou exemplo de código","incorrectInformationOrSampleCode","thumb-down"],["Não contém as informações/amostras de que eu preciso","missingTheInformationSamplesINeed","thumb-down"],["Problema na tradução","translationIssue","thumb-down"],["Outro","otherDown","thumb-down"]],["Última atualização 2025-09-02 UTC."],[],[],null,["# Quickstart: Transcribe speech to text by using the Google Cloud console\n\nTranscribe speech to text by using the Google Cloud console\n===========================================================\n\nThis quickstart introduces you to the\n[Cloud Speech-to-Text Console](https://console.cloud.google.com/speech). In this\nquickstart, you will create and refine a transcription and learn how to\nuse this configuration with the Speech-to-Text API for your own applications.\n\nTo learn how to send requests and receive responses using the REST API instead\nof the Console, see the\n[before you begin](/speech-to-text/docs/before-you-begin) page.\n\nBefore you begin\n----------------\n\nBefore you can begin using the Speech-to-Text Console, you must enable the\nAPI in the Google Cloud Platform Console. The steps below walk you through the\nfollowing actions:\n\n- Enable Speech-to-Text on a project.\n- Make sure billing is enabled for Speech-to-Text.\n\n### Set up your Google Cloud project\n\n1. [Sign in to Google Cloud console](https://console.cloud.google.com/)\n\n2. [Go to the project selector page](https://console.cloud.google.com/projectselector2/home/dashboard)\n\n You can either choose an existing project or create a new one. For more details\n about creating a project, see\n [Google Cloud Platform documentation](/resource-manager/docs/creating-managing-projects).\n3. If you create a new project, you will be prompted to link a billing account\n to this project. If you are using a pre-existing project, make sure that you\n have billing enabled.\n\n [Learn how to confirm that billing is enabled for your project](/billing/docs/how-to/modify-project)\n | **Note:** You must enable billing to use Speech-to-Text API, however you will not be charged unless you exceed the free quota. See the [pricing](/speech-to-text/pricing) page for more details.\n4. Once you have selected a project and linked it to a billing account, you\n can enable the Speech-to-Text API. Go to the **Search products and\n resources** bar at the top of the page and type in **\"speech\"**.\n\n5. Select the **Cloud Speech-to-Text API** from the list of results.\n\n6. To try Speech-to-Text without linking it to your project, choose\n the **TRY THIS API** option. To enable the Speech-to-Text API for use\n with your project, click **ENABLE**.\n\nCreate a transcription\n----------------------\n\n#### Permissions required for this task\n\nTo perform this task, you must have the following\n[permissions](/iam/docs/overview#permissions):\n\n\n- `storage.buckets.get`\n- `storage.buckets.list`\n- `storage.buckets.update`\n\nAt the project or bucket level:\n\n- `storage.objects.create`\n- `storage.objects.delete`\n- `storage.objects.get`\n- `storage.objects.list`\n- `storage.objects.update`\n\nUse the Google Cloud console to create a new transcription:\n\n### Audio configuration\n\n1. Open the [**Speech-to-Text** overview](https://console.cloud.google.com/speech).\n\n \u003cbr /\u003e\n\n2. Click **Create transcription**.\n\n - If this is your first time using the console, you will be asked to choose where in Cloud Storage to store your configurations and transcriptions.\n3. In the **Create transcription** page, **Upload a source audio file**.\n You can choose a file that is already saved in Cloud Storage or upload a\n new one to your specified Cloud Storage destination.\n\n4. Select the uploaded audio file's **encoding type**.\n\n5. Specify its **sample rate**.\n\n6. Click **Continue** . You will be taken to **Transcription options**.\n\n### Transcription options\n\n1. Select the **language code** of your source audio. This is the language\n being spoken in the recording.\n\n2. Choose the **transcription model** you would like to use on the file.\n The Default option is pre-selected and, generally, no change is needed,\n but matching the model to the type of audio may result in higher accuracy.\n Note that model costs vary.\n\n \u003cbr /\u003e\n\n3. Click **Continue** . You will be taken to **Model adaptation**.\n\n### Model adaptation (optional)\n\nIf your source audio contains things like rare words, proper names, or\nproprietary terms and you experience problems with recognition, model\nadaptation can help.\n\n1. Check **Turn on model adaptation**.\n\n2. Choose **One-time adaptation resource**.\n\n3. Add relevant **phrases** and give them a **boost value**.\n\n \u003cbr /\u003e\n\n4. In the left column, click **Submit** to create your transcription.\n\n### Review your transcription\n\nDepending on the size of your audio file, a transcription may take from minutes\nto hours to create. Once your transcription has been created, it's ready for\nreview. Sorting the table by timestamp can help you easily locate your recent\ntranscriptions.\n\n1. Click on the **Name** of the transcription you would like to review.\n\n2. Compare the **Transcription** text to the audio file\n\n3. If you would like to make changes, click **Reuse configuration** .\n This will bring you to the **Create transcription** flow with the same\n options pre-selected, allowing you to change a few things, create a new\n transcription, and compare the results.\n\nWhat's next\n-----------\n\n\n- Practice [transcribing short audio files](/speech-to-text/docs/sync-recognize).\n- Learn how to [batch long audio files for speech recognition](/speech-to-text/docs/async-recognize).\n- Learn how to [transcribe streaming audio](/speech-to-text/docs/streaming-recognize) like from a microphone.\n- Get started with the Speech-to-Text in your language of choice by using a [Speech-to-Text client library](/speech-to-text/docs/reference/libraries).\n- Work through the [sample applications](/speech-to-text/docs/samples).\n- For best performance, accuracy, and other tips, see the [best practices](/speech-to-text/docs/best-practices) documentation.\n\n\u003cbr /\u003e"]]