This page shows how to generate static overlay images on top of a live stream. A static overlay image persists during the entire live stream. You can configure the resolution and position of a static overlay image.
Set up your Google Cloud project and authentication
If you have not created a Google Cloud project and credentials, see Before you begin.Upload an image to your Cloud Storage bucket
- In the Google Cloud console, go to the Cloud Storage Browser page.
Go to the Cloud Storage Browser page - Click the name of your bucket to open it.
- Click Upload files.
- Select an image file (JPEG or PNG) to upload from your local machine. You can use this sample overlay image.
Your image is now saved to the Cloud Storage bucket.
Create an asset
Assets are video or images that can be used with the Live Stream API. Create an image asset to use as a static overlay.
To create an asset, use the
projects.locations.assets.create method.
Before using any of the request data, make the following replacements:
PROJECT_NUMBER: your Google Cloud project number; this is located in the Project number field on the IAM Settings pageLOCATION: the location in which to create the asset; use one of the supported regionsShow locationsus-central1us-east1us-east4us-west1us-west2northamerica-northeast1southamerica-east1asia-east1asia-east2asia-south1asia-northeast1asia-southeast1australia-southeast1europe-north1europe-west1europe-west2europe-west3europe-west4
ASSET_ID: A user-defined identifier for the new asset to create. This value must be 1-63 characters, begin and end with[a-z0-9], and can contain dashes (-) between characters. For example,my-asset.ASSET_URI: the URI of the image in your Cloud Storage bucket to use, such asgs://my-bucket/my-image.png
Request JSON body:
{
  "image": {
    "uri": "ASSET_URI"
  }
}
To send your request, expand one of these options:
You should receive a JSON response similar to the following:
{
  "name": "projects/PROJECT_NUMBER/locations/LOCATION/operations/OPERATION_ID",
  "metadata": {
    "@type": "type.googleapis.com/google.cloud.video.livestream.v1.OperationMetadata",
    "createTime": CREATE_TIME,
    "target": "projects/PROJECT_NUMBER/locations/LOCATION/assets/ASSET_ID",
    "verb": "create",
    "requestedCancellation": false,
    "apiVersion": "v1"
  },
  "done": false
}
Copy the returned
OPERATION_ID to use in
the next section.
Check for the result
Use the projects.locations.operations.get method to check if
the asset has been created. If the response contains "done: false",
repeat the command until the response contains "done: true".
Before using any of the request data, make the following replacements:
PROJECT_NUMBER: your Google Cloud project number; this is located in the Project number field on the IAM Settings pageLOCATION: the location where your asset is located; use one of the supported regionsShow locationsus-central1us-east1us-east4us-west1us-west2northamerica-northeast1southamerica-east1asia-east1asia-east2asia-south1asia-northeast1asia-southeast1australia-southeast1europe-north1europe-west1europe-west2europe-west3europe-west4
OPERATION_ID: the identifier for the operation
To send your request, expand one of these options:
You should receive a JSON response similar to the following:
{
  "name": "projects/PROJECT_NUMBER/locations/LOCATION/operations/OPERATION_ID",
  "metadata": {
    "@type": "type.googleapis.com/google.cloud.video.livestream.v1.OperationMetadata",
    "createTime": CREATE_TIME,
    "endTime": END_TIME,
    "target": "projects/PROJECT_NUMBER/locations/LOCATION/assets/ASSET_ID",
    "verb": "create",
    "requestedCancellation": false,
    "apiVersion": "v1"
  },
  "done": true,
  "response": {
    "@type": "type.googleapis.com/google.cloud.video.livestream.v1.Asset",
    "name": "projects/PROJECT_NUMBER/locations/LOCATION/assets/ASSET_ID",
    "createTime": CREATE_TIME,
    "updateTime": UPDATE_TIME,
    "image": {
      "uri": "ASSET_URI"
    },
    "crc32c": "ae1EJg==",
    "state": "ACTIVE"
  }
}
Create the input endpoint
To create the input endpoint, use the
projects.locations.inputs.create method.
Before using any of the request data, make the following replacements:
PROJECT_NUMBER: your Google Cloud project number; this is located in the Project number field on the IAM Settings pageLOCATION: the location in which to create the input endpoint; use one of the supported regionsShow locationsus-central1us-east1us-east4us-west1us-west2northamerica-northeast1southamerica-east1asia-east1asia-east2asia-south1asia-northeast1asia-southeast1australia-southeast1europe-north1europe-west1europe-west2europe-west3europe-west4
INPUT_ID: a user-defined identifier for the new input endpoint to create (to which you send your input stream). This value must be 1-63 characters, begin and end with[a-z0-9], and can contain dashes (-) between characters. For example,my-input.
Request JSON body:
{
  "type": "RTMP_PUSH"
}
To send your request, expand one of these options:
You should receive a JSON response similar to the following:
{
  "name": "projects/PROJECT_NUMBER/locations/LOCATION/operations/OPERATION_ID",
  "metadata": {
    "@type": "type.googleapis.com/google.cloud.video.livestream.v1.OperationMetadata",
    "createTime": CREATE_TIME,
    "target": "projects/PROJECT_NUMBER/locations/LOCATION/inputs/INPUT_ID",
    "verb": "create",
    "requestedCancellation": false,
    "apiVersion": "v1"
  },
  "done": false
}
You can check for the result of the input creation operation using the new operation ID.
Get input endpoint details
To get the details of the input endpoint, use the
projects.locations.inputs.get method.
Before using any of the request data, make the following replacements:
PROJECT_NUMBER: your Google Cloud project number; this is located in the Project number field on the IAM Settings pageLOCATION: the location where your input endpoint is located; use one of the supported regionsShow locationsus-central1us-east1us-east4us-west1us-west2northamerica-northeast1southamerica-east1asia-east1asia-east2asia-south1asia-northeast1asia-southeast1australia-southeast1europe-north1europe-west1europe-west2europe-west3europe-west4
INPUT_ID: the user-defined identifier for the input endpoint
To send your request, expand one of these options:
You should receive a JSON response similar to the following:
{
  "name": "projects/PROJECT_NUMBER/locations/LOCATION/inputs/INPUT_ID",
  "createTime": CREATE_TIME,
  "updateTime": UPDATE_TIME,
  "type": "RTMP_PUSH",
  "uri":  "INPUT_STREAM_URI", # For example, "rtmp://1.2.3.4/live/b8ebdd94-c8d9-4d88-a16e-b963c43a953b",
  "tier": "HD"
}
Find the uri field and copy the returned
INPUT_STREAM_URI
to use later in the Send the input stream section.
Create the channel
To create the channel, use the
projects.locations.channels.create method.
Note the staticOverlays array in the channel configuration:
"staticOverlays": [
  {
    "asset": "projects/PROJECT_NUMBER/locations/LOCATION/assets/ASSET_ID",
    "position": {
      "x": 0.5,
      "y": 0.5
    },
    "resolution": {
      "w": 0.1
    },
    "opacity": 0.8
  }
],
Before using any of the request data, make the following replacements:
PROJECT_NUMBER: your Google Cloud project number; this is located in the Project number field on the IAM Settings pageLOCATION: the location in which to create the channel; use one of the supported regionsShow locationsus-central1us-east1us-east4us-west1us-west2northamerica-northeast1southamerica-east1asia-east1asia-east2asia-south1asia-northeast1asia-southeast1australia-southeast1europe-north1europe-west1europe-west2europe-west3europe-west4
CHANNEL_ID: a user-defined identifier for the channel to create; this value must be 1-63 characters, begin and end with[a-z0-9], and can contain dashes (-) between charactersINPUT_ID: the user-defined identifier for the input endpointBUCKET_NAME: the name of the Cloud Storage bucket you created to hold the live stream manifest and segment filesASSET_ID: the user-defined identifier for the asset
Request JSON body:
{
  "inputAttachments": [
    {
      "key": "my-input",
      "input": "projects/PROJECT_NUMBER/locations/LOCATION/inputs/INPUT_ID"
    }
  ],
  "output": {
    "uri": "gs://BUCKET_NAME"
  },
  "staticOverlays": [
    {
      "asset": "projects/PROJECT_NUMBER/locations/LOCATION/assets/ASSET_ID",
      "position": {
        "x": 0.5,
        "y": 0.5
      },
      "resolution": {
        "w": 0.1
      },
      "opacity": 0.8
    },
  ],
  "elementaryStreams": [
    {
      "key": "es_video",
      "videoStream": {
        "h264": {
          "profile": "high",
          "widthPixels": 1280,
          "heightPixels": 720,
          "bitrateBps": 3000000,
          "frameRate": 30
        }
      }
    },
    {
      "key": "es_audio",
      "audioStream": {
        "codec": "aac",
        "channelCount": 2,
        "bitrateBps": 160000
      }
    }
  ],
  "muxStreams": [
    {
      "key": "mux_video_ts",
      "container": "ts",
      "elementaryStreams": ["es_video", "es_audio"],
      "segmentSettings": { "segmentDuration": "2s" }
    }
  ],
  "manifests": [
    {
      "key": "manifest_hls",
      "fileName": "main.m3u8",
      "type": "HLS",
      "muxStreams": [
        "mux_video_ts"
      ],
      "maxSegmentCount": 5
    }
  ]
}
To send your request, expand one of these options:
You should receive a JSON response similar to the following:
{
  "name": "projects/PROJECT_NUMBER/locations/LOCATION/operations/OPERATION_ID",
  "metadata": {
    "@type": "type.googleapis.com/google.cloud.video.livestream.v1.OperationMetadata",
    "createTime": CREATE_TIME,
    "target": "projects/PROJECT_NUMBER/locations/LOCATION/channels/CHANNEL_ID",
    "verb": "create",
    "requestedCancellation": false,
    "apiVersion": "v1"
  },
  "done": false
}
You can check for the result of the channel creation operation using the new operation ID.
Start the channel
To start a channel, use the
projects.locations.channels.start method.
Before using any of the request data, make the following replacements:
PROJECT_NUMBER: your Google Cloud project number; this is located in the Project number field on the IAM Settings pageLOCATION: the location where your channel is located; use one of the supported regionsShow locationsus-central1us-east1us-east4us-west1us-west2northamerica-northeast1southamerica-east1asia-east1asia-east2asia-south1asia-northeast1asia-southeast1australia-southeast1europe-north1europe-west1europe-west2europe-west3europe-west4
CHANNEL_ID: a user-defined identifier for the channel
To send your request, expand one of these options:
You should receive a JSON response similar to the following:
{
  "name": "projects/PROJECT_NUMBER/locations/LOCATION/operations/OPERATION_ID",
  "metadata": {
    "@type": "type.googleapis.com/google.cloud.video.livestream.v1.OperationMetadata",
    "createTime": CREATE_TIME,
    "target": "projects/PROJECT_NUMBER/locations/LOCATION/channels/CHANNEL_ID",
    "verb": "start",
    "requestedCancellation": false,
    "apiVersion": "v1"
  },
  "done": false
}
You can check for the result of the channel start operation using the new operation ID.
Send the input stream
Open a new terminal window. Run the following command, using
INPUT_STREAM_URI
from the
Get input endpoint details section:
ffmpeg -re -f lavfi -i "testsrc=size=1280x720 [out0]; sine=frequency=500 [out1]" \
  -acodec aac -vcodec h264 -f flv INPUT_STREAM_URI
Play the generated live stream
To play the generated media file in Shaka Player, complete the following steps:
- Make the Cloud Storage bucket you created publicly readable.
- To enable cross-origin resource
sharing (CORS) on a Cloud Storage bucket, do the following:
- Create a JSON file that contains the following:
[ { "origin": ["https://shaka-player-demo.appspot.com/"], "responseHeader": ["Content-Type", "Range"], "method": ["GET", "HEAD"], "maxAgeSeconds": 3600 } ] -
Run the following command after replacing
JSON_FILE_NAMEwith the name of the JSON file you created in the previous step:gcloud storage buckets update gs://BUCKET_NAME --cors-file=JSON_FILE_NAME.json
- Create a JSON file that contains the following:
- In the Cloud Storage bucket, find the generated
main.m3u8file. Click Copy URL in the file's Public access column. - Navigate to Shaka Player, an online live stream player.
- Click Custom Content in the top navigation bar.
- Click the + button.
Paste the public URL of the file into the Manifest URL box.
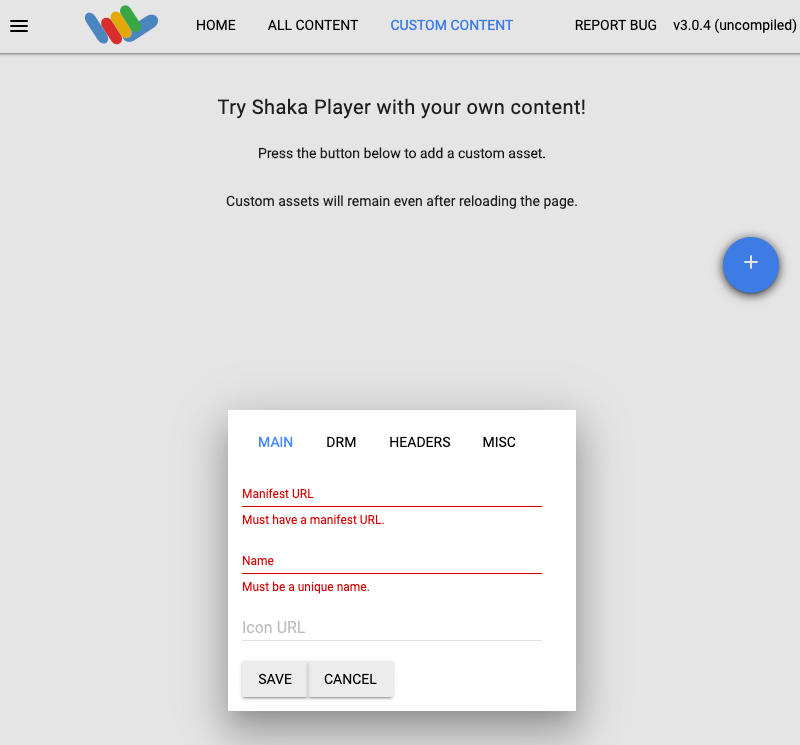
Type a name in the Name box.
Click Save.
Click Play.
You should see the overlay appear over the live stream.