在 Compute Engine 中,您可以使用 VM 管理員,管理虛擬機器 (VM) 上執行的作業系統。
您可以為個別 VM、專案,或資料夾/機構中的所有專案啟用 VM 管理員。如要查看設定 VM 使用 VM 管理員的必要步驟,請參閱設定總覽。
設定 VM 管理員後,您可以查看使用 OS 設定 API 執行的 API 作業稽核記錄,請參閱「查看 VM 管理員稽核記錄」。
事前準備
- 查看專案的 OS 設定配額。
-
如果尚未設定驗證,請先完成設定。
驗證可確認您的身分,以便存取 Google Cloud 服務和 API。如要從本機開發環境執行程式碼或範例,可以選取下列任一選項,向 Compute Engine 進行驗證:
Select the tab for how you plan to use the samples on this page:
Console
When you use the Google Cloud console to access Google Cloud services and APIs, you don't need to set up authentication.
gcloud
-
安裝 Google Cloud CLI。 安裝完成後,執行下列指令初始化 Google Cloud CLI:
gcloud init如果您使用外部識別資訊提供者 (IdP),請先 使用聯合身分登入 gcloud CLI。
- Set a default region and zone.
REST
如要在本機開發環境中使用本頁的 REST API 範例,請使用您提供給 gcloud CLI 的憑證。
安裝 Google Cloud CLI。 安裝完成後,執行下列指令初始化 Google Cloud CLI:
gcloud init如果您使用外部識別資訊提供者 (IdP),請先 使用聯合身分登入 gcloud CLI。
詳情請參閱 Google Cloud 驗證說明文件中的「Authenticate for using REST」。
支援的作業系統
如需支援 VM 管理工具的作業系統版本完整清單,請參閱作業系統詳細資料。如果特定作業系統沒有 OS 設定代理程式,您就無法為執行該作業系統的 VM 啟用 VM 管理員。
使用組織政策啟用 VM 管理員
您可以使用「需要 OS 設定」組織政策,為機構、資料夾或專案中的所有新 VM 自動啟用 VM 管理員。
設定「須完成 OS 設定」布林限制後,即適用於以下狀況:
- 所有新專案的專案中繼資料都包含
enable-osconfig=TRUE。 - 對於新 VM、現有 VM、新專案和現有專案,在執行個體或專案中繼資料中,將
enable-osconfig設為FALSE的要求都會遭到拒絕。 - 對於在啟用這項政策前建立的 VM 或專案,這項機構政策不會將
enable-osconfig中繼資料值變更為TRUE。如要在這些 VM 或專案上啟用 VM 管理員,建議更新中繼資料。詳情請參閱「設定中繼資料值」。
啟用 OS 設定機構政策後,您仍可使用
osconfig-disabled-features中繼資料停用一或多項 VM 管理器功能。啟用 OS 設定組織政策
如要啟用 OS 設定政策,您可以使用Google Cloud 控制台或 Google Cloud CLI,為整個機構、資料夾或特定專案設定「需要 OS 設定」限制。
主控台
如要透過主控台設定 OS Config 組織政策,請完成下列步驟:
前往 Google Cloud 控制台的「Organization policies」(機構政策) 頁面。
從專案選擇工具中,選取要編輯機構政策的專案、資料夾或機構。
「Organization policies」(機構政策) 頁面會顯示可篩選的機構政策限制清單。
從限制條件清單中選取「Require OS Config」限制條件。「Policy details」(政策詳情) 頁面會描述限制條件,並說明限制條件的套用方式。
如要更新資源的機構政策,請按一下「管理政策」。
在「編輯政策」頁面中,選取「覆寫上層政策」。
選取「新增規則」。
在「Enforcement」(強制執行) 下,選取是否要強制執行這項機構政策。
如要強制執行這項政策,請按一下「設定政策」。
gcloud
如要設定 OS Config 組織政策,請使用
gcloud beta resource-manager org-policies enable-enforce指令。找出您的機構 ID
gcloud organizations list
在您的機構中設定限制。請將
organization-id改成您的機構 ID。gcloud beta resource-manager org-policies enable-enforce compute.requireOsConfig \ --organization=organization-id
您也可以將 OS Config 組織政策分別套用到具有
--folder或--project標記的資料夾或專案,以及資料夾 ID 和專案 ID。如要套用至資料夾,請執行下列指令:
gcloud beta resource-manager org-policies enable-enforce compute.requireOsConfig \
    --folder=folder-id
如要套用至專案,請執行下列指令:
gcloud beta resource-manager org-policies enable-enforce compute.requireOsConfig \
    --project=project-id
更改下列內容:
在專案中啟用 VM 管理員
如要在專案中啟用 VM 管理員,有以下兩種方法:
- 自動啟用:適用於整個 Google Cloud 專案。您可透過 Google Cloud 控制台完成自動啟用程序。你可能仍需手動完成某些步驟。
手動啟用:可為每個 VM 或整個專案啟用。 Google Cloud
手動
如要手動設定 VM 管理工具,請完成下列步驟:
- 在 Google Cloud 專案中啟用 OS Config API。
- 在每個 VM 上,檢查是否已 安裝 OS 設定代理程式。 如果尚未安裝代理程式,請安裝 OS 設定代理程式。
- 在專案或每個 VM 上,為 OS 設定代理程式設定執行個體中繼資料。 您必須執行這個步驟,才能在 VM 或專案中啟用 OS 設定代理程式。
- 確認所有 VM 都附加了服務帳戶。您不需要為這個服務帳戶授予任何 IAM 角色。VM 管理工具會使用這個服務帳戶簽署 API 服務的要求。
- 如果 VM 是在私人虛擬私有雲網路中運作,且沒有公開網際網路存取權,請啟用 Private Google Access。
- 如果 VM 使用 HTTP Proxy,請設定 HTTP Proxy。
- 選用。在專案或每個 VM 上,停用不需要的功能。
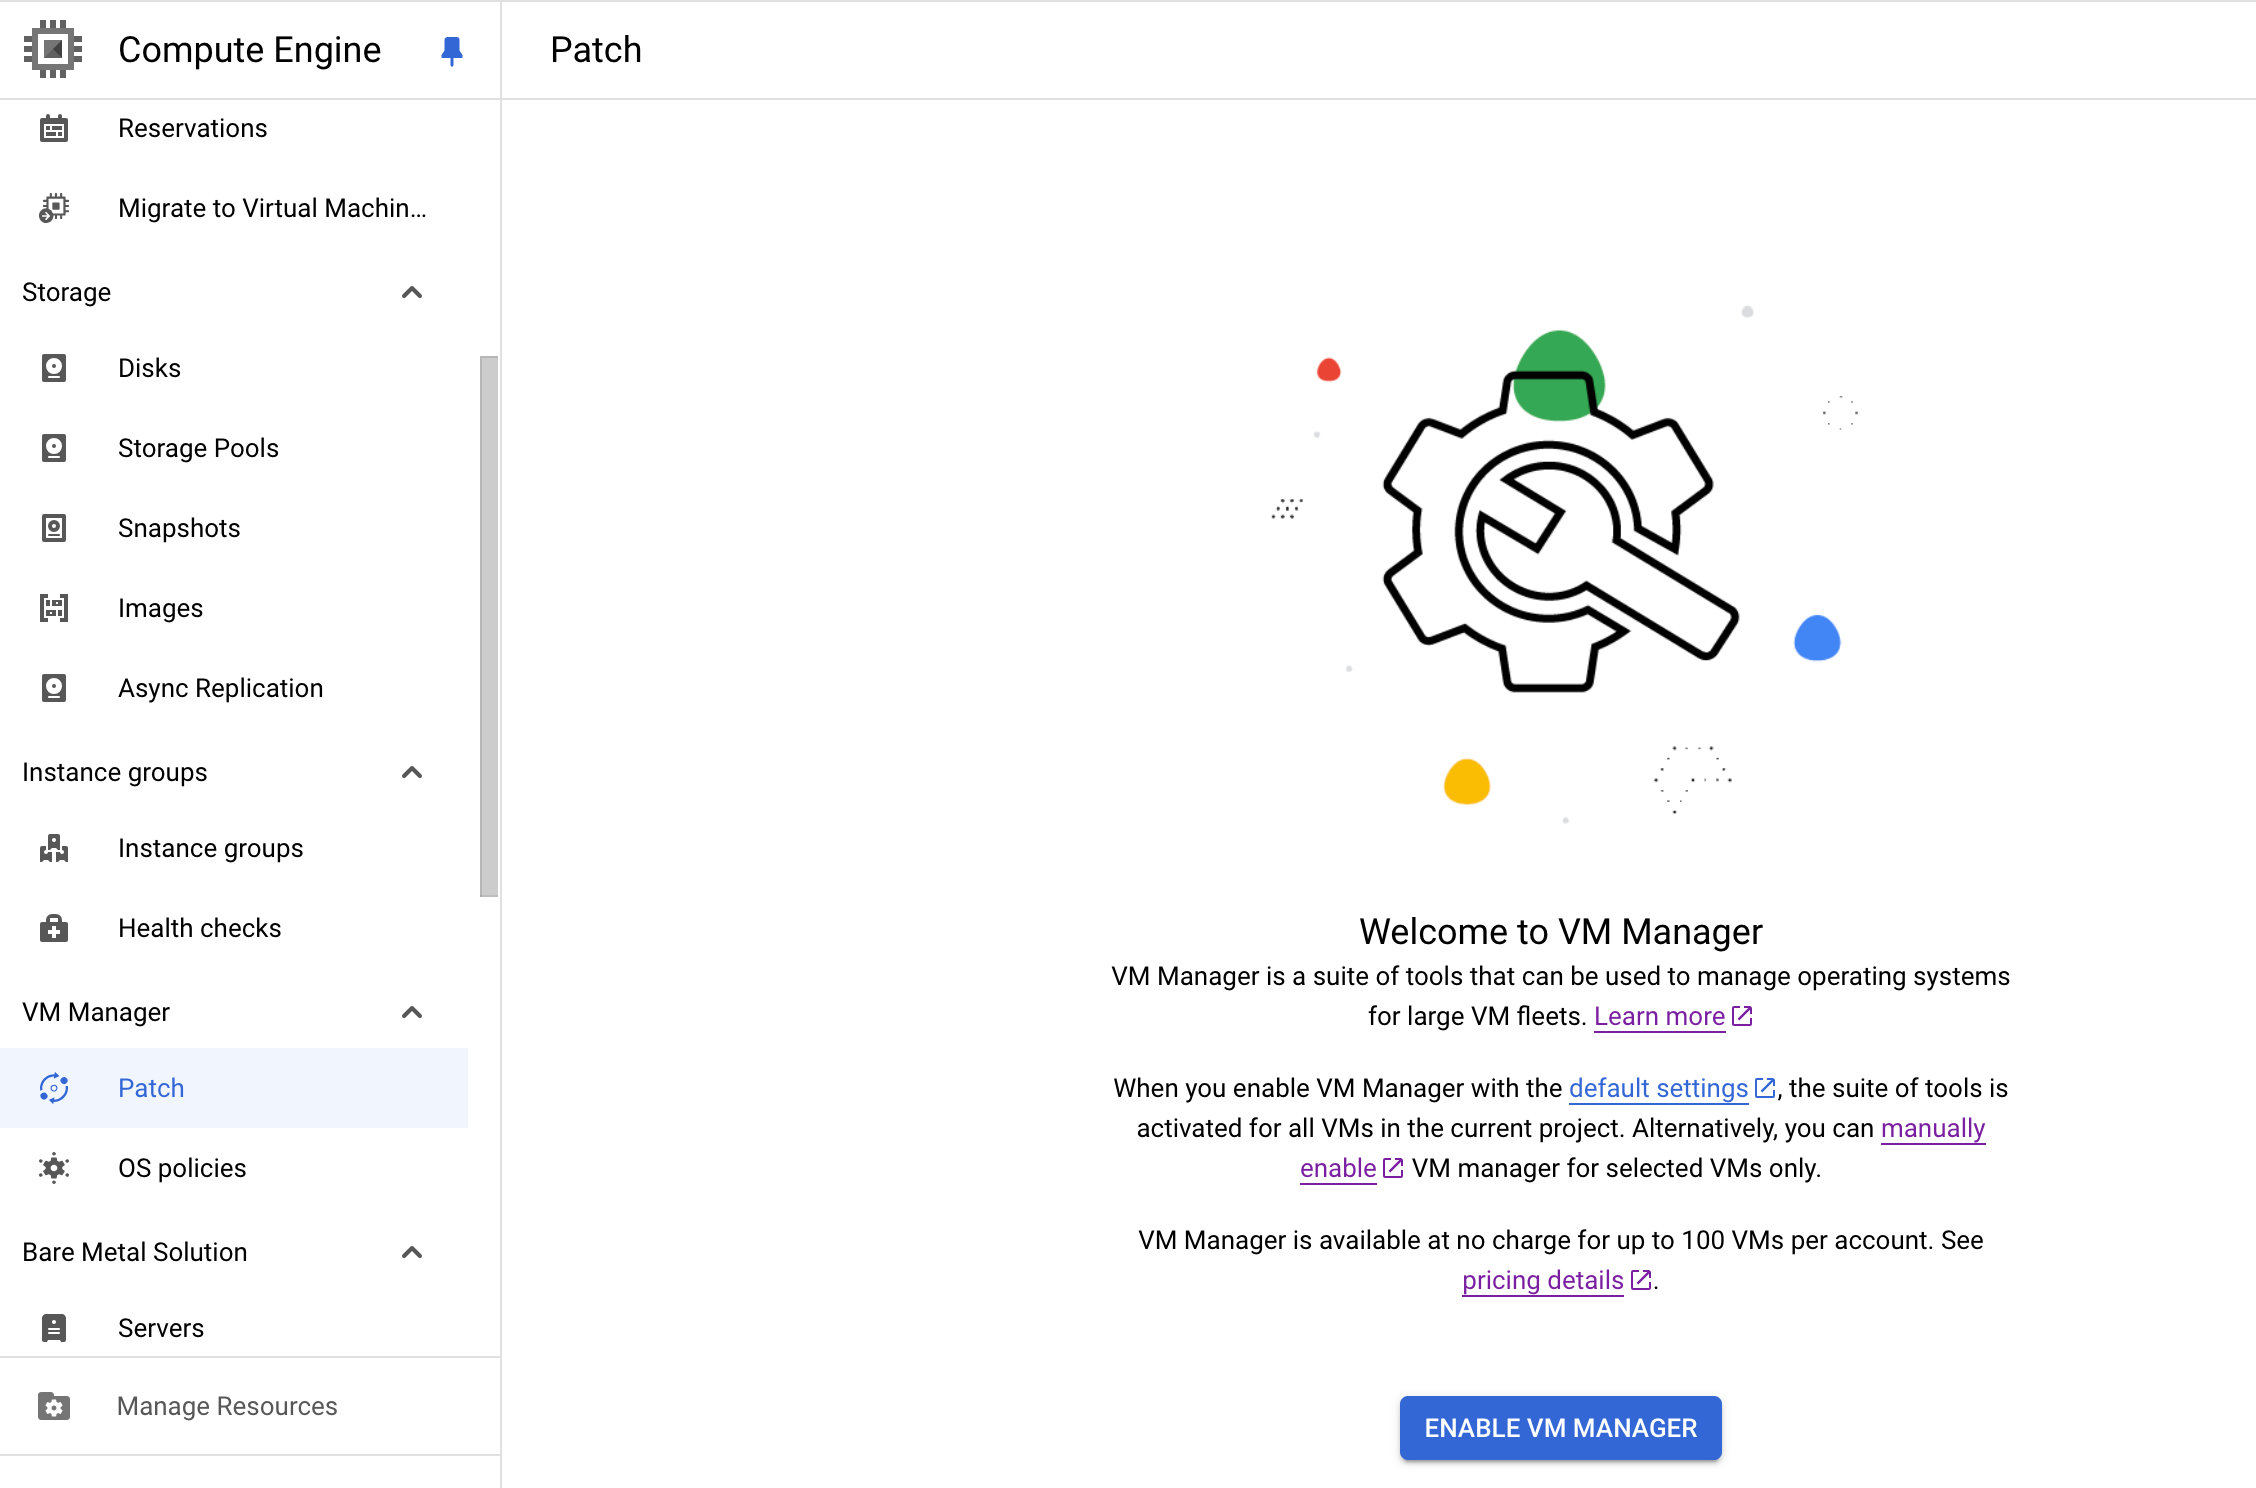
自動
首次前往Google Cloud 控制台中的任一 VM 管理員頁面時,您可以選擇自動啟用 VM 管理員。
按照引導步驟操作,即可使用自動啟用功能完成下列事項:
- 在 Google Cloud 專案中啟用 VM 管理員 (OS 設定 API)
- 在 Google Cloud 專案中已安裝代理程式的所有 VM 上啟用 OS 設定代理程式
啟用 OS 設定服務 API
在 Google Cloud 專案中啟用 OS Config API。
主控台
在 Google Cloud 控制台啟用 VM 管理工具 (OS Config API)。
gcloud
如要啟用 API,請執行下列指令:
gcloud services enable osconfig.googleapis.com
檢查是否已安裝 OS 設定代理程式
對於建構日期為
v20200114或更新的 CentOS、Container-Optimized OS (COS)、Debian、Red Hat Enterprise Linux (RHEL)、Rocky Linux、SLES、Ubuntu 和 Windows Server 映像檔,系統預設會安裝 OS Config 代理程式。如要瞭解已安裝 OS Config 代理程式的作業系統版本,請參閱「作業系統詳細資料」。在啟用代理程式中繼資料和啟用服務 API 之前,這些代理程式都會閒置。Linux
如要檢查 Linux VM 是否已安裝代理程式,請執行下列指令:
sudo systemctl status google-osconfig-agent
如果代理程式已安裝並正在執行,輸出結果會類似以下內容:
google-osconfig-agent.service - Google OSConfig Agent
Loaded: loaded (/lib/systemd/system/google-osconfig-agent.service; enabled; vendor preset:
Active: active (running) since Wed 2020-01-15 00:14:22 UTC; 6min ago
Main PID: 369 (google_osconfig)
 Tasks: 8 (limit: 4374)
Memory: 102.7M
CGroup: /system.slice/google-osconfig-agent.service
        └─369 /usr/bin/google_osconfig_agent
如果尚未安裝代理程式,請安裝 OS 設定代理程式。
Windows
如要檢查 Windows VM 是否已安裝代理程式,請執行下列指令:
PowerShell Get-Service google_osconfig_agent
如果代理程式已安裝並正在執行,輸出結果會類似以下內容:
Status   Name               DisplayName
------   ----               -----------
Running  google_osconfig... Google OSConfig Agent
如果尚未安裝代理程式,請安裝 OS 設定代理程式。
安裝 OS 設定代理程式
按照下列步驟安裝代理程式前,請先檢查代理程式是否已在 VM 上執行。
在每個 VM 上安裝 OS 設定代理程式。您可以使用下列其中一個選項來安裝 OS Config 代理程式:
- 透過終端機手動安裝代理程式。
- 在 VM 中使用開機指令碼。
- 使用 Google Cloud Observability 代理程式政策,自動在多部 VM 上安裝 OS 設定。
- 在建立 VM 時安裝作業套件代理程式。
手動安裝代理程式
請使用這個選項,在現有的 VM 上安裝 OS 設定代理程式。
如要安裝代理程式,請完成下列步驟:
安裝 OS Config 代理程式。
Windows Server
如要在 Windows 伺服器中安裝 OS 設定代理程式,請執行下列指令:
googet -noconfirm install google-osconfig-agent
Ubuntu
如要在 Ubuntu VM 上安裝 OS 設定代理程式,請執行下列指令:
設定 Ubuntu 存放區。
如為 Ubuntu 20.04 以上版本,請執行下列指令:
新增 Ubuntu 存放區。
sudo su -c "echo 'deb http://packages.cloud.google.com/apt google-compute-engine-focal-stable main' > \
/etc/apt/sources.list.d/google-compute-engine.list"
匯入 Google Cloud 公開金鑰。
curl https://packages.cloud.google.com/apt/doc/apt-key.gpg | \
sudo apt-key add -
如為 Ubuntu 18.04 以上版本,請執行下列指令:
新增 Ubuntu 存放區。
sudo su -c "echo 'deb http://packages.cloud.google.com/apt google-compute-engine-bionic-stable main' > \
/etc/apt/sources.list.d/google-compute-engine.list"
匯入 Google Cloud 公開金鑰。
curl https://packages.cloud.google.com/apt/doc/apt-key.gpg | \
sudo apt-key add -
如果是 Ubuntu 16.04,請執行下列指令:
新增 Ubuntu 存放區。
sudo su -c "echo 'deb http://packages.cloud.google.com/apt google-compute-engine-xenial-stable main'> \
/etc/apt/sources.list.d/google-compute-engine.list"
匯入 Google Cloud 公開金鑰。
curl https://packages.cloud.google.com/apt/doc/apt-key.gpg | \
sudo apt-key add -
安裝 OS Config 代理程式。
sudo apt update
sudo apt -y install google-osconfig-agent
Debian
如要在 Debian VM 上安裝 OS Config 代理程式,請執行下列指令:
sudo apt update
sudo apt -y install google-osconfig-agent
新增 Google Cloud 存放區和公開金鑰
如果您使用的 VM 執行個體不是從 Google 提供的映像檔建立,或是收到「無法找到套件」錯誤訊息,請完成下列步驟,新增 Google Cloud存放區並匯入公開金鑰。
新增存放區並匯入金鑰後,即可執行指令來安裝 OS Config 代理程式。
如為 Debian 9 (Stretch),請執行下列指令:
新增 Debian 存放區。
sudo su -c "echo 'deb http://packages.cloud.google.com/apt \
google-compute-engine-stretch-stable main'> /etc/apt/sources.list.d/google-compute-engine.list"
匯入 Google Cloud 公開金鑰。
curl https://packages.cloud.google.com/apt/doc/apt-key.gpg | \
sudo apt-key add -
如為 Debian 10 (Buster),請執行下列指令:
新增 Debian 存放區。
sudo su -c "echo 'deb http://packages.cloud.google.com/apt \
google-compute-engine-buster-stable main'> /etc/apt/sources.list.d/google-compute-engine.list"
匯入 Google Cloud 公開金鑰。
curl https://packages.cloud.google.com/apt/doc/apt-key.gpg | \
sudo apt-key add -
RHEL/CentOS/Rocky
如要在 RHEL 7/8、CentOS 7/8 VM 或 Rocky Linux 8/9 上安裝 OS Config 代理程式,請執行下列指令:
sudo yum -y install google-osconfig-agent
SLES/openSUSE
如要在 SLES 或 openSUSE VM 中安裝 OS 設定代理程式,請執行下列指令:
設定 SLES 存放區。
如為 SLES 12,請執行下列指令:
sudo su -c "cat > /etc/zypp/repos.d/google-compute-engine.repo <<EOM
[google-compute-engine]
name=Google Compute Engine
baseurl=https://packages.cloud.google.com/yum/repos/google-compute-engine-sles12-stable
enabled=1
gpgcheck=1
repo_gpgcheck=0
gpgkey=https://packages.cloud.google.com/yum/doc/yum-key.gpg
  https://packages.cloud.google.com/yum/doc/rpm-package-key.gpg
EOM"
如為 SLES 15 和 OpenSUSE 15,請執行下列指令:
sudo su -c "cat > /etc/zypp/repos.d/google-compute-engine.repo <<EOM
[google-compute-engine]
name=Google Compute Engine
baseurl=https://packages.cloud.google.com/yum/repos/google-compute-engine-sles15-stable
enabled=1
gpgcheck=1
repo_gpgcheck=0
gpgkey=https://packages.cloud.google.com/yum/doc/yum-key.gpg
  https://packages.cloud.google.com/yum/doc/rpm-package-key.gpg
EOM"
匯入「 Google Cloud」的 GPG 金鑰。
sudo rpm --import https://packages.cloud.google.com/yum/doc/yum-key.gpg \
--import https://packages.cloud.google.com/yum/doc/rpm-package-key.gpg
安裝 OS Config 代理程式。
sudo zypper -n --gpg-auto-import-keys install --from google-compute-engine google-osconfig-agent
使用開機指令碼安裝代理程式
您也可以利用手動安裝指令,建立會在 VM 建立期間安裝 OS Config 代理程式的開機指令碼。
- 複製所用作業系統的手動指令。
將開機指令碼提供給所用的 VM 建立方法。
舉例來說,如果您使用
gcloud compute instances create指令建立 Debian 10 VM,指令會類似於下列內容:gcloud compute instances create VM_NAME \ --image-family=debian-10 --image-project=debian-cloud \ --metadata startup-script='#! /bin/bash apt update apt -y install google-osconfig-agent'
將您的 VM 名稱替換為
VM_NAME。
設定中繼資料值
您可以為每個 VM 設定執行個體中繼資料,也可以設定專案中繼資料,套用至專案中的所有 VM。
在 Google Cloud 專案或 VM 上,將
enable-osconfig中繼資料值設為TRUE。將enable-osconfig中繼資料值設為TRUE,即可啟用下列功能:- 修補程式
- OS 政策
- OS 庫存管理服務
主控台
您可以採用下列其中一個選項,將中繼資料值套用至 Google Cloud 專案或 VM:
選項 1:在全專案範圍的中繼資料內設定
enable-osconfig,以將其套用至您專案中的所有 VM。前往 Google Cloud 控制台的「Metadata」頁面。
按一下 [編輯]。
新增下列中繼資料項目:
鍵:
enable-osconfig
值:TRUE如要使用舊版 OS 庫存管理服務,請同時設定
enable-osconfig和enable-guest-attributes:- 鍵:
enable-osconfig
值:TRUE - 鍵:
enable-guest-attributes
值:TRUE
- 鍵:
點選「儲存」來套用變更。
方法 2:建立執行個體時,在 VM 中繼資料中設定
enable-osconfig。前往 Google Cloud 控制台的「建立執行個體」頁面。
指定 VM 詳細資料。
展開「Advanced options」(進階選項) 區段,然後執行下列操作:
- 展開「管理」部分。
在「Metadata」(中繼資料) 區段中,按一下「Add item」(新增項目),並新增下列中繼資料項目:
鍵:
enable-osconfig
值:TRUE。如要使用舊版 OS 庫存管理服務,請同時設定
enable-osconfig和enable-guest-attributes:- 鍵:
enable-osconfig
值:TRUE - 鍵:
enable-guest-attributes
值:TRUE
- 鍵:
如要建立 VM,請按一下「建立」。
方法 3:在現有 VM 的中繼資料中設定
enable-osconfig。前往 Google Cloud 控制台的「VM instances」(VM 執行個體) 頁面。
按一下要設定中繼資料值的 VM 名稱。
在「執行個體詳細資料」頁面中,按一下「編輯」即可編輯設定。
在「Custom metadata」(自訂中繼資料) 下新增下列中繼資料項目:
鍵:
enable-osconfig
值:TRUE。如要使用舊版 OS 庫存管理服務,請同時設定
enable-osconfig和enable-guest-attributes:- 鍵:
enable-osconfig
值:TRUE - 鍵:
enable-guest-attributes
值:TRUE
- 鍵:
按一下「儲存」,將變更套用至 VM。
gcloud
使用
project-info add-metadata或instances add-metadata指令,並加上--metadata=enable-osconfig=TRUE旗標。您可以採用下列其中一個選項,將中繼資料值套用至專案或 VM:
選項 1:在全專案範圍的中繼資料內設定
enable-osconfig,以將其套用至您專案中的所有執行個體:gcloud compute project-info add-metadata \ --project PROJECT_ID \ --metadata=enable-osconfig=TRUE
如要使用舊版 OS 庫存管理服務,請同時設定
enable-osconfig和enable-guest-attributes:gcloud compute project-info add-metadata \ --project PROJECT_ID \ --metadata=enable-guest-attributes=TRUE,enable-osconfig=TRUE
將
PROJECT_ID替換為您的專案 ID。方法 2:在現有執行個體的中繼資料內設定
enable-osconfig。gcloud compute instances add-metadata VM_NAME \ --metadata=enable-osconfig=TRUE
如要使用舊版 OS 庫存管理服務,請同時設定
enable-osconfig和enable-guest-attributes:gcloud compute instances add-metadata VM_NAME \ --metadata=enable-guest-attributes=TRUE,enable-osconfig=TRUE
將您的 VM 名稱替換為
VM_NAME。方法 3:建立執行個體時,請在執行個體中繼資料內設定
enable-osconfig。gcloud compute instances create VM_NAME \ --metadata=enable-osconfig=TRUE
如要使用舊版 OS 庫存管理服務,請同時設定
enable-osconfig和enable-guest-attributes:gcloud compute instances create VM_NAME \ --metadata=enable-guest-attributes=TRUE,enable-osconfig=TRUE
將您的 VM 名稱替換為
VM_NAME。
REST
您可以在 Google Cloud 專案或執行個體層級設定中繼資料值。
- 如要瞭解如何設定全專案中繼資料,請參閱設定全專案自訂中繼資料。
- 如要瞭解如何設定執行個體中繼資料,請參閱設定執行個體中繼資料。
中繼資料屬性必須包含下列鍵/值組合:
- 鍵:
enable-osconfig
值:TRUE
如要使用舊版 OS 庫存管理功能,請一併新增下列鍵/值組合:
- 鍵:
enable-guest-attributes
值:TRUE
設定 HTTP Proxy
如果您為 VM 使用 HTTP Proxy,請執行下列指令來設定
http_proxy和https_proxy環境變數。您也應設定no_proxy環境變數,排除中繼資料伺服器 (169.254.169.254),讓 OS 設定代理程式可以存取本機中繼資料伺服器。Linux
在採用 systemd 的 Linux 發行版本中,以
root使用者身分,將 Proxy 環境變數新增至google-osconfig-agent.service單位:mkdir -p /etc/systemd/system/google-osconfig-agent.service.d cat >/etc/systemd/system/google-osconfig-agent.service.d/override.conf <<EOF [Service] Environment="http_proxy=http://PROXY_IP:PROXY_PORT" \ "https_proxy=http://PROXY_IP:PROXY_PORT" \ "no_proxy=169.254.169.254,metadata,metadata.google.internal" EOF
請將
PROXY_IP和PROXY_PORT分別替換為 Proxy 伺服器的 IP 位址和通訊埠編號。重新啟動 OS 設定代理程式服務:
systemctl daemon-reload
systemctl restart google-osconfig-agent
如要確認變數是否設定正確,請檢查執行中代理程式的環境變數:
tr '\0' '\n' < /proc/$(systemctl show -p MainPID --value google-osconfig-agent)/environWindows
以管理員身分開啟命令提示字元,然後執行下列指令。
  setx http_proxy http://PROXY_IP:PROXY_PORT /m
  setx https_proxy http://PROXY_IP:PROXY_PORT /m
  setx no_proxy 169.254.169.254,metadata,metadata.google.internal /m
將
PROXY_IP和PROXY_PORT分別替換為 Proxy 伺服器的 IP 位址和通訊埠編號。Google 建議您新增
no_proxy環境變數來排除*.googleapis.com,以免 OS Config 代理程式發生連線問題。如要只將特定 VM 連線至 OS Config 代理程式,請在 VM 所在區域加上前置字元,並使用[zone-name]-osconfig.googleapis.com格式。例如:us-central1-f-osconfig.googleapis.com。停用不需要的功能
如要停用不需要的功能,請設定下列中繼資料值:
osconfig-disabled-features=FEATURE1,FEATURE2。將
FEATURE1,FEATURE2替換為下列任一值:- OS 庫存管理服務:
osinventory - 修補程式和 OS 政策:
tasks - OS 客體政策 (Beta 版):
guestpolicies
請使用下列任一方法停用中繼資料值。
控制台
如要停用專案或 VM 的中繼資料值,請使用下列其中一個選項: Google Cloud
選項 1:在全專案範圍的中繼資料中停用這項功能,以將其套用至您專案中的所有執行個體。
前往 Google Cloud 控制台的「Metadata」頁面。
按一下 [編輯]。
新增下列中繼資料項目:
鍵:
osconfig-disabled-features
值:FEATURE1,FEATURE2例如:
鍵:osconfig-disabled-features
值:osinventory,guestpolicies點選「儲存」來套用變更。
選項 2:在現有 VM 的中繼資料中停用這項功能。
前往 Google Cloud 控制台的「VM instances」(VM 執行個體) 頁面。
按一下要設定中繼資料值的 VM 名稱。
在「執行個體詳細資料」頁面上,按一下「編輯」即可編輯 VM 設定。
在「Custom metadata」(自訂中繼資料) 下新增下列中繼資料項目:
鍵:
osconfig-disabled-features
值:FEATURE1,FEATURE2例如:
鍵:osconfig-disabled-features
值:osinventory按一下「儲存」,將變更套用至 VM。
gcloud
使用
project-info add-metadata或instances add-metadatagcloud指令,並加上--metadata=osconfig-disabled-features旗標。如要停用多項功能,標記的格式必須為
--metadata=osconfig-disabled-features=FEATURE1,FEATURE2。請參閱範例 2。範例
範例 1 如要使用 Google Cloud CLI 在 Google Cloud 專案層級停用 Patch,請執行下列指令:
gcloud compute project-info add-metadata \
    --project PROJECT_ID \
    --metadata=osconfig-disabled-features=tasks
範例 2 如要使用 Google Cloud CLI 在專案層級停用 OS 政策和 OS 資訊清單管理功能,請執行下列指令:
gcloud compute project-info add-metadata \
    --project PROJECT_ID \
    --metadata=osconfig-disabled-features=osinventory,guestpolicies
將
PROJECT_ID替換為您的專案 ID。REST
您可以在 Google Cloud 專案或執行個體層級設定中繼資料值。
- 如要瞭解如何設定全專案中繼資料,請參閱設定全專案自訂中繼資料。
- 如要瞭解如何設定執行個體中繼資料,請參閱設定執行個體中繼資料。
中繼資料屬性必須包含下列鍵/值組合:
- 按鍵:
osconfig-disabled-features - 值:可以是下列任一標記或標記組合:
osinventorytasksguestpolicies
啟用 OS 設定代理程式的必要條件
OS Config 代理程式必須符合下列所有條件,才會視為有效並計費:
- 必須設定 VM 管理員。
VM 必須處於
RUNNING狀態,且 OS 設定代理程式必須與 OS 設定服務通訊。如果 VM 停止、暫停或與網路中斷連線,該 VM 上的代理程式就不會計為有效代理程式。
驗證設定
完成設定程序後,即可驗證設定。
查看專案的 VM 管理員功能設定
如要確認專案是否已啟用所有 VM 管理員功能,請按照下列步驟操作:
gcloud
使用
gcloud compute os-config project-feature-settings describe指令,如下所示:gcloud compute os-config project-feature-settings describe \ --project PROJECT_ID指令會輸出類似以下的結果:
name: projects/my-project/locations/global/projectFeatureSettings
patchAndConfigFeatureSet: OSCONFIG_C
值
OSCONFIG_C代表完整的 VM 管理員功能集,OSCONFIG_B則代表功能受限的集合。REST
如要在 Google Cloud 專案中查看 VM 管理員功能,請對
projects.locations.global.getProjectFeatureSettings方法建立GET要求。GET https://osconfig.googleapis.com/v1/projects/PROJECT_ID/locations/global/projectFeatureSettings
將
PROJECT_ID替換為您的專案 ID。如果成功,這個方法會傳回專案功能設定,如下列範例所示:
{
 "name": "projects/my-project/locations/global/projectFeatureSettings",
 "patchAndConfigFeatureSet": "OSCONFIG_C"
}
值
OSCONFIG_C代表完整的 VM 管理員功能集,OSCONFIG_B則代表功能受限的集合。啟用完整的 VM 管理員功能
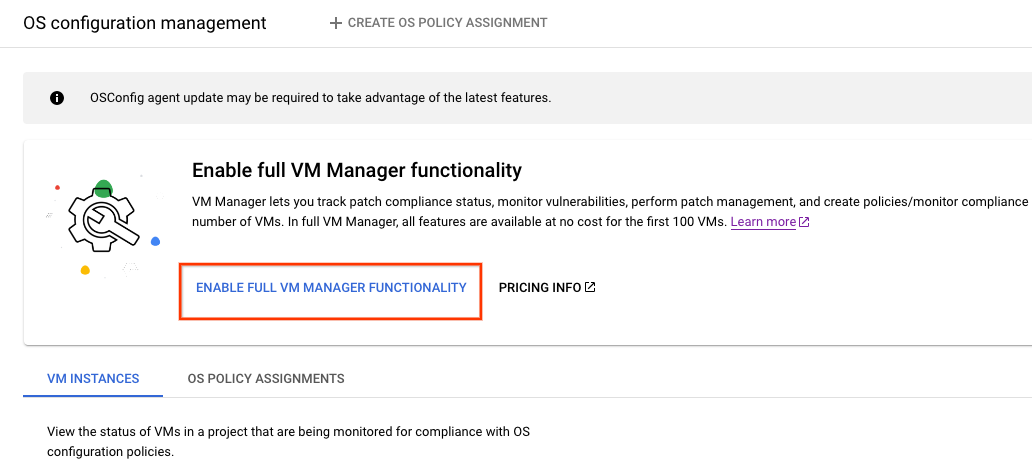
如果專案未啟用 VM 管理員,且您在建立 VM 時安裝作業套件代理程式,VM 管理員就會以受限模式啟用。在此模式下,VM 管理員可讓不限數量的 VM 免費使用特定幾項功能。舉例來說,您可以在「OS policies」(作業系統政策) 頁面查看 VM 的作業系統政策指派項目,但無法建立或編輯作業系統政策指派項目。
如要為已安裝 Ops Agent 的 VM 啟用所有 VM 管理員功能,請按照下列步驟操作:
主控台
- 前往 Google Cloud 控制台的「OS policies」(作業系統政策) 頁面。
按一下「啟用完整的 VM 管理員功能」,即可啟用所有 VM 管理員功能。
gcloud
如要為 Google Cloud 專案啟用所有 VM 管理員功能,請使用
gcloud compute os-config project-feature-settings update指令:gcloud compute os-config project-feature-settings update \ --project PROJECT_ID \ --patch-and-config-feature-set=fullREST
如要在 Google Cloud 專案層級啟用所有 VM 管理員功能,請將
PATCH要求傳送至projprojects.locations.global.updateProjectFeatureSettings方法。PATCH https://osconfig.googleapis.com/v1/projects/PROJECT_ID/locations/global/projectFeatureSettings { "name": "projects/PROJECT_ID/locations/global/projectFeatureSettings", "patchAndConfigFeatureSet": "OSCONFIG_C" }將
PROJECT_ID替換為專案 ID。值OSCONFIG_C代表完整的 VM 管理員功能集。停用 OS 設定代理程式
停用 OS 設定代理程式不會影響 VM 的行為。停用代理程式的方式與停止作業系統的其他服務相同。
Linux
如要使用
systemctl停用代理程式,請執行下列指令:sudo systemctl stop google-osconfig-agent sudo systemctl disable google-osconfig-agent
Windows
如要使用
powershell停用代理程式,請執行下列指令:PowerShell Stop-Service google_osconfig_agent [-StartupType disabled]
後續步驟
- 建立 OS 政策指派作業。
- 查看作業系統詳細資料。
- 建立修補工作。
- 進一步瞭解 VM 管理員。
除非另有註明,否則本頁面中的內容是採用創用 CC 姓名標示 4.0 授權,程式碼範例則為阿帕契 2.0 授權。詳情請參閱《Google Developers 網站政策》。Java 是 Oracle 和/或其關聯企業的註冊商標。
上次更新時間:2025-09-10 (世界標準時間)。
-