Zugriffsanfragen mit dem von Google verwalteten Signaturschlüssel prüfen und genehmigen
In diesem Dokument wird beschrieben, wie Sie die Zugriffsgenehmigung mithilfe derGoogle Cloud Console einrichten, um E-Mail-Benachrichtigungen über Zugriffsanfragen für ein Projekt zu erhalten.
Die Zugriffsgenehmigung sorgt dafür, dass eine kryptografisch signierte Genehmigung vorliegt, damit Google-Mitarbeiter auf Ihre inGoogle Cloudgespeicherten Inhalte zugreifen können.
Hinweise
- Aktivieren Sie Access Transparency für Ihre Organisation. Weitere Informationen finden Sie unter Access Transparency aktivieren.
- Sie benötigen die IAM-Rolle Access Approval Config Editor (
roles/accessapproval.configEditor).
Für Access Approval registrieren
So melden Sie sich für Access Approval an:
Wählen Sie in der Google Cloud Console das Projekt aus, für das Sie die Zugriffsgenehmigung aktivieren möchten.
Rufen Sie die Seite Zugriffsgenehmigung auf.
Klicken Sie auf Registrieren, um sich für die Zugriffsgenehmigung anzumelden.
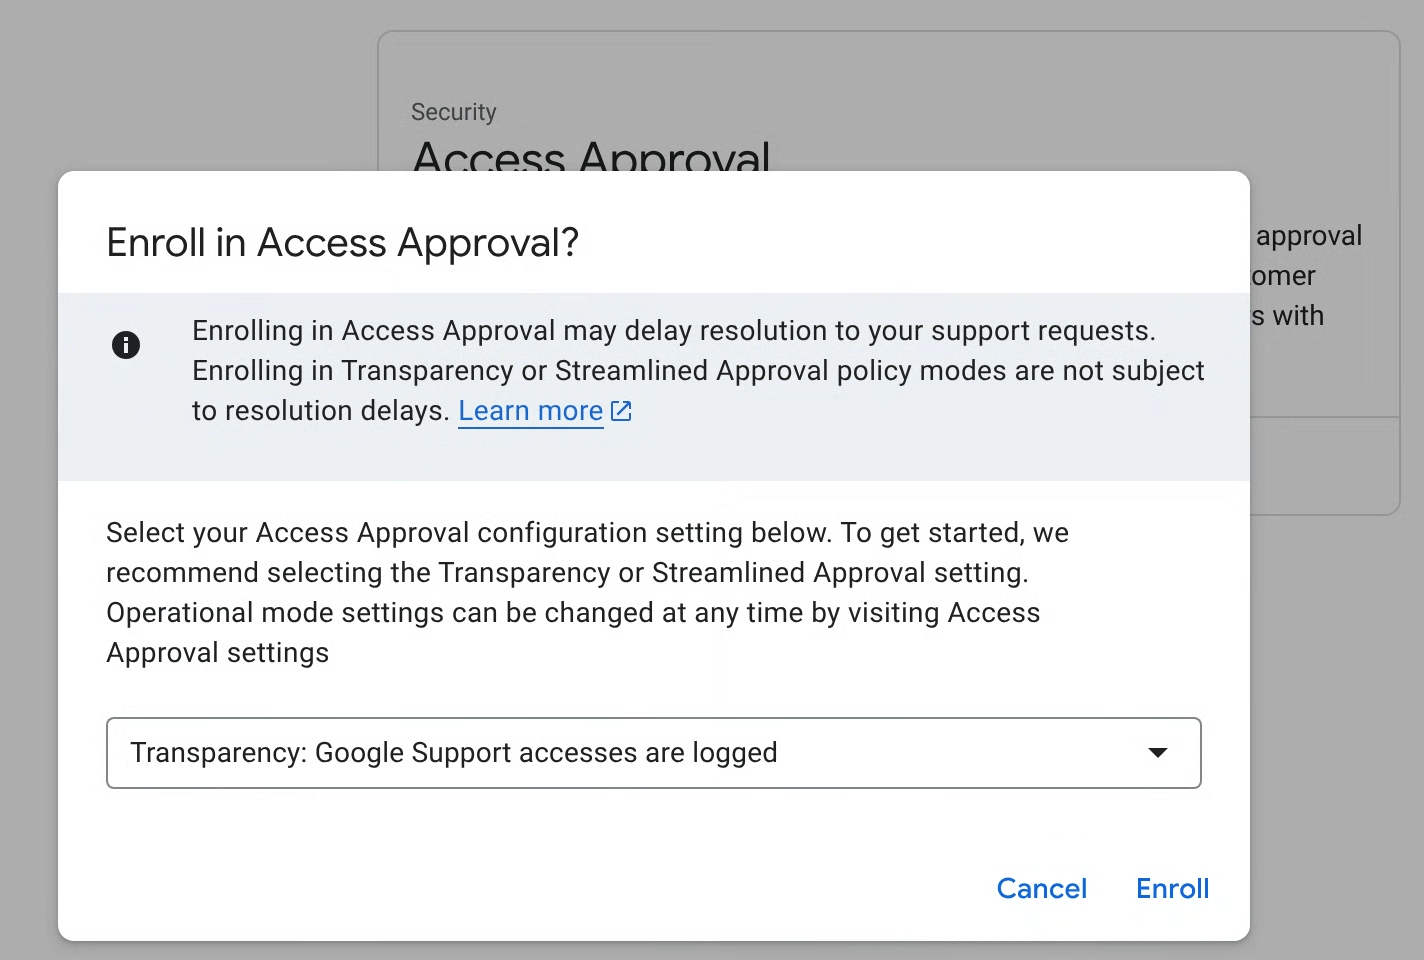
Wählen Sie im Dialogfeld den Registrierungsmodus für Ihre Richtlinie aus und klicken Sie auf Registrieren.
Primärer Registrierungsmodus für Zugriffsgenehmigungen
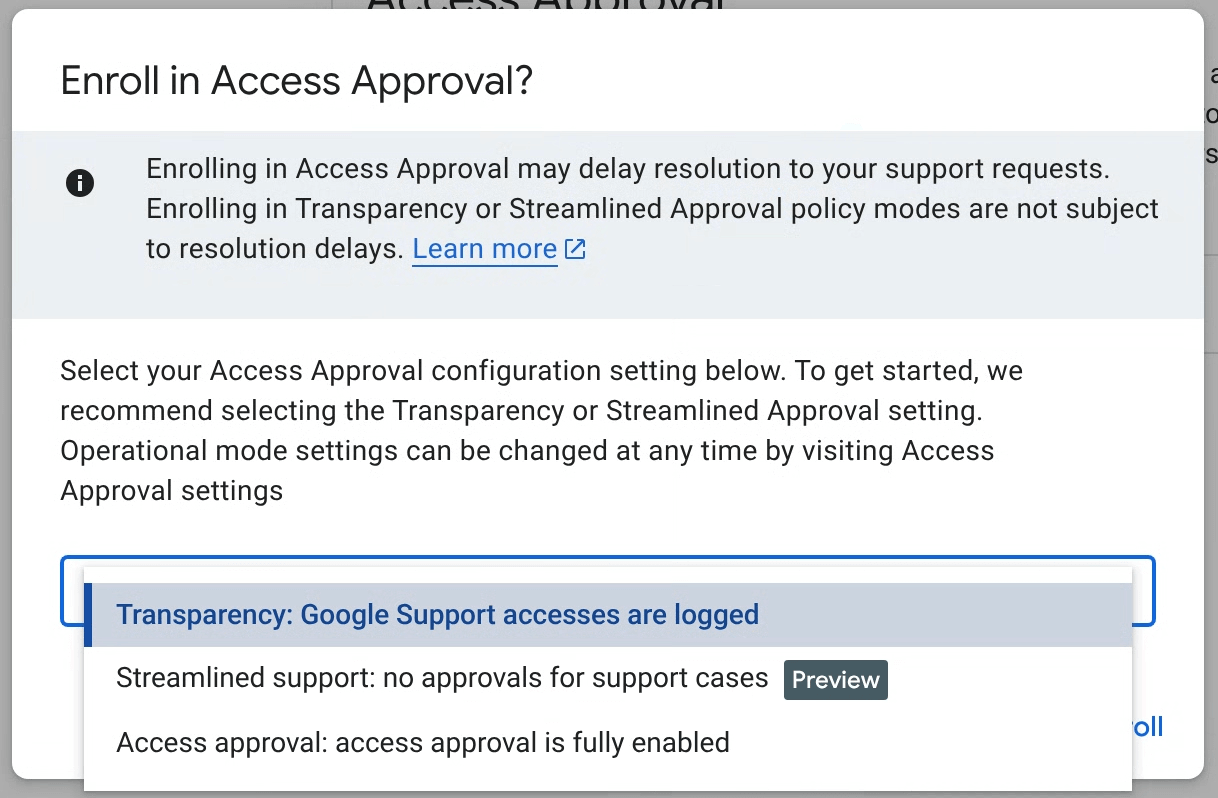
Sie können Access Approval in einem von drei Modi konfigurieren und den Modus jederzeit in den Einstellungen für Access Approval ändern. Folgende Modi können ausgewählt werden:
- Transparenz (empfohlen): In diesem Modus wird nur der administrative Zugriff von Google auf Ihre Arbeitslasten protokolliert, ohne dass der Google-Support für Ihre Supportanfragen oder die proaktive Wartung Ihrer Arbeitslasten unterbrochen wird. Weitere Informationen finden Sie in der Dokumentation zu Access Transparency.
- Optimierter Support: In diesem Modus wird der Zugriff des Kundenservice auf Ihre Supportanfragen automatisch genehmigt. Der proaktive Wartungs- und Reparaturzugriff wird mit der Zugriffsgenehmigung zur Genehmigung angefordert.
- Zugriffsgenehmigung: In diesem Modus wird die vollständige Funktion „Zugriffsgenehmigung“ für alle Zugriffe aktiviert.
Access Transparency-Logs werden für alle Zugriffsgenehmigungsmodi automatisch generiert.
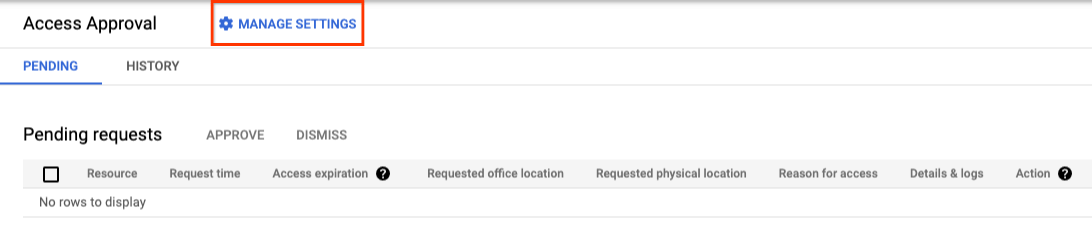
Einstellungen konfigurieren
Klicken Sie auf der Seite Zugriffsgenehmigung in der Google Cloud -Konsole auf Einstellungen verwalten.
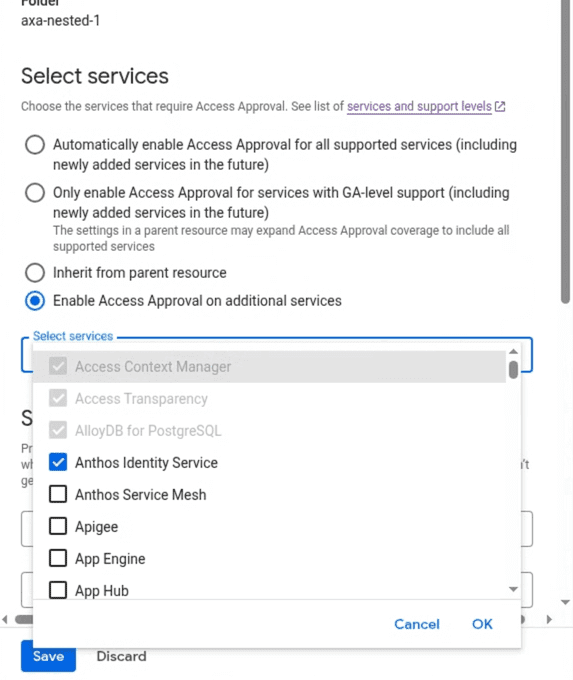
Dienste auswählen
Access Approval-Einstellungen, einschließlich der Liste der aktivierten Produkte, werden von der übergeordneten Ressource übernommen. Sie können den Umfang der Registrierung erweitern, indem Sie Access Approval für alle oder ausgewählte zusätzliche unterstützte Dienste aktivieren.
E-Mail- und Pub/Sub-Benachrichtigungen einrichten
In diesem Abschnitt wird erläutert, wie Sie Benachrichtigungen über Zugriffsanfragen für dieses Projekt erhalten können.
Sich selbst die erforderliche IAM-Rolle gewähren
Zum Ansehen und Genehmigen von Zugriffsanfragen benötigen Sie die IAM-Rolle „Genehmiger von Zugriffsgenehmigungen“ (roles/accessapproval.approver).
So weisen Sie sich diese IAM-Rolle selbst zu:
- Rufen Sie in der Google Cloud -Console die Seite IAM auf.
- Klicken Sie auf dem Tab Von Hauptkonten anzeigen auf Zugriff gewähren.
- Geben Sie im Feld Neue Hauptkonten im rechten Bereich Ihre E-Mail-Adresse ein.
- Klicken Sie auf das Feld Rolle auswählen und wählen Sie im Menü die Rolle Access Approval Approver (Genehmiger für Zugriffsanfragen) aus.
- Klicken Sie auf Speichern.
Sich selbst als Genehmiger für Anfragen für Zugriffsgenehmigungen hinzufügen und Benachrichtigungen konfigurieren
So fügen Sie sich selbst als Genehmiger hinzu, damit Sie Zugriffsanfragen prüfen und genehmigen können:
Rufen Sie in der Google Cloud Console die Seite Zugriffsgenehmigung auf.
Klicken Sie auf Einstellungen verwalten.
Wenn Sie E‑Mail-Benachrichtigungen aktivieren möchten, fügen Sie Ihre E‑Mail-Adresse im Feld E‑Mail-Adresse des Nutzers oder der Gruppe unter Genehmigungsbenachrichtigungen einrichten hinzu.
Wenn Sie Pub/Sub-Benachrichtigungen aktivieren möchten, fügen Sie Ihr Pub/Sub-Thema im Feld Pub/Sub-Thema unter Genehmigungsbenachrichtigungen einrichten hinzu.
Von Google verwalteten Signaturschlüssel auswählen
Bei der Zugriffsgenehmigung wird ein Signaturschlüssel verwendet, um die Integrität der Anfrage zur Zugriffsgenehmigung zu überprüfen.
Der von Google verwaltete Signaturschlüssel ist die Standardoption. Für die Verwendung einesGoogle-owned and managed key ist keine zusätzliche Konfiguration erforderlich.
Anfragen für die Zugriffsgenehmigung prüfen
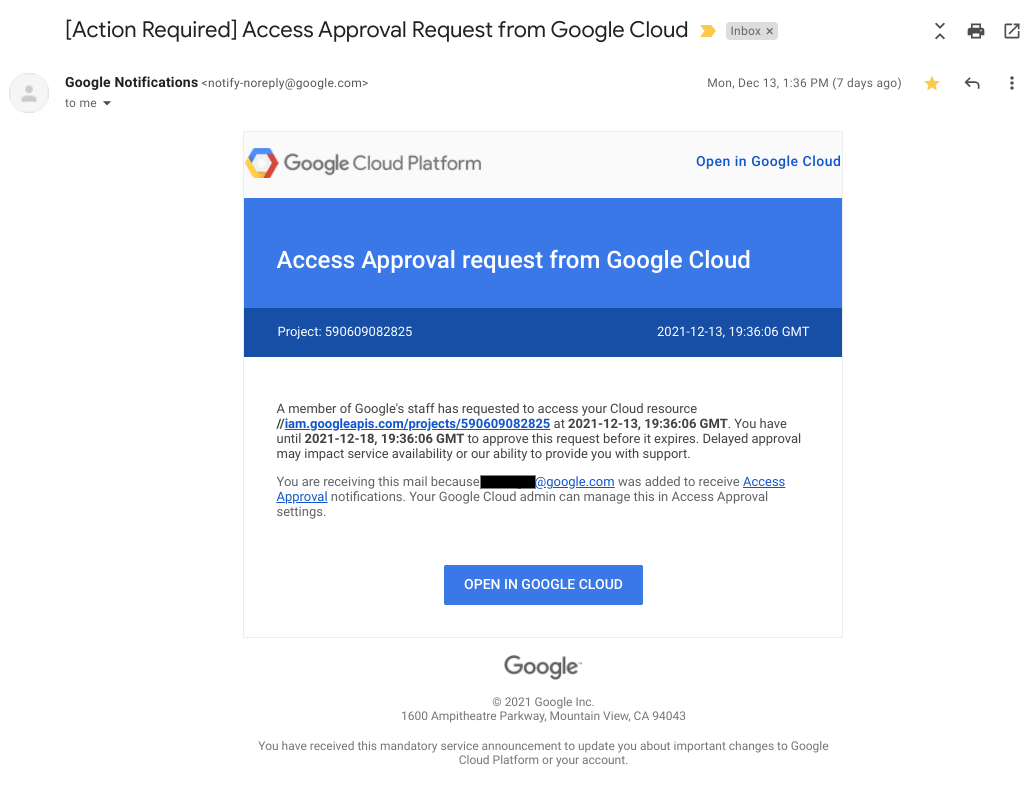
Nachdem Sie sich für die Zugriffsgenehmigung registriert und sich selbst als Genehmiger für Zugriffsanfragen hinzugefügt haben, erhalten Sie E‑Mail-Benachrichtigungen für Zugriffsanfragen.
Das folgende Bild zeigt eine Beispiel-E‑Mail-Benachrichtigung, die im Rahmen der Zugriffsgenehmigung gesendet wird, wenn Google-Mitarbeiter Zugriff auf Kundendaten anfordern.
So überprüfen und genehmigen Sie eine eingehende Zugriffsanfrage:
Rufen Sie in der Google Cloud Console die Seite Zugriffsgenehmigung auf.
Sie können auch auf den Link in der E-Mail klicken, die Sie mit der Genehmigungsanfrage erhalten haben, um auf diese Seite weitergeleitet zu werden.
Klicken Sie auf Genehmigen.
Nachdem Sie die Anfrage genehmigt haben, können Google-Mitarbeiter mit Merkmalen, die mit der Genehmigung übereinstimmen, z. B. mit derselben Begründung, demselben Standort oder demselben Schreibtischstandort, innerhalb des genehmigten Zeitrahmens auf die angegebene Ressource und ihre untergeordneten Ressourcen zugreifen.
Bereinigen
-
So melden Sie sich von Access Approval ab:
- Klicken Sie auf der Seite Zugriffsgenehmigung in der Google Cloud Konsole auf Einstellungen verwalten.
- Klicken Sie auf Abmelden.
- Klicken Sie im angezeigten Dialogfeld auf Abmelden.
- Wenn Sie Access Transparency für Ihre Organisation deaktivieren möchten, wenden Sie sich an Cloud Customer Care.
Es sind keine zusätzlichen Schritte erforderlich, um zu vermeiden, dass Gebühren für Ihr Konto anfallen.