Stay organized with collections
Save and categorize content based on your preferences.
This quickstart walks you through the series of actions that must be completed
before you can deploy the Speech-to-Text On-Prem API.
For more information on the configurable API parameters that are exposed during
installation and setup, see the
API configurations page.
Purchase a plan.
Assign the required Identity Access Management (IAM) roles to a service
account.
Install the required tools.
Create a Kubernetes cluster.
Preconfigure the API from the command line (Optional- for CLI installation
only).
Install Istio for gRPC load balancing (Optional).
Set up billing
On the Google Cloud Platform solutions page,
click PURCHASE PLAN. This should be done by a Billing Account Administrator.
You can verify it by navigating from Google Cloud Platform Console left hand
side navigation bar: Billing -> Account Management, then check the right
hand side Role/Principal. This is only required once.
Required IAM roles
Locate the Google Cloud Platform project drop-down menu in your
dashboard:
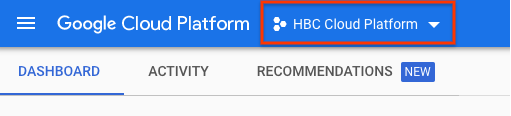
In the window that pops up, you can either choose an existing Google Cloud
Platform project or create a new one. After you have selected the project
you want to associate with Speech-to-Text On-Prem, navigate to the hamburger
icon in the top left corner and select IAM & Admin --> IAM to see
the list of the service accounts associated with that project.
Assign the following roles to service accounts belonging to the
Google Cloud Platform project that you will use during installation. They
can be assigned to a single service account or multiple separate accounts,
but all accounts must belong to the same project. To edit service account
permissions, click on the pencil icon to the right of the service account's
name. You can also create new service accounts by clicking the +ADD
button at the top of the IAM page in your Google Cloud Platform console.
Required IAM roles:
Project Viewer
Billing Account Administrator (Required to purchase a plan, not
required for deployment)
Kubernetes Engine Admin (If deploying to GKE)
Kubernetes Engine Cluster Admin (If deploying to Anthos)
Make sure that you are running either a
GKE or
Anthos cluster. Kubernetes clusters are
available on Google Cloud
Platform. If you have pre-existing clusters, you can choose one from the
list that appears by checking the box at the far left of the cluster's name:
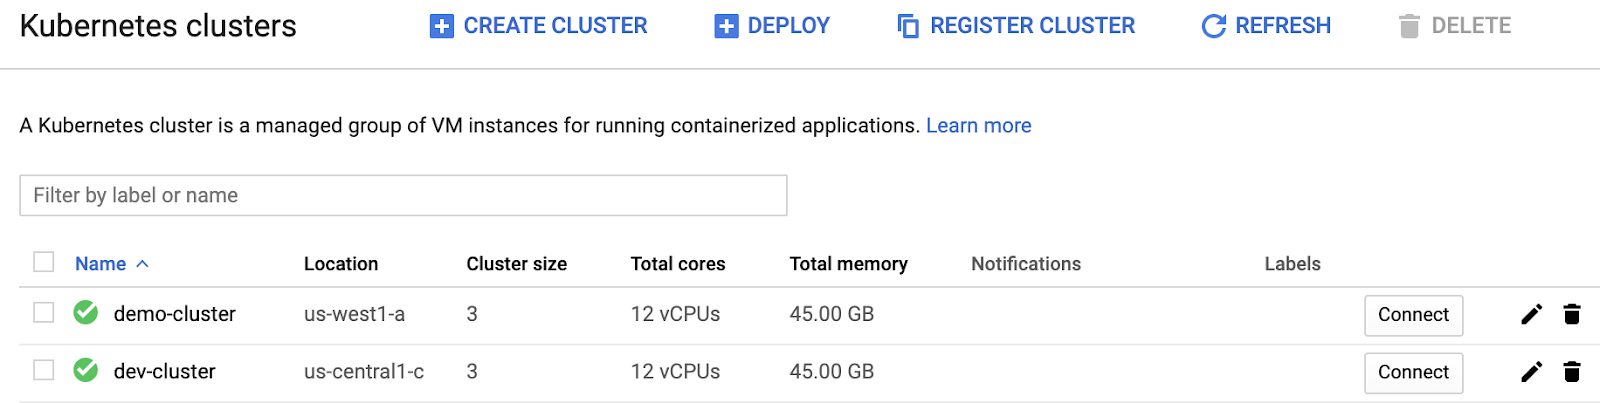
If you don't have any pre-existing clusters you are prompted to create one.
Make sure that the cluster's parameters match the recommendations in the list
below (the default parameters are not sufficient). Record the cluster's Name
and Location, as well as the name of the Google Cloud Platform project the
cluster is deployed to.
Basic recommendations for cluster setup:
Release Channel: Regular.
Node pool size should be equal or larger than the $REPLICAS.
Enable Istio if you need gRpc load balancing (Optional).
Enable Kubernetes Engine Monitoring if you want to export metrics to
Stackdriver (Optional).
Install Istio for gRPC load balancing (Optional)
In order to scale Speech-to-Text On-Prem, we rely on a L7 load balancer that is
compatible with gRPC. While there are several options available, we provide an
Istio sample
configuration here. Be aware, the default Kubernetes service L3 load balancing
strategy is not sufficient. You can follow either the
Google Cloud official guide
or the Istio official page to install Istio. If you also
want to export the metrics, follow
steps 1 and 2 (in the Configure your Kubernetes cluster section, below)
and then run the command below:
kubectl get deployment/istio-pilot -n istio-system \
&& kubectl set env deployment/istio-pilot -n istio-system PILOT_HTTP10=1 \
|| kubectl set env deployment/istiod -n istio-system PILOT_HTTP10=1
The PILOT_HTTP10=1 flag allows HTTP 1.0 requests to be made by our
application. This is crucial for allowing the application to authenticate with
Stackdriver (using the
Google Cloud Platform metadata server)
in order to publish telemetry.
Preconfigure the API from the command line (Optional)
If you plan to perform a CLI-based installation, follow the instructions in this
section.
Set your PROJECT and NAMESPACE environment variables. PROJECT is
the project id of the Google Cloud Platform project your cluster is deployed to. NAMESPACE
is the name of the new namespace you will create in Step 3, below. You can
input any value for NAMESPACE, but "speech" is a safe default.
Create a reporting secret. This value is used by the application to report
usage back to Google, and is used for future billing. On the
solution page,
under "Deploy via command line" tab, follow only instructions 1 & 2 to
generate & deploy the license reporting secret.
What's next
Learn how to deploy the
Speech-to-Text On-Prem API.
[[["Easy to understand","easyToUnderstand","thumb-up"],["Solved my problem","solvedMyProblem","thumb-up"],["Other","otherUp","thumb-up"]],[["Hard to understand","hardToUnderstand","thumb-down"],["Incorrect information or sample code","incorrectInformationOrSampleCode","thumb-down"],["Missing the information/samples I need","missingTheInformationSamplesINeed","thumb-down"],["Other","otherDown","thumb-down"]],["Last updated 2025-08-29 UTC."],[],[],null,["# Quickstart: Before you begin\n\n| **Private feature** \n| This product is a private feature. The documentation is publicly available but you must [contact Google](https://cloud.google.com/contact) for full access.\n\nThis quickstart walks you through the series of actions that must be completed\nbefore you can [deploy the Speech-to-Text On-Prem API](/speech-to-text/priv/docs/deploy).\nFor more information on the configurable API parameters that are exposed during\ninstallation and setup, see the\n[API configurations](/text-to-speech/priv/docs/configurations) page.\n\n1. Purchase a plan.\n2. Assign the required Identity Access Management (IAM) roles to a service account.\n3. Install the required tools.\n4. Create a Kubernetes cluster.\n5. Preconfigure the API from the command line (Optional- for CLI installation only).\n6. Install Istio for gRPC load balancing (Optional).\n\nSet up billing\n--------------\n\nOn the Google Cloud Platform [solutions page](https://console.cloud.google.com/marketplace/details/speech-onprem/speech-to-text-on-prem),\nclick **PURCHASE PLAN** . This should be done by a Billing Account Administrator.\nYou can verify it by navigating from Google Cloud Platform Console left hand\nside navigation bar: **Billing -\\\u003e Account Management**, then check the right\nhand side Role/Principal. This is only required once.\n\nRequired IAM roles\n------------------\n\n1. Locate the Google Cloud Platform project drop-down menu in your\n [dashboard](https://console.cloud.google.com/):\n\n2. In the window that pops up, you can either choose an existing Google Cloud\n Platform project or create a new one. After you have selected the project\n you want to associate with Speech-to-Text On-Prem, navigate to the hamburger\n icon in the top left corner and select **IAM \\& Admin** --\\\u003e **IAM** to see\n the list of the service accounts associated with that project.\n\n3. Assign the following roles to service accounts belonging to the\n Google Cloud Platform project that you will use during installation. They\n can be assigned to a single service account or multiple separate accounts,\n but all accounts must belong to the same project. To edit service account\n permissions, click on the pencil icon to the right of the service account's\n name. You can also create new service accounts by clicking the **+ADD**\n button at the top of the IAM page in your Google Cloud Platform console.\n\n Required IAM roles:\n - Project Viewer\n - Billing Account Administrator (Required to purchase a plan, not required for deployment)\n - Kubernetes Engine Admin (If deploying to GKE)\n - Kubernetes Engine Cluster Admin (If deploying to Anthos)\n\nRequired tools\n--------------\n\n1. Install the [Google Cloud CLI](https://cloud.google.com/sdk/gcloud).\n2. Install [kubectl](https://kubernetes.io/docs/tasks/tools/install-kubectl/).\n\nCreate a Kubernetes cluster\n---------------------------\n\nMake sure that you are running either a\n[GKE](https://cloud.google.com/kubernetes-engine/) or\n[Anthos](https://cloud.google.com/anthos/gke) cluster. Kubernetes clusters are\n[available](https://console.cloud.google.com/kubernetes/list) on Google Cloud\nPlatform. If you have pre-existing clusters, you can choose one from the\nlist that appears by checking the box at the far left of the cluster's name:\n\nIf you don't have any pre-existing clusters you are prompted to create one.\nMake sure that the cluster's parameters match the recommendations in the list\nbelow (the default parameters are not sufficient). Record the cluster's **Name**\nand **Location**, as well as the name of the Google Cloud Platform project the\ncluster is deployed to.\n\nBasic recommendations for cluster setup:\n\n- Release Channel: Regular.\n- Node pool size should be equal or larger than the $REPLICAS.\n- Node Machine Type: e2-standard-4 (4 vCPU, 16 GB Memory) or higher.\n- Enable autoscaling\n- Enable Istio if you need gRpc load balancing (Optional).\n- Enable Kubernetes Engine Monitoring if you want to export metrics to Stackdriver (Optional).\n\nInstall Istio for gRPC load balancing (Optional)\n------------------------------------------------\n\nIn order to scale Speech-to-Text On-Prem, we rely on a L7 load balancer that is\ncompatible with gRPC. While there are several options available, we provide an\n[Istio](https://istio.io/latest/docs/concepts/traffic-management/) sample\nconfiguration here. Be aware, **the default Kubernetes service L3 load balancing\nstrategy is not sufficient** . You can follow either the\n[Google Cloud official guide](https://cloud.google.com/istio/docs/istio-on-gke/installing)\nor the [Istio official page](https://istio.io/) to install Istio. If you also\nwant to export the metrics, follow\n[steps 1 and 2 (in the Configure your Kubernetes cluster section, below)](/speech-to-text/priv/docs/before-you-begin#configure_your_kubernetes_cluster)\nand then run the command below: \n\n kubectl get deployment/istio-pilot -n istio-system \\\n && kubectl set env deployment/istio-pilot -n istio-system PILOT_HTTP10=1 \\\n || kubectl set env deployment/istiod -n istio-system PILOT_HTTP10=1\n\nThe `PILOT_HTTP10=1` flag allows HTTP 1.0 requests to be made by our\napplication. This is crucial for allowing the application to authenticate with\nStackdriver (using the\n[Google Cloud Platform metadata server](https://cloud.google.com/compute/docs/storing-retrieving-metadata))\nin order to publish telemetry.\n\nPreconfigure the API from the command line (Optional)\n-----------------------------------------------------\n\nIf you plan to perform a CLI-based installation, follow the instructions in this\nsection.\n\n### Configure your environment\n\n1. [Install Docker](https://docs.docker.com/get-docker/).\n2. [Install the `mpdev` tool](https://github.com/GoogleCloudPlatform/marketplace-k8s-app-tools/blob/master/docs/mpdev-references.md).\n\n### Configure your Kubernetes cluster\n\n1. Set your **PROJECT** and **NAMESPACE** environment variables. **PROJECT** is\n the project id of the Google Cloud Platform project your cluster is deployed to. **NAMESPACE**\n is the name of the new namespace you will create in Step 3, below. You can\n input any value for **NAMESPACE**, but \"speech\" is a safe default.\n\n export PROJECT=\u003cmy-project-id\u003e\n export CLUSTER_NAME=\u003cname of the cluster\u003e\n export LOCATION=\u003clocation of the cluster\u003e\n export NAMESPACE=\u003cnew name for NAMESPACE\u003e\n\n2. Fetch your [cluster's credentials](https://cloud.google.com/sdk/gcloud/reference/container/clusters/get-credentials):\n\n gcloud container clusters get-credentials $CLUSTER_NAME\n --project $PROJECT --zone $LOCATION\n\n3. Create the namespace the application will be deployed to and assign it to the\n **NAMESPACE** name you created in step 1, above:\n\n kubectl create namespace ${NAMESPACE:?}\n\n4. Install the [Application CRD](https://github.com/kubernetes-sigs/application),\n which is required in order to use Google Cloud Platform marketplace apps:\n\n kubectl apply -f \"https://raw.githubusercontent.com/GoogleCloudPlatform/marketplace-k8s-app-tools/master/crd/app-crd.yaml\"\n\n5. Create a reporting secret. This value is used by the application to report\n usage back to Google, and is used for future billing. On the\n [solution page](https://console.cloud.google.com/marketplace/kubernetes/config/speech-onprem/speech-to-text-on-prem),\n under \"Deploy via command line\" tab, follow only instructions 1 \\& 2 to\n generate \\& deploy the license reporting secret.\n\n| **Note:** Before running `kubectl apply`, make sure that you update `license.yaml`. Set the value of `metadata.name` to `reporting-secret`, and `metadata.namespace` to the value chosen for `$NAMESPACE`.\n\nWhat's next\n-----------\n\nLearn how to [deploy](/speech-to-text/priv/docs/deploy) the\nSpeech-to-Text On-Prem API."]]