设置多租户
了解如何为 Identity Platform 启用多租户,以及如何使用 Google Cloud 控制台创建新租户。
如需在 Google Cloud 控制台中直接遵循有关此任务的分步指导,请点击操作演示:
准备工作
- Sign in to your Google Cloud account. If you're new to Google Cloud, create an account to evaluate how our products perform in real-world scenarios. New customers also get $300 in free credits to run, test, and deploy workloads.
-
In the Google Cloud console, on the project selector page, select or create a Google Cloud project.
Roles required to select or create a project
- Select a project: Selecting a project doesn't require a specific IAM role—you can select any project that you've been granted a role on.
-
Create a project: To create a project, you need the Project Creator
(
roles/resourcemanager.projectCreator), which contains theresourcemanager.projects.createpermission. Learn how to grant roles.
-
Verify that billing is enabled for your Google Cloud project.
-
In the Google Cloud console, on the project selector page, select or create a Google Cloud project.
Roles required to select or create a project
- Select a project: Selecting a project doesn't require a specific IAM role—you can select any project that you've been granted a role on.
-
Create a project: To create a project, you need the Project Creator
(
roles/resourcemanager.projectCreator), which contains theresourcemanager.projects.createpermission. Learn how to grant roles.
-
Verify that billing is enabled for your Google Cloud project.
启用多租户
在 Google Cloud 控制台中打开 Identity Platform 设置页面。
前往“设置”页面点击安全标签。
点击页面底部的允许多租户。
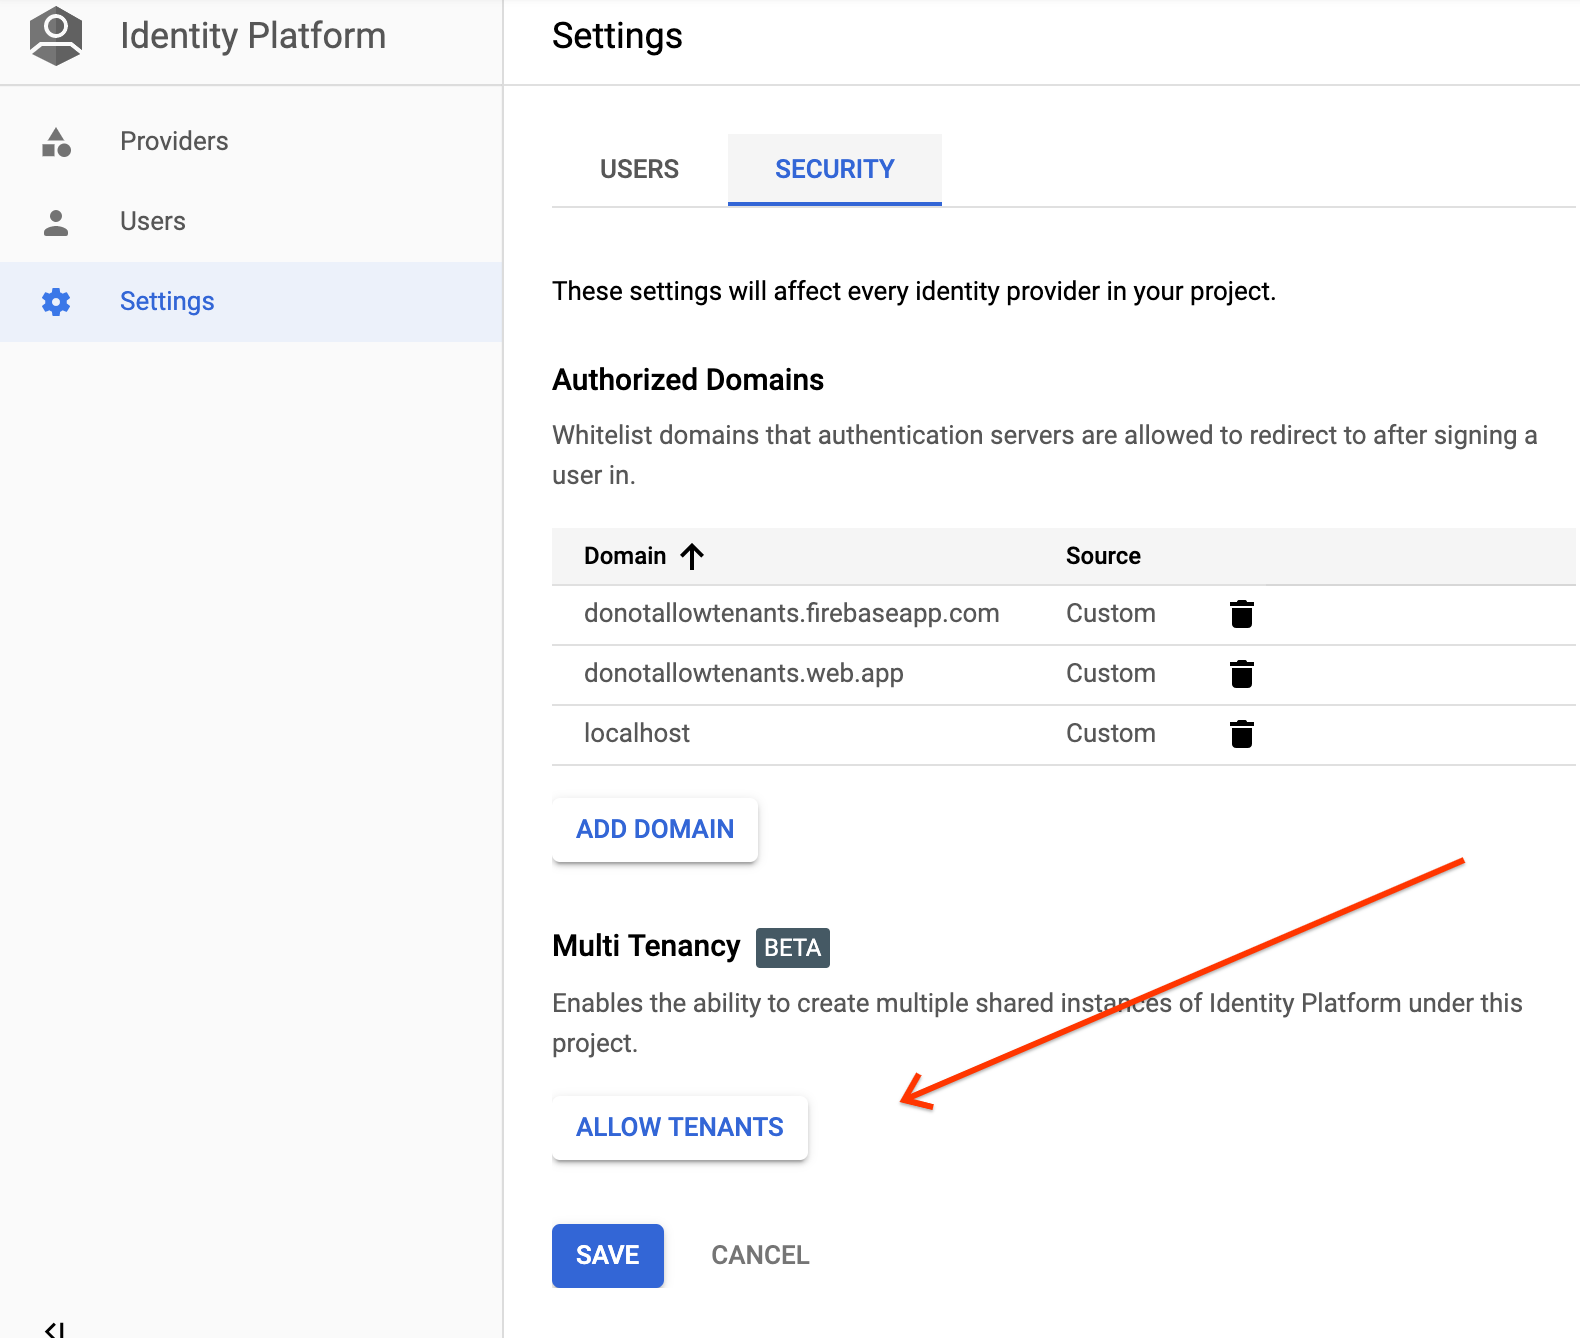
点击此按钮后,您可以启用多租户并打开租户页面。
您现在可以创建第一个租户了。
创建租户
在 Google Cloud 控制台中打开 Identity Platform 租户页面。
前往“租户”页面点击添加租户。
输入租户的名称。该名称不必是唯一的;Identity Platform 将自动分配不同的 ID。
点击保存。
恭喜!您已创建 Identity Platform 租户。
选择租户
在设置页面中,从限定到租户列表中选择您的租户。
每个租户都有自己的提供商和用户。选择租户后,您可以像管理非租户 Identity Platform 项目一样管理该租户。
停用多租户
使用 Identity Toolkit API 停用多租户。