This document describes how you can use Gemini Code Assist Standard and Enterprise, an AI-powered collaborator in your IDE, to help you do the following in VS Code or IntelliJ and other supported JetBrains IDEs:
- Receive guidance to help you solve problems with your code.
- Generate code for your project.
- Manage the context of your project by specifying files and folders.
- Create custom commands and rules.
Code customization lets you get code suggestions based on your organization's private codebase directly from Gemini Code Assist Enterprise. Learn how to configure code customization.
This document is intended for developers of all skill levels. It assumes you have working knowledge of VS Code or IntelliJ and other supported JetBrains IDEs, and are familiar with Google Cloud. If you prefer, you can also explore Gemini Code Assist in Cloud Shell Editor, Cloud Workstations, and Android Studio.
Before you begin
VS Code
Set up Gemini Code Assist Standard or Enterprise, if you haven't already.
Before testing Gemini Code Assist capabilities in your code file, make sure your file's coding language is supported. For more information on supported coding languages, see Supported coding languages.
If you prefer to use your IDE behind a proxy, see Network Connections in Visual Studio Code.
IntelliJ
Set up Gemini Code Assist Standard or Enterprise, if you haven't already.
Before testing Gemini Code Assist capabilities in your code file, make sure your file's coding language is supported. For more information on supported coding languages, see Supported coding languages.
If you prefer to use your IDE behind a proxy, see HTTP Proxy.
Use the Gemini Code Assist chat to explain your code
In this section, you prompt Gemini Code Assist to provide an explanation of your existing code.
VS Code
To get an explanation of your code, follow these steps:
Open your code file.
In the activity bar of your IDE, click spark Gemini Code Assist.
In the Gemini Code Assist pane, enter the prompt
Explain this code to
me
and click send Send.Gemini Code Assist uses the code in your code file as a reference to your prompt and responds with an explanation of your code.
To refer to a specific block of code instead of all the code in the file, you can select the block in your code file and then prompt Gemini Code Assist.
IntelliJ
To get an explanation of your code, follow these steps:
In your IDE, open your code file.
In the Gemini Code Assist tool window, enter the prompt
Explain this code to meand click Submit.
Gemini Code Assist uses the code in your code file as a reference to your prompt and responds with an explanation of your code.
If you only want an explanation of a certain part of your code, you can select certain code and then prompt Gemini Code Assist again. Gemini Code Assist will only use the selected code as a reference to its generated response.
When Gemini Code Assist provides you with code in its response, you can select the following options listed at the end of its response:
Insert at Cursor: Inserts the generated code into your current file at your current cursor position.
Insert in New File: Opens a new file and inserts the generated code into the new file.

These options are available when Gemini Code Assist identifies the language used in your code block, and if this language is supported in your current IDE.
View query history
If you want to re-use your previous prompts, you can find them in your Query History in the Gemini Code Assist tool window by clicking schedule Show Query History.

Create multiple chats
You can create multiple chats with Gemini Code Assist which contain their own context separate from other chats. Your chat history shows your first chat and the last updated timestamp. There's a limit of 20 chats. Once you reach this limit, the oldest chat is automatically deleted when you add a new chat.
VS Code
- To add a new chat, click add New Chat and enter your prompt in the text field. After you enter the prompt, Gemini Code Assist creates the new chat.
- To access your previous chat, click history Resume Previous Chat. A list of your chats appear. Select the chat that you want to view.
- To delete a chat thread, click Resume Previous Chat and then click delete Delete next to the chat that you want to delete.
IntelliJ
- To add a new chat, click add New Chat and enter your prompt in the text field. After you enter the prompt, Gemini Code Assist creates the new chat.
- To access your previous chat, click chat_bubble Recent Chats. A list of your chats appear. Select the chat that you want to view.
- To delete a chat thread, click Recent chats and then click delete Delete next to the chat that you want to delete.
Clear chat history
Gemini Code Assist uses the chat history for additional context when responding to your prompts. If your chat history is no longer relevant, you can clear the chat history.
Manage your chat
You can manage your Gemini Code Assist chat settings by doing the following:
Configure automatic scrolling
VS Code
By default, Gemini Code Assist automatically scrolls through your chat. To disable this behavior, perform the following tasks:
Navigate to Settings > Extensions > Gemini Code Assist.
Search for the Automatic Scrolling setting and unselect the checkbox.
IntelliJ
This feature isn't supported in Gemini Code Assist for IntelliJ and other JetBrains IDEs.
Stop in-progress chat
VS Code
You can stop an in-progress chat response by pressing stop Stop:

IntelliJ
You can stop an in-progress chat response by pressing stop Stop:

Edit a prior prompt
When you edit a prior prompt, Gemini Code Assist regenerates the response to the edited prompt. To edit your prompt, follow these steps:
VS Code
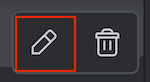
In the chat pane, hold your pointer over the prompt that you want to edit.
Click edit Edit.

Make changes to your prompt and click Update.
Gemini Code Assist generates a new response to your edited prompt.
IntelliJ
In the chat pane, hold your pointer over the prompt that you want to edit.
Click edit Edit.
Make changes to your prompt and click Update.
Gemini Code Assist generates a new response to your edited prompt.
Regenerate a prompt response
If preferred, you can regenerate a different response to your most recent prompt by following these steps:
VS Code
In the Gemini Code Assist Chat pane, at the bottom of your most recent response, click replay Regenerate response.
Gemini Code Assist re-evaluates your recent prompt and provides a new response.
IntelliJ
In the Gemini Code Assist Chat pane, at the bottom of your most recent response, click replay Regenerate response.
Gemini Code Assist re-evaluates your recent prompt and provides a new response.
Delete prompt and response pairs
To delete your prompt and Gemini Code Assist's response to that particular prompt, follow these steps:
VS Code
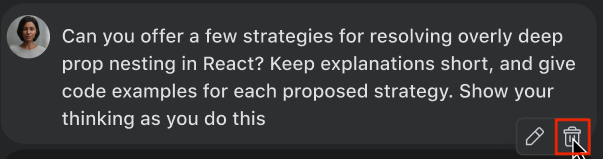
In the chat pane, hold your pointer over your prompt that you wish to remove.
Click Delete.
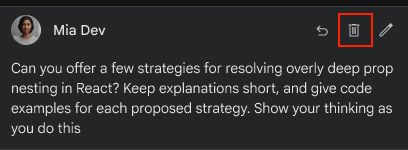
When prompted to confirm if you want to delete the prompt and response pair, select Delete. Otherwise, click Cancel to cancel the operation.
Your prompt and response pair is removed from your chat history with Gemini Code Assist.
IntelliJ
In the chat pane, hold your pointer over your prompt that you wish to remove.
Click Delete.
When prompted to confirm if you want to delete the prompt and response pair, select Delete. Otherwise, click Cancel to cancel the operation.
Your prompt and response pair is removed from your chat history with Gemini Code Assist.
Configure code preview pane
By default, the code preview pane setting for Gemini Code Assist chat is enabled. With this setting enabled, the preview code block in the Gemini Code Assist chat shows the first 6 lines of code. You can expand and collapse code blocks.
To change the default setting, perform the following tasks:
VS Code
In your IDE, navigate to Settings > Extensions > Gemini Code Assist.
Search for the Default Code Block Display setting.
Select one of the following options:
Expanded: Automatically expands all code blocks in Gemini Code Assist chat responses.
Preview: Only shows the first 6 lines of code in the code block. You must expand the code block in the Gemini Code Assist chat response to see the rest of the code. This is the default setting.
Collapse: Automatically collapses all code blocks in Gemini Code Assist chat responses.
When the IDE reloads, the new setting takes effect.
IntelliJ
This feature is the default in IntelliJ Gemini Code Assist and other JetBrains IDEs and is not configurable.
Prompt Gemini Code Assist with selected code using chat
Gemini Code Assist can perform tasks or answer your questions based on the code that you select. To get generated code that's based on a prompt with selected code, follow these steps:
VS Code
In the activity bar, click spark Gemini Code Assist to open the Gemini Code Assist pane.
In your code file, select a block of code.
In the Gemini Code Assist pane text field, enter a prompt for the selected code.
For example, select a function in your code and enter the prompt
Write a unit test for this function.Gemini uses your selected code as reference and responds to your prompt.
IntelliJ
In the activity bar, click spark Gemini Code Assist to open the Gemini Code Assist tool window.
In your code file, select a block of code.
In the Gemini Code Assist tool window text field, enter a prompt for the selected code.
For example, select a function in your code and enter the prompt
Write a
unit test for this function.
Gemini Code Assist uses your selected code as reference and responds to your prompt.
Add selected code snippets to context
You can select, attach, and direct Gemini Code Assist to focus on code snippets. Code snippet selection enables discrete analysis of smaller code blocks instead of entire files.
When you select a code snippet in your code file, you can instruct Gemini Code Assist add the code snippet to the Context Drawer.
Anything selected in the editor window, but not yet added to the Context Drawer, is also automatically included in the context. Selected code snippets only show up for a single chat turn. They won't persist in the Context Drawer, but remain in your Gemini Code Assist chat history.
In this section, you add a selected code snippet to your context and get an explanation about the code snippet from Gemini Code Assist:
VS Code
In your code file, select a code snippet.
In the Gemini Code Assist Chat text field, click Add to Chat Context.
Gemini Code Assist adds the selected code snippet to your Context Drawer.
In the Gemini Code Assist Chat text field, enter the prompt
what does this code do?.Gemini Code Assist responds to your prompt based on your selected code snippet in the Context Drawer.
IntelliJ
In your code file, select a code snippet.
Select the spark Gemini icon and then select Add Selected Text to Chat Context from the menu.
The code snippet is added to your Context Drawer.
Prompt Gemini Code Assist with selected terminal output using chat
Gemini Code Assist can perform tasks or answer your questions based on selected terminal output. To get an explanation of selected terminal output, follow these steps:
VS Code
In your IDE, open your terminal (View > Terminal).
Select any terminal output.
Right-click the selected terminal output and select Gemini Code Assist: Add to Chat Context.
Gemini Code Assist adds your terminal output to the Context Drawer.
In the Gemini Code Assist Chat text field, enter the prompt
what does this do?.Gemini Code Assist responds to your prompt based on your selected terminal output in the Context Drawer.
IntelliJ
In the Gemini Code Assist Chat text field, enter
@terminal.In the list that appears, under Terminals, select the terminal that you want to enquire about.
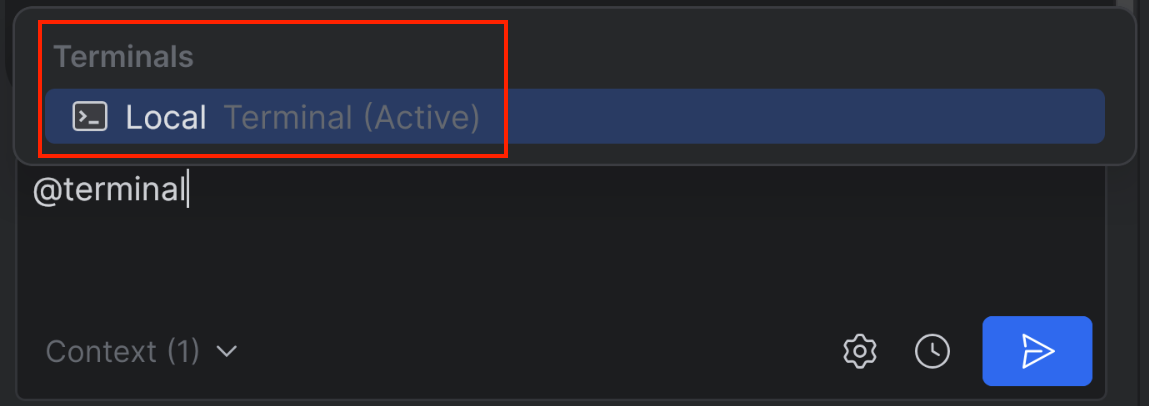
In the Gemini Code Assist Chat text field, enter the prompt
what does this do?.Gemini Code Assist responds to your prompt based on your selected terminal output.
Specify files and folders in your workspace context
You can specify files or folders in your workspace for Gemini Code Assist to use as context. When you specify a folder, Gemini Code Assist uses the files in the folder as well as the files in subfolders as context.
VS Code
To specify files or folders in your chat prompt, type @ and select the file or folder you want to specify.

To get an explanation on the differences of two files in your codebase, follow these steps:
In the activity bar, click spark Gemini Code Assist.
In the Gemini Code Assist pane, enter the prompt
Explain the
difference between @YOUR_FILE_NAME_1 and @YOUR_FILE_NAME_2
and press Enter (for Windows and Linux) or Return (for macOS), or Tab. You can also click the name of the file in the list to select the file. Clicking the file name adds the file to your prompt context and opens the file in your IDE.
Gemini Code Assist responds to your prompt while using the two files you specified for context. Gemini Code Assist also includes the files you specified in Context Sources.
Now that you've specified those files, you can continue asking additional questions or prompts in the same chat history, without having to specify the files again.
For example: In the Gemini Code Assist pane, enter the prompt How can I
improve YOUR_FILE_NAME_1? (without the @ symbol) and press
Enter (for Windows and Linux) or Return (for macOS).
Gemini Code Assist responds to your enquiry about the file you specified in your prompt.
IntelliJ
To specify files or folders in your chat prompt, type @ and select the files or folders you want to specify.

To get an explanation on the differences of two files in your codebase, follow these steps:
In the activity bar, click spark Gemini Code Assist.
In the Gemini Code Assist pane, enter the prompt
Explain the
difference between @YOUR_FILE_NAME_1 and @YOUR_FILE_NAME_2
and press Enter (for Windows and Linux) or Return (for macOS), or Tab. You can also click the name of the file in the list to select the file. Clicking the file name adds the file to your prompt context and opens the file in your IDE.
Gemini Code Assist responds to your prompt while using the two files you specified for context. Gemini Code Assist also includes the files you specified in Context Sources.
Now that you've specified those files, you can continue asking additional questions or prompts in the same chat history, without having to specify them again.
For example: In the Gemini Code Assist pane, enter the prompt How can I
improve YOUR_FILE_NAME_1? (without the @ symbol) and press
Enter (for Windows and Linux) or Return (for macOS).
Gemini Code Assist responds to your enquiry about the file you specified in your prompt.
Manage files and folders in the Context Drawer
After you specify a file or folder to be used as context for your Gemini Code Assist prompts, these files and folders are placed in the Context Drawer, where you can view and remove them from the prompt context.
To manage the files and folders in your Context Drawer, perform the following tasks:
VS Code
In the activity bar of your IDE, click spark Gemini Code Assist.
To view the files and folders in your Context Drawer, click Context items.

To remove items from the Context Drawer, click close Remove.
IntelliJ
In the activity bar, click spark Gemini Code Assist.
To view the files and folders in your Context Drawer, click Context.

To remove files and folders from the Context Drawer, click close Remove.
Exclude files from local context
By default, Gemini Code Assist excludes files from local use in
the context for code completion, code generation, code transformation, and chat
if the files are specified in a .aiexclude or .gitignore file.
To learn how to exclude files from local use, see Exclude files from Gemini Code Assist use.
Revert to a checkpoint in chat
After applying the changes that Gemini Code Assist generates based on your prompt, you can choose to revert the modified code file(s) to a certain checkpoint, which reverts all of the applied changes to the code file(s).
Reverting to a checkpoint does not revert manual changes that you may have made to the code file(s).
To revert your code file to a checkpoint, follow these steps:
VS Code
In the Gemini Code Assist chat pane, click undo Revert to checkpoint. This reverts your code file back to the checkpoint state before the edits were made.
IntelliJ
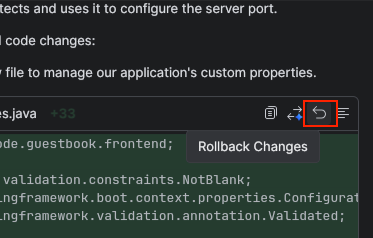
If you've already clicked check Accept changes for a chat generated code suggestion, then you have the option to rollback the changes using the undo Rollback changes button:
In the Gemini Code Assist chat pane, click undo Rollback Changes. This reverts your code file back to the checkpoint state before the edits were made.
View code diffs
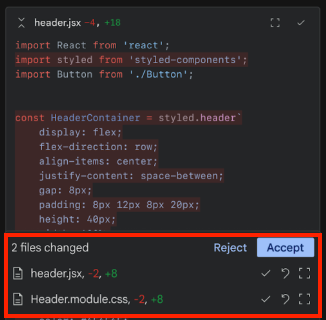
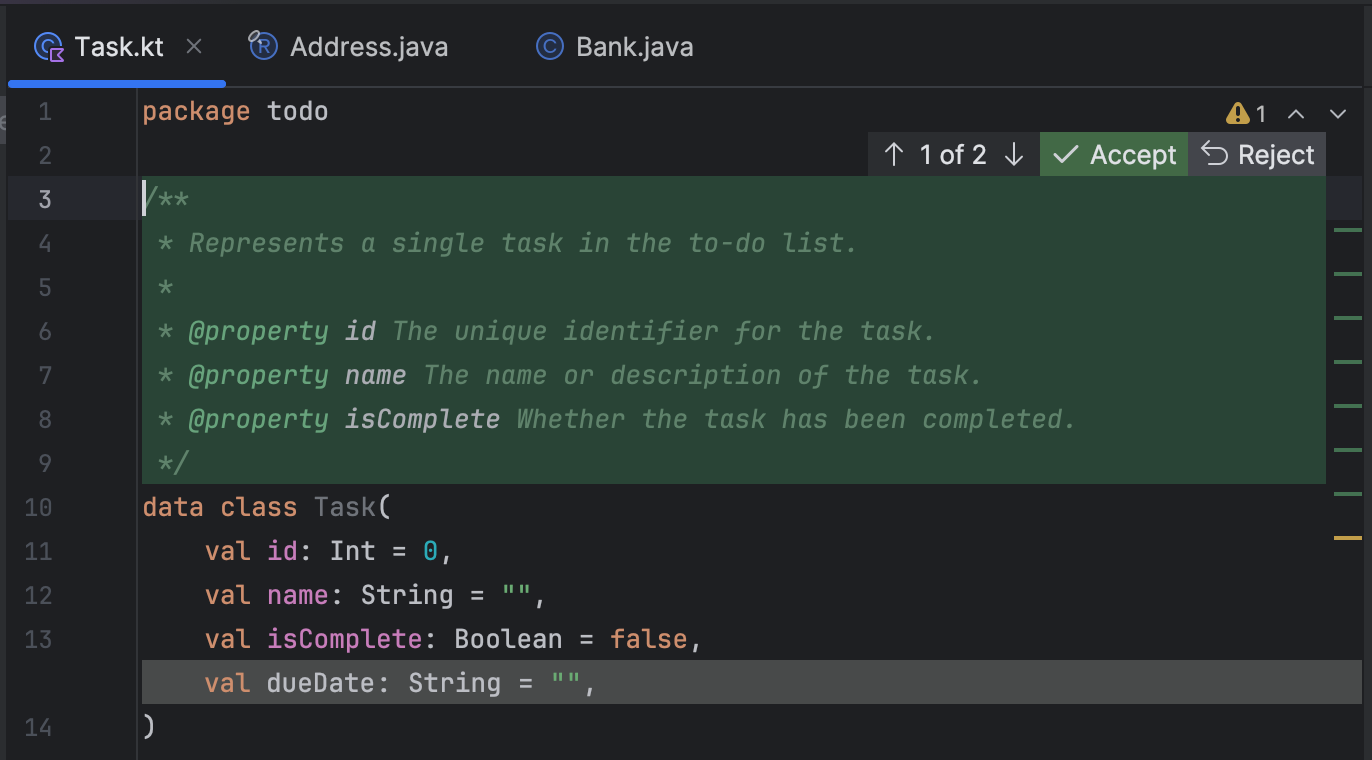
By default, Gemini Code Assist suggests changes to your code with a code diff. You can trigger this diff any time you ask Gemini Code Assist to make changes to your code.
In this section, you prompt Gemini Code Assist to optimize your code file, view the diff in your code file, and accept or reject changes as preferred.
VS Code
With your code file opened, prompt Gemini Code Assist to
optimize this file. If you want to optimize multiple files and folders, prompt Gemini Code Assist tooptimize @FILE1 and @FILE2.Gemini Code Assist responds to your prompt with code change suggestions in the code file(s) along with an inline diff that illustrates these changes.
In the code file, click check_small Accept or close_small Reject.
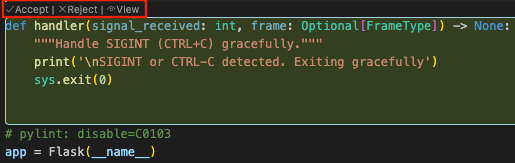
If Gemini Code Assist suggests multiple changes throughout your code file(s), click View above the suggestion and then click Next or Previous, to cycles through the other suggestions.
If you want to accept or reject all of the suggested changes, click Accept file or Reject file.

You can also use the Quick Preview in the prompt response to accept or reject all suggestions across multiple code files.
IntelliJ
With your code file opened, prompt Gemini Code Assist to
optimize this file. If you want to optimize multiple files and folders prompt Gemini Code Assist tooptimize @FILE1 and @FILE2.Gemini Code Assist responds to your prompt with code change suggestions in the code file(s) along with an inline diff that illustrates these changes.
In the code file, click check_small Accept or undo Reject.
If Gemini Code Assist suggests multiple changes throughout your code file(s), click arrow_upward or arrow_downward to cycle through the other suggestions.

You can also use the Quick Preview in the prompt response to accept or reject all suggestions across multiple code files.
Change diff view settings
VS Code
If you prefer, you can change this setting to have a separate diff view window in your IDE by following these steps:
In the activity bar, navigate to settings Settings > Settings.
In the User tab of the settings, navigate to Extensions > Gemini Code Assist.
Scroll to the Geminicodeassist > Chat: Change View setting.
In the dropdown list, select one of the following options:
Inline suggestions (enabled by default): Code changes displayed in your code file.
Default diff view: Opens a new file with side-by-side code changes.
IntelliJ
In the chat response of the Gemini Code Assist sidebar Ask panel, click the Preview in diff mode button (compare_arrows).
A Side-by-side tab appears in the main coding pane.
Click on the Side-by-side tab to view side-by-side code changes.
Create custom commands
By default, Gemini Code Assist provides commands like
/generate for VS Code and Generate Code for IntelliJ and
other supported JetBrains IDEs.
You can also create your own custom commands to help you accomplish
repetitive tasks faster in your IDE.
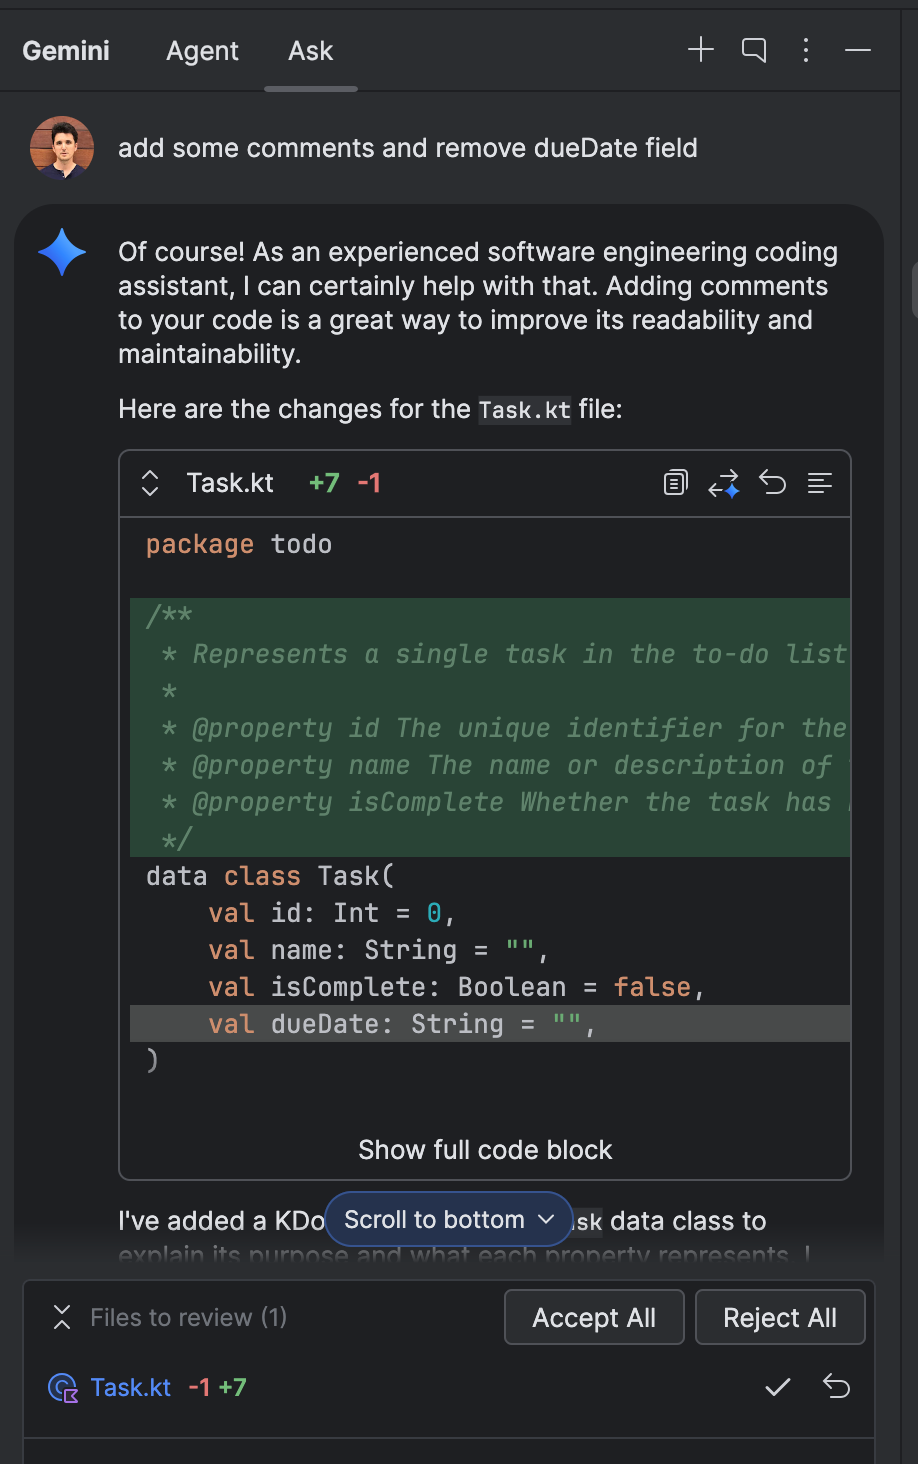
In this section, you create a custom command called add-comments that adds
comments to the code in your code file. For IntelliJ and other supported
JetBrains IDEs, you'll create, save, and execute the custom command from the
Prompt Library, and from the in-editor prompt.
VS Code
In your code file, press Control+I (for Windows and Linux) or Command+I (for macOS) to open the Gemini Code Assist Quick Pick menu.
In the menu, search for and select Preferences: Open Settings (UI).
In the Search settings field, enter
Geminicodeassist: Custom Commands.In the Custom Commands box, select Add Item.
In the Item field, enter
add-commentsas the name of the command.In the Value field, enter
add comments to all functions without
comments in my code
as the prompt.Click OK.
You can now use the custom command add-comments in your IDE. The command
appears in the list of commands in the Gemini Code Assist
Quick Pick menu (Control+I (for Windows and Linux) or
Command+I (for macOS)).
IntelliJ
In your IDE, navigate to Settings > Tools > Gemini > Prompt Library.

In the Prompt Library window, click add Add.
Name your custom command
add-comments.In the Prompt Library's text box, enter the prompt:
Add comments to all functions without comments in this code.Select the Show in In-Editor Prompt checkbox if it's unselected.
Click OK to save the custom command in the Prompt Library.
In your code file, highlight the code that you want to modify.
Right-click the highlighted code and navigate to Gemini > Prompt Library and then select the custom command
add-comments.Gemini Code Assist executes the
add-commentscommand and adds comments to your highlighted code.
You can also invoke the custom command with the in-editor prompt by performing the following tasks:
In your code file, highlight the code that you want to modify, and press Alt+\ (for Windows and Linux) or Cmd+\ (for macOS) to open the Gemini Code Assist Quick Pick menu.
In the menu, select your custom command
add-comments.Gemini Code Assist executes the
add-commentscommand and adds comments to your highlighted code.
In the Gemini Code Assist chat pane, you can type @ to retrieve and use a saved prompt in your Prompt Library.
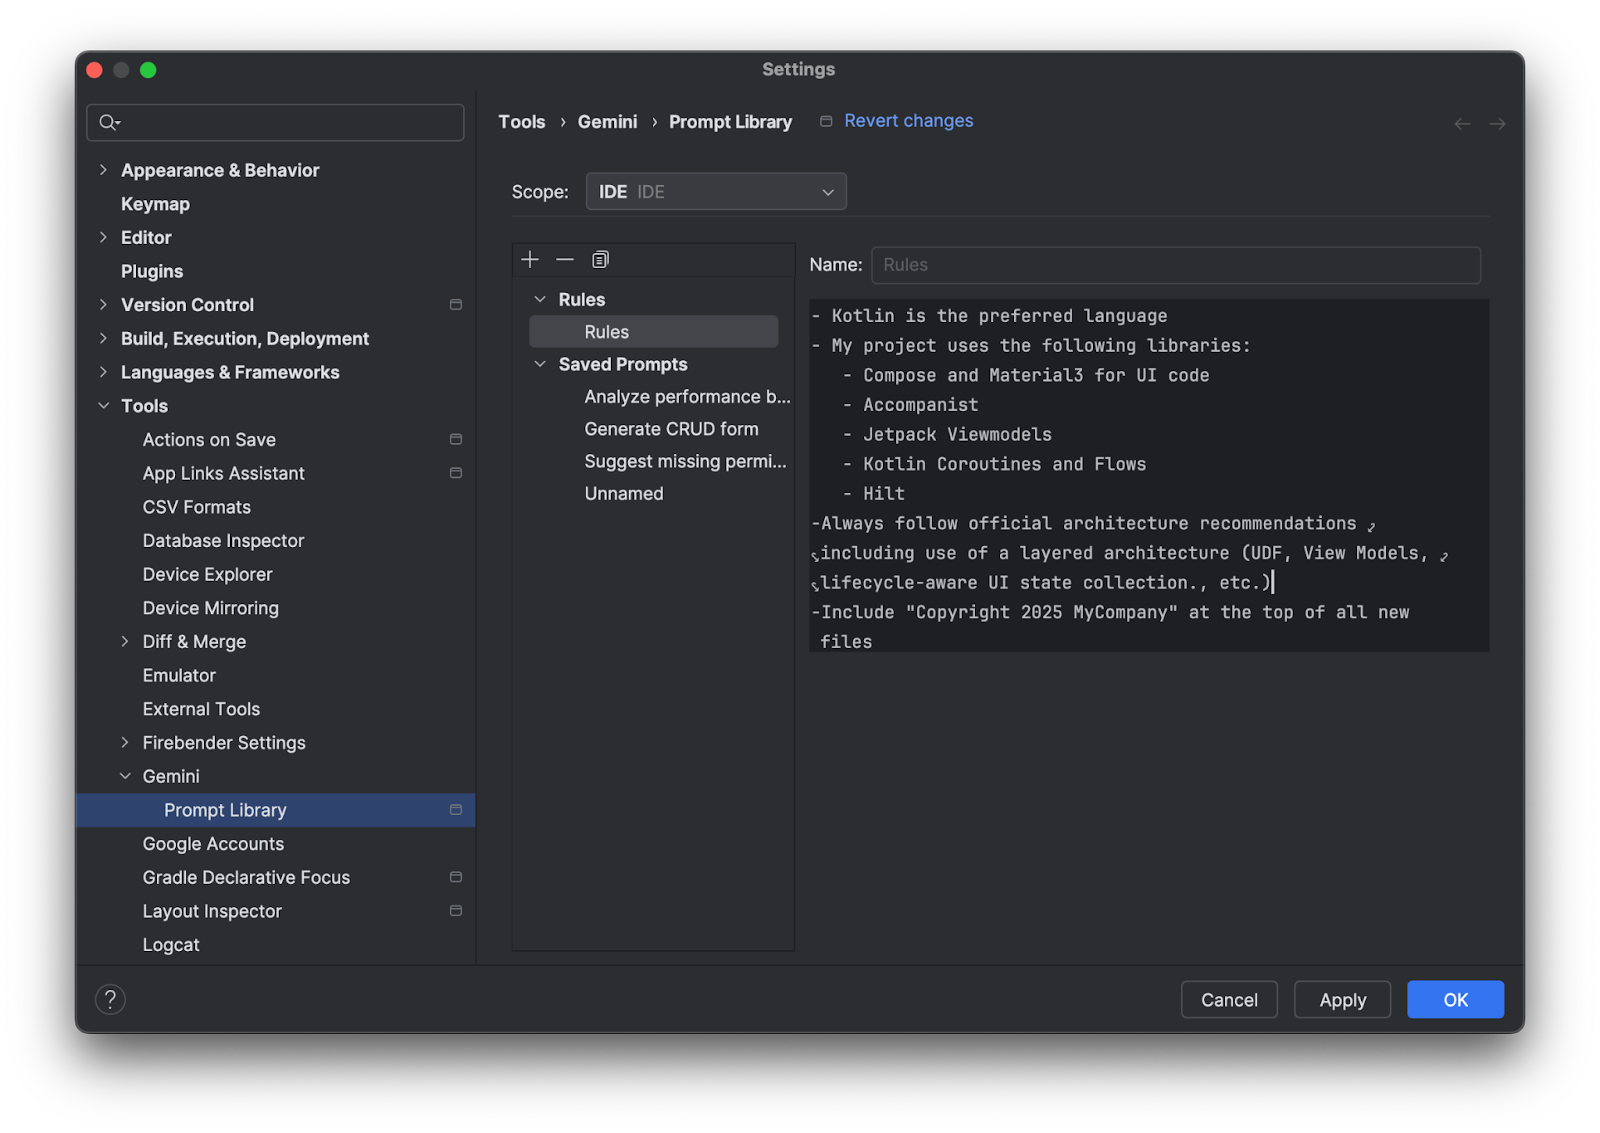
Create rules
You can create rules for Gemini Code Assist to follow, and the rules are included in every chat prompt you enter.
Rules in Gemini let you define your preferences, such as:
- Coding style
- Output formats
- Tech stack
- Language
For example, you can create a rule such as "Always give me concise responses in Kotlin."
VS Code
In your code file, press Control+I (for Windows and Linux) or Command+I (for macOS) to open the Gemini Code Assist Quick Pick menu.
In the menu, search for and select Preferences: Open Settings (UI).
In the Search settings field, enter
Geminicodeassist: Rules.In the text field, enter a rule such as:
Always generate unit tests when
creating a new function
. You can also add one or more rules with multiple lines in the text field.After adding rules in the Rules settings, Gemini Code Assist considers the rule for every prompt or request you make.
To remove the rule, delete the content from the Rules text field.
IntelliJ
- To create a rule, go to Settings > Tools > Gemini > Prompt Library > Rules and then edit the text in the editor.
To set the scope of the rule, in the Scope drop-down, select IDE or Project.
- IDE-level rules are private to yourself and can be used across multiple projects.
- Project-level rules can be shared among teammates working on the same project.
To share prompts across the team you must add the
.ideafolder to the version control system.
Known issues
This section outlines the known issues of Gemini Code Assist:
VS Code
Chat responses may be truncated when they include an updated version of a large open file
To work around this issue, select a smaller section of code and include an additional directive in the chat prompt, such as
only output the selected
code.
Vim: Cannot accept or dismiss code generation suggestions unless in insert mode
When using the Vim plugin in normal mode, you can't accept or dismiss code suggestions.
To work around this issue, press i to enter insert mode, and then press Tab to accept the suggestion.
Vim: Inconsistent behavior when pressing Esc to dismiss suggestions
When you press Esc, both the IDE and Gemini Code Assist suggestions are dismissed. This behavior is different from the non-Vim behavior where pressing Esc re-triggers Gemini Code Assist.
Sign-in attempts keep timing out
If your sign-in attempts keep timing out, try adding the
cloudcode.beta.forceOobLoginsetting to yoursettings.jsonfile:"cloudcode.beta.forceOobLogin": trueLicense recitation warnings don't persist across sessions
If license recitation warnings don't persist across sessions, refer to the persistent logs:
Click View > Output.
Select Gemini Code Assist - Citations.
Connectivity issues in the Gemini Code Assist output window
If you see a connection error or other connectivity problems in the Gemini Code Assist output window, try the following:
Configure your firewall to allow access to
oauth2.googleapis.comandcloudaicompanion.googleapis.com.Configure your firewall to allow communication over HTTP/2, which gRPC uses.
You can use the
grpc-health-probetool to test connectivity. A successful check results in the following output:$ grpc-health-probe -addr cloudaicompanion.googleapis.com:443 -tls error: this server does not implement the grpc health protocol (grpc.health.v1.Health): GRPC target method can't be resolvedAn unsuccessful check results in the following output:
timeout: failed to connect service "cloudaicompanion.googleapis.com:443" within 1sTo obtain more details, run the following before
grpc-health-probe:export GRPC_GO_LOG_SEVERITY_LEVEL=info
'Activate Gemini Code Assist' still appears after selecting Gemini Code Assist project
If you selected your project per the instructions in this guide, which includes enabling the Gemini for Google Cloud API, then there may be an issue with the LS server.
To find out more details about your issue, perform the following actions:
In the status bar, click spark Gemini Code Assist and then select Send feedback.
Click Show for any of the log files to see more details and to help troubleshoot the issue.
IntelliJ
There are no known issues for Gemini Code Assist for IntelliJ and other supported JetBrains IDEs.
Leave feedback
To leave feedback of your experience, see Provide Gemini for Google Cloud feedback.
What's next
- Learn how to write better prompts.
- Learn how Gemini for Google Cloud uses your data.
- Learn about Gemini Code Assist pricing.
- Learn more about Google Cloud compliance.