本頁說明如何設定開發環境,以使用 App Engine 標準環境適用的 Cloud Endpoints Frameworks 建構及部署後端 API。本頁會使用 Endpoints Frameworks 2.0 版基本架構程式碼範例,說明開始進行設定所需的基本軟體和元件。
建議您透過使用 Apache Maven 和 App Engine 外掛程式 (以 Google Cloud CLI 為基礎) 一文所述的 endpoints-skeleton-archetype 或 hello-endpoints-archetype,建立新的 Endpoints Frameworks 2.0 版專案。
如要進一步瞭解使用 Endpoints Frameworks 部署範例 API 的所需步驟,請參閱開始在 App Engine 上使用 Endpoints Frameworks 的相關教學課程。
事前準備
- Sign in to your Google Cloud account. If you're new to Google Cloud, create an account to evaluate how our products perform in real-world scenarios. New customers also get $300 in free credits to run, test, and deploy workloads.
-
In the Google Cloud console, on the project selector page, select or create a Google Cloud project.
Roles required to select or create a project
- Select a project: Selecting a project doesn't require a specific IAM role—you can select any project that you've been granted a role on.
-
Create a project: To create a project, you need the Project Creator
(
roles/resourcemanager.projectCreator), which contains theresourcemanager.projects.createpermission. Learn how to grant roles.
-
Verify that billing is enabled for your Google Cloud project.
-
In the Google Cloud console, on the project selector page, select or create a Google Cloud project.
Roles required to select or create a project
- Select a project: Selecting a project doesn't require a specific IAM role—you can select any project that you've been granted a role on.
-
Create a project: To create a project, you need the Project Creator
(
roles/resourcemanager.projectCreator), which contains theresourcemanager.projects.createpermission. Learn how to grant roles.
-
Verify that billing is enabled for your Google Cloud project.
- 記下 Google Cloud 專案 ID,後續步驟將會用到。
- 如果您尚未安裝 Java 8,請從 Oracle 的網站下載 Java Development Kit (JDK) 並進行安裝。
- 安裝 Maven 或 Gradle:
Maven
- 下載 Apache Maven 3.3.9 以上版本
- 為您的本機開發環境安裝及設定 Maven。
Gradle
- 下載並初始化 Google Cloud CLI。
- 執行下列指令:
- 確認 gcloud CLI 已獲授權,可存取您在 Google Cloud上的資料與服務:
gcloud auth login
- 使用應用程式預設憑證:
gcloud auth application-default login
- 安裝 Google Cloud SDK
app-engine-java元件:gcloud components install app-engine-java
- 將 Google Cloud SDK 和所有元件更新至最新版本:
gcloud components update
- 確認 gcloud CLI 已獲授權,可存取您在 Google Cloud上的資料與服務:
- 建立 App Engine 應用程式:
-
將預設專案設為您的 Google Cloud 專案 ID:
gcloud config set project YOUR_PROJECT_ID
將
YOUR_PROJECT_ID替換為專案 ID。 Google Cloud如果您有其他 Google Cloud 專案,而且想要使用gcloud來進行管理,請參閱管理 gcloud CLI 設定。 - 選取您要在其中建立 App Engine 應用程式的地區。如需地區清單,請參閱 App Engine 位置一文。
- 建立 App Engine 應用程式。請將
YOUR_PROJECT_ID改成您的 Google Cloud 專案 ID,並將YOUR_REGION改成您要在其中建立 App Engine 應用程式的地區。gcloud app create \ --project=YOUR_PROJECT_ID \ --region=YOUR_REGION
-
將預設專案設為您的 Google Cloud 專案 ID:
將範例存放區複製到本機電腦中:
git clone https://github.com/GoogleCloudPlatform/java-docs-samples變更為包含 Endpoints Frameworks 基本架構範例的目錄:
cd java-docs-samples/appengine-java8/endpoints-v2-skeleton/範例的目錄結構如下:
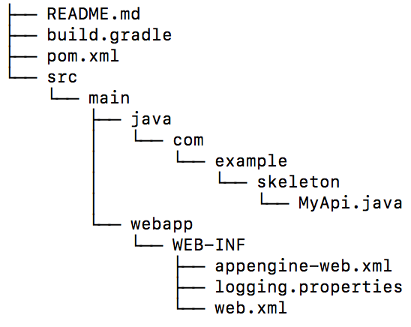
MyApi.java包含空白類別,可用來編寫 API。您可以使用 echo 範例中的程式碼範例開始編寫 API。appengine-web.xml會定義使用 Java 8 將 API 部署到 App Engine 標準環境所需的資訊。pom.xml包含專案和設定資訊,供 Maven 用來建構專案及將 API 部署到 App Engine。build.gradle包含專案和設定資訊,供 Gradle 用來建構專案及將 API 部署到 App Engine。
endpoints-framework依附元件包含建立 API 所需的類別。- 您需要 App Engine Standard API SDK (
appengine-api-sdk) 才能將專案部署至 App Engine 標準環境。 - 需要標準
javax.servlet套件才能建構 Servlet。 - 需要標準
javax.inject套件才能支援依附元件植入功能。 maven-war-plugin是java外掛程式的延伸,可另外提供對組合網頁應用程式的支援。appengine-maven-plugin是在 App Engine 上執行 API 所需的外掛程式。endpoints-framework-maven-plugin提供建構 Endpoints Frameworks 專案所需的工作和設定。- Endpoints Frameworks Gradle 外掛程式可用來產生 OpenAPI 文件和用戶端程式庫。
- 您需要 App Engine Gradle 外掛程式才能將專案部署到 App Engine。
java外掛程式可為專案提供 Java 專用的編譯和建構步驟。war外掛程式是java外掛程式的延伸,可另外提供對組合網頁應用程式的支援。endpoints-framework-server外掛程式可為 Endpoints Frameworks Gradle 外掛程式提供伺服器端支援。appengine是在 App Engine 上執行 API 所需的外掛程式。endpoints-framework依附元件包含建立 API 所需的類別。- 需要 App Engine Standard API SDK (
appengine-api-sdk) 才能將專案部署至 App Engine 標準環境。 - 需要標準
javax.servlet套件才能建構 Servlet。 - 需要標準
javax.inject套件才能支援依附元件植入功能。
安裝並設定所需的軟體
取得 Endpoints Frameworks 基本架構範例
Endpoints Frameworks 2.0 版基本架構範例包含必要的 Maven 和 Gradle 建構指令碼,同時包含建立您第一個 API 所需的檔案。
設定建構檔
本節說明範例程式碼中的 Maven pom.xml 和 Gradle build.gradle 檔案。只要再輸入 Google Cloud 專案 ID 做為主機名稱,這些建構檔隨時可用來開始建立 API。
關於基本設定
本節將說明建構檔所需的基本設定。
Maven
基本依附元件
pom.xml 需要以下內容所示的基本依附元件,才能建立 API:
套用外掛程式
系統會套用下列外掛程式來予以啟用:
Gradle
外掛程式依附元件
以下是建構 API 所需的外掛程式:
套用外掛程式
系統會套用下列外掛程式,在 Gradle 建構指令碼中予以啟用:
專案依附元件
以下是專案使用的依附元件:
為服務定義主機名稱
Endpoints Frameworks 使用與 DNS 相容的名稱來識別特定服務。由於 Google Cloud 專案 ID 一定不重複,因此您應該使用 Google Cloud 專案 ID 做為 API 服務名稱的一部分。
您必須在建構檔中新增 Google Cloud 專案 ID,才能為服務設定主機名稱。主機名稱應採以下格式:
YOUR_PROJECT_ID.appspot.com
在您將 API 部署至 App Engine 時,系統會自動建立名稱格式為 YOUR_PROJECT_ID.appspot.com 的 DNS 項目。主機名稱是 Cloud Endpoints 服務名稱,同時也是用來傳送要求至 API 的網域名稱。
Maven
在 hostname 欄位中,將 YOUR_PROJECT_ID 替換為您的專案 ID。 Google Cloud
Gradle
請將 projectID 變數設為您的 Google Cloud專案 ID,例如:
def projectId = 'example-project-12345'
設定 Endpoints servlet
Endpoints servlet 會處理傳入的要求,並將其轉送至在 App Engine 上執行的後端服務。您的 API 需要 Endpoints servlet 才能由 Cloud Endpoints 代管。
如要進一步瞭解 web.xml,請參閱部署作業描述元:web.xml 一文。
進行 App Engine 部署設定
appengine-web.xml 檔案是用於在部署 API 時定義 App Engine 標準環境設定。詳情請參閱 appengine-web.xml 參考資料。