For instructions on installing AlloyDB Omni onto a standard Linux environment, see Install AlloyDB Omni.
Overview
To deploy AlloyDB Omni onto a Kubernetes cluster, install the AlloyDB Omni operator, an extension to the Kubernetes API provided by Google.
You configure and control a Kubernetes-based AlloyDB Omni database
cluster by pairing declarative manifest files with the kubectl utility, just
like any other Kubernetes-based deployment. You don't use the
AlloyDB Omni CLI, which is intended for
deployments onto individual Linux machines and not Kubernetes clusters.
Base image
Starting with version 1.5.0, AlloyDB Omni operator Kubernetes images are built upon Red Hat's Universal Base Image (UBI) 9. This transition enhances security, consistency, and compliance for your deployments.
AlloyDB Omni operator 1.1.0 (and later) compatibility
The AlloyDB Omni operator version 1.1.0 is not compatible with versions 15.5.3 and 15.5.4 of AlloyDB Omni. If you use one of these versions of AlloyDB Omni, you might receive an error similar to the following:
Error from server (Forbidden): error when creating "[...]/dbcluster.yaml": admission webhook "vdbcluster.alloydbomni.dbadmin.goog" denied the request: unsupported database version 15.5.3
Before you begin
Before you install AlloyDB Omni on a Kubernetes cluster with AlloyDB Omni operator, make sure that you meet the following requirements.
Choose a download or installation option
Choose one of the following download and installation options:
| Media | Download locations and installation guides | Deployment to |
|---|---|---|
| OpenShift Operator with OLM Bundle | Openshift Container Platform Web Console | OpenShift environment |
| Kubernetes Operator with OLM bundle | Artifacthub.io | Bring-your-own Kubernetes container environment—for example, on-premises, public clouds, Google Kubernetes Engine, Amazon EKS, and Azure AKS. |
| Kubernetes Operator with Helm Chart | Install AlloyDB Omni on Kubernetes (this page) | Bring-your-own Kubernetes container environment—for example, on-premises, public clouds, GKE, Amazon EKS, and Azure AKS. |
Verify access
Verify that you have access to the following:
- A Kubernetes cluster, running the following software:
- Kubernetes version 1.21 or later.
- The
cert-managerservice.
- The
kubectlutility. - The
helmpackage manager or the Operator Lifecycle Manager. - The Google Cloud CLI. After you install the
gcloud CLI, you must authenticate your Google Cloud account by
running
gcloud auth login.
Fulfill hardware and software requirements
Each node in the Kubernetes cluster must have the following:
- A minimum of two x86 or AMD64 CPUs.
- At least 8GB of RAM.
- Linux kernel version 4.18 or later.
- Control group (cgroup) v2 enabled.
Install the AlloyDB Omni operator
You can install the AlloyDB Omni operator using different methods, including Helm and the Operator Lifecycle Manager (OLM).
Helm
To install the AlloyDB Omni operator, follow these steps:
- Define the following environment variables:
export GCS_BUCKET=alloydb-omni-operator export HELM_PATH=$(gcloud storage cat gs://$GCS_BUCKET/latest) export OPERATOR_VERSION="${HELM_PATH%%/*}" - Download the AlloyDB Omni operator:
gcloud storage cp gs://$GCS_BUCKET/$HELM_PATH ./ --recursive
- Install the AlloyDB Omni operator:
helm install alloydbomni-operator alloydbomni-operator-${OPERATOR_VERSION}.tgz \
--create-namespace \
--namespace alloydb-omni-system \
--atomic \
--timeout 5m
Successful installation displays the following output:
NAME: alloydbomni-operator
LAST DEPLOYED: CURRENT_TIMESTAMP
NAMESPACE: alloydb-omni-system
STATUS: deployed
REVISION: 1
TEST SUITE: None
- To clean up, delete the downloaded AlloyDB Omni operator
installation file. The file is named
alloydbomni-operator-VERSION_NUMBER.tgz, and is located in your current working directory.
OLM
To install the AlloyDB Omni operator using the Operator Lifecycle Manager, follow these steps:
Navigate to https://operatorhub.io/operator/alloydb-omni-operator.
Click the Install button to display the instructions.
Complete all installation steps.
After installing the AlloyDB Omni operator, manually create the cert-manager resources in your cluster. This is a requirement. Use these commands:
kubectl create ns ${NAMESPACE:?}
kubectl apply -f - <<EOF
apiVersion: cert-manager.io/v1
kind: ClusterIssuer
metadata:
  name: alloydbomni-selfsigned-cluster-issuer
spec:
  selfSigned: {}
---
apiVersion: cert-manager.io/v1
kind: Issuer
metadata:
  name: fleet-selfsigned-issuer
  namespace: ${NAMESPACE:?}
spec:
  selfSigned: {}
---
apiVersion: cert-manager.io/v1
kind: Certificate
metadata:
  name: fleet-serving-cert
  namespace: ${NAMESPACE:?}
spec:
  dnsNames:
  - fleet-webhook-service.alloydb-omni-system.svc
  - fleet-webhook-service.alloydb-omni-system.svc.cluster.local
  issuerRef:
    kind: Issuer
    name: fleet-selfsigned-issuer
  secretName: fleet-webhook-server-cert
---
apiVersion: cert-manager.io/v1
kind: Issuer
metadata:
  name: local-selfsigned-issuer
  namespace: ${NAMESPACE:?}
spec:
  selfSigned: {}
---
apiVersion: cert-manager.io/v1
kind: Certificate
metadata:
  name: local-serving-cert
  namespace: ${NAMESPACE:?}
spec:
  dnsNames:
  - local-webhook-service.alloydb-omni-system.svc
  - local-webhook-service.alloydb-omni-system.svc.cluster.local
  issuerRef:
    kind: Issuer
    name: local-selfsigned-issuer
  secretName: local-webhook-server-cert
EOF
Replace
NAMESPACEwith the namespace where you have your operator—for example,alloydb-omni-system.
OLM
To install the AlloyDB Omni operator on your Red Hat OpenShift environment using the OLM, sign in to your Red Hat OpenShift web console.
Select Operators > OperatorHub.
Find AlloyDB Omni operator using the search field.
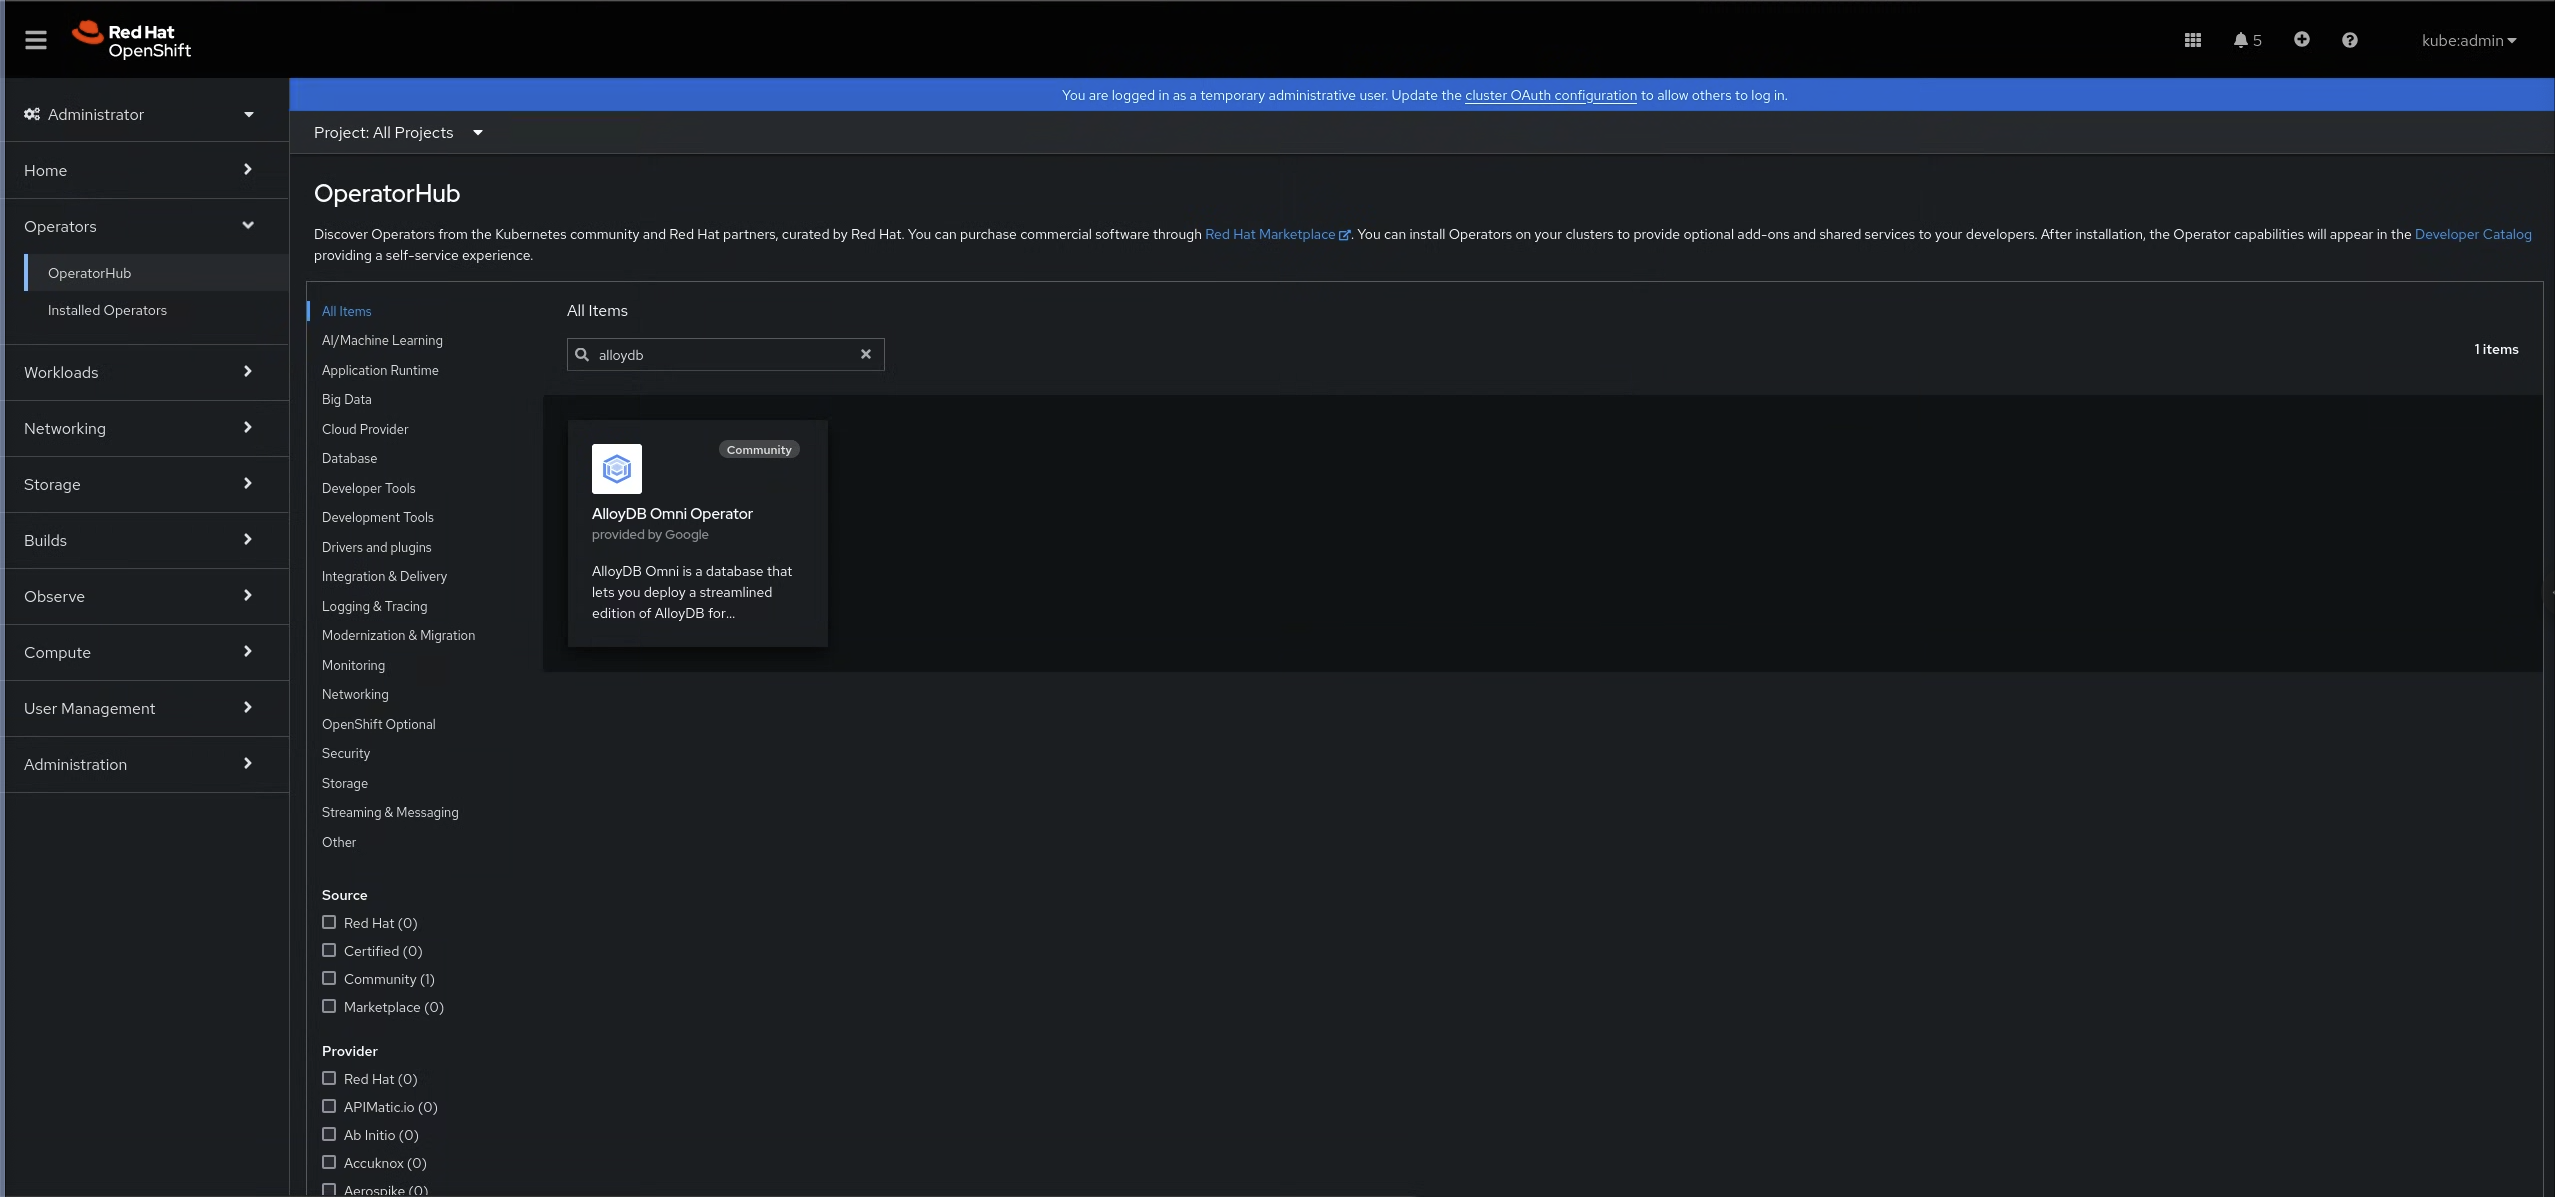
Figure 1: The AlloyDB Omni operator in the OperatorHub In the AlloyDB Omni operator pane, click Install.
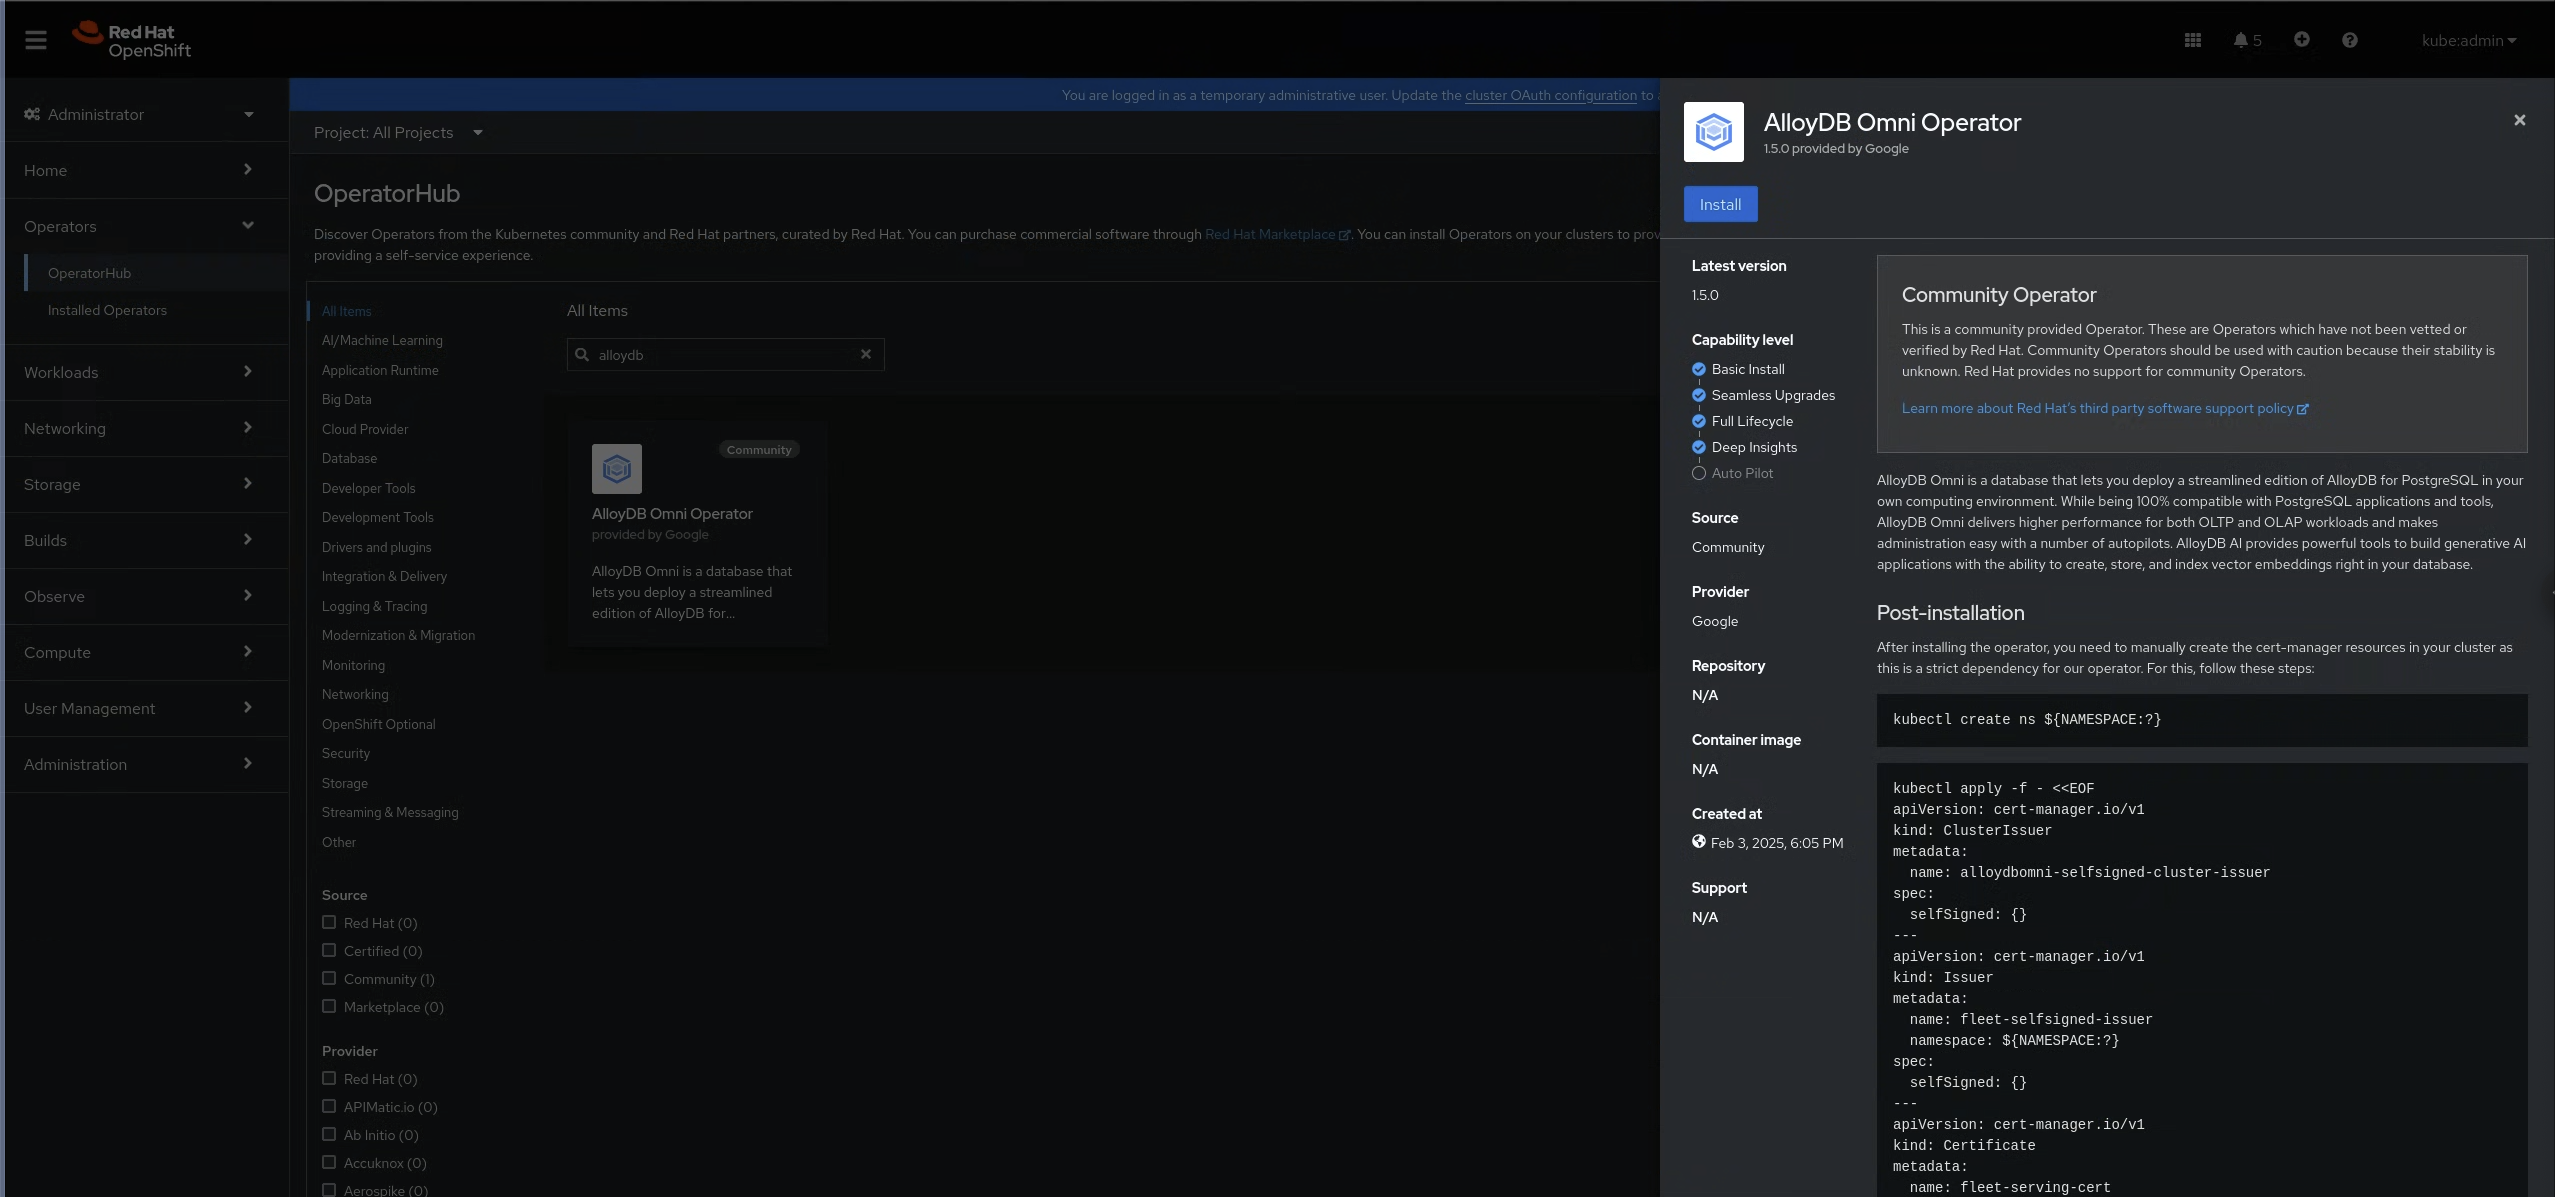
Figure 2: The AlloyDB Omni operator pane After installing the AlloyDB Omni operator, manually create the cert-manager resources in your cluster. This is a requirement. Use these commands:
kubectl create ns ${NAMESPACE:?}
kubectl apply -f - <<EOF
apiVersion: cert-manager.io/v1
kind: ClusterIssuer
metadata:
  name: alloydbomni-selfsigned-cluster-issuer
spec:
  selfSigned: {}
---
apiVersion: cert-manager.io/v1
kind: Issuer
metadata:
  name: fleet-selfsigned-issuer
  namespace: ${NAMESPACE:?}
spec:
  selfSigned: {}
---
apiVersion: cert-manager.io/v1
kind: Certificate
metadata:
  name: fleet-serving-cert
  namespace: ${NAMESPACE:?}
spec:
  dnsNames:
  - fleet-webhook-service.alloydb-omni-system.svc
  - fleet-webhook-service.alloydb-omni-system.svc.cluster.local
  issuerRef:
    kind: Issuer
    name: fleet-selfsigned-issuer
  secretName: fleet-webhook-server-cert
---
apiVersion: cert-manager.io/v1
kind: Issuer
metadata:
  name: local-selfsigned-issuer
  namespace: ${NAMESPACE:?}
spec:
  selfSigned: {}
---
apiVersion: cert-manager.io/v1
kind: Certificate
metadata:
  name: local-serving-cert
  namespace: ${NAMESPACE:?}
spec:
  dnsNames:
  - local-webhook-service.alloydb-omni-system.svc
  - local-webhook-service.alloydb-omni-system.svc.cluster.local
  issuerRef:
    kind: Issuer
    name: local-selfsigned-issuer
  secretName: local-webhook-server-cert
EOF
Replace
NAMESPACEwith the namespace where you have your operator—for example,alloydb-omni-system.
Configure GDC connected storage
To install the AlloyDB Omni operator on GDC connected, you need to follow additional steps to configure storage because GDC connected clusters don't set a default storage class. You must set a default storage class before you create an AlloyDB Omni database cluster.
To learn how to set Symcloud Storage as the default storage class, see Set Symcloud Storage as the default storage class.
For more information about changing the default for all other storage classes, see Change the default StorageClass.
Create a database cluster
An AlloyDB Omni database cluster contains all the storage and compute resources needed to run an AlloyDB Omni server, including the primary server, any replicas, and all of your data.
To create an AlloyDB Omni database cluster, follow these steps:
Create a dedicated namespace for your database cluster. This improves isolation and security.
kubectl create namespace DB_CLUSTER_NAMESPACEReplace
DB_CLUSTER_NAMESPACEwith the namespace where you want to create the database cluster—for example,my-db-cluster-namespace.Create a manifest file named
db-cluster.yamlwith the following content. This manifest defines both the secret for the database password and the DBCluster resource itself.apiVersion: v1 kind: Secret metadata: name: db-pw-DB_CLUSTER_NAME namespace: DB_CLUSTER_NAMESPACE type: Opaque data: DB_CLUSTER_NAME: "ENCODED_PASSWORD" --- apiVersion: alloydbomni.dbadmin.goog/v1 kind: DBCluster metadata: name: DB_CLUSTER_NAME namespace: DB_CLUSTER_NAMESPACE spec: databaseVersion: "16.8.0" primarySpec: adminUser: passwordRef: name: db-pw-DB_CLUSTER_NAME resources: cpu: CPU_COUNT memory: MEMORY_SIZE disks: - name: DataDisk size: DISK_SIZEReplace the following:
DB_CLUSTER_NAME: the name of this database cluster—for example,my-db-cluster.ENCODED_PASSWORD: the database login password for the defaultpostgresuser role, encoded as a base64 string—for example,Q2hhbmdlTWUxMjM=forChangeMe123.CPU_COUNT: the number of CPUs available to each database instance in this database cluster.MEMORY_SIZE: the amount of memory per database instance of this database cluster. We recommend setting this to 8 gigabytes per CPU. For example, if you setcputo2earlier in this manifest, then we recommend settingmemoryto16Gi.DISK_SIZE: the disk size per database instance—for example,10Gi.
Apply the manifest to your Kubernetes cluster:
kubectl apply -f db-cluster.yaml
After you apply this manifest, your Kubernetes cluster contains an
AlloyDB Omni database cluster with the specified memory, CPU,
and storage configuration. To establish a test connection with the new
database cluster, see Connect using the preinstalled psql.
For more information about Kubernetes manifests and how to apply them, see Managing resources.