Executar o app Web Risk de amostra
Saiba como instalar o app Web Risk de amostra do GitHub e como executar o app de amostra para detectar URLs maliciosos em um ambiente Go.
Para seguir as instruções detalhadas desta tarefa diretamente no console do Google Cloud , clique em Orientação:
Antes de começar
- Sign in to your Google Cloud account. If you're new to Google Cloud, create an account to evaluate how our products perform in real-world scenarios. New customers also get $300 in free credits to run, test, and deploy workloads.
-
In the Google Cloud console, on the project selector page, select or create a Google Cloud project.
Roles required to select or create a project
- Select a project: Selecting a project doesn't require a specific IAM role—you can select any project that you've been granted a role on.
-
Create a project: To create a project, you need the Project Creator
(
roles/resourcemanager.projectCreator), which contains theresourcemanager.projects.createpermission. Learn how to grant roles.
-
Verify that billing is enabled for your Google Cloud project.
-
Enable the Web Risk API.
Roles required to enable APIs
To enable APIs, you need the Service Usage Admin IAM role (
roles/serviceusage.serviceUsageAdmin), which contains theserviceusage.services.enablepermission. Learn how to grant roles. -
In the Google Cloud console, on the project selector page, select or create a Google Cloud project.
Roles required to select or create a project
- Select a project: Selecting a project doesn't require a specific IAM role—you can select any project that you've been granted a role on.
-
Create a project: To create a project, you need the Project Creator
(
roles/resourcemanager.projectCreator), which contains theresourcemanager.projects.createpermission. Learn how to grant roles.
-
Verify that billing is enabled for your Google Cloud project.
-
Enable the Web Risk API.
Roles required to enable APIs
To enable APIs, you need the Service Usage Admin IAM role (
roles/serviceusage.serviceUsageAdmin), which contains theserviceusage.services.enablepermission. Learn how to grant roles. - Crie uma chave de API para autenticação:
- No menu de navegação do console Google Cloud , clique em APIs e Serviços > Credenciais.
- Na página Credenciais, clique em Criar credenciais e selecione Chave de API.
- Na caixa de diálogo Chave de API criada, clique em Copiar chave para copiar a chave. Feche a caixa de diálogo e proteja a chave que você copiou para uso posterior.
- Configure seu ambiente:
-
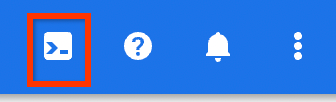
No console do Google Cloud , clique em Ativar o Cloud Shell
para abrir uma janela do terminal.
O terminal do Cloud Shell pode levar vários segundos para ser totalmente carregado.
- Exporte a chave de API que você copiou.
export APIKEY=API_KEY
-
- Servidor
wrserver: este binário executa o proxy de pesquisa da API Web Risk, que permite verificar URLs. - Linha de comando
wrlookup: este binário filtra URLs perigosos transmitidos pelo STDIN. - No terminal do Cloud Shell, instale
wrserver:go install github.com/google/webrisk/cmd/wrserver@latest
- Execute
wrservercom sua chave de API:wrserver -apikey=$APIKEY
Quando você vir a mensagem Start server at localhost:8080, o
wrserveré iniciado emlocalhost:8080. - Para visualizar o aplicativo no host local, clique em
Visualização na Web e selecione Visualizar na porta 8080. 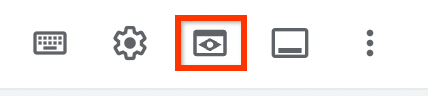
O Cloud Shell abre o URL de visualização (porta 8080) no serviço de proxy em uma nova janela do navegador. A janela do navegador do URL de visualização mostra uma mensagem 404 página não encontrada.
- Na janela do URL de visualização, verifique os URLs a seguir.
Para verificar um URL, substitua a string de consulta que fica depois do URL de visualização do servidor local pelo
URL que você quer verificar no seguinte formato:
PREVIEW_URL/r?url=URL_TO_BE_CHECKED.Se o URL não for seguro, uma página de aviso intersticial será exibida conforme recomendado pelo Web Risk. Se o URL for seguro, o cliente será redirecionado automaticamente para o destino.
Um URL de malware falso:
http://testsafebrowsing.appspot.com/apiv4/ANY_PLATFORM/MALWARE/URL/
Um URL seguro:
http://www.google.com/ - Para interromper o servidor, pressione
Control+C. - No terminal do Cloud Shell, instale o binário da linha de comando
wrlookup:go install github.com/google/webrisk/cmd/wrlookup@latest
- Verifique os URLs com sua chave de API.
Um URL de malware falso:
echo "http://testsafebrowsing.appspot.com/apiv4/ANY_PLATFORM/MALWARE/URL/" | wrlookup -apikey=$APIKEY
A saída a seguir é abreviada para um URL de malware:
   ......
   Unsafe URL: [MALWARE]
Um URL seguro:
echo "http://www.google.com/" | wrlookup -apikey=$APIKEY
A saída a seguir é abreviada para um URL seguro:
   ......
   Safe URL: http://google.com
- A exclusão de um projeto exclui todos os recursos dele.
- Não é possível reutilizar o ID personalizado de um projeto excluído.
- No menu de navegação do console Google Cloud , clique em IAM e administrador > Configurações.
- Confirme se o nome do projeto corresponde ao que você quer excluir.
Caso contrário, escolha o projeto que você quer excluir no seletor de projetos.
- Clique em Encerrar.
- Na caixa de diálogo, digite o ID do projeto e clique em Encerrar para excluí-lo.
- Saiba mais sobre o Web Risk.
- Saiba mais sobre o app Web Risk no projeto do GitHub sobre o Web Risk.
Instalar e executar o app Web Risk de amostra
O app Web Risk tem os seguintes binários para detectar se os URLs são maliciosos ou seguros:
Este guia de início rápido mostra como detectar se os URLs são maliciosos ou seguros usando os binários de servidor
wrserver e de linha de comando wrlookup.
Verificar URLs usando o binário de servidor wrserver
Os URLs foram verificados usando o binário de servidor wrserver.
Verificar URLs usando o binário de linha de comando wrlookup
Os URLs foram verificados usando o binário de linha de comando wrlookup.
Limpar
Para evitar cobranças na conta do Google Cloud pelos recursos usados nesta página, siga as etapas abaixo.
Tenha isto em mente ao excluir um projeto:
Se você planeja ver vários tutoriais e guias de início rápido, a reutilização de projetos pode evitar que você exceda os limites da cota do projeto.
Para excluir seu projeto, faça o seguinte: