Vertex AI Vision 是一項 AI 輔助平台,可供您擷取、分析及儲存影片 資料。Vertex AI Vision 可讓您建構及部署 AI 應用程式。您可以運用 Vertex AI Vision 與其他產品元件的整合功能,建構端對端 Vertex AI Vision 解決方案。
如要開始使用 Vertex AI Vision 平台導入解決方案,請先瞭解下列 Vertex AI Vision 概念和元件:
串流:代表解決方案中的影片串流層。串流來源可以是即時影片 (例如 IP 攝影機) 或影片檔案 (例如 MP4 檔案)。
應用程式:啟用串流與 AI 處理器之間的連線,對影片執行機器學習作業。舉例來說,您可以將攝影機串流連結至 AI 模型,計算攝影機前方經過的人數。
媒體倉儲:將串流擷取的影片儲存至Google Cloud 儲存空間。將資料儲存至這個目的地後,您就能查詢分析輸出內容,以及從擷取的串流資料中使用的 AI 處理器取得中繼資料。
目標
本教學課程將說明如何執行下列操作:
- 建立入座率計算應用程式。
- 部署應用程式以供使用。
- 設定遠端電腦,以便串流播放影片。
- 將串流影片擷取至應用程式的串流節點。
- 在 Vertex AI Vision 的媒體倉儲中搜尋影片。
費用
在本文件中,您會使用 Google Cloud的下列計費元件:
- Vertex AI Vision (Streams - Data ingested, Streams - Data consumed, Models - Occupancy analytics suite, Warehouse - Video storage)
- Compute Engine
如要根據預測用量估算費用,請使用 Pricing Calculator。
完成本文所述工作後,您可以刪除已建立的資源,避免繼續計費。詳情請參閱清除所用資源一節。
事前準備
- Sign in to your Google Cloud account. If you're new to Google Cloud, create an account to evaluate how our products perform in real-world scenarios. New customers also get $300 in free credits to run, test, and deploy workloads.
-
In the Google Cloud console, on the project selector page, select or create a Google Cloud project.
-
Make sure that billing is enabled for your Google Cloud project.
-
Enable the Compute Engine and Vision AI APIs.
-
Create a service account:
-
In the Google Cloud console, go to the Create service account page.
Go to Create service account - Select your project.
-
In the Service account name field, enter a name. The Google Cloud console fills in the Service account ID field based on this name.
In the Service account description field, enter a description. For example,
Service account for quickstart
. - Click Create and continue.
-
Grant the following roles to the service account: Vision AI > Vision AI Editor, Compute Engine > Compute Instance Admin (beta), Storage > Storage Object Viewer†.
To grant a role, find the Select a role list, then select the role.
To grant additional roles, click
Add another role and add each additional role. - Click Continue.
-
Click Done to finish creating the service account.
Do not close your browser window. You will use it in the next step.
-
-
Create a service account key:
- In the Google Cloud console, click the email address for the service account that you created.
- Click Keys.
- Click Add key, and then click Create new key.
- Click Create. A JSON key file is downloaded to your computer.
- Click Close.
-
Install the Google Cloud CLI.
-
If you're using an external identity provider (IdP), you must first sign in to the gcloud CLI with your federated identity.
-
To initialize the gcloud CLI, run the following command:
gcloud init
-
In the Google Cloud console, on the project selector page, select or create a Google Cloud project.
-
Make sure that billing is enabled for your Google Cloud project.
-
Enable the Compute Engine and Vision AI APIs.
-
Create a service account:
-
In the Google Cloud console, go to the Create service account page.
Go to Create service account - Select your project.
-
In the Service account name field, enter a name. The Google Cloud console fills in the Service account ID field based on this name.
In the Service account description field, enter a description. For example,
Service account for quickstart
. - Click Create and continue.
-
Grant the following roles to the service account: Vision AI > Vision AI Editor, Compute Engine > Compute Instance Admin (beta), Storage > Storage Object Viewer†.
To grant a role, find the Select a role list, then select the role.
To grant additional roles, click
Add another role and add each additional role. - Click Continue.
-
Click Done to finish creating the service account.
Do not close your browser window. You will use it in the next step.
-
-
Create a service account key:
- In the Google Cloud console, click the email address for the service account that you created.
- Click Keys.
- Click Add key, and then click Create new key.
- Click Create. A JSON key file is downloaded to your computer.
- Click Close.
-
Install the Google Cloud CLI.
-
If you're using an external identity provider (IdP), you must first sign in to the gcloud CLI with your federated identity.
-
To initialize the gcloud CLI, run the following command:
gcloud init
† 如果要從 Cloud Storage bucket 複製範例影片檔案,才需要這個角色。
建立入座人數計算應用程式
設定環境後,第一步是建立處理資料的應用程式。應用程式可視為自動化管道,連結下列項目:
- 擷取資料:將影片動態饋給擷取至串流。
- 資料分析:擷取資料後,即可加入 AI 模型。您可以對擷取的影片資訊執行任何電腦視覺作業。
- 資料儲存:影片動態饋給的兩個版本 (原始串流和 AI 模型處理的串流) 可以儲存在媒體倉儲中。
在 Google Cloud 控制台中,應用程式會以圖表形式呈現。此外,在 Vertex AI Vision 中,應用程式圖表必須至少有兩個節點:影片來源節點 (串流),以及至少一個節點 (處理模型或輸出目的地)。
建立空白的應用程式
您必須先建立空白應用程式,才能填入應用程式圖表。
控制台
在 Google Cloud 控制台中建立應用程式。
開啟 Vertex AI Vision 資訊主頁的「應用程式」分頁。
按一下「建立」
按鈕。輸入
occupancy-count-app
做為應用程式名稱,然後選擇您所在的地區。點選「建立」。
新增應用程式元件節點
建立空白應用程式後,即可將三個節點新增至應用程式圖表:
- 擷取節點:串流資源,用於擷取您建立的 Compute Engine VM 執行個體傳送的資料。
- 處理節點:根據擷取資料運作的占用率分析模型。
- 儲存節點:媒體倉儲,用於儲存處理過的影片,同時也是中繼資料儲存空間。資料倉儲可根據擷取的影片資料生成分析資訊,並儲存 AI 模型根據資料推斷出的資訊。
控制台
在管理中心將元件節點新增至應用程式。
開啟 Vertex AI Vision 資訊主頁的「應用程式」分頁。
在
occupancy-count-app
行中,選取「查看圖表」 。這會將您導向至處理管道的圖表視覺化畫面。
新增資料匯入節點
如要新增輸入串流節點,請在側邊選單的「Connectors」(連接器) 區段中選取「Streams」(串流) 選項。
在隨即開啟的「Stream」(串流) 選單中,選取「Source」(來源) 區段的
「Add Stream」(新增串流)。在「新增串流」選單中,選擇「註冊新串流」
,然後新增occupancy-count-stream
做為串流名稱。如要將串流新增至應用程式圖表,請按一下「新增串流」。
新增資料處理節點
如要新增入住人數計數模型節點,請在側邊選單的「Specialized models」(專業模型) 區段中,選取「occupancy analytics」(入住人數分析) 選項。
保留預設選取項目「人物」
和「車輛」 。
新增資料儲存節點
如要新增輸出目的地 (儲存空間) 節點,請在側邊選單的「Connectors」(連接器) 區段中選取「Vertex AI Vision's Media Warehouse」(Vertex AI Vision 的媒體倉儲) 選項。
在「Vertex AI Vision's Media Warehouse」(Vertex AI Vision 媒體倉儲) 選單中,按一下「Connect warehouse」(連結倉儲)。
在「Connect Warehouse」(連結倉儲) 選單中,選取
「Create new warehouse」(新建倉儲)。將倉儲命名為occupancy-count-warehouse
,並將 TTL 持續時間保留 14 天。按一下「Create」(建立) 按鈕來新增倉儲。
部署應用程式以供使用
使用所有必要元件建構端對端應用程式後,最後一個步驟就是部署應用程式。控制台
開啟 Vertex AI Vision 資訊主頁的「應用程式」分頁。
在清單中,選取
occupancy-count-app
應用程式旁邊的「查看圖表」。在應用程式圖表建構工具頁面中,按一下「部署」
按鈕。在隨即顯示的確認對話方塊中,選取「Deploy」。
部署作業可能需要幾分鐘才能完成。部署作業完成後,節點旁會顯示綠色勾號。
設定遠端電腦串流影片
現在您已部署好入住人數計數應用程式,準備接收、處理及儲存串流資料,接下來必須將影片資料串流至應用程式。
在本教學課程中,您將建立 Compute Engine VM 執行個體來代管影片,並從該 VM 傳送串流影片資料。
建立 Linux VM
從 Compute Engine VM 執行個體傳送影片的第一步,是建立 VM 執行個體。
主控台
設定 VM 環境
VM 啟動後,您可以使用控制台在瀏覽器中建立 SSH 連線。建立連線後,您就可以下載 vaictl
指令列工具,將影片匯入應用程式。
主控台
與 VM 建立 SSH 連線
前往控制台的「VM instances」(VM 執行個體) 頁面。
在您建立的執行個體列的「連線」部分,按一下「SSH」。系統會在新瀏覽器視窗中開啟 SSH 連線。
下載 vaictl
指令列工具
在 瀏覽器中的 SSH 視窗中,使用下列指令下載 Vertex AI Vision (
vaictl
) 指令列工具:wget https://github.com/google/visionai/releases/download/v0.0.5/visionai_0.0-5_amd64.deb
執行下列指令來安裝指令列工具:
sudo apt install ./visionai_0.0-5_amd64.deb
您可以執行下列指令來測試安裝作業:
vaictl --help
將影片檔擷取至應用程式
設定 VM 環境後,您可以複製範例影片檔案,然後使用 vaictl
將影片資料串流至入住人數計數應用程式。
直接透過瀏覽器進行 SSH 連線
將範例影片複製到 VM
- 在 VM 的「SSH-in-browser」(直接透過瀏覽器進行 SSH 連線) 視窗中,使用下列
gcloud storage cp
指令複製範例影片。替換下列變數:- SOURCE:要使用的影片檔案位置。你可以使用自己的影片檔案來源 (例如
gs://BUCKET_NAME/FILENAME.mp4
),或使用下列其中一個範例影片:
gcloud storage cp SOURCE .
- SOURCE:要使用的影片檔案位置。你可以使用自己的影片檔案來源 (例如
從 VM 串流影片,並將資料擷取至應用程式
- 如要將這個本機影片檔案傳送至應用程式輸入串流,請使用下列指令。您必須進行下列變數替換:
- PROJECT_ID:您的 Google Cloud 專案 ID。
- LOCATION_ID:您的位置 ID。例如:
us-central1
。詳情請參閱「Cloud 服務據點」。 - LOCAL_FILE.EXT:本機影片檔案的檔案名稱。
例如:
my-video.mp4
。 --loop
旗標:選用。迴圈檔案資料以模擬串流。
這項指令會將影片檔案串流至串流。如果您使用
--loop
旗標,影片會循環播放到串流中,直到您停止指令為止:vaictl -p PROJECT_ID \ -l LOCATION_ID \ -c application-cluster-0 \ --service-endpoint visionai.googleapis.com \ send video-file to streams 'occupancy-count-stream' --file-path LOCAL_FILE.EXT --loop
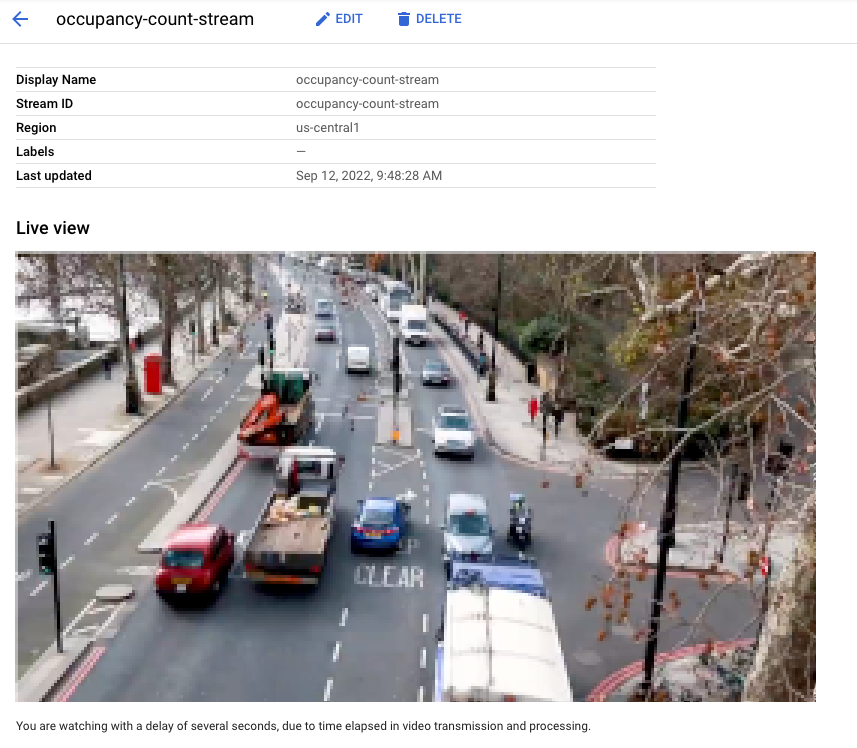
從開始擷取作業到影片顯示在資訊主頁,可能需要約 100 秒。vaictl
串流擷取功能上線後,選取 occupancy-count-stream
串流,即可在 Vertex AI Vision 資訊主頁的「串流」分頁中查看影片動態饋給。

在儲存倉儲中搜尋影片內容
將影片資料擷取至處理應用程式後,即可查看分析結果,並根據入住率分析資訊搜尋資料。
主控台
開啟 Vertex AI Vision 資訊主頁的「倉庫」分頁。
在清單中找出
occupancy-count-warehouse
倉庫,然後按一下「查看資產」 。在「人數」或「車輛數」部分,將「最小值」值設為
1
,並將「最大值」設為5
。如要篩選儲存在 Vertex AI Vision 媒體倉儲中的已處理影片資料,請按一下「搜尋」。
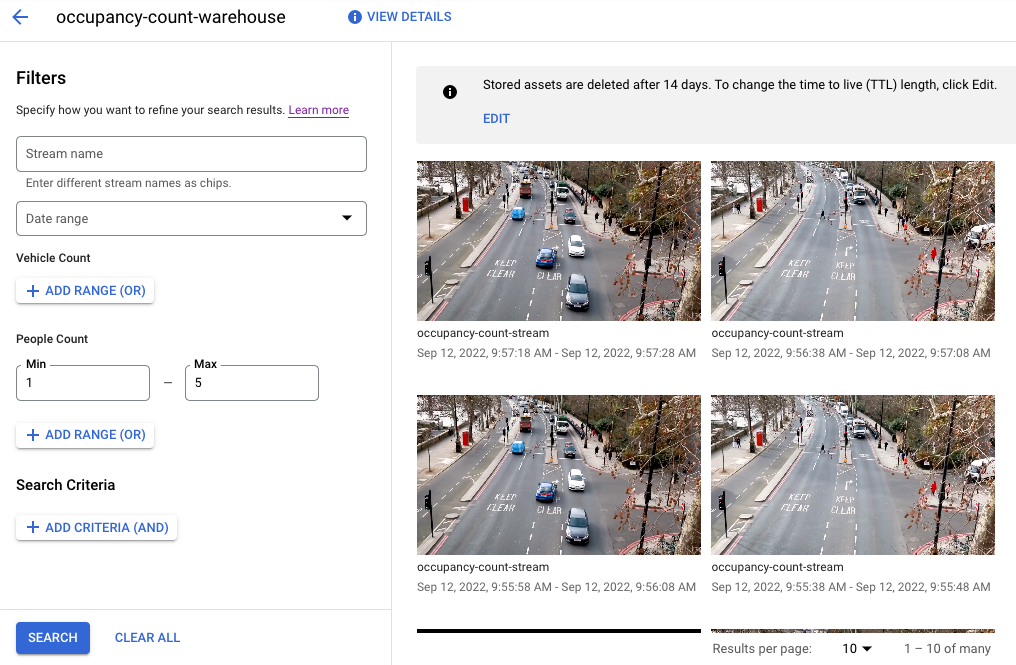
在 Google Cloud 控制台中,查看符合搜尋條件的已儲存影片資料。影片出處: Elizabeth Mavor (Pixabay) (已套用搜尋條件)。
清除所用資源
如要避免系統向您的 Google Cloud 帳戶收取本教學課程中所用資源的相關費用,請刪除含有該項資源的專案,或者保留專案但刪除個別資源。
刪除專案
- In the Google Cloud console, go to the Manage resources page.
- In the project list, select the project that you want to delete, and then click Delete.
- In the dialog, type the project ID, and then click Shut down to delete the project.
刪除個別資源
刪除 Compute Engine VM 執行個體
- In the Google Cloud console, go to the VM instances page.
- Select the checkbox for the instance that you want to delete.
- To delete the instance, click More actions, click Delete, and then follow the instructions.
刪除倉庫
- In the Google Cloud console, go to the Warehouses page.
-
Locate
your
occupancy-count-warehouse
warehouse. - To delete the warehouse, click Actions, click Delete warehouse, and then follow the instructions.
刪除串流
- In the Google Cloud console, go to the Streams page.
-
Locate
your
occupancy-count-stream
stream. - To delete the stream, click Actions, click Delete stream, and then follow the instructions.
刪除應用程式
- In the Google Cloud console, go to the Applications page.
-
Locate
your
occupancy-count-app
app. - To delete the app, click Actions, click Delete application, and then follow the instructions.
後續步驟
- 進一步瞭解負責任的 AI 做法。
- 如要瞭解可新增至應用程式的其他元件,請參閱「建構應用程式」。
- 如要瞭解其他輸出儲存空間和處理選項,請參閱「將應用程式輸出結果連結至資料目的地」一文。
- 請參閱這篇文章,瞭解如何在控制台中查看搜尋倉儲資料。
- 探索 Google Cloud 的參考架構、圖表和最佳做法。 歡迎瀏覽我們的雲端架構中心。