This document explains how to create future reservation requests based on the usage and forecast of your Compute Engine resources.
You can use future reservation requests to gain high-level assurance that you have capacity available for creating Compute Engine instances or GPUs at future date and time. Specifically, future reservation requests help ensure that your Google Cloud project, folder, or organization has sufficient capacity during expected growth in a specific zone, such as in the following scenarios:
Peak scale events
Large-scale migrations
Compliance requirements
When you create a future reservation request, and Google Cloud approves it, you commit to pay for the requested resources for the entire reservation period and regardless of usage. These features differ from capacity requests, which offer best-effort assurance for resources across multiple regions or zones, but you only pay for resources when you use them.
If you aren't sure whether future reservation requests or capacity requests are better for your use case, then see the different methods to request capacity in Capacity Planner.
Limitations
Creating future reservation requests in Capacity Planner has the following limitations:
You can only create requests by specifying properties directly.
You can only create requests based on the usage and forecast of your compute instances or GPUs.
You can't set an end time more than six months from the current date. To set an end time further in the future, choose one of the following:
Create a draft request using the Google Cloud console, and then modify it.
Generate gcloud CLI commands, and manually edit them before running them.
Before you begin
If you haven't used Capacity Planner before, review Capacity Planner overview and enable Capacity Planner by completing the prerequisites for projects and users.
If you want to create shared future reservation requests, then ensure that the project in which to create a shared request (the owner project) is allowed to create and modify shared reservations. For details, see Allow and restrict projects from creating and modifying shared reservations.
Verify that you have sufficient quota for the resources that you want to reserve. To learn how to check your quota, see Allocation quotas.
Required roles
To get the permissions that you need to create future reservation requests, ask your administrator to grant you the following IAM roles:
-
To access and view Capacity Planner:
Capacity Planner Viewer (
roles/capacityplanner.viewer) on the project, folder, or organization -
To create future reservation requests:
Compute Future Reservation User (
roles/compute.futureReservationUser) on the owner project
For more information about granting roles, see Manage access to projects, folders, and organizations.
These predefined roles contain the permissions required to create future reservation requests. To see the exact permissions that are required, expand the Required permissions section:
Required permissions
The following permissions are required to create future reservation requests:
-
To create future reservation requests:
compute.futureReservations.createon the owner project -
To let Compute Engine auto-create reservations:
compute.reservations.createon the owner project -
To view the forecasted usage of your instances or GPUs:
capacityplanner.forecasts.liston the project, folder, or organization -
To view the actual usage of your instances or GPUs:
capacityplanner.usageHistories.liston the project, folder, or organization -
To summarize the actual usage of your instances or GPUs:
capacityplanner.usageHistories.summarizeon the project, folder, or organization
You might also be able to get these permissions with custom roles or other predefined roles.
Overview
To reserve capacity by creating future reservation requests in Capacity Planner, complete the following steps:
Choose the creation method. Choose one of the following methods based on how many machine types you want to reserve capacity for at once, and whether you want to edit a future reservation request before creating it:
Recommended: Generate gcloud CLI commands
This method is useful for creating one or more future reservation requests at once for various machine types. After configuring the requests in the Google Cloud console, the Google Cloud console generates the gcloud CLI commands to create the requests. Before running the commands, you can optionally edit their fields according to your needs—for example, to specify a recommended start time or minimum duration for the reservation period.
Use the Google Cloud console
This method is useful for creating a single future reservation request for one machine type. Use the Google Cloud console to configure and create the request. You can only modify the request after creating a draft of it.
Select Compute Engine resources. Select the compute instances or GPUs, along with their actual and forecasted usage data, that you want to use to create your future reservation requests.
For instructions, see Select the Compute Engine resources in this document.
Create future reservation requests. After you select the Compute Engine resources, create a future reservation request using the Google Cloud console for a single machine type, or generate gcloud CLI commands to create future reservation requests for multiple machine types at once.
For instructions, see Create future reservation requests in this document.
Select the Compute Engine resources
To select the Compute Engine resources to create future reservation requests for, do the following:
In the Google Cloud console, go to the Capacity planner page.
Optional: To change project, folder, or organization, in the project picker at the top of the page, select a project, folder, or organization.
Select one of the following Compute Engine resources:
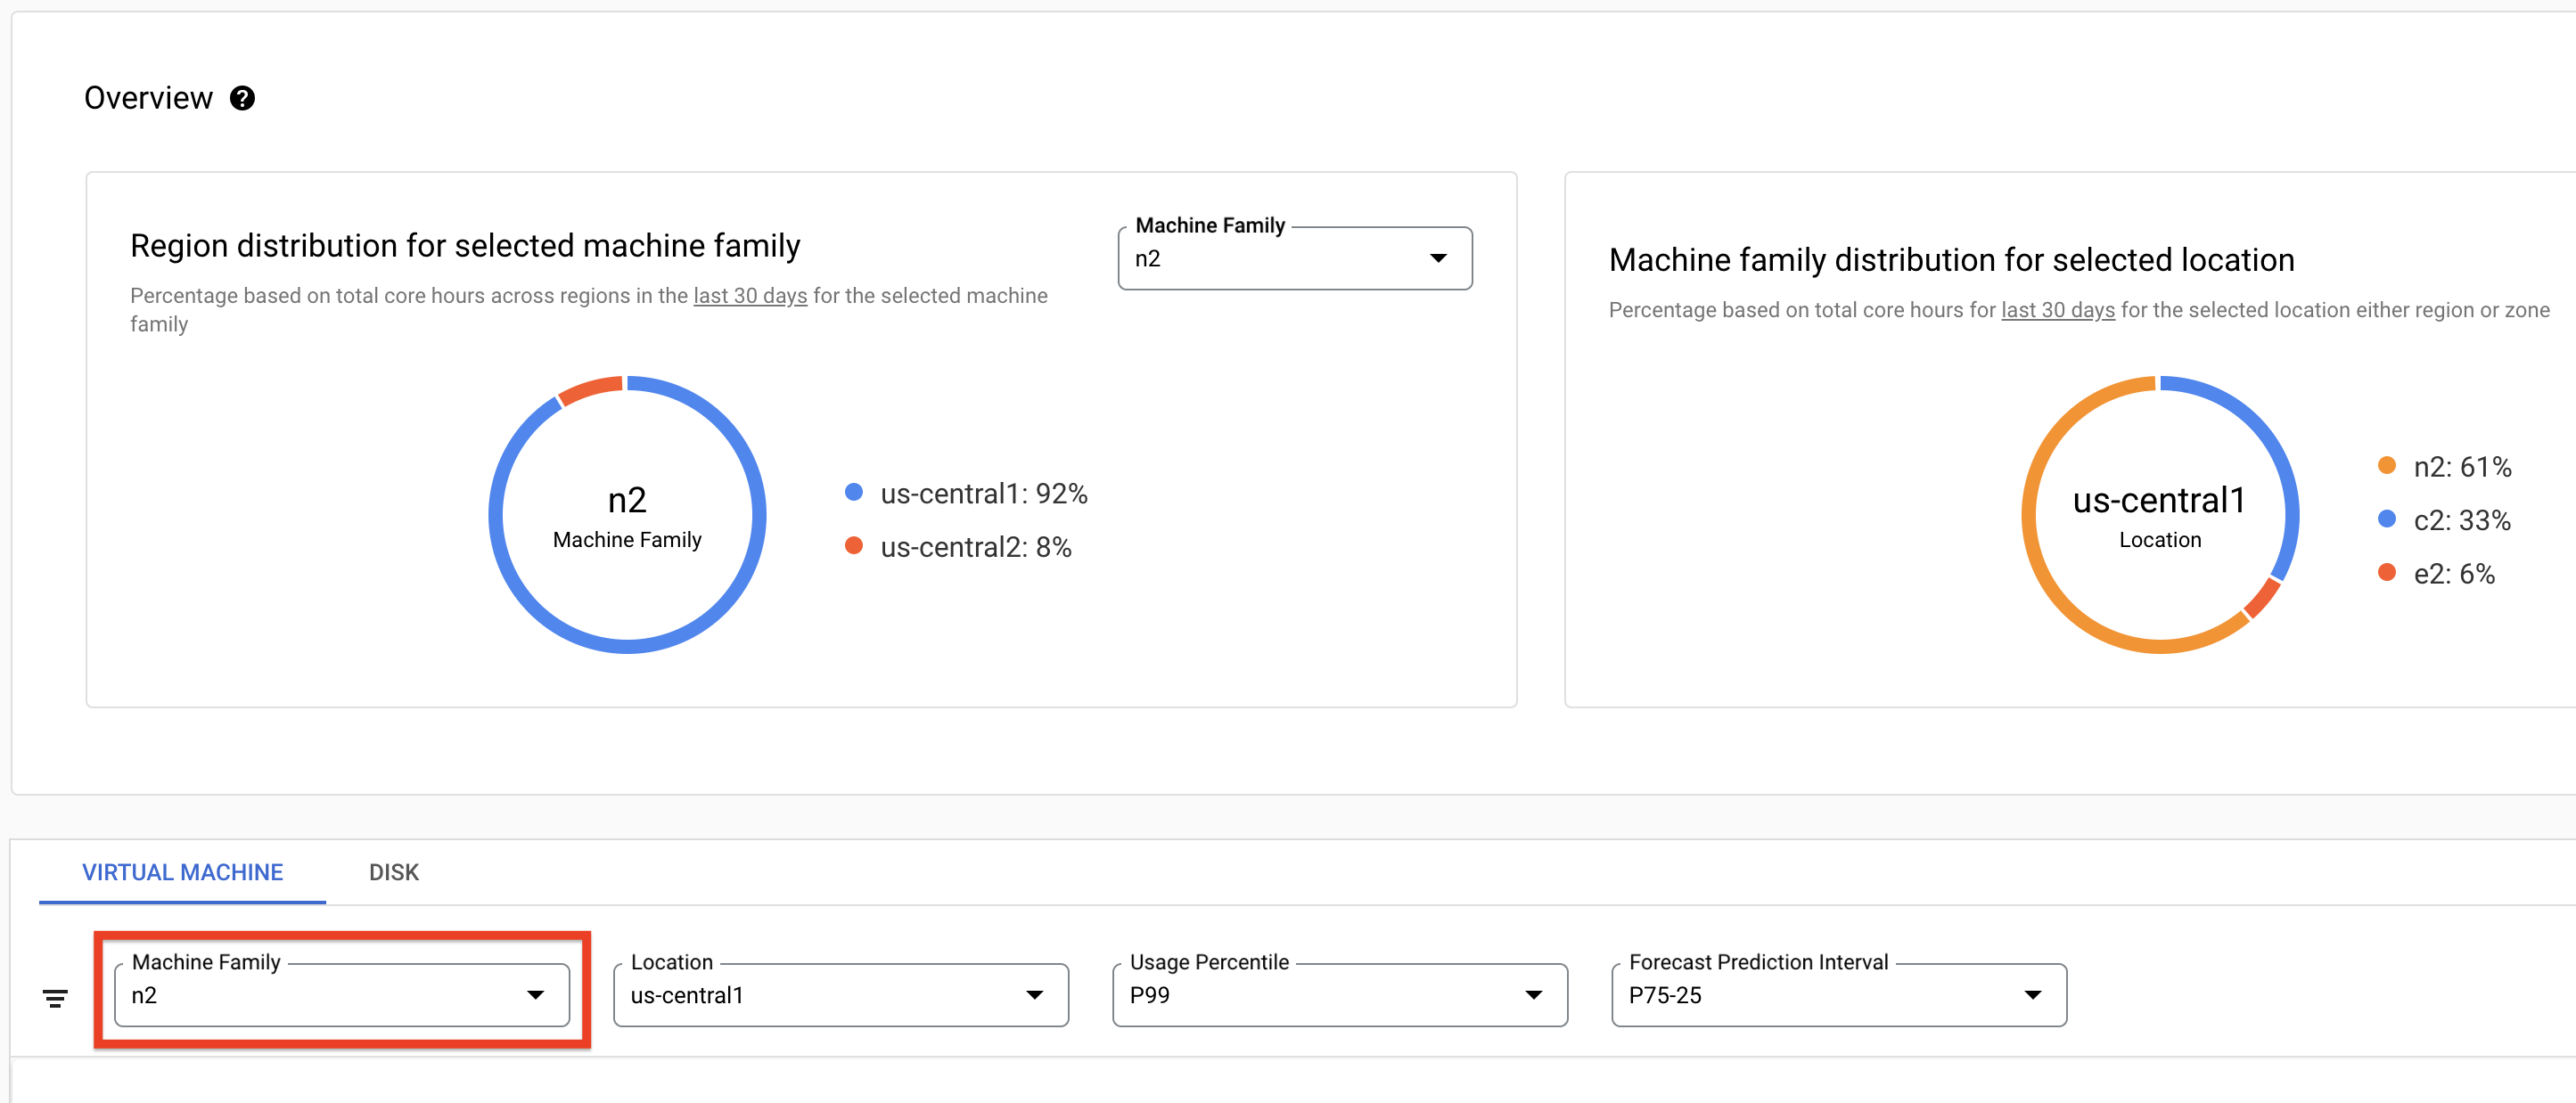
Compute instances
Click the Virtual machine tab, if it isn't already selected.
For Machine family, select one of the following options:
To select a single machine family, select one of the available machine families.
To select all machine families, select All.
GPUs
Click the GPU tab.
For GPU type, select one of the following options:
To select a single GPU type, select one of the available GPU types.
To select all GPU types, select All.
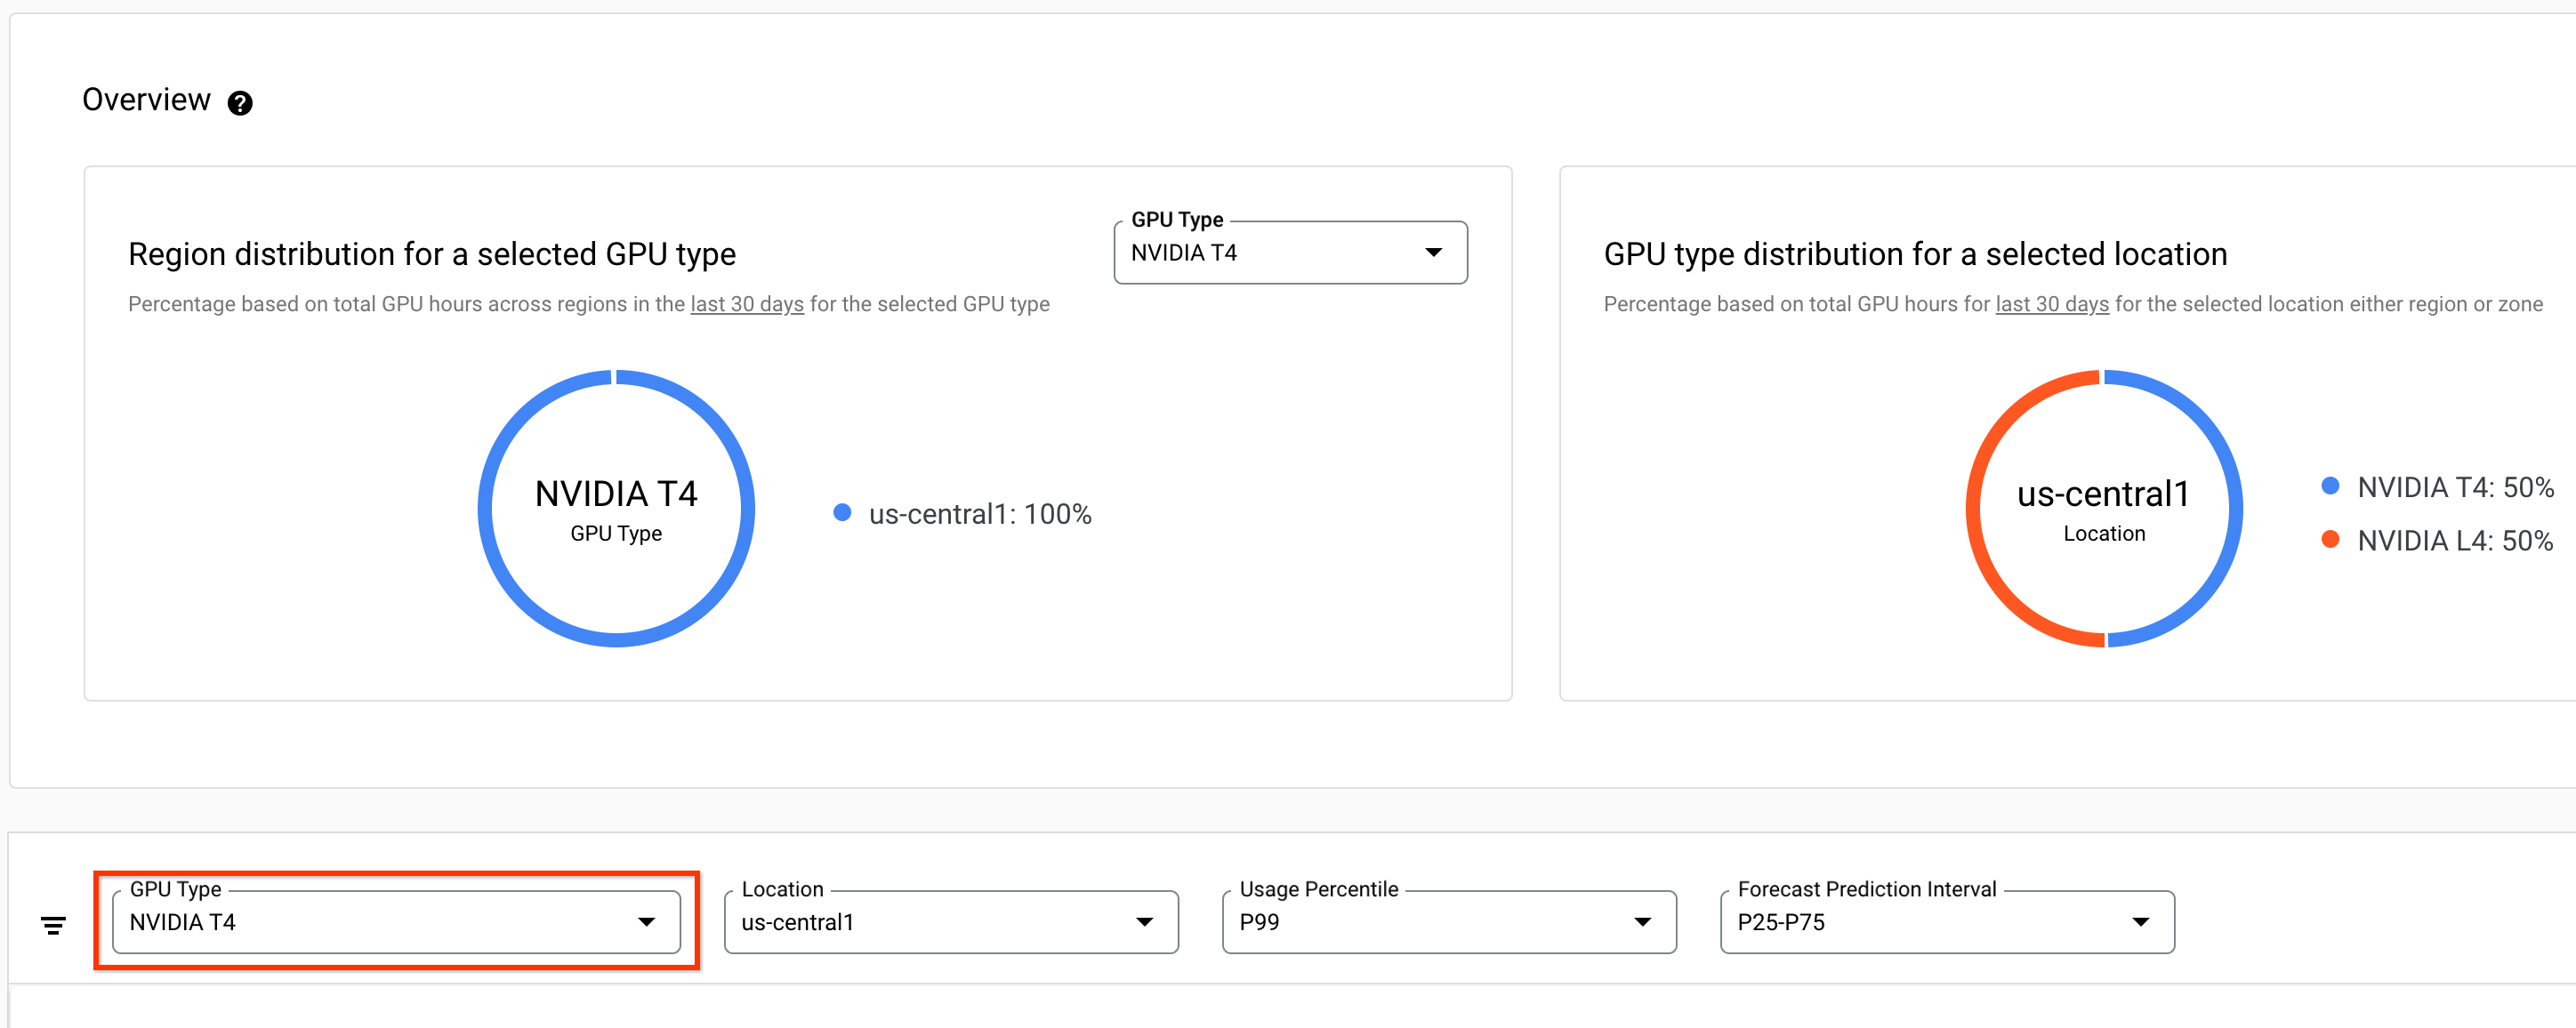
For Location, select a region or zone.
For Usage percentile, select a usage percentile.
In the Usage and forecast by machine types table, do the following:
For View data for, select one of the following options:
To view usage and forecast by instances, select VM.
To view usage and forecast by CPU cores, select Cores.
To view usage and forecast by GPUs, select GPU.
For History start date, select the start date of the usage period.
For History end date, select the end date of the usage period.
Create future reservation requests
After you select a Compute Engine resource and its usage data in the previous section using the Google Cloud console, you can create future reservation requests for one or more machine types by completing the following steps:
Specify the request name, name prefix, and auto-delete option
If you're creating multiple future reservation requests at once by generating gcloud CLI commands, then the following properties will have matching values across all requests:
Auto-delete option
Name prefix
Reservation period
You can optionally customize these values for individual requests by editing the generated gcloud CLI commands.
To create future reservation requests for multiple machine types at once, select the gcloud CLI. For individual machine types, select one of the following options:
Console
In the Usage and forecast by machine types table, select the machine type that you want to create a future reservation request for, and then click Create future reservation.
The Create future reservations page appears.
For Name, enter a name for the future reservation request.
For Prefix, enter a name prefix. The names of the auto-created reservations for this request will start with this prefix.
For Start date and time, enter the start time for the reservation period.
For End date and time, enter the end time for the reservation period.
In the Auto-generated reservations auto-delete section, do one of the following:
To automatically delete the auto-created reservations after the reservation period ends, regardless if they're fully consumed or not, do the following:
Click the Enable auto-delete to the on position, if it isn't already.
For Auto-delete time, specify a date and time time with no UTC offset when Compute Engine can automatically delete the auto-created reservations.
To prevent the auto-created reservations from being deleted after the reservation period ends, click the Enable auto-delete to the off position.
Click Continue.
gcloud
In the Usage and forecast by machine types table, select the machine types that you want to create a future reservation request for, and then click Generate future reservation gcloud commands.
The Create future reservations pane appears.
For Name, enter a name for the future reservation requests. If you create more than one request, then Capacity Planner names the requests as NAME-1, NAME-2, continuing up to the number of requests that you're creating.
For Prefix, enter a name prefix. The names of the auto-created reservations for your requests will start with this prefix.
For Start date and time, enter the start time for the reservation period.
For End date and time, enter the end time for the reservation period.
In the Auto-generated reservations auto-delete section, do one of the following:
To automatically delete the auto-created reservations after the reservation period ends, regardless if they're fully consumed or not, do the following:
Click the Enable auto-delete to the on position, if it isn't already.
For Auto-delete time, specify a date and time time with no UTC offset when Compute Engine can automatically delete the auto-created reservations.
To prevent the auto-created reservations from being deleted after the reservation period ends, click the Enable auto-delete to the off position.
Click Continue.
Specify the number of instances to reserve
To specify the number of compute instances to reserve, do the following:
For VM count based on, select the option to base the number of VMs to request.
For Operator, select whether to increase or decrease the calculated usage value:
To increase the selected usage value, select (+) Increase.
To decrease the selected usage value, select (-) Decrease.
For Value percentage, enter the percentage to increase or decrease the calculated usage. This affects the total number of instances to reserve.
Optional: For Total VM count, adjust the number of instances to reserve.
Optional: For Min CPU Platform and Local SSD interface based on historical usage percentage, specify a minimum CPU platform and Local SSD disk interface. The default is based on the highest percentage of usage in the past 30 days.
Click Continue.
Specify the share type
To specify the share type for your future reservation requests, select the same option that you used in the previous sections:
Console
For Owner project, specify the owner project for your request.
To specify the share type for the request, do one of the following:
To share a request across multiple projects, do the following:
For Share type, select Project.
For Share with, enter or select the projects to share the request with.
To create a single-project request, for Share type, select Local.
gcloud
Specify the Owner project for each request.
To specify the share type for each request, do one of the following:
To share a request across multiple projects, do the following:
For Share type, select Project.
For Share with, enter or select the projects to share the request with.
To create a single-project request, for Share type, select Local.
Create draft requests and submit them
After completing the steps in the previous sections, you can either create draft future reservation requests and submit them later, or immediately submit the requests for review. Google recommends creating a draft request first. This lets you determine the number of instances that Compute Engine will provision for your request, and optionally modify the request before submitting it.
To create draft future reservation requests and submit them for review, select the same option that you used in the previous sections:
Console
Click Save a draft.
The Capacity Planner page appears. The creation of the draft request can take up to one minute.
To submit the draft request for review, do one of the following:
To change one or more properties before submitting, modify the draft request.
Otherwise, submit the request for review.
gcloud
Click Generate gcloud commands.
In the Generate gcloud commands for future reservations pane, do the following:
Optional: Edit the generated gcloud CLI commands.
Copy and store the generated gcloud CLI commands. You need them later to create the future reservation requests.
In the Cloud Shell or a command line of your choice, run the commands that you stored in the previous step.
For example, the output for creating two future reservation requests is similar to the following:
Created [https://www.googleapis.com/compute/beta/projects/example-project/zones/us-central1-c/futureReservations/example-fr-1].
Created [https://www.googleapis.com/compute/beta/projects/example-project/zones/us-central1-f/futureReservations/example-fr-2].
To submit the draft request for review, do one of the following:
To change one or more properties before submitting, modify the draft request.
Otherwise, submit the request for review.
What's next
Learn how to view future reservation requests.
Learn how to consume the automatically created reservations that Compute Engine provisions for a future reservation.
Learn how to cancel or delete future reservation requests.