In this tutorial, you will learn what authorization is, and how to enable it
with Cloud Service Mesh on a sample application to learn how to enable
authorization policies to your microservices. You will create an
AuthorizationPolicy to DENY access to a microservice, then create an
AuthorizationPolicy to ALLOW specific access to a microservice.
What is authorization?
Authentication verifies an identity -- is this service who they say they are?
Authorization verifies the permission - is this service allowed to do that?
Identity is fundamental to this idea. With Cloud Service Mesh,
AuthorizationPolicies allow for workload-to-workload communication in your
mesh to be controlled for improved security and access.
In a microservice architecture, where calls are made across network boundaries, IP-based firewall rules are often not adequate to secure access between workloads. With Cloud Service Mesh, you can set authorization rules to:
- Control access to workloads within your mesh, either workload-to-workload or end-user-to-workload
- Broadly or granularly define policies depending on your needs.
To see an in-depth explanation on configuring policies and best practices, see Authorization with Cloud Service Mesh.
Costs
This tutorial uses the following billable components of Google Cloud:
When you finish this tutorial, you can avoid ongoing costs by deleting the resources you created. For more information, see Clean up.
Before you begin
Provision Cloud Service Mesh on a GKE cluster. There are various supported setup methods:
Clone the repo:
git clone https://github.com/GoogleCloudPlatform/anthos-service-mesh-samples
cd anthos-service-mesh-samples
Deploy an ingress gateway
Set the current context for
kubectlto the cluster:gcloud container clusters get-credentials CLUSTER_NAME \ --project=PROJECT_ID \ --zone=CLUSTER_LOCATIONCreate a namespace for your ingress gateway:
kubectl create namespace asm-ingressEnable the namespace for injection. The steps depend on your control plane implementation.
Managed (TD)
Apply the default injection label to the namespace:
kubectl label namespace asm-ingress \
    istio.io/rev- istio-injection=enabled --overwrite
Managed (Istiod)
Recommended: Run the following command to apply the default injection label to the namespace:
  kubectl label namespace asm-ingress \
      istio.io/rev- istio-injection=enabled --overwrite
If you are an existing user with the Managed Istiod control plane: We recommend that you use default injection, but revision-based injection is supported. Use the following instructions:
Run the following command to locate the available release channels:
kubectl -n istio-system get controlplanerevisionThe output is similar to the following:
NAME AGE asm-managed-rapid 6d7hIn the output, the value under the
NAMEcolumn is the revision label that corresponds to the available release channel for the Cloud Service Mesh version.Apply the revision label to the namespace:
kubectl label namespace asm-ingress \
    istio-injection- istio.io/rev=REVISION_LABEL --overwrite
In-cluster
Recommended: Run the following command to apply the default injection label to the namespace:
  kubectl label namespace asm-ingress \
      istio.io/rev- istio-injection=enabled --overwrite
We recommend that you use default injection, but revision-based injection is supported: Use the following instructions:
Use the following command to locate the revision label on
istiod:kubectl get deploy -n istio-system -l app=istiod -o \ jsonpath={.items[*].metadata.labels.'istio\.io\/rev'}'{"\n"}'Apply the revision label to the namespace. In the following command,
REVISION_LABELis the value of theistiodrevision label that you noted in the previous step.kubectl label namespace asm-ingress \ istio-injection- istio.io/rev=REVISION_LABEL --overwrite
Deploy the example gateway in the
anthos-service-mesh-samplesrepo:kubectl apply -n asm-ingress \ -f docs/shared/asm-ingress-gatewayExpected output:
serviceaccount/asm-ingressgateway configured
service/asm-ingressgateway configured
deployment.apps/asm-ingressgateway configured
gateway.networking.istio.io/asm-ingressgateway configured
Deploy the Online Boutique sample application
If you haven't, set the current context for
kubectlto the cluster:gcloud container clusters get-credentials CLUSTER_NAME \ --project=PROJECT_ID \ --zone=CLUSTER_LOCATIONCreate the namespace for the sample application:
kubectl create namespace onlineboutiqueLabel the
onlineboutiquenamespace to automatically inject Envoy proxies. Follow the steps to enable automatic sidecar injection.Deploy the sample app, the
VirtualServicefor the frontend, and service accounts for the workloads. For this tutorial, you will deploy Online Boutique, a microservice demo app.kubectl apply \ -n onlineboutique \ -f docs/shared/online-boutique/virtual-service.yaml kubectl apply \ -n onlineboutique \ -f docs/shared/online-boutique/service-accounts
View your services
View the pods in the
onlineboutiquenamespace:kubectl get pods -n onlineboutiqueExpected output:
NAME                                     READY   STATUS    RESTARTS   AGE
adservice-85598d856b-m84m6               2/2     Running   0          2m7s
cartservice-c77f6b866-m67vd              2/2     Running   0          2m8s
checkoutservice-654c47f4b6-hqtqr         2/2     Running   0          2m10s
currencyservice-59bc889674-jhk8z         2/2     Running   0          2m8s
emailservice-5b9fff7cb8-8nqwz            2/2     Running   0          2m10s
frontend-77b88cc7cb-mr4rp                2/2     Running   0          2m9s
loadgenerator-6958f5bc8b-55q7w           2/2     Running   0          2m8s
paymentservice-68dd9755bb-2jmb7          2/2     Running   0          2m9s
productcatalogservice-84f95c95ff-c5kl6   2/2     Running   0          114s
recommendationservice-64dc9dfbc8-xfs2t   2/2     Running   0          2m9s
redis-cart-5b569cd47-cc2qd               2/2     Running   0          2m7s
shippingservice-5488d5b6cb-lfhtt         2/2     Running   0          2m7s
All of the pods for your application should be up and running, with a
2/2in theREADYcolumn. This indicates that the pods have an Envoy sidecar proxy injected successfully. If it does not show2/2after a couple of minutes, visit the Troubleshooting guide.Get the external IP, and set it to a variable:
kubectl get services -n asm-ingress
export FRONTEND_IP=$(kubectl --namespace asm-ingress \
get service --output jsonpath='{.items[0].status.loadBalancer.ingress[0].ip}' \
)
You see output similar to the following:
NAME                   TYPE           CLUSTER-IP      EXTERNAL-IP   PORT(S)                                      AGE
asm-ingressgateway   LoadBalancer   10.19.247.233   35.239.7.64   80:31380/TCP,443:31390/TCP,31400:31400/TCP   27m
Visit the
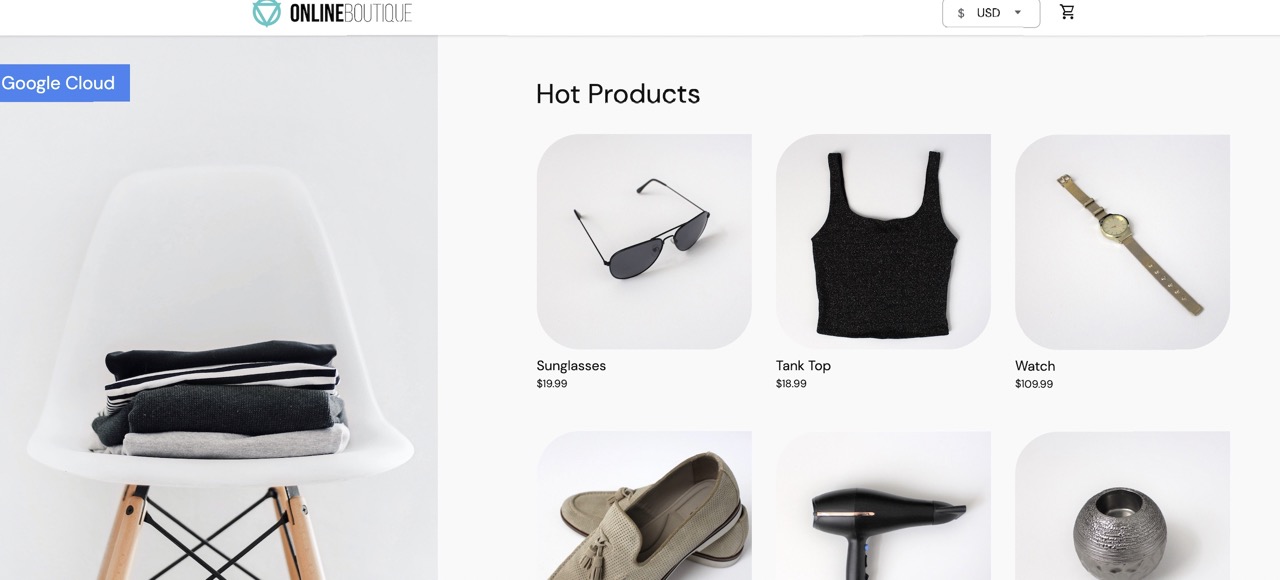
EXTERNAL-IPaddress in your web browser. You should expect to see the Online Boutique shop in your browser.
DenyAll Authorization for a workload
This section adds an AuthorizationPolicy to deny all incoming traffic to the
currency service. AuthorizationPolicies work by transforming
AuthorizationPolicies into Envoy-readable configs, and applying the configs to
your sidecar proxies. This enables the Envoy proxy to authorize or deny incoming
requests to a service.
Apply an
AuthorizationPolicyto thecurrencyservice. Notice the match on the labelcurrencyservicein the YAML file.kubectl apply -f docs/authorization/currency-deny-all.yaml -n onlineboutiqueTry accessing your gateway's
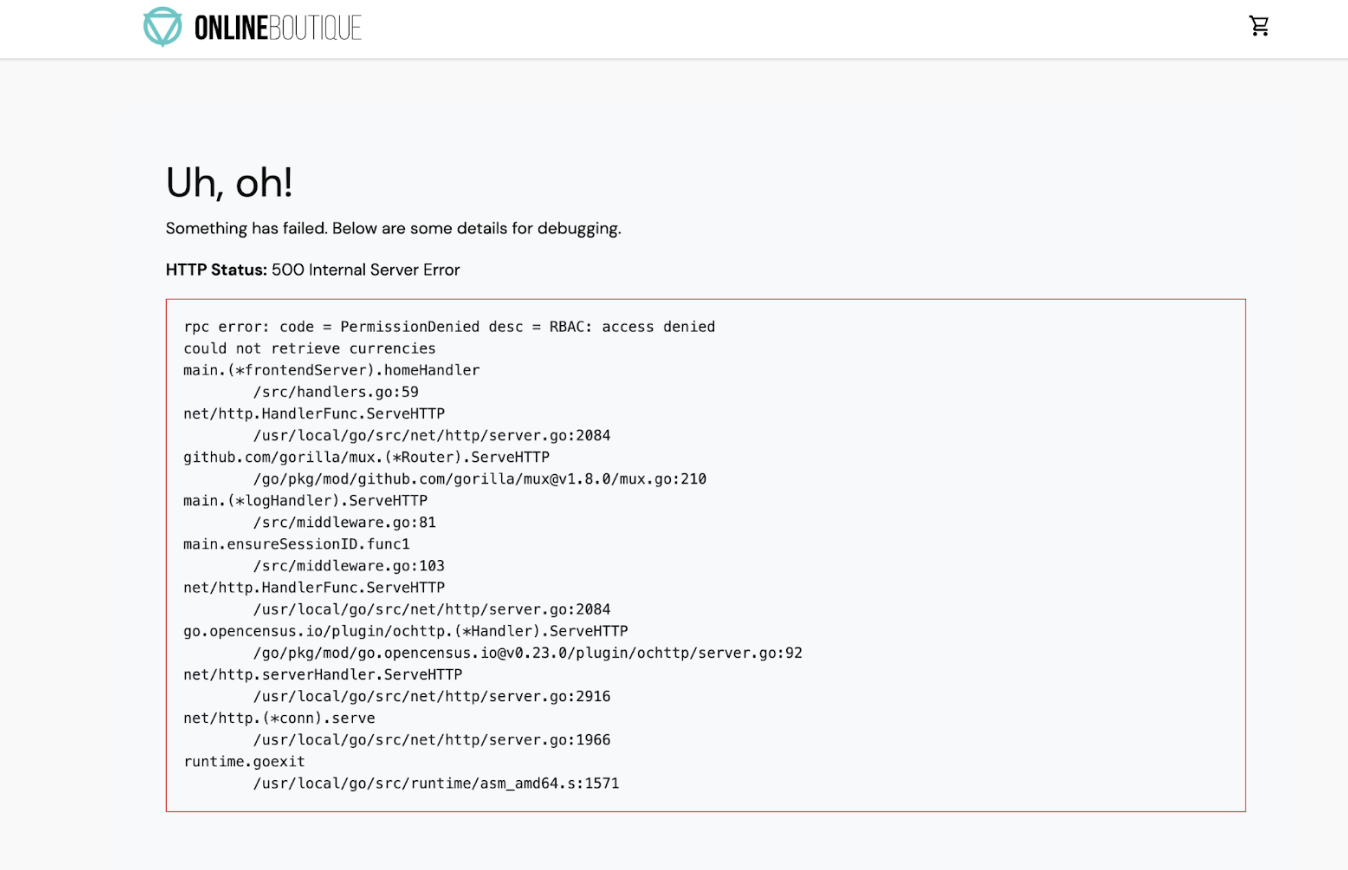
EXTERNAL-IPto view Online Boutique in the web browser. You should see an authorization error (500 Internal Service Error) fromcurrency service.
Observe your sidecar proxy logs
To see what is occurring in the sidecar proxy, you can review the logs in the pod.
Get the name of your
currencyservicepod:CURRENCY_POD=$(kubectl get pod -n onlineboutique |grep currency|awk '{print $1}')Set the Envoy proxy to allow for trace level logs. By default, blocked authorization calls are not logged:
kubectl debug --image istio/base --target istio-proxy -it $CURRENCY_POD -n onlineboutique -- curl -X POST "http://localhost:15000/logging?level=trace"Expected output:
none {:.devsite-disable-click-to-copy}
active loggers:
admin: trace
alternate_protocols_cache: trace
...
tracing: trace
upstream: trace
udp: trace
wasm: trace
Use
curlto send traffic to yourEXTERNAL_IPto generate logs:for i in {0..10}; do curl -s -I $FRONTEND_IP ; doneView the role-based access control (RBAC) related logs in your istio-proxy:
kubectl logs -n onlineboutique $CURRENCY_POD -c istio-proxy | grep -m5 rbacExpected output:
2022-07-08T14:19:20.442920Z     debug   envoy rbac      checking request: requestedServerName: outbound_.7000_._.currencyservice.onlineboutique.svc.cluster.local, sourceIP: 10.8.8.5:34080, directRemoteIP: 10.8.8.5:34080, remoteIP: 10.8.8.5:34080,localAddress: 10.8.0.6:7000, ssl: uriSanPeerCertificate: spiffe://christineskim-tf-asm.svc.id.goog/ns/onlineboutique/sa/default, dnsSanPeerCertificate: , subjectPeerCertificate: OU=istio_v1_cloud_workload,O=Google LLC,L=Mountain View,ST=California,C=US, headers: ':method', 'POST'
2022-07-08T14:19:20.442944Z     debug   envoy rbac      enforced denied, matched policy none
2022-07-08T14:19:20.442965Z     debug   envoy http      [C73987][S13078781800499437460] Sending local reply with details rbac_access_denied_matched_policy[none]
  ```
You should see an enforced denied message in the logs, showing that
currencyservice is set to block inbound requests.
Allow Restricted Access
Instead of a DENYALL policy, you can set access to be allowed for certain
workloads. This will be relevant in a microservice architecture where you want
to ensure that only authorized services can communicate with each other.
In this section, you will enable the frontend and checkout service the
ability to communicate with the currency service.
- In the following file, see that a specific
source.principal(client) is allowed to accesscurrencyservice:
Apply the policy:
kubectl apply -f docs/authorization/currency-allow-frontend-checkout.yaml -n onlineboutiqueVisit the
EXTERNAL-IPin your web browser, you should now be able to access Online Boutique.
Clean up
To avoid incurring charges to your Google Cloud account for the resources used in this tutorial, either delete the project that contains the resources, or keep the project and delete the individual resources.
To avoid incurring continuing charges to your Google Cloud account for the resources used in this tutorial, you can either delete the project or delete the individual resources.
Delete the project
In Cloud Shell, delete the project:
gcloud projects delete PROJECT_ID
Delete the resources
If you want to keep your cluster and remove the Online Boutique sample:
Delete the application namespaces:
kubectl delete namespace onlineboutiqueExpected output:
namespace "onlineboutique" deletedDelete the Ingress Gateway namespace:
kubectl delete namespace asm-ingressExpected output:
amespace "asm-ingress" deleted
If you want to prevent additional charges, delete the cluster:
gcloud container clusters delete  CLUSTER_NAME  \
--project=PROJECT_ID \
--zone=CLUSTER_LOCATION
What's next
- For a general guide on configuring
PeerAuthenticationpolicies, see Configuring transport security. - Explore your mesh's security dashboard with Monitor mesh security.
- Deep dive with authorization policies with Configure authorization policy advanced features.
- Familiarize yourself with Cloud Service Mesh security best practices.
